Category: Egg Recipes

  • Reshmi Anda Cashew Curry Recipe

    Reshmi Anda Cashew Curry Recipe

    Zaika Mazedaar · North Indian Curries

    A silky onion-cashew gravy, a careful yogurt technique, and one simple egg-boiling trick that keeps the yolks tender instead of chalky — filmed, tested, restaurant-style.

    The onion-cashew paste turns a soft, pale light green the moment it hits hot oil — that’s the first sign this gravy is heading somewhere silky rather than rustic. By the time yogurt disappears seamlessly into the roasted masala and the cream cooks in at the end, you’ve got a curry that’s genuinely smooth from edge to edge, no graininess anywhere.

    This recipe is demonstrated step-by-step on the Zaika Mazedaar channel, filmed and cooked in a real kitchen. Quick note before we start: if you’re looking for our Egg Malai Curry instead, that one’s built a little differently — it uses an onion-green-chilli paste finished with plain milk, no cashews, no yogurt, no cream. This Reshmi Anda Curry uses a richer onion-cashew-coriander-stem paste, a yogurt-based roasted masala, and a finish of kasuri methi plus actual cream. If you want something further afield in the same egg-curry family, our Chicken Egg Dak Bungalow recipe is worth a look too.

    What Is Reshmi Anda Curry?

    Reshmi anda curry is built specifically to come out silky, thanks to an onion-cashew paste and a careful yogurt technique. “Reshmi” (silky) is a recognized descriptor on Indian restaurant menus — reshmi kebab, reshmi paneer — and it accurately names what’s distinct about this dish: a smooth, no-grain gravy built from a softened onion-cashew-coriander-stem paste, roasted twice with yogurt until oil separates both times.

    The other defining detail is the eggs themselves: half-boiled, not hard-boiled, scored lightly before going into the gravy. That single choice is the real reason the yolks here stay tender rather than turning dry and chalky once they finish cooking in the simmering curry.

    Why This Recipe Works (and How It’s Different from Our Egg Malai Curry)

    Two techniques carry this dish, and they’re also what separate it from the site’s existing Egg Malai Curry article, despite the creator’s own informal naming overlap in the source video.

    First: an onion-cashew-coriander-stem paste, not a plain onion-chilli paste. Softening the onion together with cashews, coriander stems, and green chillies before grinding gives the base both richness and a faint herbaceousness that a simple onion paste doesn’t have. If you like this cashew-forward style, our Anda Korma recipe leans on a similar ground base.

    Second: half-boiled eggs, scored before going in. Using half-boiled rather than fully hard-boiled eggs felt like a small detail the first time we tried it — but it’s the real reason the yolks here stay tender instead of turning chalky once they finish cooking through in the hot gravy. Hard-boiled yolks, cooked again in a simmering curry, dry out and turn unpleasantly firm.

    Ingredients

    For the Onion-Cashew Paste

    • 2 tbsp oil
    • 1 onion (~250g), roughly sliced
    • Coriander stems, a handful (saved specifically for this — extra flavour)
    • A few cashews
    • 2 green chillies
    • Optional: 2–3 garlic cloves + 1 inch ginger, added at the same softening stage
    • 2–3 tbsp more oil, for frying the ground paste
    • 1 tbsp ginger-garlic paste (if not already added with the onion)

    For the Eggs

    • 4–5 eggs, half-boiled (not hard-boiled), lightly scored with a knife

    Dry Spices

    • 1.5 tbsp coriander powder
    • 1 tsp cumin powder
    • 1 tsp red chilli powder (adjusted down, since green chillies are already in the paste)
    • ½ tsp turmeric powder
    • Salt, to taste
    • 2 tbsp yogurt, at room temperature, whisked smooth

    For the Finishing Touches

    • ½ cup water plus a little extra, including jar-rinse water
    • 1 tsp kasuri methi (home-dried, lightly roasted first)
    • A scant ½ tsp garam masala powder
    • Fresh coriander, for finishing
    • 2 tbsp fresh cream

    Ingredient Substitutions

    IngredientSubstituteEffect on Taste / Texture
    Fresh creamHomemade malai / cream skimmed from milkNearly identical, a little less processed-tasting — whisk smooth before adding
    CashewsSoaked blanched almondsSlightly drier body and a less rounded sweetness — still works well
    Coriander stemsSkip if unavailableLoses a layer of fresh, herbaceous flavour in the paste — not essential, but noticeable

    If you’d rather skip the gravy altogether on a busier day, our quicker Butter Garlic Egg recipe uses many of the same pantry staples.

    Mise en Place Checklist

    Get all of this ready before turning on the flame. The onion-cashew paste needs to cool before grinding, so plan a few extra minutes for that.

    • Onion roughly sliced
    • Coriander stems, cashews, and green chillies measured
    • Ginger-garlic paste ready (or fresh ginger-garlic, if adding early)
    • Dry spices measured into one bowl
    • Yogurt whisked smooth and at room temperature
    • Eggs half-boiled, peeled, and lightly scored
    • Cream measured
    • Kasuri methi lightly roasted and ready to crush
    • A pan with a lid, ready on the hob

    Step-by-Step Method

    1

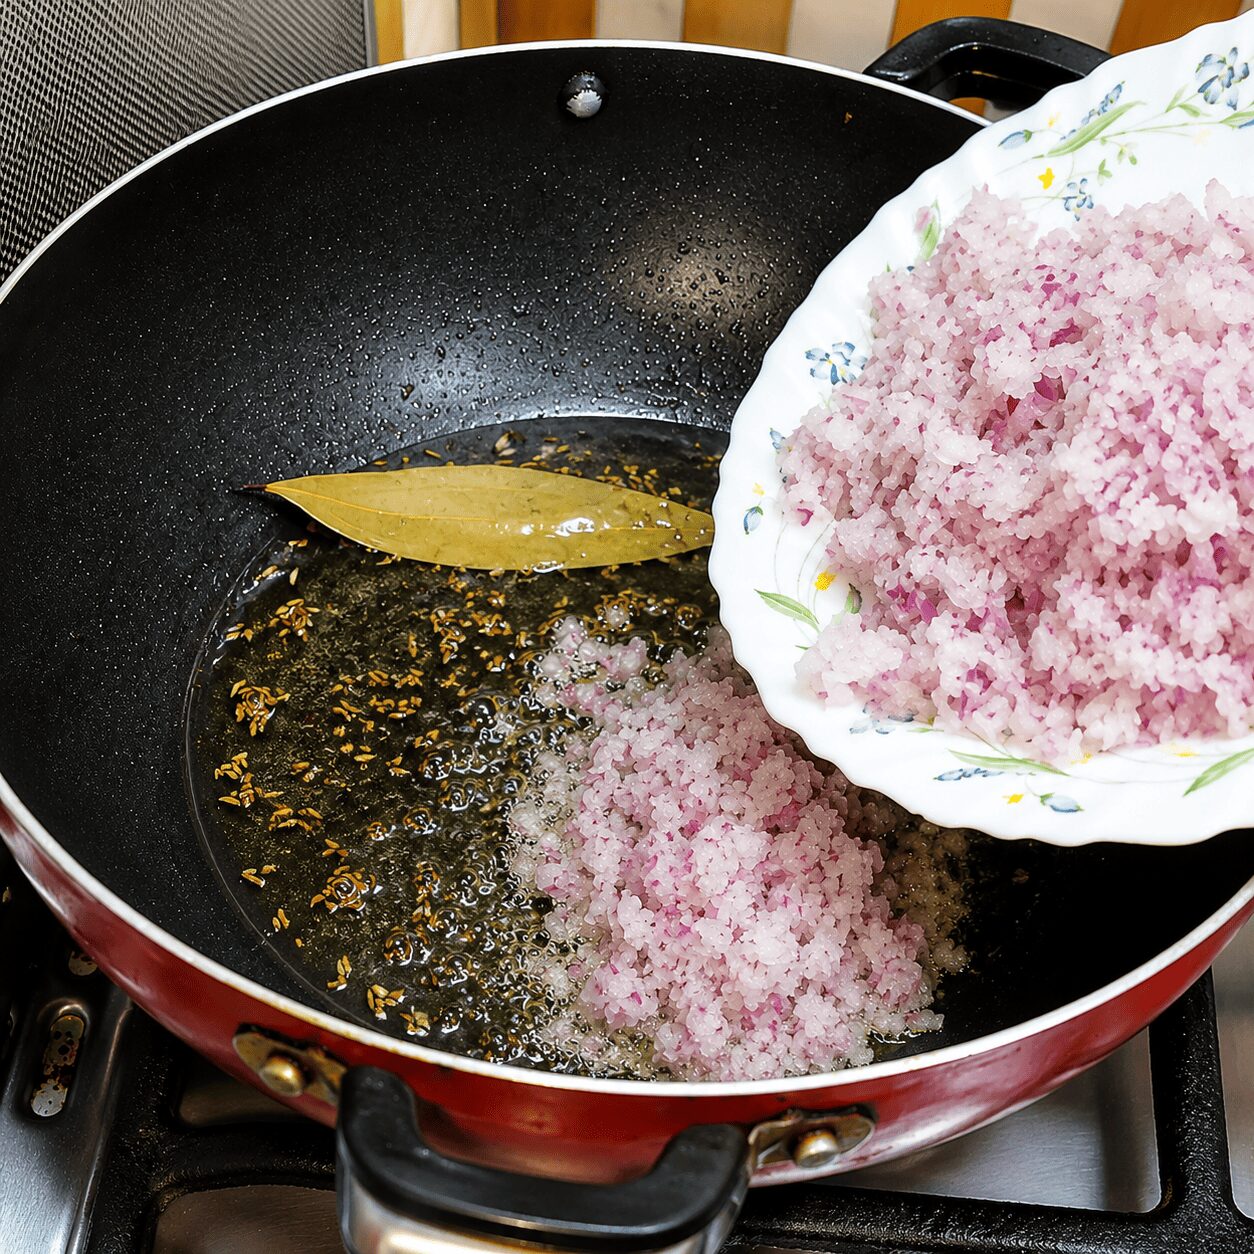
    Soften the onion, coriander stems, cashews, and chillies together

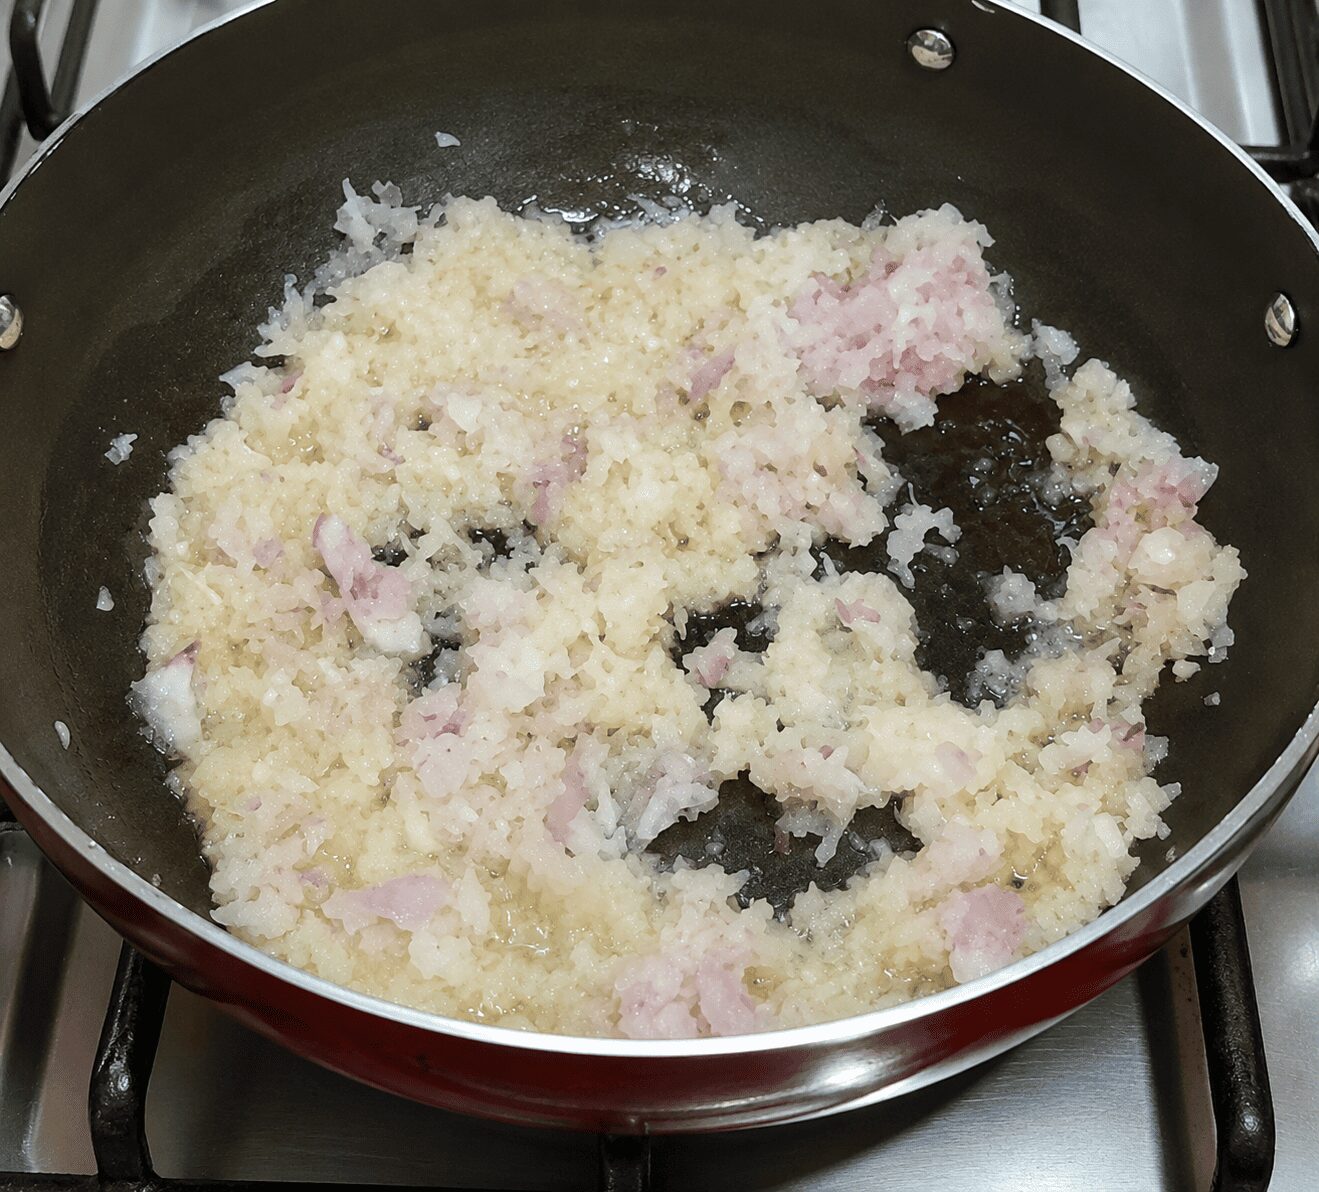
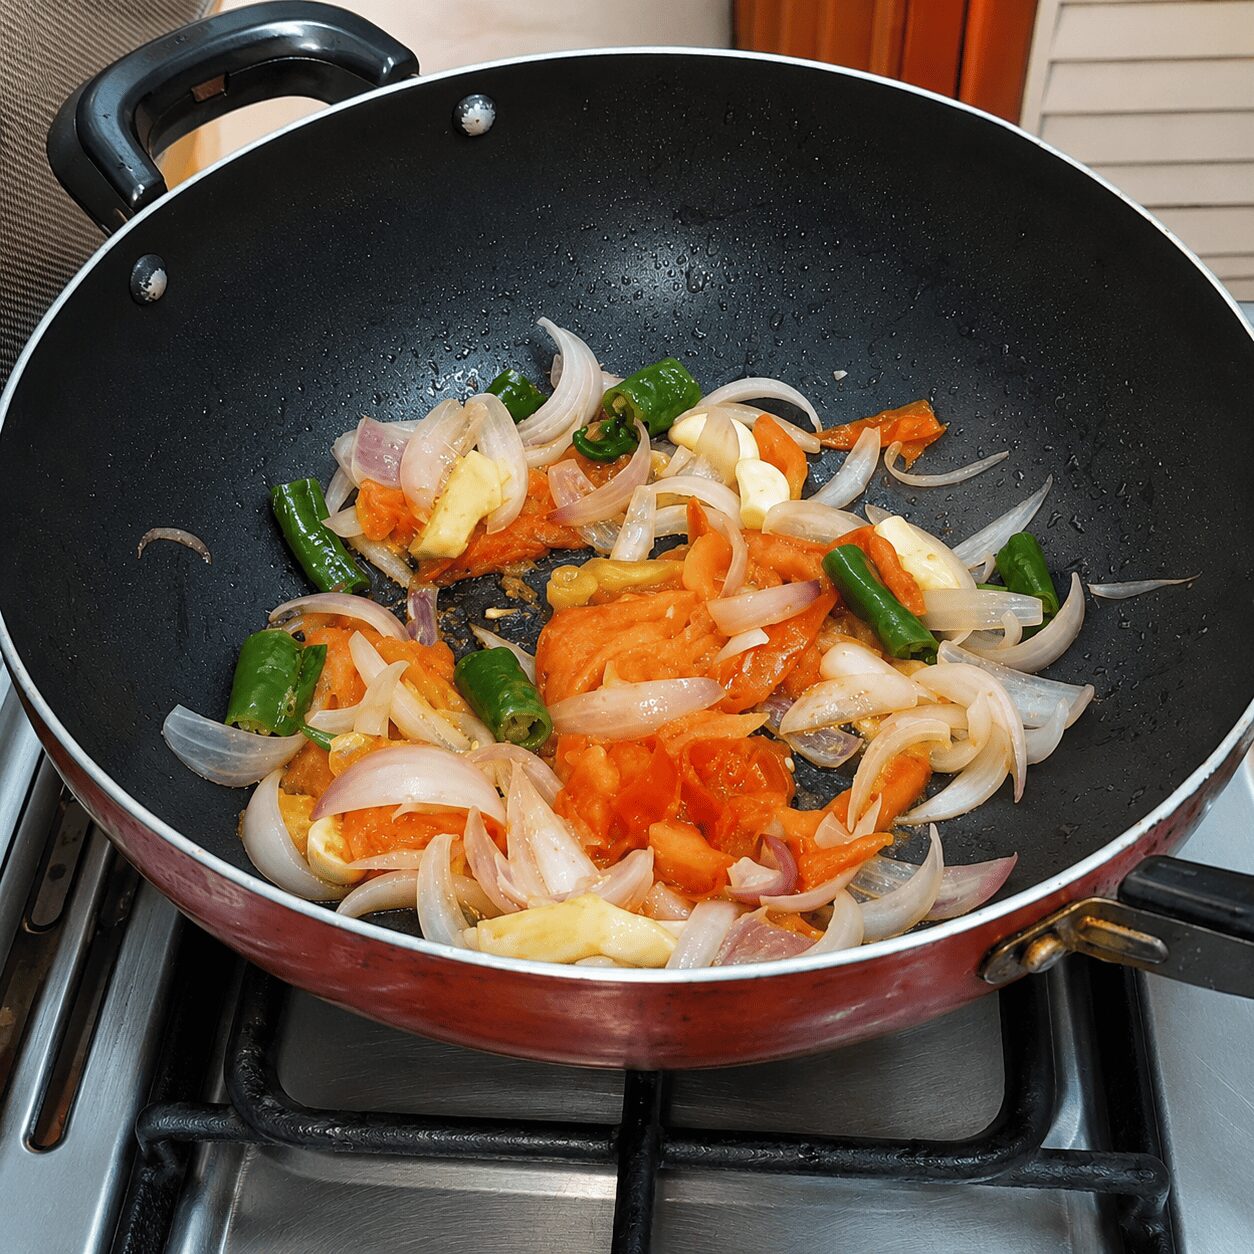
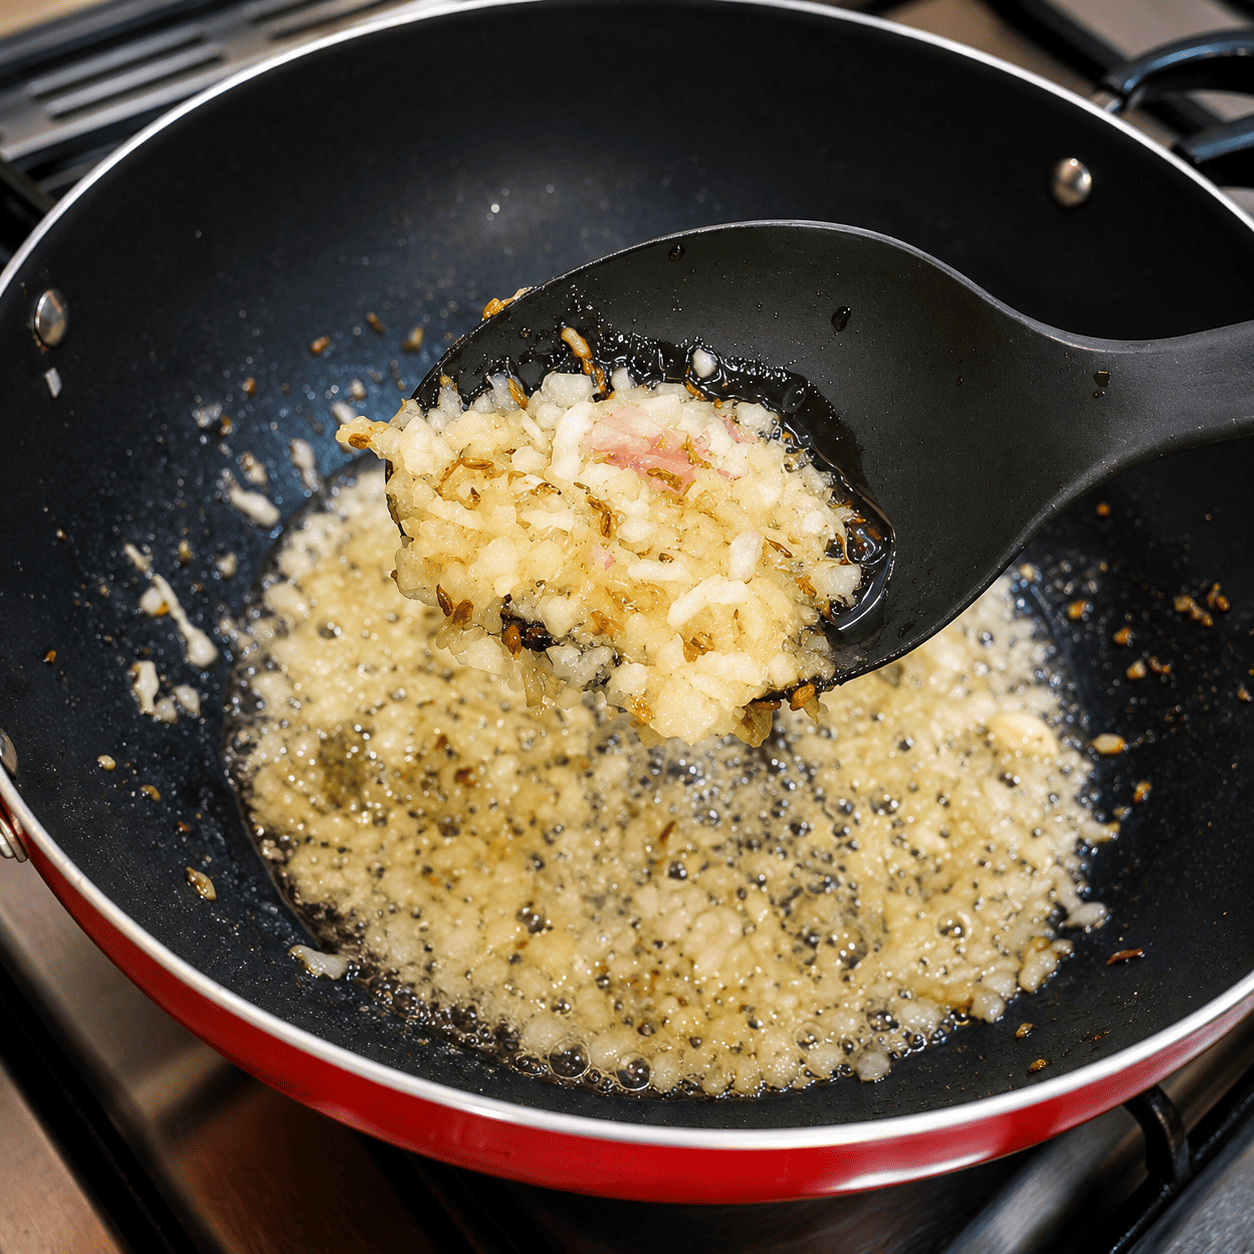
    Heat 2 tbsp oil in a pan. Add the roughly sliced onion, coriander stems, a few cashews, and the green chillies together — and ginger-garlic at this stage too, if using fresh. Cover and cook on medium flame just until the onion turns soft and barely starts to take on colour. Don’t let it brown.

    Softening onion, cashews, and coriander stems together for Reshmi Anda Curry
    2

    Cool and grind into a paste

    Remove the softened mixture, let it cool, then grind it into a fine paste.

    3

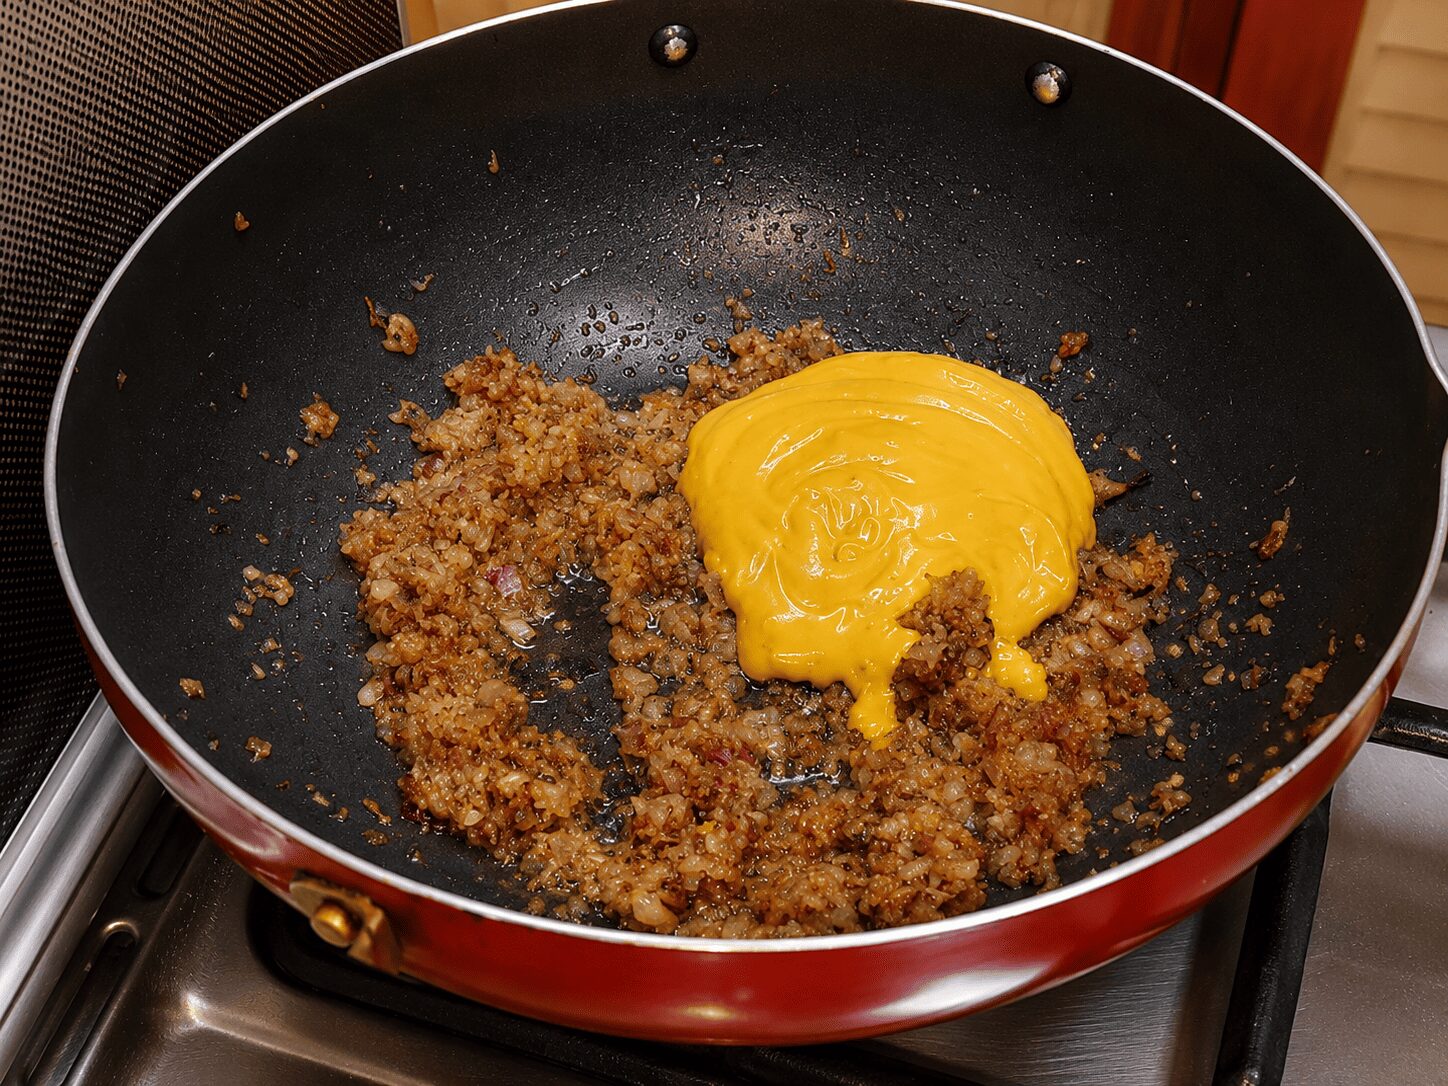
    Fry the paste until light green

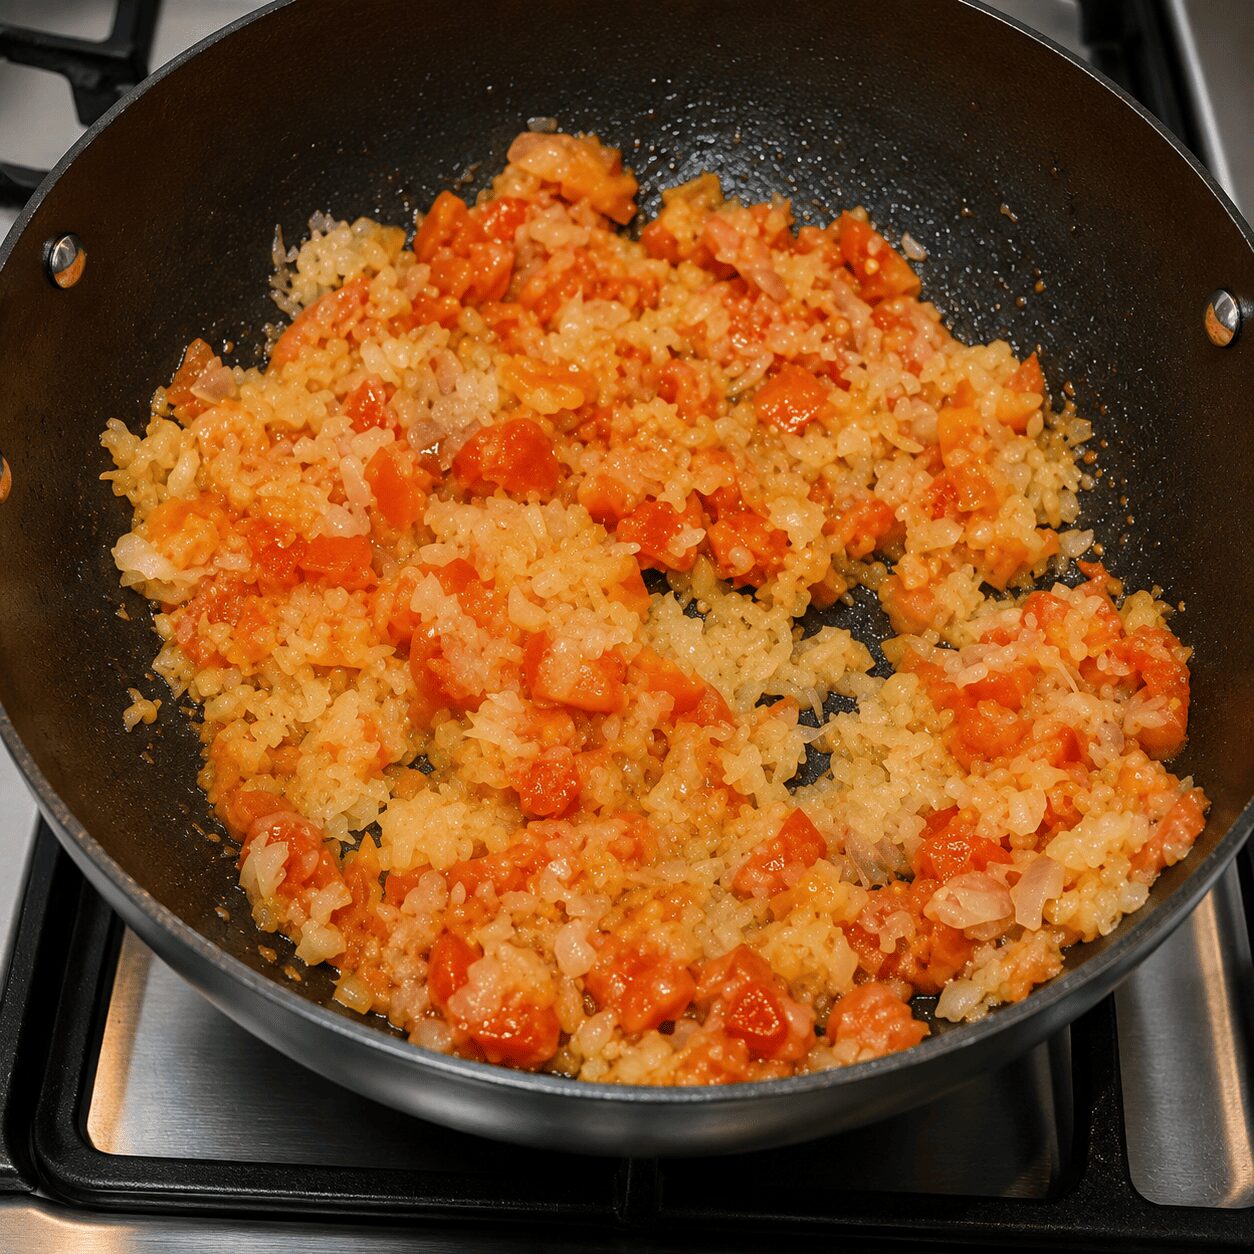
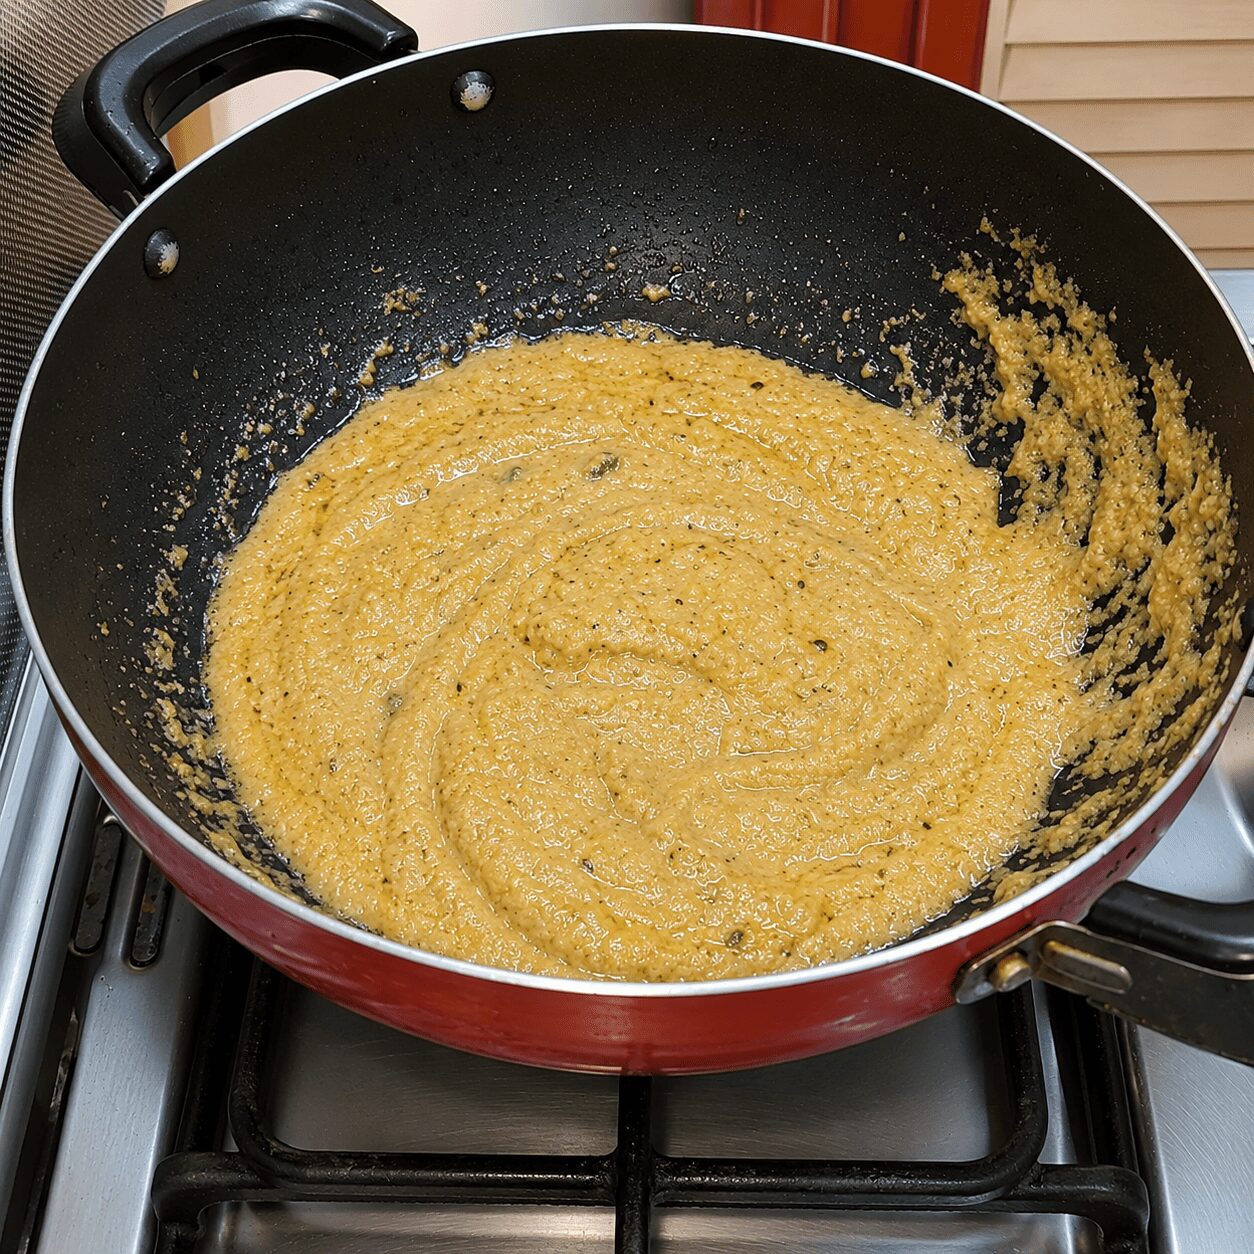
    Add 2–3 tbsp more oil to the same pan. Add the onion-cashew paste back in and fry for about a minute — you’ll see it turn a soft, light green.

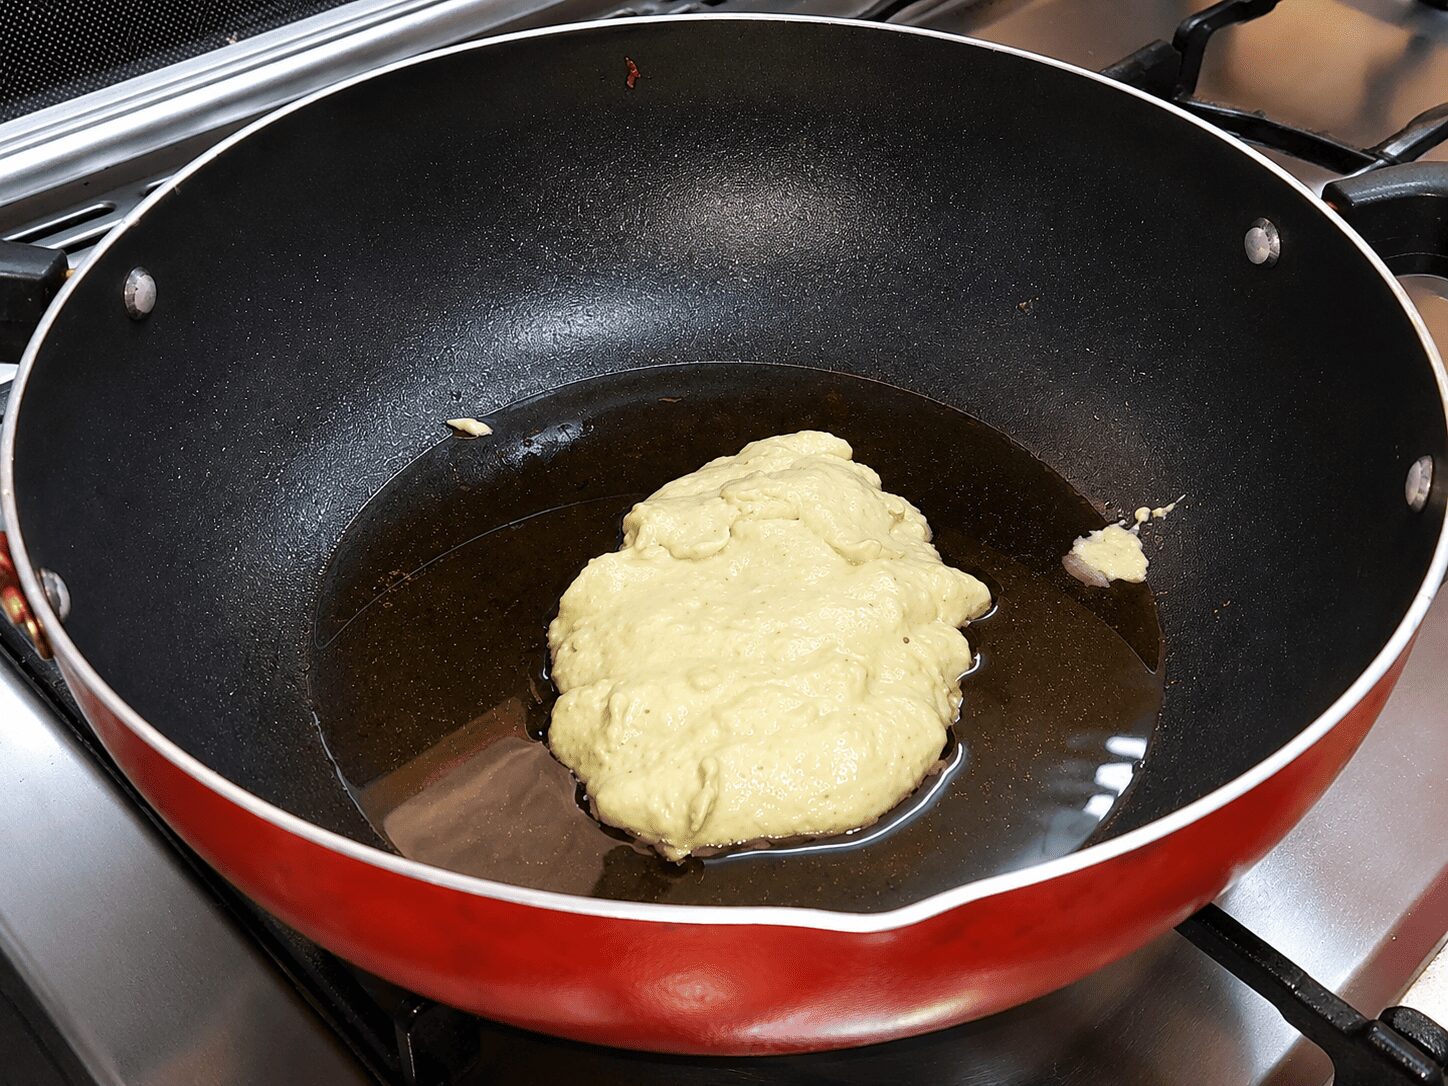
    Light green onion-cashew paste frying in oil for Reshmi Anda Curry
    4

    Add the ginger-garlic paste, if not already in

    If you haven’t already added ginger-garlic at the softening stage, stir in 1 tbsp ginger-garlic paste now and fry about a minute, until the raw smell is gone.

    5

    Add the dry spices and roast until oil separates

    Add the coriander powder, cumin powder, red chilli powder, and turmeric. Cover and roast on low flame for 4–5 minutes, until oil separates and a fragrant aroma develops.

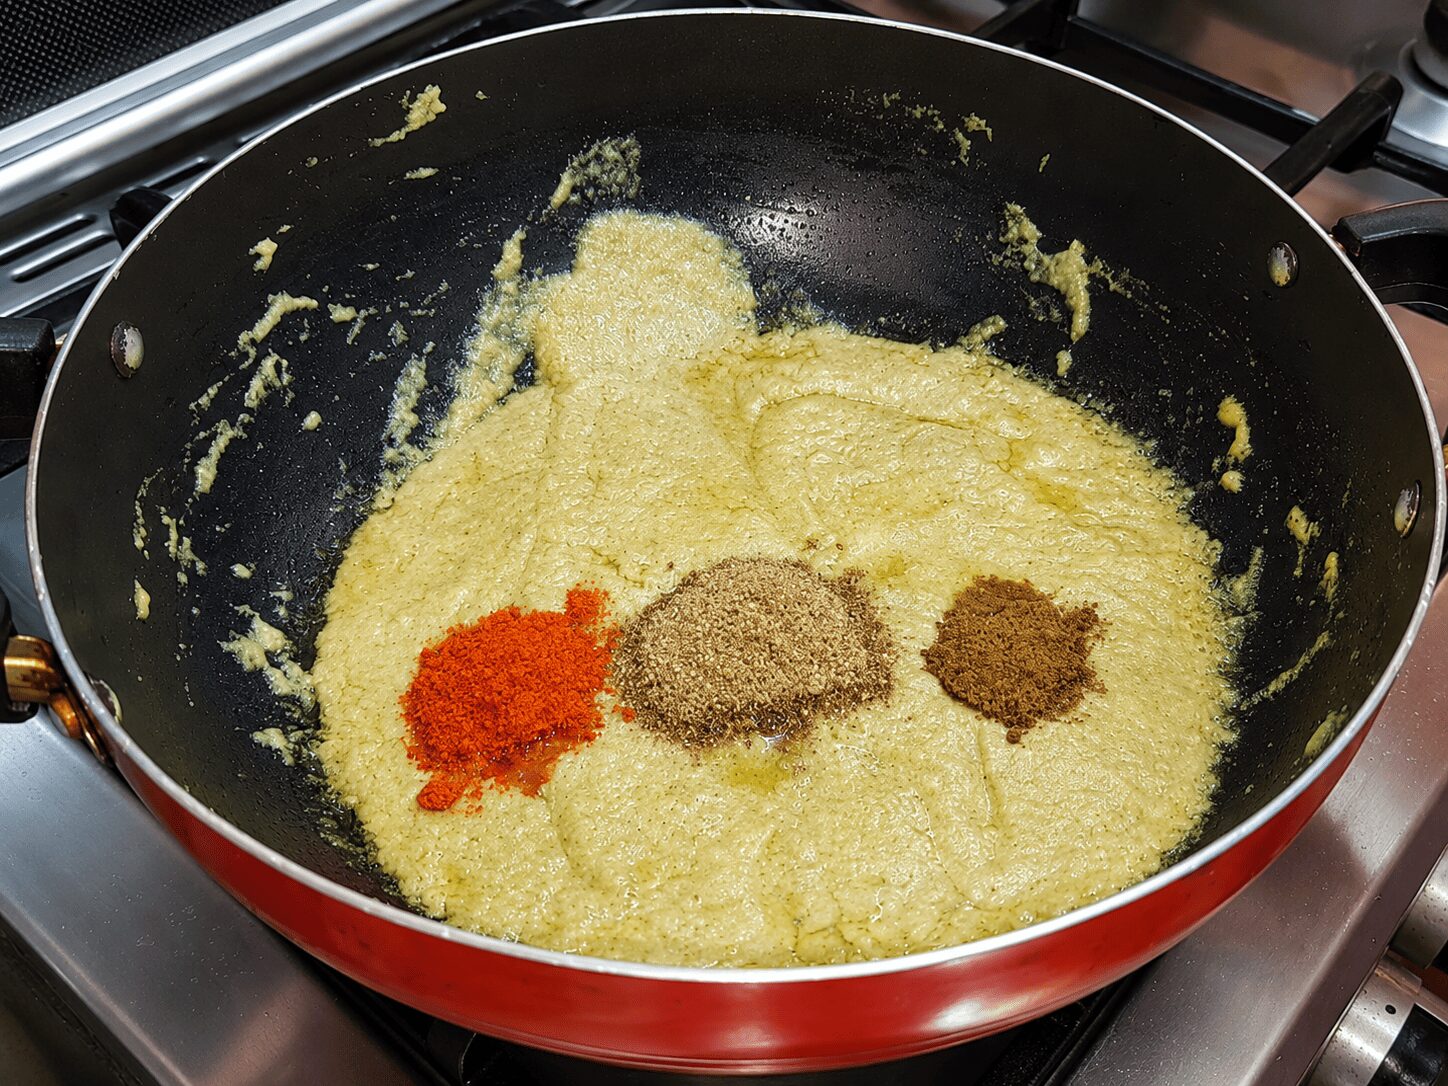
    Recipe tester’s tipIf you catch yourself forgetting the salt at this stage — it happens — just add it at the next natural point, the way it’s shown here. Nothing about this gravy depends on a perfectly rehearsed order.
    Roasting dry spices into the onion-cashew paste for Reshmi Anda Curry
    6

    Add the salt

    Add salt to taste, if you haven’t already mixed it in with the dry spices.

    7

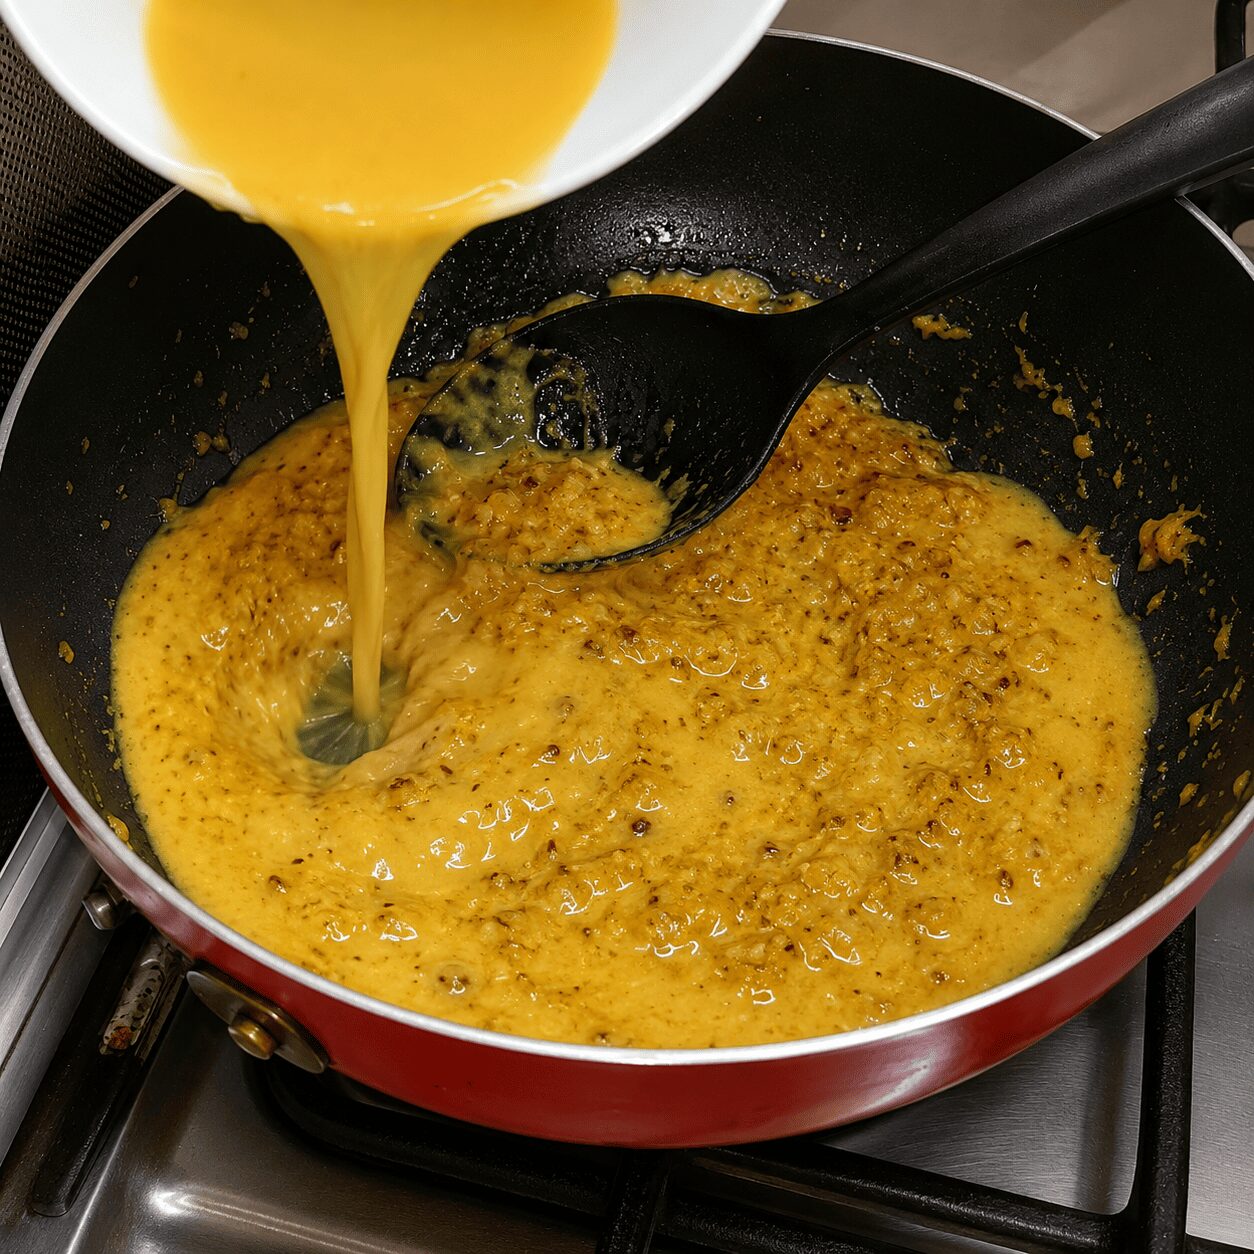
    Whisk in the room-temperature yogurt

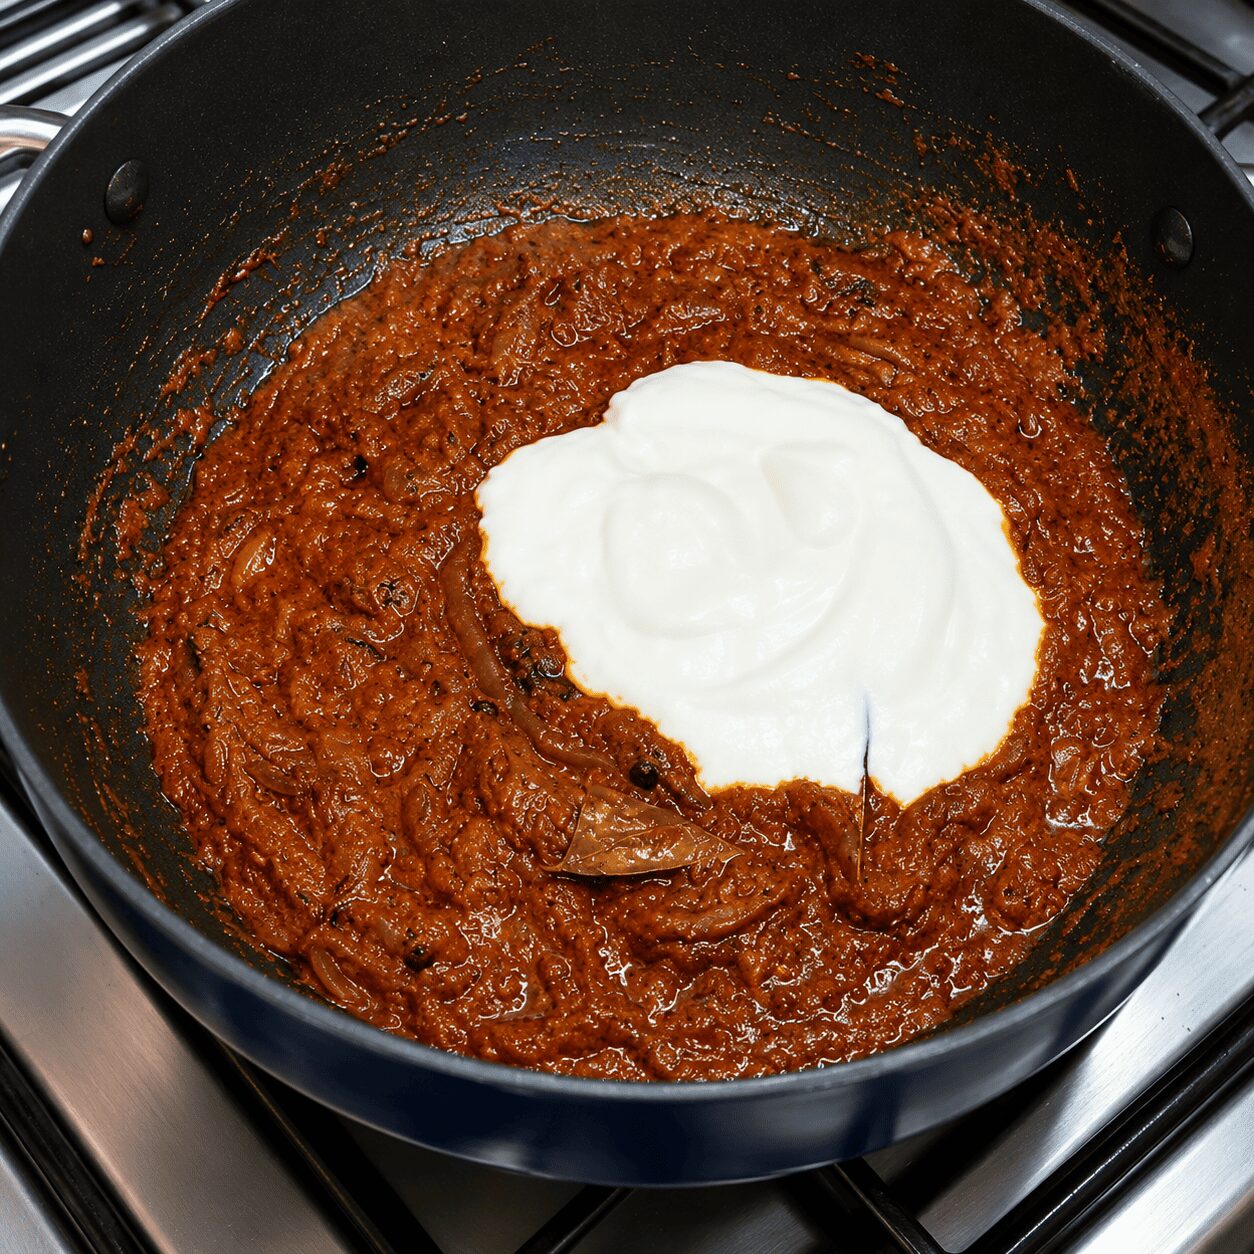
    On low flame, add the whisked, room-temperature yogurt and mix it in quickly — this is what keeps the gravy smooth instead of curdled or grainy.

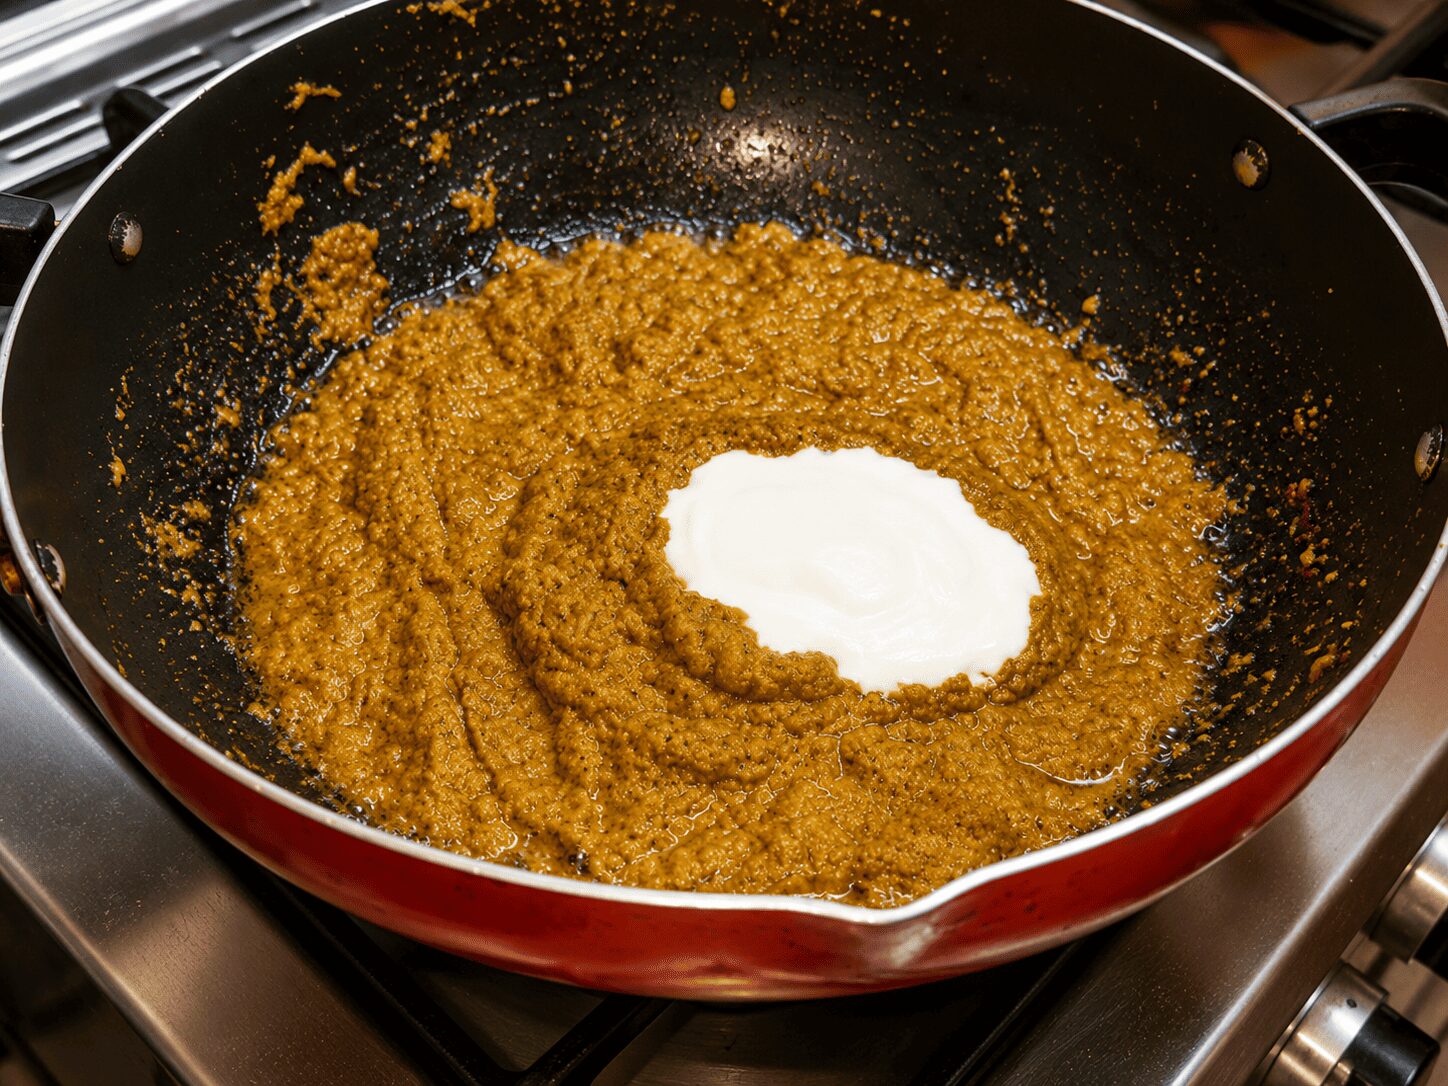
    Watch pointRoom-temperature yogurt, mixed in fast on low flame, is the difference between a silky gravy and a split one. Cold yogurt added slowly is the most common way this step goes wrong.
    Whisking room-temperature yogurt into the masala for Reshmi Anda Curry
    8

    Roast further until oil separates again

    Continue roasting until the oil separates a second time. This is the point the gravy turns visibly smooth — genuinely silky, not just thick.

    9

    Add the scored, half-boiled eggs

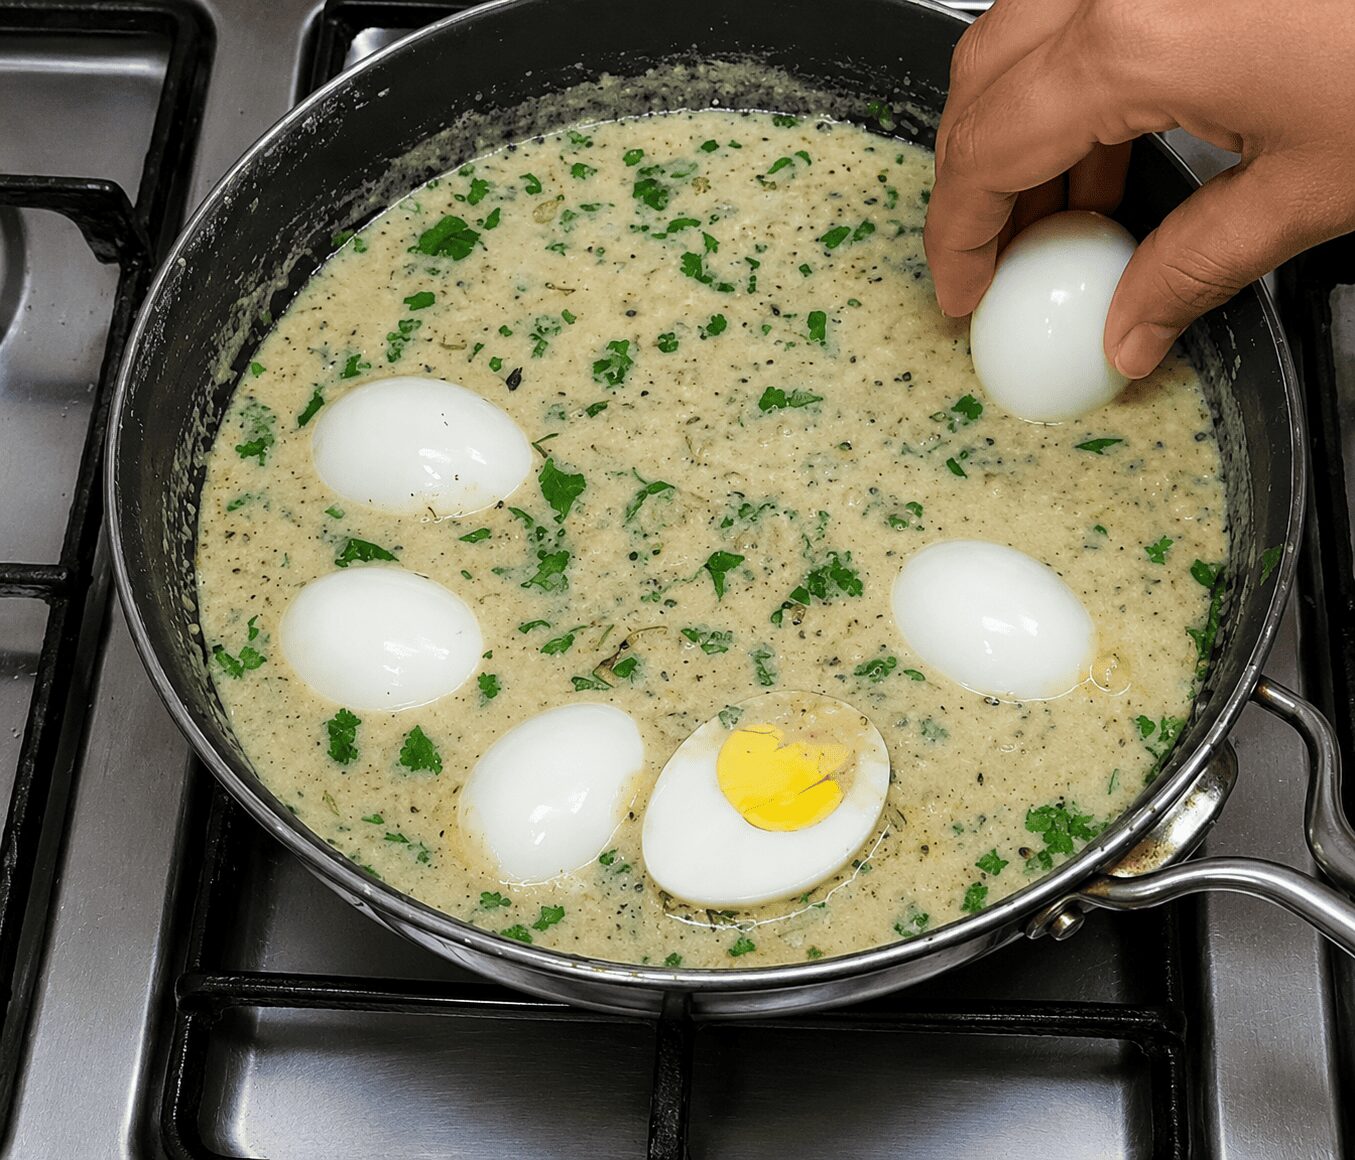
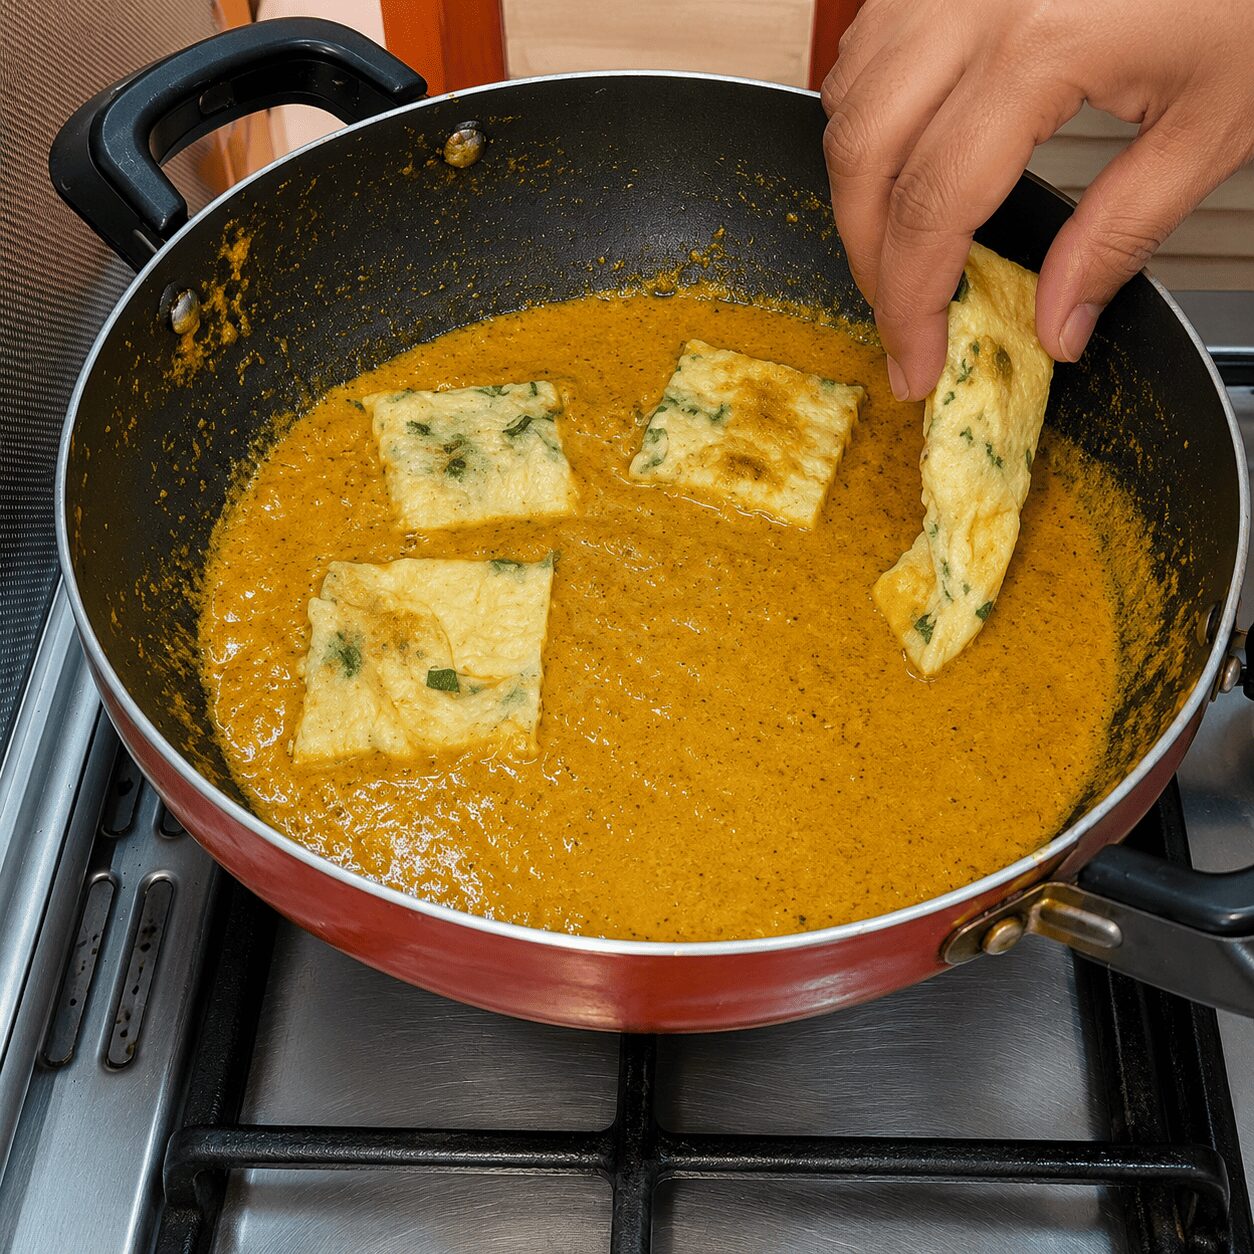
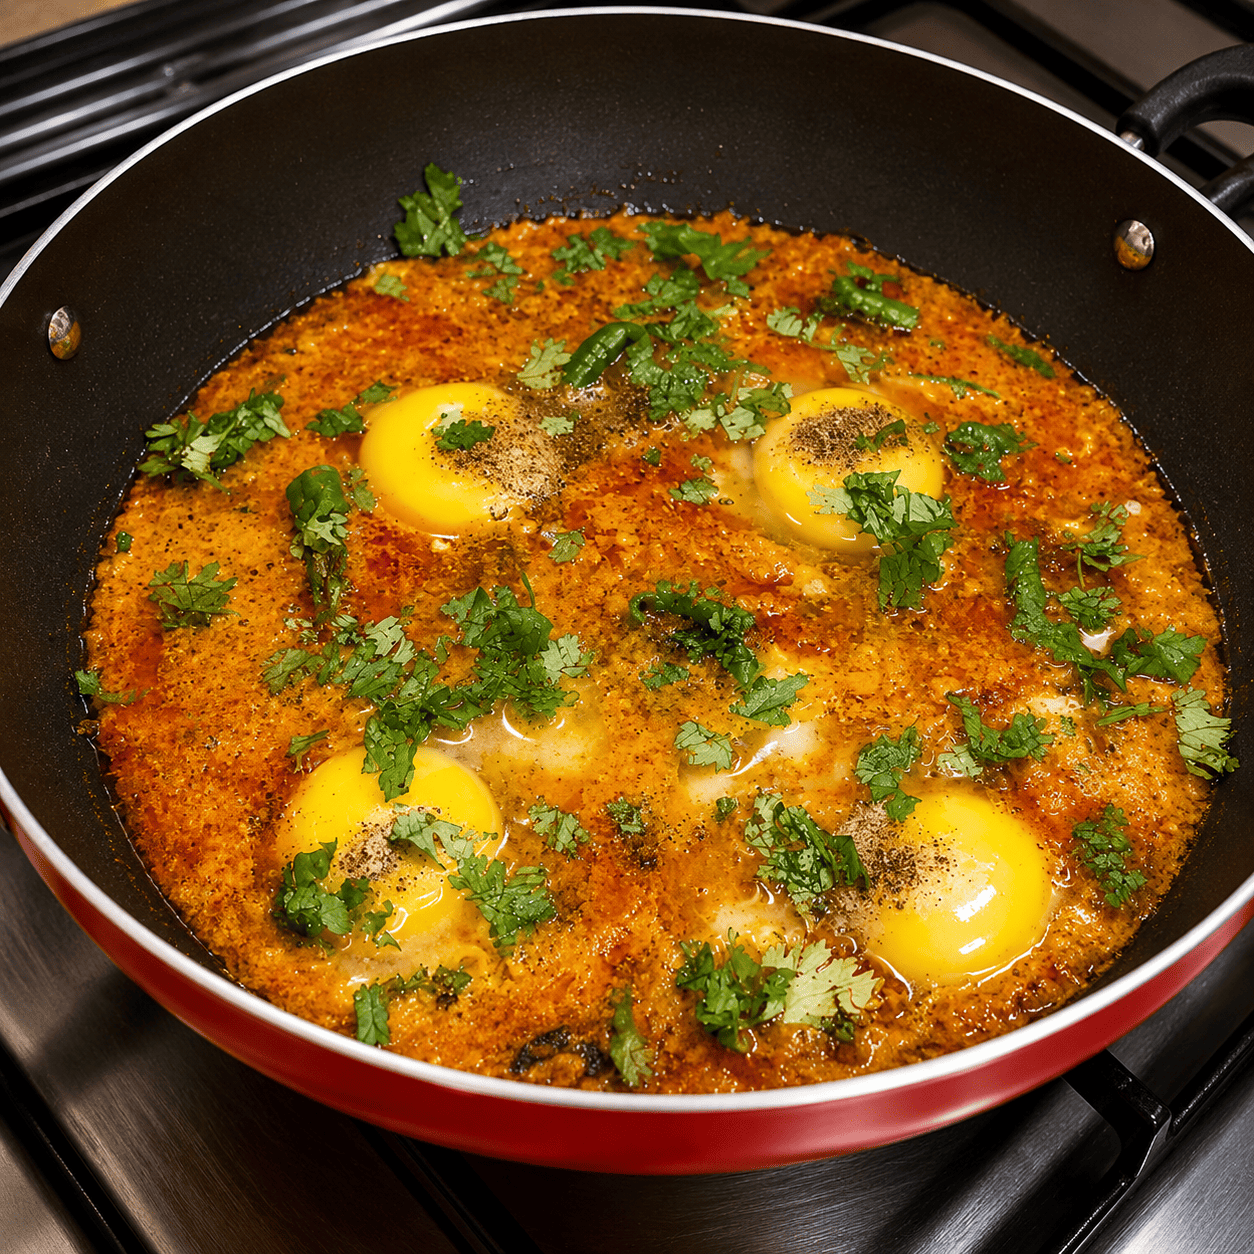
    Score the half-boiled eggs lightly with a knife so the masala can penetrate, then mix them gently into the gravy.

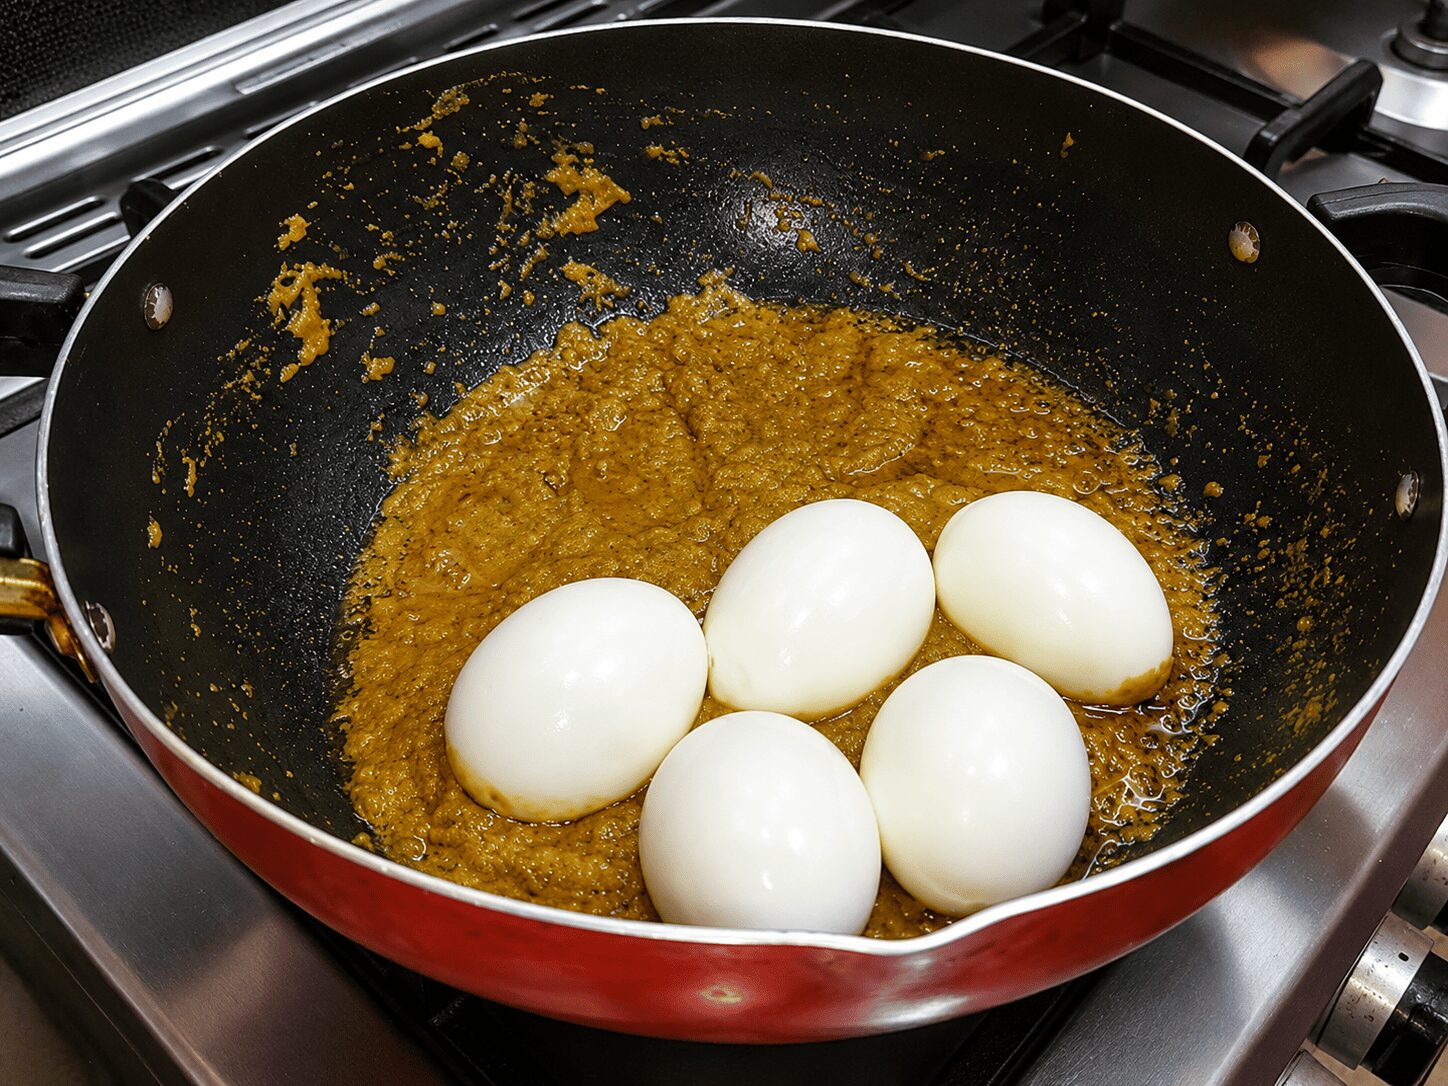
    Recipe tester’s tipUse half-boiled eggs here, not hard-boiled. Half-boiled eggs finish cooking fully once simmered in the gravy, while already-hard-boiled eggs turn dry and overly firm in the yolk when cooked further.
    Adding scored, half-boiled eggs to the silky gravy, Reshmi Anda Curry
    10

    Add water and cook covered

    Add about ½ cup plus a little extra water — use the same jar you ground the paste in, rinsed with water, so no masala goes to waste. Cover and cook 3–4 minutes on low flame, until oil resurfaces on top.

    11

    Stir in kasuri methi, garam masala, and coriander

    Stir in the roasted kasuri methi, the garam masala powder, and fresh coriander.

    12

    Add the cream

    Add the fresh cream and cook a further 2–3 minutes on low flame, so the cream’s raw taste cooks out fully.

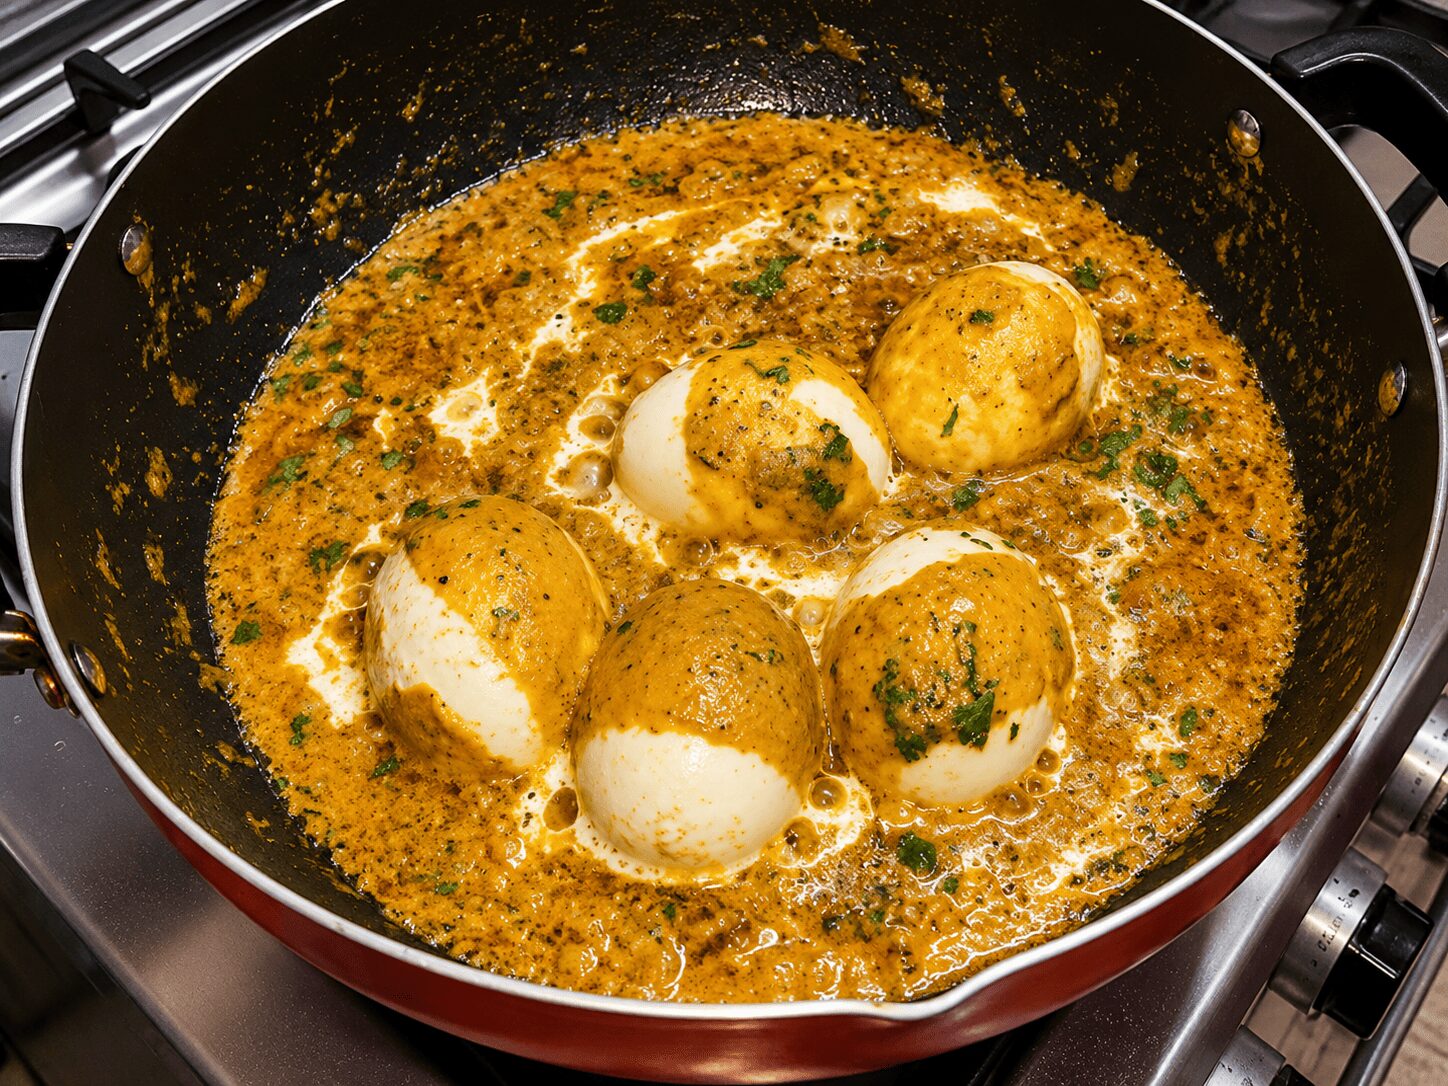
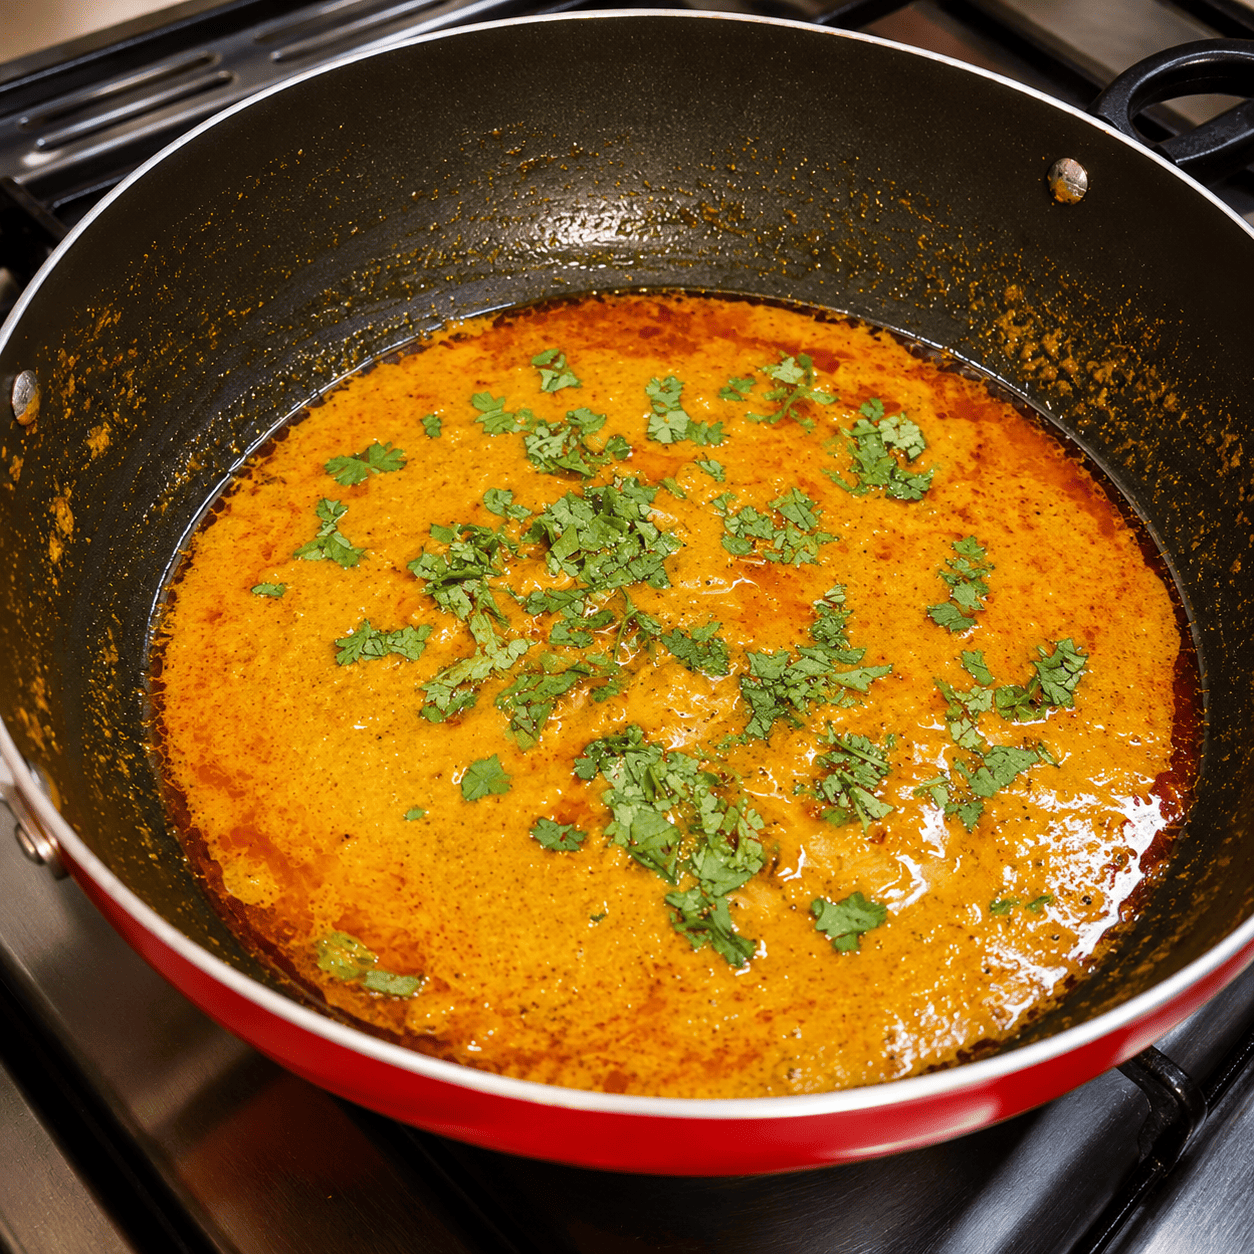
    Stirring in kasuri methi and cream for a restaurant-style finish, Reshmi Anda Curry
    13

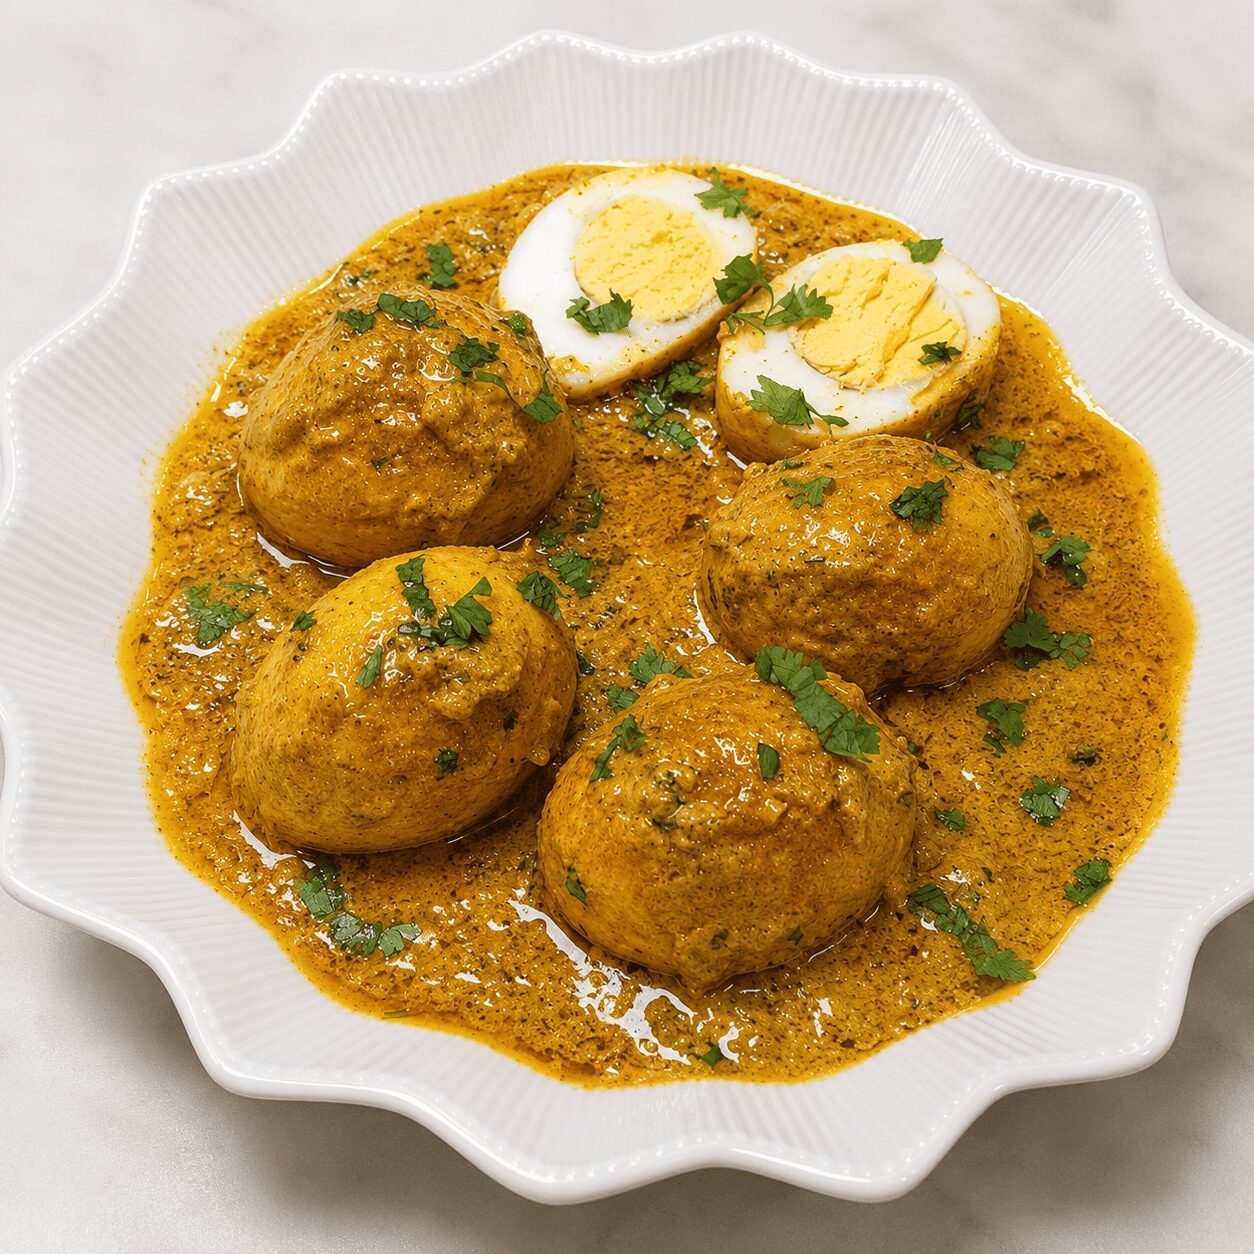
    Cover and dish out

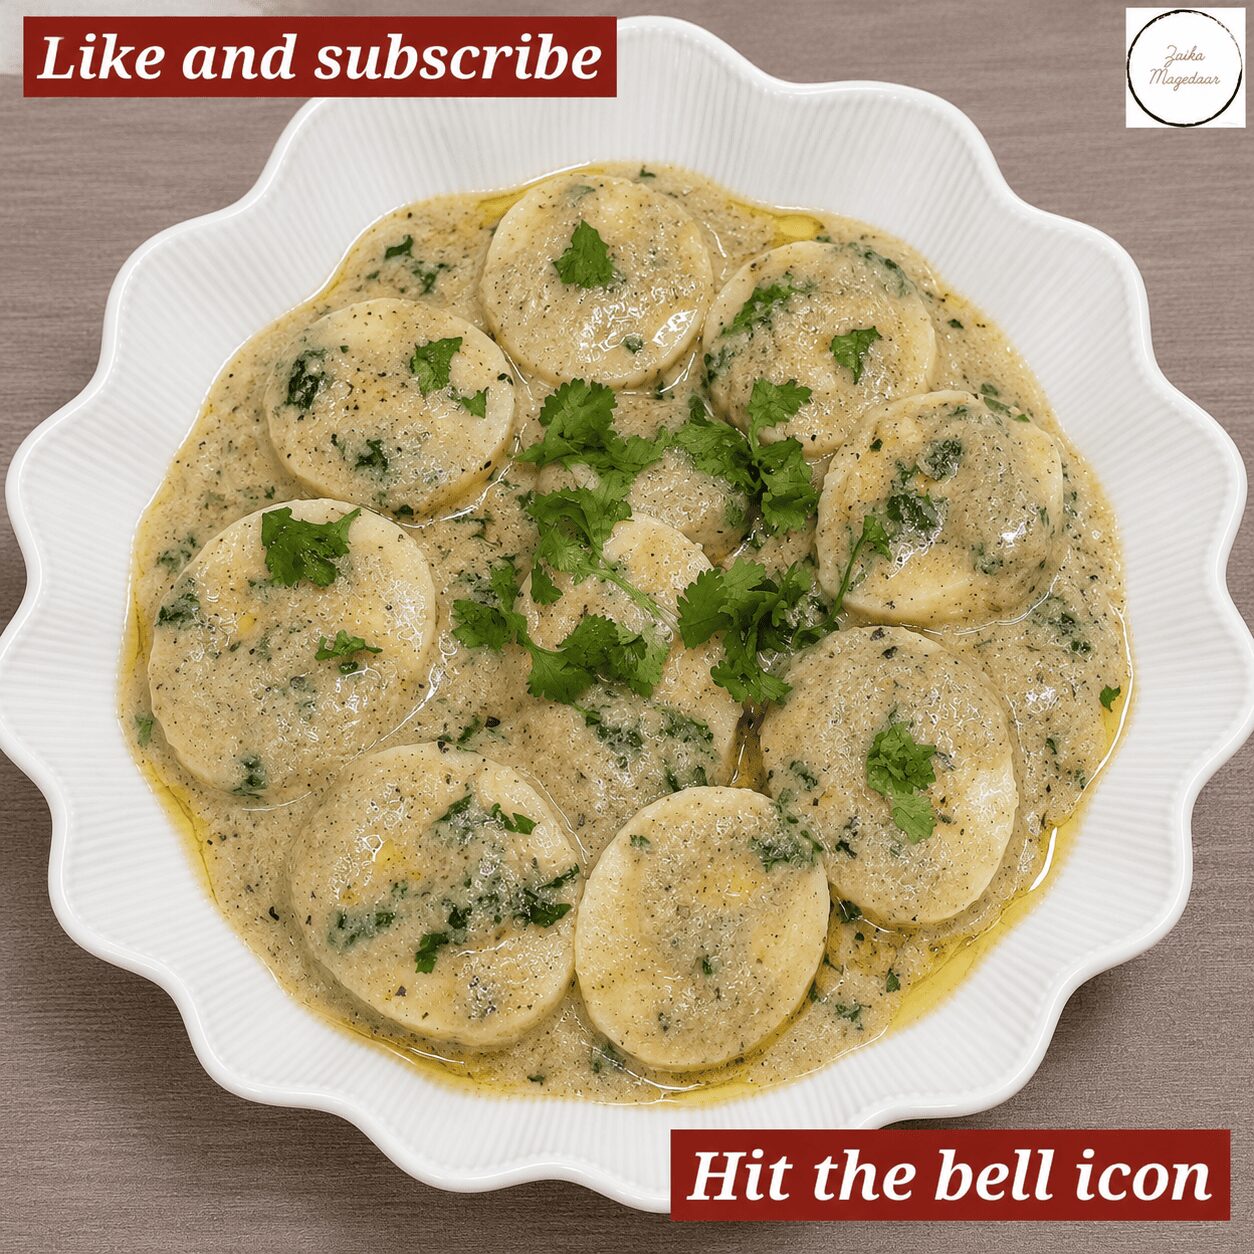
    Cover briefly, then dish out hot, garnished with fresh coriander. Your reshmi anda curry is ready.

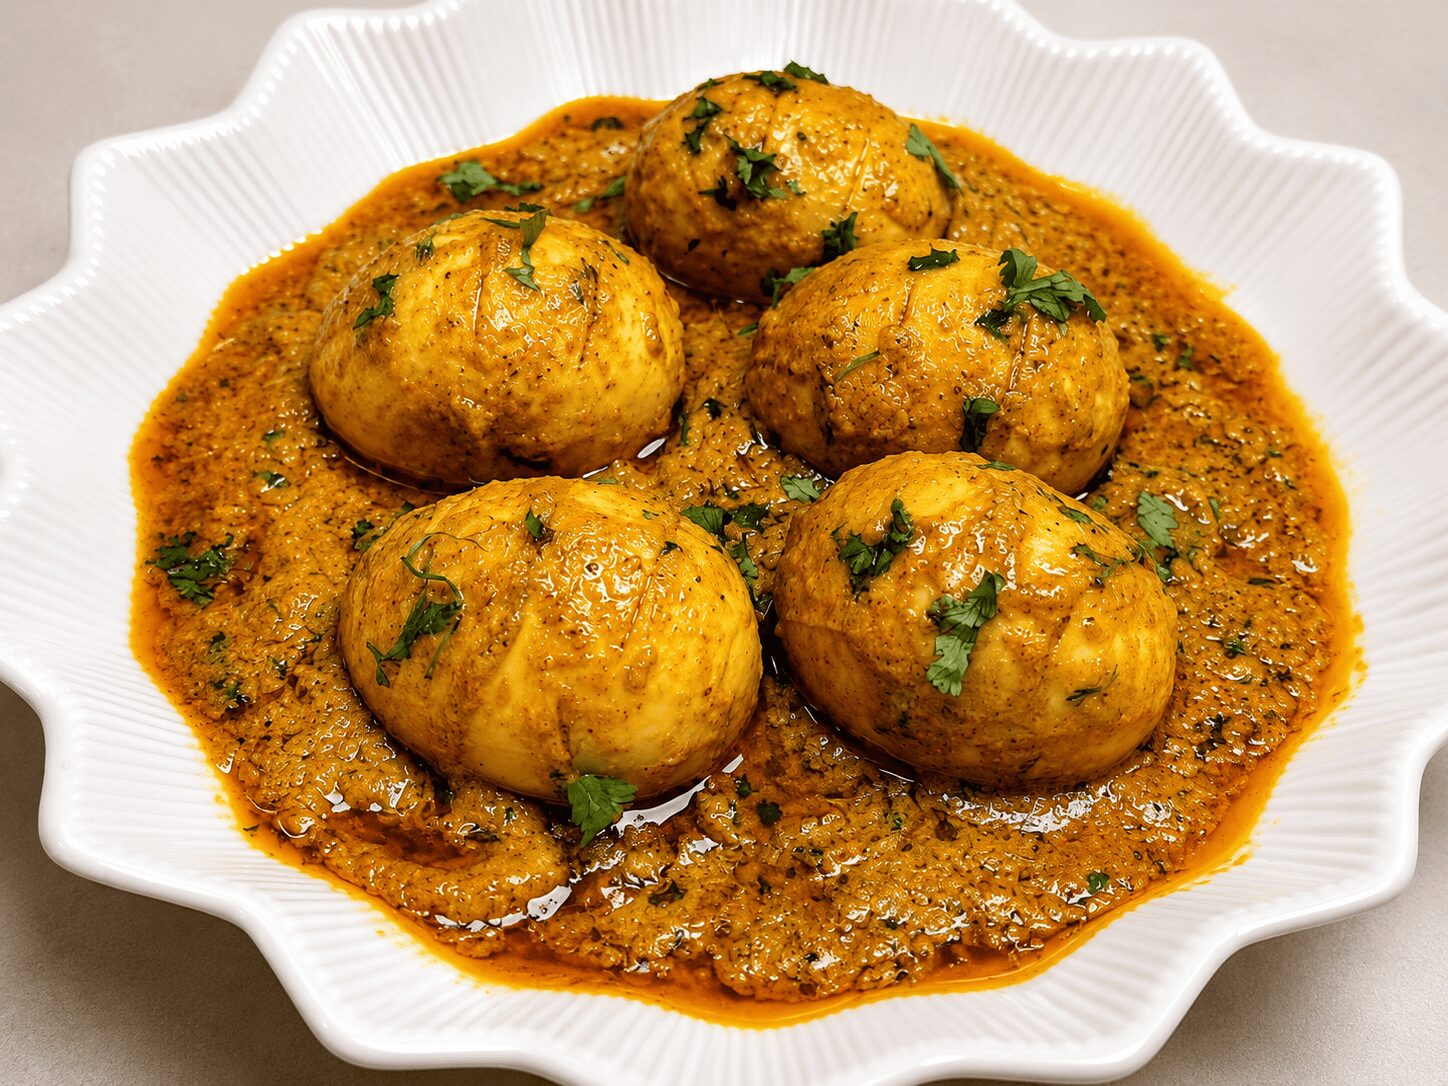
    Finished Reshmi Anda Curry garnished with fresh coriander

    6 Things to Remember for a Perfect Reshmi Anda Curry

    1. Soften onion, cashews, and coriander stems together before grinding — don’t let the onion brown
    2. Fry the ground paste briefly until it turns visibly light green
    3. Roast the masala twice — once after the dry spices, again after the yogurt
    4. Whisk the yogurt and mix it in fast, on low flame, to avoid curdling
    5. Use half-boiled, not hard-boiled, eggs — score them before adding
    6. Finish with kasuri methi and real cream for the restaurant-style touch

    Want something looser and more scrambled for a change of pace? Our Anda Ghotala recipe is a good contrast to this dish’s silky gravy.

    The One Mistake That Ruins Reshmi Anda Curry

    Using fully hard-boiled eggs instead of half-boiled.

    It’s the most natural thing in the world to just hard-boil your eggs the way you normally would — but this gravy simmers the eggs further, and a yolk that’s already fully set turns dry and unpleasantly firm by the time it’s done. Half-boiled eggs, by contrast, finish cooking through gently in the hot gravy and come out tender. The fix is simple: boil the eggs only until the yolk is set but still slightly soft in the centre, then let the curry do the rest.

    Half-boiled going in. Fully cooked coming out. That’s the whole trick. Getting the boil right matters just as much in other egg dishes — our Turkish Eggs Cilbir recipe lives or dies on a similarly soft yolk.

    For Beginners

    Don’t worry if you forget a step like salt at the right moment — just add it at the next natural point, the way it’s shown here. This gravy is forgiving about order as long as the key checkpoints (onion barely coloured, paste light green, oil separating twice) are hit.

    For Confident Home Cooks

    Try using homemade cream or malai skimmed from milk instead of store-bought for a richer, less processed-tasting finish. If you have coriander stems left over from another recipe, this is a good place to use them up — they add a layer of fresh flavour to the paste that’s easy to miss otherwise.

    What to Serve Reshmi Anda Curry With

    Paratha and hand-rolled roti are both named directly in the source video, and both make sense — the silky gravy clings well to either. If you’d rather wrap the leftovers up, our Anda Paratha Roll recipe turns them into a handheld lunch. For an even richer gravy on your next bread-dipping night, try our Mughlai Shahi Egg Curry recipe.

    It’s a good weekend dinner option, and a richer alternative to the site’s existing malai curry when you want something that looks and tastes a little more restaurant-style for guests.

    Storage, Reheating & Make-Ahead

    SituationGuidance
    Fridge storage (gravy only)Up to 2 days in an airtight container
    Fridge storage (with eggs)Best eaten the same day — reheating firms the egg yolks up further, which can undo some of the half-boiled texture
    FreezingNot recommended — the yogurt-cream gravy can separate on thawing
    ReheatingGentle reheat on low flame with a splash of water; avoid high microwave heat
    Make-ahead strategyThe masala base (through Step 8) can be made up to 2 days ahead. Reheat gently, then add fresh half-boiled eggs and finish the remaining steps

    Be honest with yourself about the eggs here — reheating leftovers will firm the yolks further regardless of how carefully you do it, so this dish is genuinely best fresh. The USDA’s guidance on egg doneness and safe handling is a good general reference if you’re unsure about half-boiled eggs being cooked further in a dish. If you’d rather cook a fresh batch than reheat leftovers, our one-pan Egg Shakshuka recipe is a quicker option for the same craving.

    Myth vs. Fact: Should You Always Use Hard-Boiled Eggs in Curry?

    Eggs in curry should always be fully hard-boiled first — that’s the safest, most reliable way to cook them.

    For a gravy that simmers the eggs further, hard-boiling first often backfires: the yolk is already fully set, so the extra time in hot gravy just dries it out. Half-boiled eggs — yolk set but still slightly soft — are the better choice here, since they finish cooking through gently in the curry and come out tender rather than chalky. The egg still ends up fully cooked by the time it’s served; it just gets there more gently. Our Afghani Egg Curry recipe follows the same half-boiled logic in a completely different spice profile.

    Nutrition Snapshot (Estimated per serving)

    NutrientEstimated Amount
    Calories~290–330 kcal
    Protein~12–15 g
    Fat~21–25 g
    Carbohydrates~10–13 g
    SodiumVaries with salt added

    Figures are estimated and will vary based on exact oil quantity, egg size, and cream used. These are not a substitute for individualised nutritional advice. Per-egg nutritional data is available via USDA FoodData Central, and cashew nutrient data via USDA FoodData Central’s cashew entry.

    Frequently Asked Questions

    What is reshmi anda curry?

    Reshmi anda curry is a silky North Indian egg curry built on a softened onion-cashew-coriander-stem paste, roasted with yogurt until the oil separates twice, and finished with kasuri methi and cream. “Reshmi” means silky — a recognized descriptor on Indian restaurant menus — and it accurately describes the gravy’s smooth, no-grain texture.

    How is this different from egg malai curry?

    Our existing Egg Malai Curry uses an onion-green-chilli paste finished with plain room-temperature milk — no cashews, no yogurt, no cream. This Reshmi Anda Curry uses a richer onion-cashew-coriander-stem paste, a yogurt-based roasted masala, half-boiled eggs, and a cream-and-kasuri-methi finish — a meaningfully different technique and result.

    Why use half-boiled eggs instead of hard-boiled?

    Half-boiled eggs finish cooking fully once simmered in the gravy, staying tender in the process. Already hard-boiled eggs, cooked again in a hot gravy, turn dry and overly firm in the yolk — half-boiled is the technique that avoids that altogether.

    Can I use cream alternatives like malai?

    Yes. Homemade malai or cream skimmed from milk works as a direct substitute for store-bought fresh cream, with a slightly less processed taste. Whisk it smooth before adding so it blends into the gravy evenly.

    Why does my yogurt curdle in the gravy?

    This usually happens when cold yogurt is added too slowly to a hot pan. Whisking the yogurt smooth, bringing it to room temperature first, and mixing it in quickly on low flame are the three things that prevent curdling here.

    Can I make this less spicy?

    Yes. Reduce the red chilli powder in the dry spice mix, and use fewer or milder green chillies in the onion-cashew paste. The cashew and cream still carry plenty of richness without much heat.

    Can I make the gravy ahead and add eggs later?

    Yes — this is actually a good approach for meal prep. The masala base keeps well in the fridge for up to 2 days. Reheat gently, then add fresh half-boiled eggs and finish the remaining steps for the best texture.

    What’s the best bread to serve with reshmi anda curry?

    Paratha and hand-rolled roti are both named directly in the source recipe and pair naturally with the silky gravy. Either works well depending on whether you want something richer (paratha) or simpler (roti).

    Conclusion

    The single biggest reason this curry’s eggs stay tender instead of chalky has nothing to do with the gravy — it’s how the eggs were boiled in the first place. Pair that half-boiled technique with a properly softened onion-cashew-coriander-stem paste and a careful, room-temperature yogurt step, and you get a gravy that’s genuinely silky from the first bite to the last.

    Soften onion, cashews, and coriander stems together before grinding. Fry the paste briefly until light green. Roast the masala twice — once after the spices, again after the yogurt. Whisk the yogurt and mix it in fast. Use half-boiled, not hard-boiled, eggs, and score them before adding. Finish with kasuri methi and real cream.

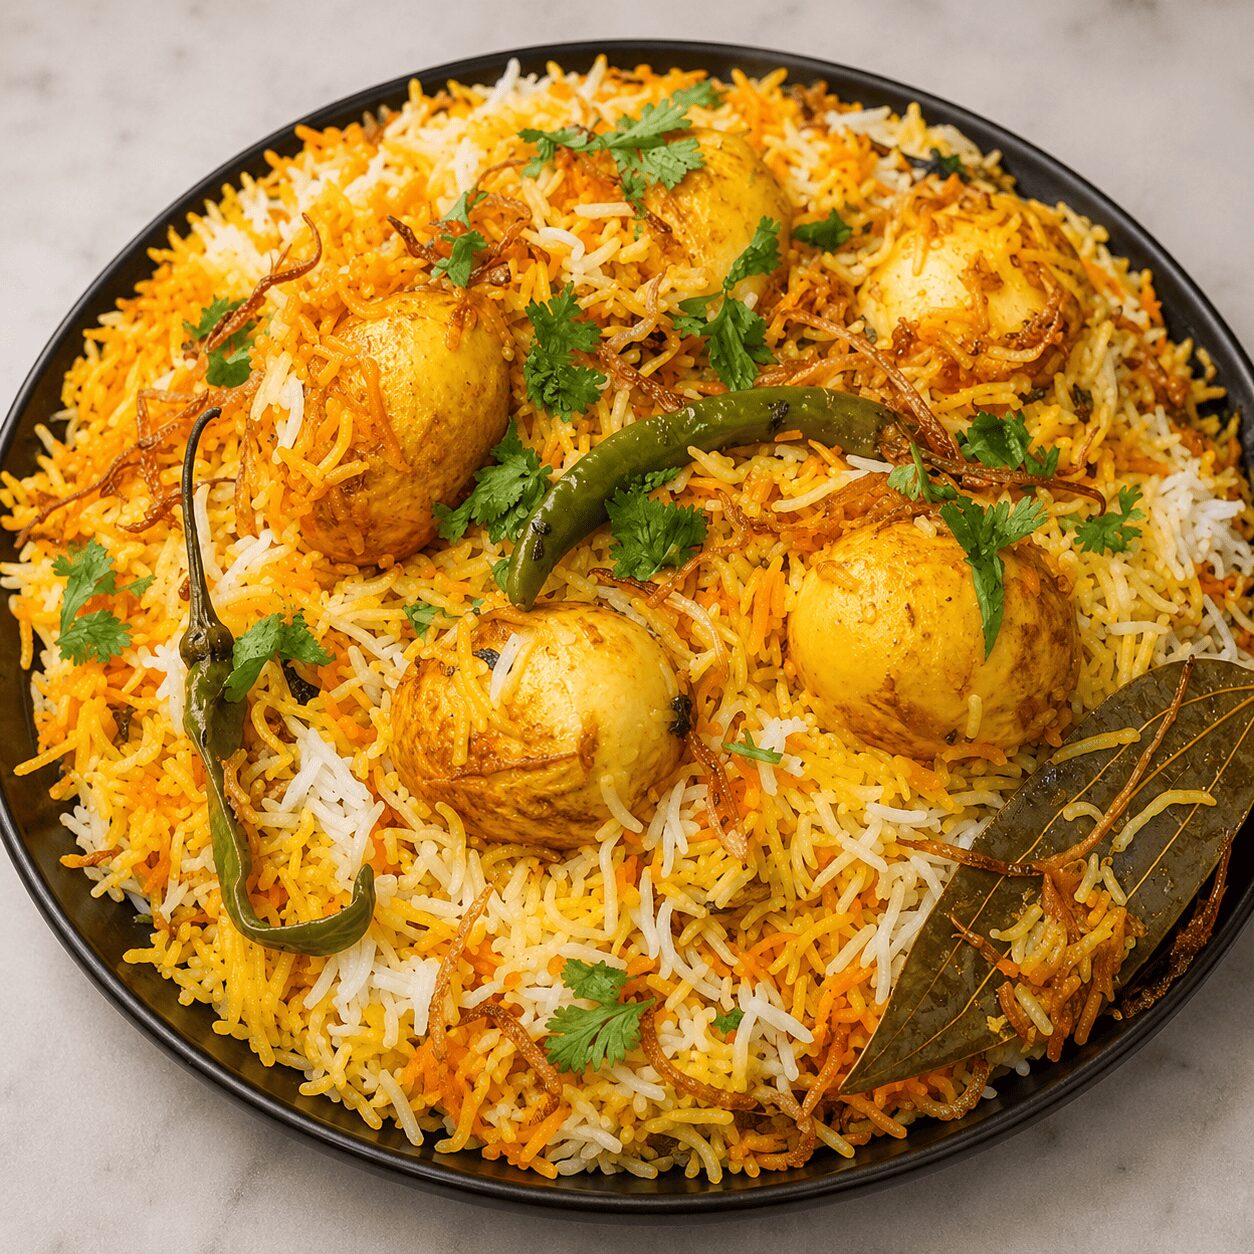
    It’s a solid pick when you want something a little richer than a regular weeknight egg curry — and if rice is more your speed than bread, our Anda Dum Biryani recipe or Anda Korma Biryani recipe both scratch a similar itch.

    Recipe demonstrated and filmed in the Zaika Mazedaar kitchen. Watch the full video on the Zaika Mazedaar YouTube channel for a step-by-step visual walkthrough.

  • Mughlai Shahi Egg Curry Recipe

    Mughlai Shahi Egg Curry Recipe

    Zaika Mazedaar · Mughlai Curries

    Scored, fried eggs in a rich cashew-and-sesame-seed gravy, finished with a yogurt-spice base rested to room temperature — a real Mughlai-style “shahi” curry, built with a practical poppy-seed swap.

    The first thing that gives this curry away as something a little more royal than a weeknight egg curry is the paste — cashews and white sesame seeds, soaked and ground together into a rich, shahi-style base. Add a yogurt-spice mixture that’s deliberately rested until it reaches room temperature before it ever touches the pan, and you’ve got a gravy that’s smooth, thick, and genuinely restaurant-grade.

    This recipe is demonstrated step-by-step on the Zaika Mazedaar channel, filmed and cooked in a real kitchen. Quick housekeeping note before we dive in: if you’ve come here looking for our Anda Korma recipe instead, that’s a different dish built a little differently — ghee-fried eggs, a separate onion-cashew-chilli paste, and a yogurt mixture combined cold before the flame goes back on (the “degi korma” technique). This Mughlai Shahi Egg Curry uses oil instead of ghee, scored (not pricked) eggs, and a yogurt-spice mixture rested at room temperature rather than mixed in cold. If Mughlai-style rice is more your mood, our Muradabadi Anda Yakhni Pulao recipe is built around the same slow-cooked spice base.

    What Is Mughlai Shahi Egg Curry?

    Mughlai shahi egg curry is built using a Mughlai-style cashew-and-seed paste, with sesame standing in for poppy seeds where they aren’t easy to find. “Shahi” simply means royal or rich in the context of North Indian restaurant cooking, and the description holds up here — the cashew-sesame paste gives the gravy real body, while a yogurt-spice base roasted in twice (once after the yogurt goes in, again after the paste) builds depth without ever turning the curry thin or soupy.

    The eggs are boiled, lightly scored with a knife, and fried until golden before they ever meet the gravy — the scoring lets the masala soak into the egg rather than leaving the inside bland once everything simmers together.

    Why This Recipe Works (and How It’s Different from Our Anda Korma)

    Two techniques set this apart from a regular egg curry — and from the site’s existing Anda Korma article, despite the creator’s own informal naming overlap in the source video.

    First: a cashew-sesame “shahi” paste, not a single-nut paste. Traditional Mughlai cooking often calls for poppy seeds (khaskhas) ground alongside cashews for body and a faint nuttiness. Where poppy seeds aren’t locally available, white sesame seeds are a genuinely workable substitute — close enough in size and flavour that the gravy’s character barely shifts.

    Second: the yogurt-spice mixture rests at room temperature, not cold. Unlike the Anda Korma’s cold-combined “degi korma” technique, here the yogurt and dry spices are mixed together and left to sit until they reach room temperature before joining the hot pan. This both deepens the spice flavour and helps prevent the yogurt from curdling or splitting the moment it hits the heat — a different sequence with a genuinely different final texture from the Anda Korma, even though both dishes get loosely called “korma” by the creator in her own videos.

    Ingredients

    For the Cashew-Sesame Paste

    • 10–12 cashews, soaked
    • 1 tsp white sesame seeds, soaked alongside the cashews (traditional khaskhas/poppy seeds can be used instead, if available)

    For the Eggs

    • 4–5 eggs, boiled and lightly scored with a knife
    • Oil, for frying

    Whole Spices & Onion Base

    • 2 tbsp oil, plus 2 more tbsp for the gravy
    • 1 bay leaf (tej patta)
    • ½ tsp cumin seeds
    • 1-inch cinnamon stick (dalchini)
    • 2 small onions, grated
    • 1 tsp ginger-garlic paste

    For the Yogurt-Spice Base

    • 1 tsp coriander powder
    • ½ tsp cumin powder
    • ½ tsp turmeric powder
    • 1 tsp red chilli powder (adjust to taste)
    • Salt, to taste
    • 3 tbsp thick yogurt, whisked (use 4 tbsp if your yogurt is thinner)

    For Finishing

    • Water, to rinse the yogurt bowl and grinding jar (nothing wasted)
    • 1 tbsp fresh cream
    • 2–3 tbsp water, to adjust gravy consistency
    • 2 green chillies, for flavour and aroma
    • 1 tsp kasuri methi (dried fenugreek leaves), roasted
    • ½ tsp garam masala powder
    • Fresh coriander, for finishing
    • ¼ tsp sugar (optional, for a restaurant-style balance)

    Ingredient Substitutions

    IngredientSubstituteEffect on Taste / Texture
    White sesame seedsPoppy seeds (khaskhas)The traditional choice; very similar flavour and thickening power if you can source them
    3 tbsp thick yogurt4 tbsp thinner yogurtUse the larger amount if your yogurt isn’t thick-set, to keep the spice-to-liquid ratio balanced
    Fresh creamMalai / cream skimmed from milkNearly identical richness; whisk smooth first so it blends in evenly
    Ginger-garlic pasteFresh grated ginger + garlic (equal parts)Stronger raw flavour; fry slightly longer to mellow it

    Want something far quicker on a weekday? Our Butter Garlic Egg recipe shares a few of these pantry staples without the long roast.

    Mise en Place Checklist

    Get all of this ready before turning on the flame. The yogurt-spice mixture needs a short resting window, so plan for that.

    • Cashews and sesame seeds soaking together
    • Eggs boiled and lightly scored
    • Onions grated
    • Ginger-garlic paste measured
    • Yogurt-spice mixture combined and resting at room temperature
    • Cream measured
    • Green chillies and fresh coriander on hand
    • Kasuri methi roasted lightly and ready to crush
    • A wide kadhai or pan, ready on the hob
    /* Step Images */ .egg-step-image { text-align: center; margin: 16px 0 24px; } .egg-step-image img { display: block; width: 100%; max-width: 450px; /* desktop */ height: auto; margin: 0 auto; border-radius: 12px; } /* Mobile */ @media (max-width: 768px) { .egg-step-image img { max-width: 280px; /* adjust 250-320px as needed */ } }

    Step-by-Step Method

    1

    Soak the cashews and sesame seeds together

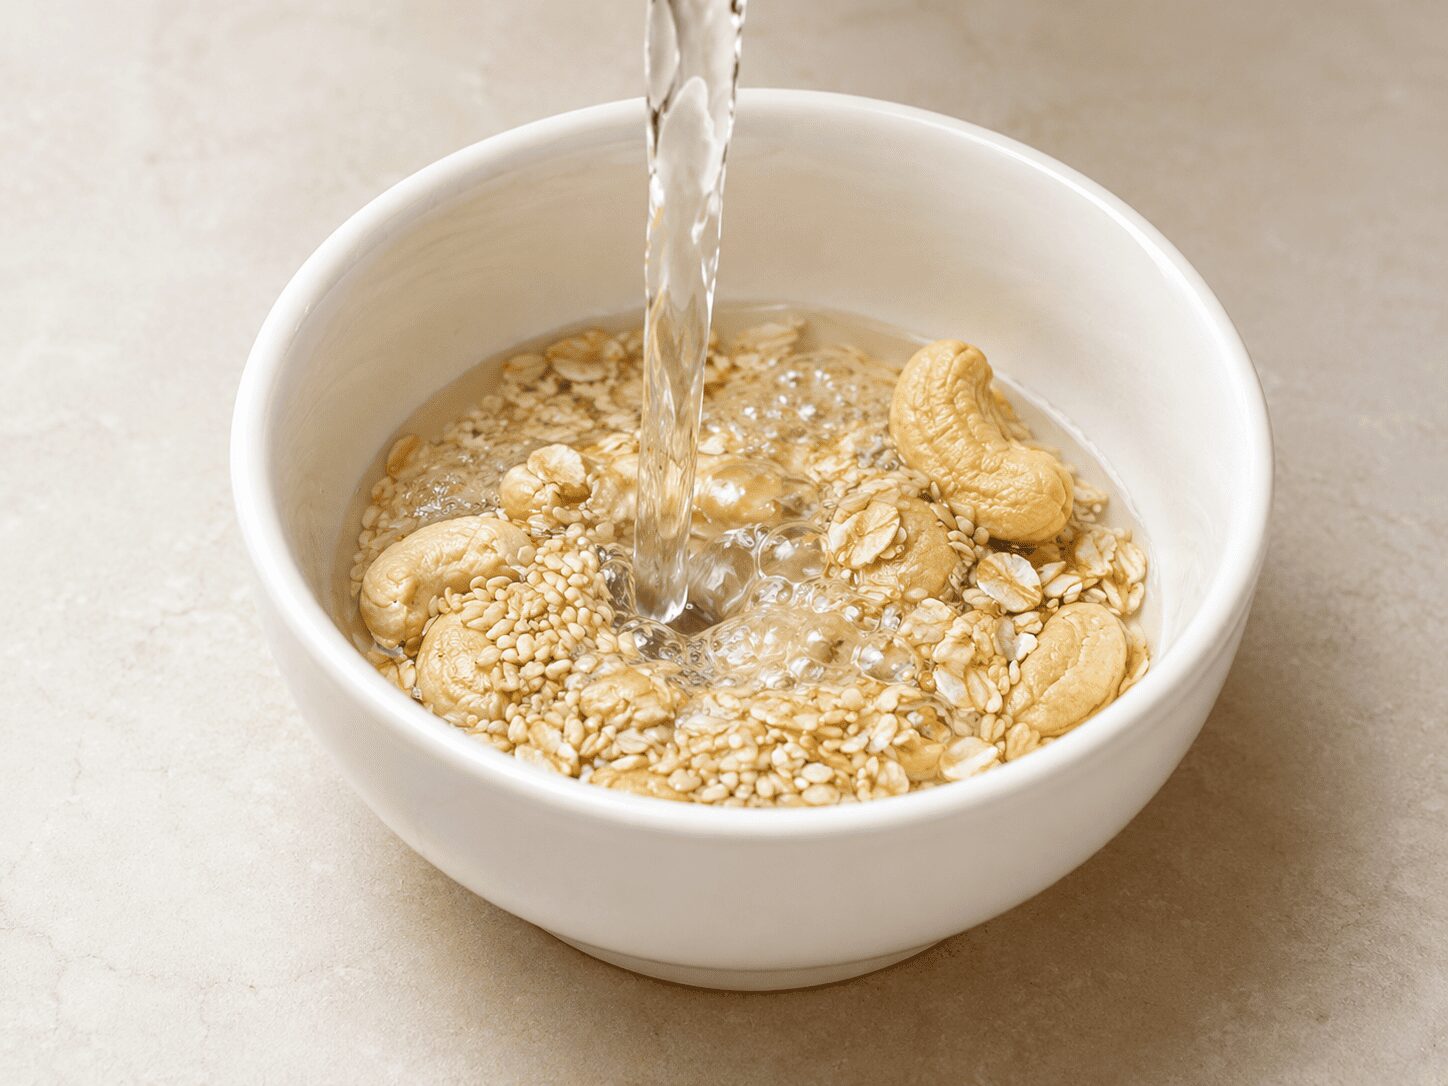
    Soak the cashews and 1 tsp white sesame seeds together so they soften enough to grind into a fine paste later.

    Recipe tester’s tipWhite sesame seeds work as a genuinely practical substitute for poppy seeds (khaskhas) when the latter isn’t locally available — close enough in flavour that most people won’t notice the swap.
    Soaking cashews and white sesame seeds together for Mughlai Shahi Egg Curry
    2

    Score and fry the eggs

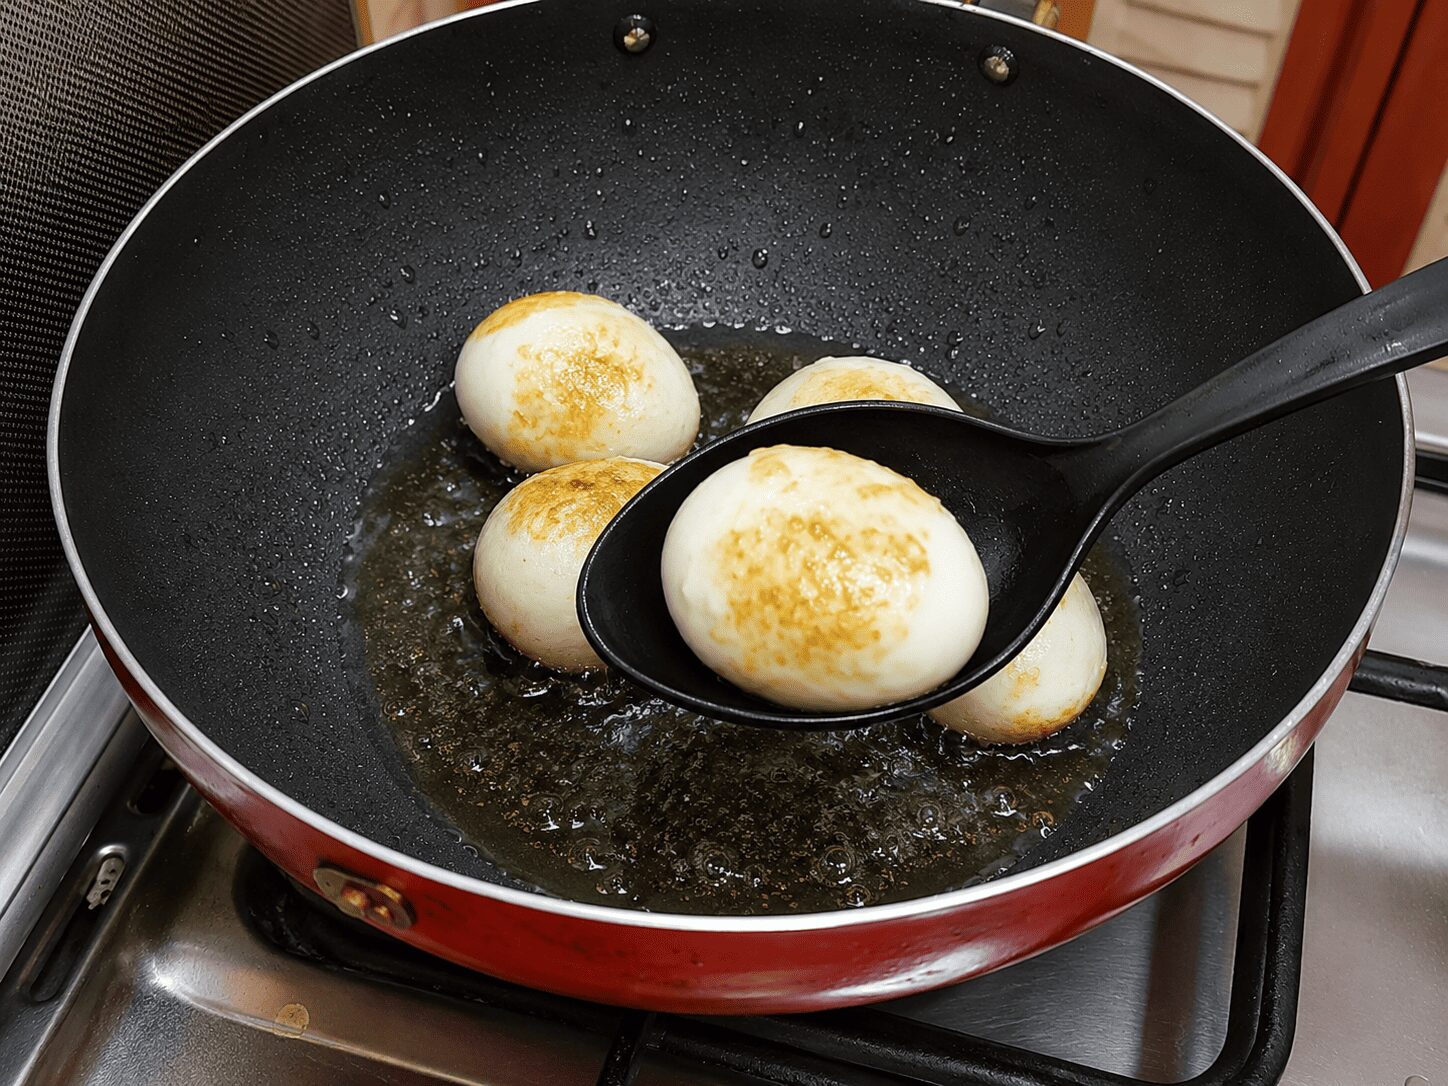
    Lightly score the boiled eggs with a knife — this lets masala soak into the egg once it joins the gravy, rather than leaving the inside bland. Fry on medium flame until a nice golden colour develops, then remove and set aside.

    Frying scored eggs golden for Mughlai Shahi Egg Curry
    3

    Temper the whole spices

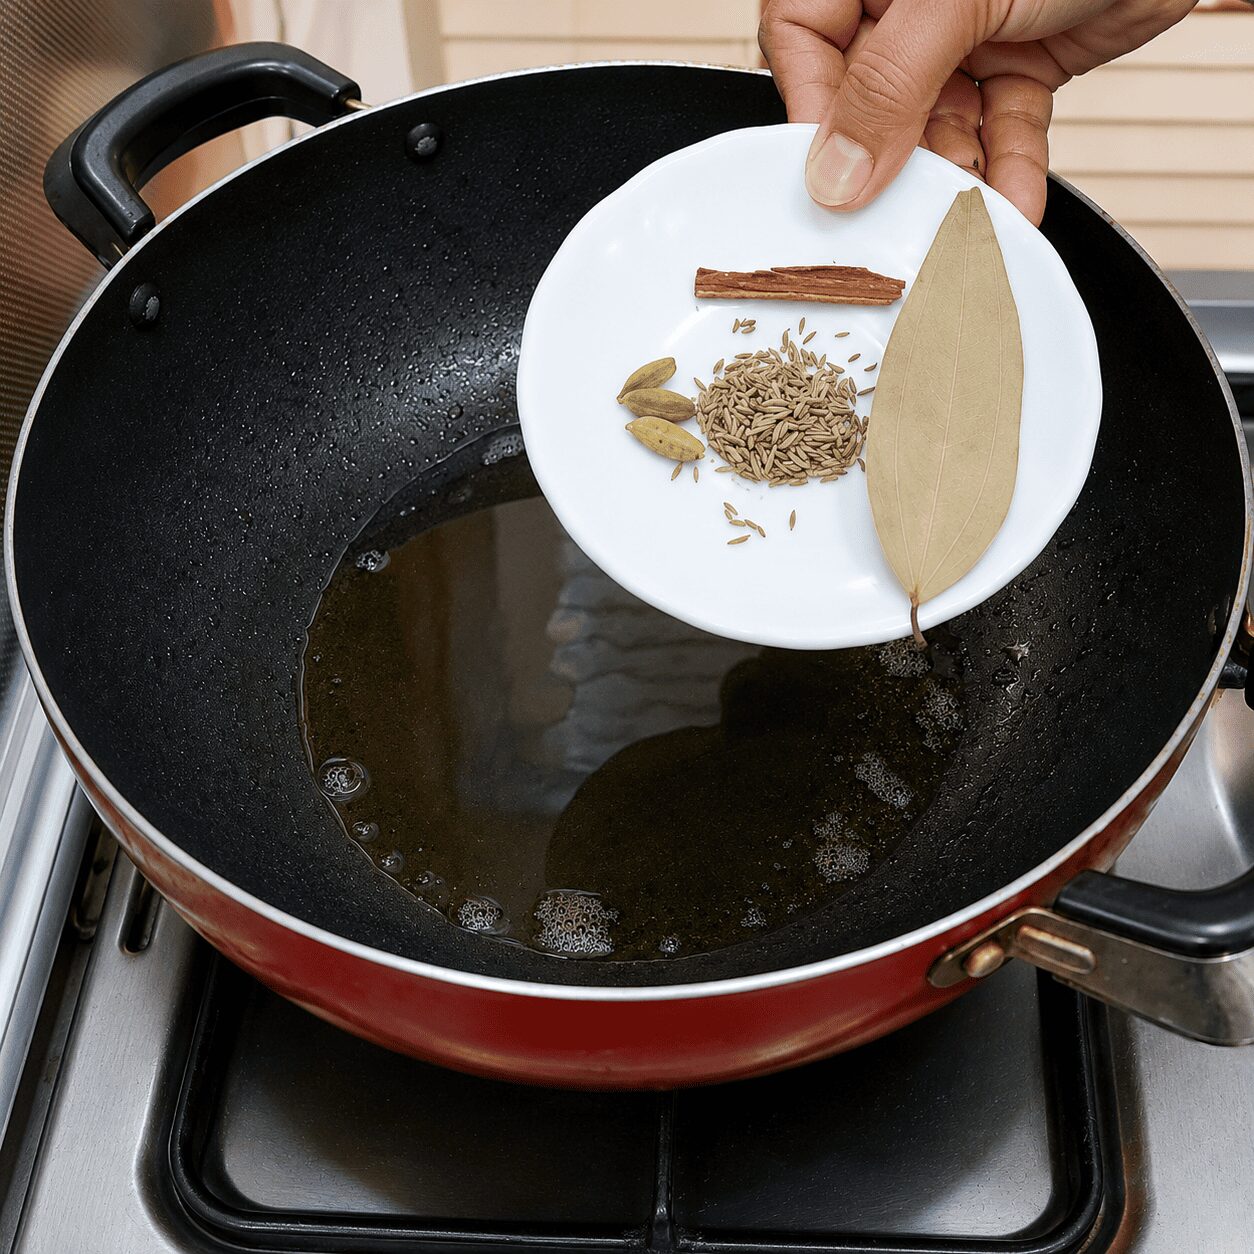
    In the same pan, add 2 tbsp oil. Add the bay leaf, cumin seeds, and cinnamon stick, and fry for 30 seconds until fragrant.

    4

    Fry the grated onion light golden

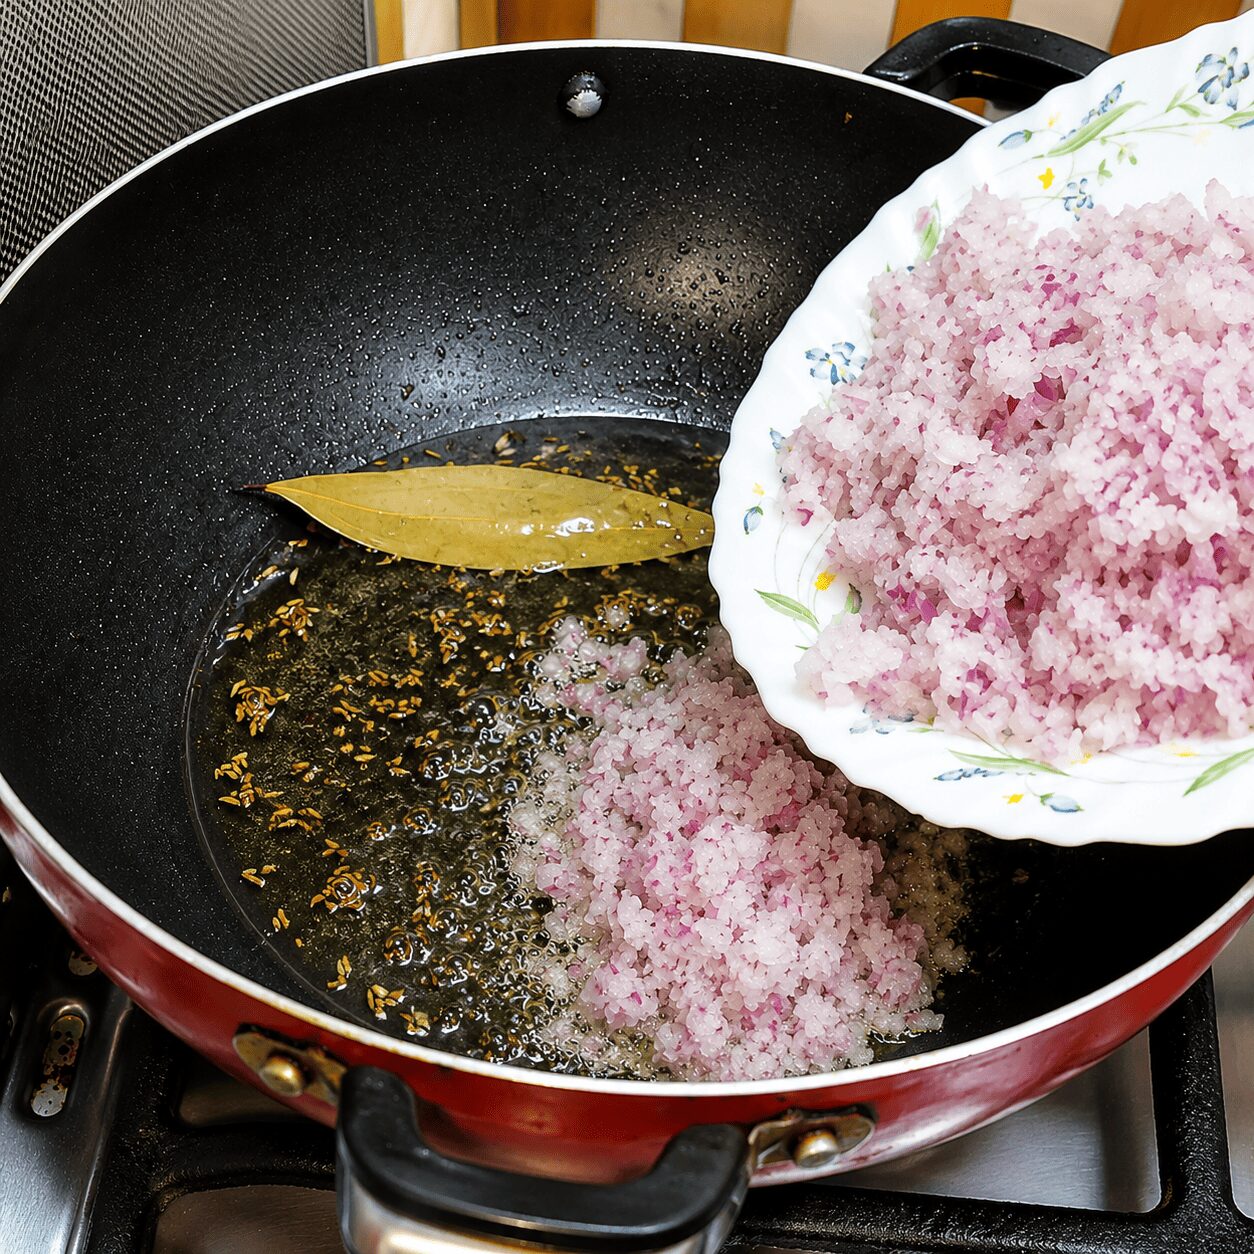
    Add the grated onions and cook on medium flame until light golden — not deeply browned. While the onion fries, move on to the next step in parallel.

    Onion fried light golden with whole spices for Mughlai Shahi Egg Curry
    5

    Mix and rest the yogurt-spice paste

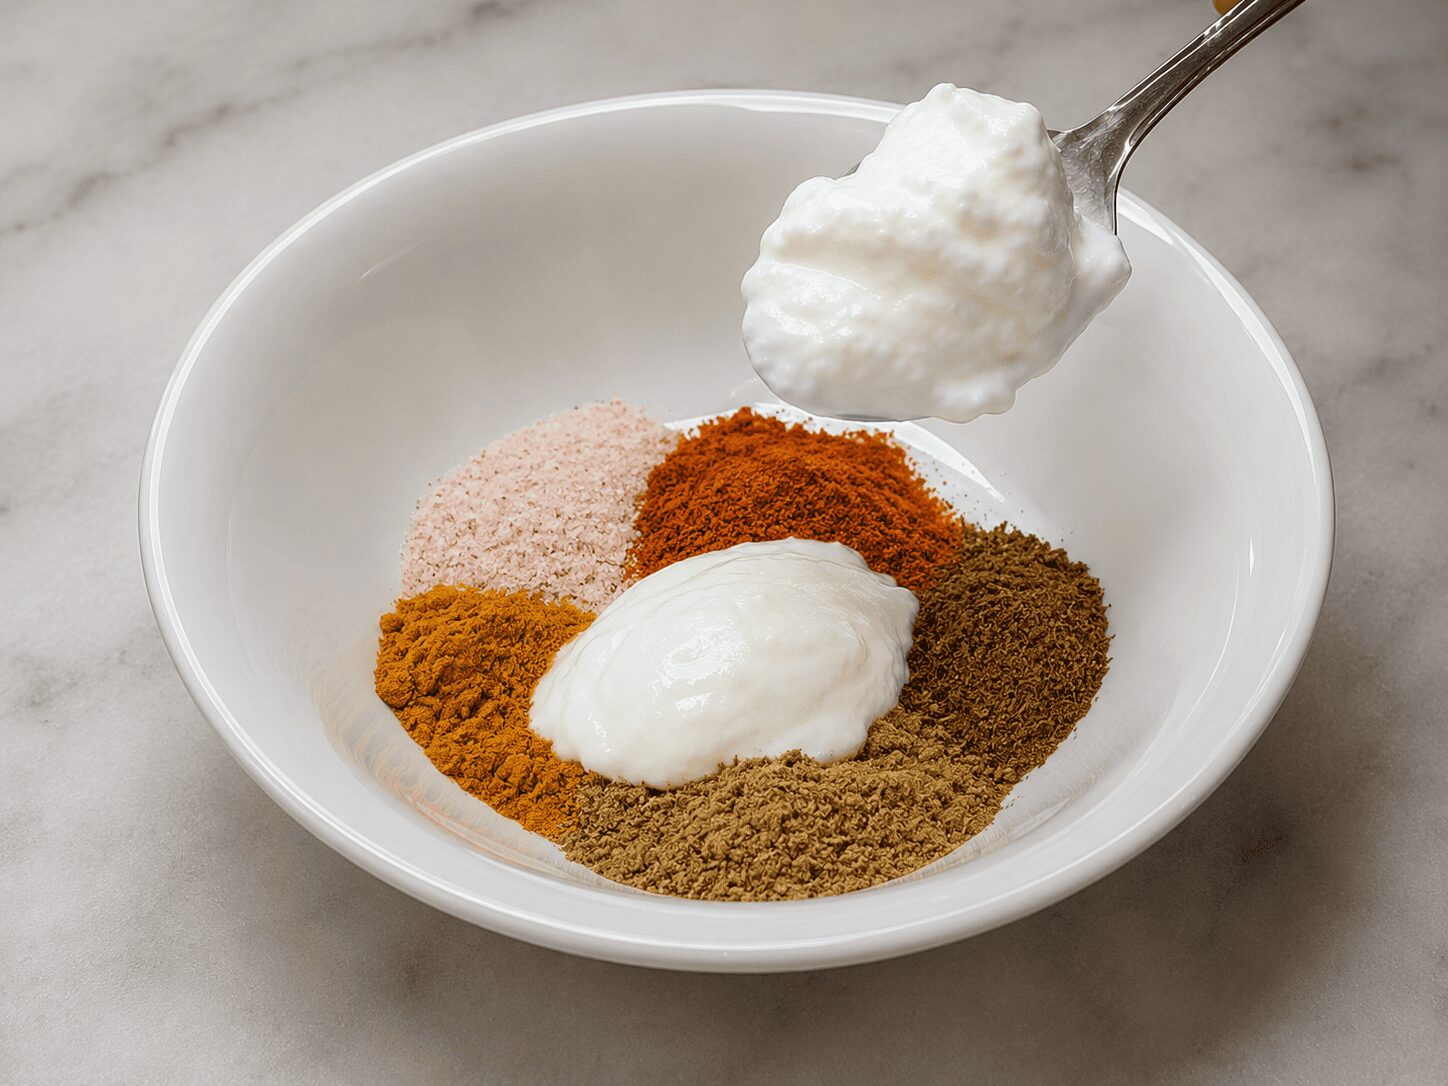
    In a bowl, combine the coriander powder, cumin powder, turmeric, red chilli powder, salt, and whisked yogurt. Set this aside and let it come to room temperature while the onion finishes frying.

    Why this mattersLetting the yogurt and spices sit together until they reach room temperature isn’t a step you can skip in a hurry — it’s quietly doing a lot of the flavour work here, and it helps prevent the yogurt from curdling once it meets the hot pan.
    Yogurt-spice paste mixed and resting at room temperature for Mughlai Shahi Egg Curry
    6

    Add the ginger-garlic paste

    Once the onion is light golden, add the ginger-garlic paste and fry for 30–40 seconds, until the raw smell is gone.

    7

    Stir in the room-temperature yogurt-spice mixture

    Lower the flame and stir the rested yogurt-spice mixture into the onion quickly, so it incorporates smoothly without curdling.

    8

    Roast until oil separates, twice

    Roast on medium flame until the oil visibly separates. Rinse the empty yogurt bowl with a little water and add that back in, so nothing’s wasted — then continue roasting until oil resurfaces fully on the gravy’s surface.

    Roasting the yogurt-spice mixture into the onion until oil separates
    9

    Lower the flame and stir in the cashew-sesame paste

    Grind the soaked cashews and sesame seeds into a fine paste. Lower the flame before adding it — it catches and burns at the bottom quickly compared to the rest of the masala. Stir it in, then rinse the grinding jar with 2 tbsp water and add that back too.

    Watch pointAlways lower the flame before the cashew-sesame paste goes in. It’s the single most likely place this curry burns if you’re not paying attention.
    Stirring the cashew-sesame paste into the roasted Mughlai Shahi Egg Curry masala
    10

    Add the cream

    Stir in 1 tbsp fresh cream and cook for 2–3 minutes, specifically so the cream’s raw taste cooks out fully.

    11

    Adjust the consistency and add green chillies

    If the gravy looks too thick, loosen it with 2–3 tbsp water — but don’t thin it down to a broth-like consistency the way a korma is sometimes served. This curry is meant to stay a little thicker. Add the green chillies purely for a light flavour and aroma boost.

    12

    Add the fried eggs back in

    Gently add the fried, scored eggs into the gravy, spacing them evenly so each one is coated.

    13

    Finish and cover

    Stir in the roasted kasuri methi, garam masala powder, fresh coriander, and the optional ¼ tsp sugar. Cover and cook for 2–3 minutes more, until oil resurfaces on top and the eggs absorb a little of the masala flavour.

    Finished Mughlai Shahi Egg Curry with eggs nestled in the gravy

    6 Things to Remember for Perfect Mughlai Shahi Egg Curry

    1. Soak cashews and sesame seeds together early — sesame stands in well for poppy seeds when they’re unavailable
    2. Score the eggs before frying so the masala flavour can penetrate later
    3. Rest the yogurt-spice mixture to room temperature before it joins the hot pan
    4. Roast the masala until oil separates twice — once after the yogurt, again after the cashew-sesame paste
    5. Lower the flame before adding the cashew-sesame paste — it burns fast on high heat
    6. Keep the final gravy thick, not broth-like

    Prefer a simpler weeknight gravy over this occasion-worthy one? Our Egg Butter Masala recipe is the easier everyday version of the same rich-curry idea.

    The One Mistake That Ruins Mughlai Shahi Egg Curry

    Adding the cashew-sesame paste on too high a flame.

    It’s easy to forget to lower the heat between steps, especially once the gravy is smelling good and you’re moving quickly. But the cashew-sesame paste catches and burns at the bottom of the pan far faster than the rest of the masala — and once it scorches, that bitterness spreads through the whole gravy and can’t really be fixed. The second most common slip is skipping the yogurt-resting step entirely and adding cold yogurt straight from the fridge, which is the fastest way to end up with a curdled, grainy gravy instead of a smooth one.

    Lower the flame before the paste goes in. Let the yogurt mixture sit until it’s no longer cold. Both take patience, neither takes extra effort. Temperature control matters just as much in simpler egg dishes — our Turkish Eggs Cilbir recipe is a good example of how much a gentle hand changes the result.

    For Beginners

    Don’t rush the yogurt-resting step — it’s brief but genuinely useful. If your kitchen runs cold, give it a few extra minutes. You’re looking for the yogurt mixture to feel neutral to the touch, not chilled, before it goes anywhere near the hot pan.

    For Confident Home Cooks

    If you can source real poppy seeds (khaskhas), try swapping them in for the sesame seeds for an even closer match to the traditional version — the flavour shifts subtly toward something nuttier and more classically Mughlai. You can also adjust the cream-to-water ratio slightly for a richer or lighter finish, depending on what you’re serving it with.

    What to Serve Mughlai Shahi Egg Curry With

    Naan is the obvious pairing here — the rich, thick gravy is built for scooping, and if you’d rather wrap leftovers up the next day, our Anda Paratha Roll recipe is a good use for them. For a more complete weekend spread, our Anda Korma Biryani recipe rounds things out nicely without competing with the gravy’s richness.

    This is a strong special-occasion or weekend dinner upgrade — the kind of egg curry that feels like it belongs on a slightly more festive table than a regular weeknight one.

    Storage, Reheating & Make-Ahead

    SituationGuidance
    Fridge storage (gravy only)Up to 2 days in an airtight container
    Fridge storage (with eggs)Best eaten within a day — egg texture firms up further on reheating
    FreezingNot recommended — the yogurt-cream gravy tends to separate on thawing
    ReheatingGentle reheat on low flame with a splash of water; avoid high microwave heat, which can split a yogurt-and-cream-based gravy
    Make-ahead strategyThe masala base (through Step 10) can be made up to 2 days ahead. Reheat gently, then add the fried eggs fresh and finish the last few steps

    A yogurt-and-cream gravy like this one needs a gentle hand when reheating — high, fast heat is what causes splitting. The USDA’s general guidance on leftovers and food safety covers the cooling and reheating principles that apply here. If reheating gently isn’t appealing, our one-pan Egg Shakshuka recipe is a quicker fresh-cooked alternative for the same craving.

    Myth vs. Fact: Does Mughlai Curry Require Poppy Seeds?

    If you don’t have poppy seeds (khaskhas), you can’t make a real Mughlai-style curry — they’re essential to the dish.

    Poppy seeds are the traditional choice in many Mughlai pastes, but they’re not the only option. White sesame seeds, ground alongside cashews, give a very close result — similar body, a comparable faint nuttiness, and a gravy that still earns the “shahi” description. If poppy seeds aren’t sold near you, sesame is a genuinely workable swap rather than a compromise.

    Nutrition Snapshot (Estimated per serving)

    NutrientEstimated Amount
    Calories~310–350 kcal
    Protein~13–16 g
    Fat~23–27 g
    Carbohydrates~11–14 g
    SodiumVaries with salt added

    Figures are estimated and will vary based on exact oil quantity, egg size, and cream used. These are not a substitute for individualised nutritional advice. Per-egg nutritional data is available via USDA FoodData Central, and cashew nutrient data via USDA FoodData Central’s cashew entry.

    Frequently Asked Questions

    What is Mughlai shahi egg curry?

    Mughlai shahi egg curry is a rich North Indian egg curry built on a cashew-and-sesame-seed “shahi” paste, with the sesame standing in for traditional poppy seeds. Scored, fried eggs simmer in a yogurt-spice gravy that’s roasted twice until the oil separates, finished with cream, kasuri methi, and garam masala for a thick, restaurant-style result.

    How is this different from anda korma?

    Our existing Anda Korma uses ghee, pricked eggs, a separate onion-cashew-chilli paste, and a yogurt-spice mixture combined cold before the flame resumes — the “degi korma” technique. This Mughlai Shahi Egg Curry uses oil, scored eggs, a cashew-sesame paste added late on low flame, and a yogurt-spice mixture rested at room temperature rather than cold. They’re genuinely different recipes despite sharing informal naming.

    Can I use poppy seeds instead of sesame seeds?

    Yes — poppy seeds (khaskhas) are actually the traditional choice in this style of paste. Use them in the same quantity as the sesame seeds if you can source them. The flavour will shift slightly toward something nuttier and more classically Mughlai, but either version works well.

    Why rest the yogurt-spice mixture before adding it?

    Mixing the spices into yogurt and letting it sit until it reaches room temperature intensifies the spice flavour and helps prevent the yogurt from curdling or the spices from scorching the moment they hit the hot pan. It’s a brief step, but it does real work for both texture and taste.

    Why does my gravy look curdled?

    This usually happens when cold yogurt is added directly to a very hot pan, or when the flame is too high while the yogurt is roasting in. Letting the yogurt-spice mixture come to room temperature first, and keeping the flame moderate to low while it roasts, are the two best ways to avoid this.

    Can I make this less rich/lighter?

    Yes. Reduce the cream slightly or skip it entirely — the cashew-sesame paste still carries most of the richness and body on its own. You can also use a thinner yogurt for a lighter overall gravy, adjusting the quantity per the substitution table above.

    Can I make this less spicy?

    Easily. Reduce the red chilli powder in the yogurt-spice base, and use the green chillies purely for aroma rather than heat — or leave them out entirely. The cashew-sesame paste and cream will still carry plenty of flavour without much heat.

    What’s the best bread or rice to serve with Mughlai egg curry?

    Naan is the most natural pairing for a thick, rich gravy like this one. Hand-rolled roti and paratha both work well too, and jeera rice makes a good simpler alternative if you’d rather skip the bread.

    Conclusion

    Mughlai shahi egg curry earns its “royal” framing honestly — not through rare ingredients, but through a cashew-sesame paste that stands in capably for poppy seeds, and a yogurt-spice base that’s given the small courtesy of resting before it meets the heat.

    Soak the cashews and sesame seeds together early. Score the eggs before frying. Rest the yogurt-spice mixture to room temperature. Roast the masala until oil separates twice — once after the yogurt, again after the cashew-sesame paste. Lower the flame before that paste goes in. Keep the final gravy thick, not broth-like. Follow that sequence and you’ll have a curry that tastes like considerably more effort went into it than actually did.

    It’s a strong pick when you want something richer than a regular weeknight curry — our silky Reshmi Anda Cashew Curry recipe sits in the same category, and our Anda Dum Biryani recipe makes a good centrepiece for a festive spread built around this one. If you want to keep exploring beyond the usual gravies, our Chicken Egg Dak Bungalow recipe is another regional favourite worth trying next.

    Recipe demonstrated and filmed in the Zaika Mazedaar kitchen. Watch the full video on the Zaika Mazedaar YouTube channel for a step-by-step visual walkthrough.

  • Spanish Garlic Fried Eggs Recipe

    Spanish Garlic Fried Eggs Recipe

    Zaika Mazedaar · Quick Breakfasts

    Soft-yolk fried eggs basted in a quick garlic-herb olive oil — a 5-minute Spanish-style breakfast that starts with one spoon and ends with something genuinely worth waking up for.

    A fried egg with a soft, unbroken yolk and a white that’s fully set — no flipping, no guesswork, no rubbery edges. These Spanish garlic fried eggs get there in five minutes using a single technique borrowed from Mediterranean-style cooking: basting. Hot garlic-infused olive oil, spooned gently over the top of the egg while it’s still in the pan. That’s the whole trick.

    This recipe is demonstrated step-by-step in our video on the Zaika Mazedaar YouTube channel, filmed and tested in a real home kitchen. If you’ve been looking for a way to upgrade a basic fried egg without adding time or equipment, this one is worth trying — especially on a weekday morning when five minutes is genuinely all there is.

    If you’ve already tried our Butter Garlic Egg recipe and loved it, note that these two are different dishes: the butter garlic version is scrambled eggs cooked in a garlicky butter-flour sauce, finished like a roux. This is something else entirely — fried eggs in olive oil, basted with a make-ahead garlic-herb-coriander infused oil, yolk left soft and runny. Different technique, different oil base, different finish. Both are worth having in your breakfast rotation, but they are not the same recipe with a different name.

    If soft yolks are your thing, our Turkish Eggs Cilbir recipe is another quick breakfast built around the same idea, and our one-pan Egg Shakshuka recipe earns its place in the same rotation.

    What Are Spanish-Style Garlic Fried Eggs?

    Spanish garlic fried eggs (huevos fritos con ajo, in their traditional Spanish form) are fried eggs cooked in olive oil with garlic — a staple of home cooking across Spain and the Mediterranean. The defining characteristics are the olive oil base, the garlic cooked gently until just pale and aromatic, and the egg fried at a temperature that lets the white set and turn lightly golden at the edges while the yolk stays soft and glossy.

    The version demonstrated here is a Spanish-style-inspired take rather than a strict regional claim. The garlic-herb infused oil — made separately in a mortar and pestle with fresh coriander — is the creator’s own practical adaptation, designed to be batched ahead and used whenever the craving hits. The basting technique, where hot oil is spooned over the top of the egg instead of flipping it, is the same method used in Spanish and Mediterranean kitchens to finish a fried egg without disturbing the yolk. It genuinely works.

    One quick search-result note worth making: in many English-language searches, “Spanish eggs” also pulls up baked egg dishes made with tomato sauce (a different dish entirely). This recipe is not that — it is a fried egg dish, cooked on the stovetop in a pan, finished with a garlic-herb drizzle.

    Why This Recipe Works (and how it differs from our Butter Garlic Egg recipe)

    Two things make this recipe worth making over a plain fried egg.

    First: the make-ahead garlic-herb infused oil. Crushed garlic and fresh coriander (a practical, accessible stand-in for the parsley traditional Spanish cooking would call for) are pounded in a mortar and pestle, then mixed with olive oil. This keeps in the fridge for several days. When you want Spanish garlic fried eggs on a Tuesday morning, the most flavourful component is already done. The five-minute claim is real because the oil is ready to go.

    Second: basting instead of flipping. Once the underside of the egg white is set and lightly golden, you nudge the egg slightly to the side, and use a spoon to scoop the hot garlic-infused oil from the pan and pour it over the yolk and any still-runny white. The hot oil cooks the top of the egg without you ever touching it with a spatula. The yolk stays soft. The white sets fully. No flipping required, and no broken yolk to mourn.

    This is explicitly different from the site’s Butter Garlic Egg recipe, which uses butter instead of olive oil, scrambles the eggs rather than frying them, and finishes them in a thickened butter-flour sauce. If you’d rather have scrambled eggs in a garlicky sauce instead of basted fried eggs, that recipe is the one to follow. If you want a soft, sunny-side-up egg basted in garlic-herb oil, you’re in the right place.

    I keep a jar of this garlic-herb oil in the fridge for exactly this reason — five minutes really is five minutes when the oil’s already made.

    Ingredients

    For the Garlic-Herb Infused Oil (make-ahead)

    • 2–3 garlic cloves, roughly crushed in a mortar and pestle
    • A small handful of fresh coriander (dhania) — stands in for parsley, which traditional Spanish eggs would use but isn’t always easy to find locally
    • 1 tbsp olive oil — or regular cooking oil if olive oil isn’t available (see substitutions below)

    For Frying the Eggs

    • Olive oil — enough to cover the base of the pan generously
    • 2 garlic cloves, thinly sliced
    • 2 eggs (3–4 if cooking for more people — scale as needed)
    • Salt, to taste
    • Black pepper, to taste

    For Serving

    • Toast or grilled bread — the recommended pairing
    • Reserved garlic-herb infused oil, to drizzle over the finished eggs

    Ingredient Substitutions

    IngredientSubstituteEffect on Taste / Texture
    Fresh parsley (traditional)Fresh coriander (dhania)A genuinely good swap, not a downgrade — coriander is brighter and more herbaceous. It works very well with the garlic-olive oil base. Use it confidently.
    Olive oilRegular cooking oil (sunflower, neutral vegetable)Works fine. Olive oil has a distinct flavour that’s part of the Mediterranean character of this dish, and it has a generally good nutritional reputation. Regular oil is a perfectly acceptable alternative if olive oil isn’t available or preferred.
    Fresh garlic clovesGarlic paste (½ tsp per clove, approximately)Will work in the infused oil but won’t sauté as cleanly in the pan — garlic paste browns unevenly. Fresh cloves are strongly recommended for the pan-frying step.
    Toast / grilled breadRoti, paratha, or plain on its ownNo change to the eggs themselves. The creator notes this is delicious on its own too — the bread is a suggestion, not a requirement.

    Mise en Place Checklist

    Everything to have ready before you turn on the flame. This recipe moves fast — two minutes of prep makes the five-minute cook time feel effortless.

    • Garlic-herb infused oil prepared (or retrieved from fridge if made ahead)
    • 2 garlic cloves thinly sliced, set aside
    • Eggs at room temperature if possible — they fry more evenly
    • Salt and black pepper measured to taste
    • Spoon or small ladle ready for basting
    • Plate ready for serving
    • Toast on or bread ready to go — these eggs are best eaten immediately

    Step-by-Step Method

    1

    Make the garlic-herb infused oil

    Put 2–3 roughly peeled garlic cloves into a mortar and pestle along with a small handful of fresh coriander. Pound and crush them together until the garlic is broken down and the coriander is well bruised. Add 1 tbsp olive oil and mix to combine. That’s the infused garlic-herb oil — simple, fragrant, and ready to use.

    Make it ahead This oil keeps in the fridge for several days. Make a double or triple batch and store it in a small jar — so that on any morning you want these eggs, the most flavourful part is already done and the five-minute window is genuinely achievable.
    2

    Finish and set the infused oil aside

    Give the mortar mixture a final stir to make sure the oil is fully incorporated with the crushed garlic and coriander. Set aside — or transfer to a small bowl or jar. If you’re using oil made ahead from the fridge, bring it out now so it’s at hand when the eggs are plated.

    Coriander vs. parsley The creator is clear about this: fresh coriander is a genuinely good substitute for the parsley that traditional Spanish-style eggs would use — not a compromise. It’s brighter and works well with garlic and olive oil. Use it without hesitation.
    3

    Sauté the sliced garlic lightly in olive oil

    Heat a generous pour of olive oil in a frying pan over medium flame. Once warm, add the 2 thinly sliced garlic cloves. Sauté gently, keeping the flame moderate, until the garlic turns very lightly golden — pale, barely coloured, just starting to turn aromatic. This takes under a minute. Watch it closely.

    Don’t over-brown the garlic This is the single most important step to get right. Garlic that tips into deep brown or darker will carry a bitter, slightly burnt smell directly into the eggs. Pull it back or reduce the flame before that happens. You’re looking for pale gold, not caramelised.
    4

    Push the garlic aside and add the eggs

    Using a spoon, nudge the sautéed garlic to the side of the pan — not removed, just moved so there’s clear space in the centre. The garlic stays in the pan and keeps infusing the oil as the eggs cook.

    Crack the eggs directly into the pan (or into a small bowl first if you’d like to inspect them before they hit the hot oil). Reduce to medium-to-low flame. The eggs will begin to set at the edges immediately.

    Scaling up The creator makes 2 eggs in the video but notes that 3–4 eggs work in the same pan. Cook however many you need — just make sure the pan is wide enough that the whites don’t merge into each other before they’ve set.
    Frying eggs with garlic pushed to the side of the pan, Spanish style
    5

    Let the underside set, then baste

    Cook the eggs on medium-to-low flame until the underside of the white is set and has turned lightly golden and firm at the base. You’ll see the edges of the white go from translucent to opaque. The yolk will still be completely raw at this stage — that’s exactly what you want.

    Now: nudge the eggs slightly to the side of the pan to pool the oil. Using a spoon, scoop the hot garlic-infused oil from the pan and pour it gently over the yolk and any still-runny white on top. Do this repeatedly — basting, not drowning — for 2–3 minutes total, until the white is fully cooked through but the yolk remains soft and glossy.

    The trick that keeps the yolk soft without ever flipping the egg happens with a spoon, not a spatula. Basting with hot oil is the technique that cooks the top of the egg by heat transfer — the oil carries the heat of the pan directly to the surface. If a whole gravy-based egg dish appeals more than a fried one, our Reshmi Anda Cashew Curry recipe is a good change of pace.

    If you prefer a hard yolk: flip the egg instead and cook for another minute or two on the second side. Both outcomes are valid — the creator simply demonstrates the soft-yolk basting approach as her preference.

    6

    Plate, season, and drizzle with infused oil

    Transfer the eggs to a plate. Season with salt and black pepper to taste — adjust to your preference. Then take the reserved garlic-herb infused oil from Step 1 and drizzle or spoon it over the finished eggs.

    Serve immediately with toast. The eggs are at their best the moment they leave the pan — don’t let them sit. The whole dish, including any earlier prep if the infused oil was already made, has taken under five minutes of active cooking time.

    Finished Spanish garlic fried eggs served with toast

    5 Things to Remember for Perfect Spanish Garlic Fried Eggs

    1. Make the garlic-herb oil ahead — it keeps in the fridge and is what makes the five-minute window real
    2. Don’t over-brown the garlic when sautéing in the pan — pale gold, not dark, or it will taste bitter in the finished eggs
    3. Baste with a spoon, don’t flip — this is the technique that sets the white fully while keeping the yolk soft
    4. Coriander works as well as parsley in the infused oil — use it confidently, not as a reluctant substitute
    5. Season simply and serve immediately — salt, pepper, a drizzle of infused oil, and toast. That’s it.

    The One Mistake That Ruins Garlic Fried Eggs

    Over-browning the garlic before the eggs go in.

    Garlic has a narrow window between “lightly golden and aromatic” and “dark brown and bitter.” In a hot pan with olive oil, that window can close in under 30 seconds. Once the garlic tips past pale gold into deep brown, it carries a faintly scorched smell that transfers directly to the eggs — and there’s no way to fix it after the fact.

    Watch the pan. Keep the flame at medium, not high. The moment the garlic is just barely golden and fragrant, push it to the side and add the eggs. When in doubt, pull the heat down rather than let it go a moment longer.

    For Beginners

    Basting is genuinely easier than flipping if you’re worried about breaking the yolk. A spatula under an egg is a high-stakes manoeuvre — one wrong angle and the yolk goes. A spoon basting hot oil over the top carries no such risk. The technique feels slightly unusual the first time, but it is straightforward: scoop, pour, repeat. If breaking a yolk stresses you out either way, our scrambled Anda Ghotala recipe sidesteps the problem entirely — there’s no whole yolk to protect.

    For Confident Home Cooks

    Try flipping instead of basting for a firmer yolk — a quick, confident flip on a well-seasoned or non-stick pan gives you a fully set yolk and a slightly crispier second side. You can also experiment with the infused oil: add a pinch of dried chilli flakes or red chilli to the mortar when pounding the garlic and coriander. It changes the character of the oil meaningfully and works well with the olive oil base. For a look at how Mediterranean egg cooking techniques developed, this overview from Serious Eats on frying eggs is worth reading.

    What to Serve Spanish Garlic Fried Eggs With

    Toast is the creator’s recommendation and the most natural pairing — thick, well-toasted bread soaks up the garlic-herb oil beautifully. Grilled or pan-toasted bread works even better if you have it. If you want the bread built right into the dish instead of served alongside, our Anda Paratha Roll recipe takes that approach.

    These eggs are also perfectly good on their own — the infused garlic oil provides enough flavour that no accompaniment is strictly necessary. For a quick weekend brunch, plate them over a piece of toast, add a pinch of red chilli flakes, and pour a strong coffee. The whole setup takes under ten minutes start to finish. For a heartier weekend option in a similar spirit, our Afghani Egg Curry recipe is worth the extra time.

    Storage, Reheating & Make-Ahead

    SituationGuidance
    Garlic-herb infused oil (fridge)Keeps for several days in an airtight jar or container. Make a larger batch for convenience. Always use a clean spoon when taking from the jar.
    Garlic-herb infused oil (freezing)Not recommended — the fresh herb character is lost, and there is no meaningful time saving given how quickly the oil is made fresh.
    Fried eggs (storage)Best eaten immediately. Fried eggs do not store or reheat well — the white turns rubbery and the yolk sets solid on reheating. Cook only as many as will be eaten in one sitting.
    Reheating fried eggsNot recommended. If reheating is unavoidable, a brief warm in a covered pan on very low flame is better than a microwave, which toughens the white significantly. Texture will not be the same as freshly made.
    Make-ahead strategyPrepare the garlic-herb infused oil in advance and refrigerate it. The frying and basting of the eggs should always be done fresh — it takes under five minutes.

    Garlic-in-oil has specific refrigeration requirements worth being aware of. If you’d rather make a full curry ahead instead of storing infused oil, our creamy Egg Malai Curry recipe keeps and reheats well.

    Myth vs. Fact: Do You Need to Flip a Fried Egg to Fully Cook the White?

    You have to flip a fried egg to get a fully cooked white — there’s no other way.

    Not if you baste it. Spooning hot oil over the top of the egg while it cooks in the pan conducts heat to the surface of the white and the yolk without any flipping required. The technique is well established in Spanish and Mediterranean frying and in professional kitchens more broadly. The result: a white that is fully set and cooked through, and a yolk that remains soft and unbroken. Flipping is one option; basting is another, and it’s the gentler one for anyone who has ever cracked a yolk trying to turn an egg.

    One genuine caveat: egg white safety. For a soft yolk to be safe to eat, the white must be fully set — that is the minimum food-safety benchmark regardless of preference. USDA guidance on safe egg cooking recommends cooking to the point where the white is firm. Basting achieves this; the key is to watch the white, not the clock.

    Nutrition Snapshot (Estimated per serving — 2 eggs with garlic-herb oil)

    NutrientEstimated Amount
    Calories~220–270 kcal
    Protein~12–14 g
    Fat~18–22 g
    Carbohydrates~1–2 g
    SodiumVaries with salt added

    Figures are estimated and will vary based on oil quantity, egg size, and how much infused oil is used as a finishing drizzle. These are not a substitute for individualised nutritional advice. Per-egg nutritional data is available via USDA FoodData Central. On olive oil’s nutritional profile and health considerations, see Harvard T.H. Chan School of Public Health — Olive Oil.

    Frequently Asked Questions

    What are Spanish-style garlic fried eggs?

    Spanish garlic fried eggs are a Mediterranean-inspired fried egg dish made with olive oil and garlic. The eggs are fried in garlic-infused oil and finished by basting — hot oil spooned over the top — rather than flipping. The result is a fully set white with a soft, runny yolk. This recipe adds a make-ahead garlic-herb olive oil (made with crushed garlic and coriander) that is drizzled over the finished eggs as a final layer of flavour. It’s a quick, flavourful take on a basic fried egg using a technique borrowed from Spanish and Mediterranean home cooking.

    How is this different from the channel’s Butter Garlic Egg recipe?

    They are genuinely different dishes. The Butter Garlic Egg recipe uses butter as its fat base and scrambles the eggs, cooking them in a thickened butter-flour sauce (similar to a roux) that coats the eggs as they come together. This Spanish garlic fried eggs recipe uses olive oil, fries the eggs sunny-side-up, and basts them with hot garlic-herb oil — the eggs remain whole, the yolk stays soft, and there is no sauce. Different technique (frying vs. scrambling), different fat (olive oil vs. butter), different finishing method (basted oil vs. a folded sauce). If you’d rather have the scrambled, saucy version, the Butter Garlic Egg recipe is here.

    Can I use parsley instead of coriander in the infused oil?

    Yes — parsley is actually the traditional herb in Spanish-style garlic eggs. The recipe uses coriander as an accessible local substitute because parsley is not always easy to find. Both work well; coriander is brighter and slightly bolder in flavour, while parsley is more neutral and herbaceous. Either is a good choice. The creator is clear that the coriander version is not a compromise — it stands on its own.

    Do I have to flip the egg?

    No. The whole point of the basting technique is that you don’t need to flip the egg to fully cook the white. Spooning hot oil over the top of the egg sets the surface by heat transfer. If you prefer a hard, fully-set yolk, flipping is a valid option — just be confident with the spatula to avoid breaking the yolk. But for a soft yolk with a fully cooked white, basting is the easier and more forgiving method.

    Can I make the garlic-herb oil ahead of time?

    Yes — and this is explicitly encouraged. The creator makes a double batch (enough for 4 eggs) even when cooking for 2, and stores the rest in the fridge. A jarful of this oil, ready to go, is what makes the five-minute timeline realistic. It keeps for several days refrigerated. For a make-ahead dish that scales even better for a crowd, our Anda Korma Biryani recipe is worth planning around too.

    Can I use regular oil instead of olive oil?

    Yes. The creator notes this directly — regular cooking oil works as a substitute if olive oil isn’t available. The flavour difference is real: olive oil has a distinct, slightly fruity character that’s part of what makes this feel Mediterranean. But the technique and the garlic-herb oil work fine with a neutral cooking oil if that’s what you have. The garlic and coriander will still carry the flavour.

    How do I avoid a burnt garlic smell in the eggs?

    Keep the flame at medium when sautéing the sliced garlic, and watch it closely — it takes less than a minute to go from pale and fragrant to over-browned and bitter. As soon as the garlic is lightly golden, push it to the side and add the eggs immediately. Don’t leave it alone at that stage. A slightly lower flame with a slightly longer sauté is safer than a high flame and a narrow window. If you want a heartier, spiced egg dish for when you have more than five minutes, our Egg Kebab Curry recipe is worth the extra time.

    What’s the best bread to serve this with?

    Well-toasted thick-cut bread is the simplest and best pairing — it soaks up the garlic-herb oil from the plate without going soggy immediately. Grilled or pan-toasted bread with a little olive oil is even better if you have time. Roti and paratha also work well as alternatives. The eggs are genuinely good on their own too — the infused oil provides enough flavour that bread is a suggestion, not a requirement. For a weekend brunch centrepiece with more spice, our Mughlai Shahi Egg Curry recipe is a good option.

    Conclusion

    Spanish garlic fried eggs are proof that a weekday breakfast can be genuinely good without adding time or effort. Five minutes, one pan, a spoon instead of a spatula — and the result is a soft-yolk fried egg that tastes like something you’d order rather than something you made while half-asleep.

    The make-ahead garlic-herb oil is the real key. Once a jar of it is sitting in your fridge, the five-minute window is genuinely achievable on any morning. The basting technique, once you’ve done it once, becomes second nature — and removes the anxiety of flipping an egg and breaking the yolk entirely.

    Make a batch of the infused oil when you have a few minutes. Try this on a morning when you want something a little better than a plain fried egg. See if it earns a regular spot.

    Key Takeaways

    • Make the garlic-herb infused oil ahead and keep it in the fridge — it’s what makes the 5-minute timing real
    • Sauté the garlic only until pale golden — dark or burnt garlic will ruin the dish
    • Push the garlic to the side before adding the eggs so it doesn’t overcook while the whites set
    • Baste the top of the egg with hot oil instead of flipping — this sets the white fully while keeping the yolk soft
    • Coriander is as good as parsley in the infused oil — use it with confidence
    • Season simply: salt, black pepper, and a drizzle of the reserved garlic oil over the plated eggs
    • Serve immediately with toast — fried eggs don’t wait and don’t reheat well
    • Scale to 3–4 eggs in the same pan if cooking for more people

    Zaika Mazedaar · Quick Breakfasts

    Thick, fluffy scrambled eggs folded into a garlic-butter milk sauce — ready in five minutes, and the kind of breakfast that makes plain fried eggs feel a little dull by comparison.

    If you’ve been rotating through the same fried egg or omelette every morning, this butter garlic egg recipe is worth trying — it takes five minutes, uses ingredients you likely already have, and produces something that tastes genuinely different from the usual breakfast routine. The eggs come out thick and fluffy, folded in a quick garlic-butter milk sauce that coats every piece.

    This recipe is demonstrated step-by-step in our video on the Zaika Mazedaar channel, filmed and cooked in a real home kitchen. It’s the earlier of two garlic-egg recipes the channel filmed — the creator later made a Spanish-style garlic fried egg as a follow-up (cross-link added once that article is live), a different technique built on the same idea.

    If you’re building a quick morning routine, our Turkish Eggs Cilbir recipe and one-pan Egg Shakshuka recipe are both good next additions.

    What Is Butter Garlic Egg?

    Butter garlic egg is a scrambled-egg dish where the eggs are cooked into thick, fluffy curds — rather than fine, broken pieces — and then folded into a small, quick garlic-butter-milk sauce. The sauce is made by sautéing grated garlic in butter, adding a little flour to thicken, then pouring in milk and cooking until it comes together glossy enough to coat each fold of egg. Chilli flakes and a pinch of all-purpose seasoning go in at the end for a bit of warmth and roundness.

    It’s a different format entirely from the channel’s later Spanish garlic fried eggs — that version uses whole eggs basted in garlic-herb-infused olive oil. This one is a scramble-in-sauce, closer to a creamy garlic-egg breakfast bowl. Best eaten scooped onto pav, or piled onto grilled, buttered toast.

    Why This Recipe Works

    Two specific choices make this different from a standard egg bhurji or plain scrambled eggs.

    First: the fold-don’t-stir technique. Once the egg mixture goes into the pan, you leave it alone for 30–40 seconds without touching it. The bottom sets, and then you scrape it gently with a spatula in large, slow folds — rather than constantly stirring. That patience in the first 30 seconds is what produces thick, fluffy clumps rather than fine, small pieces. The creator explicitly frames this dish as a way to break the monotony of always eating the same fried egg or omelette — and the technique is a big part of what makes it feel different.

    Second: the garlic-milk sauce. A tiny amount of flour — just half a teaspoon — is briefly fried with the butter and garlic to create a quick roux-style base before the milk goes in. Two to three minutes on medium flame, and the sauce thickens into something that holds its shape and clings to the egg pieces rather than pooling underneath them. It’s a simple technique, and if you like this kind of milk-based richness, our Egg Malai Curry recipe builds on the same idea with a full gravy.

    The result is something glossy, garlicky, and genuinely quick — a 5-minute breakfast that doesn’t feel like one.

    Ingredients

    For the Scrambled Eggs

    • 4 eggs, cracked individually into a bowl first
    • Salt, to taste
    • Black pepper, freshly crushed (not pre-ground)
    • 1 tbsp milk (or water)

    For the Garlic Sauce

    • 1 tsp butter (for the eggs) + 1 tsp butter (for the sauce)
    • 1 tsp grated garlic (approximately 3 cloves, finely grated)
    • ½ tsp maida (all-purpose flour) or cornflour
    • ½ cup milk
    • ½ tsp chilli flakes
    • 2 pinches magic masala / all-purpose seasoning, or curry powder
    • A small pinch of salt, to taste

    For Garnish

    • 1 tsp fresh coriander (or parsley), lightly chopped — just a little

    Ingredient Substitutions

    IngredientSubstituteEffect on Taste / Texture
    Milk (in egg mixture)WaterSlightly less rich but still works well for lightening the mixture
    Maida (in sauce)CornflourProduces a slightly glossier, more translucent sauce — both work
    ButterOil or desi gheeOil is neutral; ghee adds warmth — but butter is specifically named for this version and its flavor is part of the dish’s identity
    Magic masala / all-purpose seasoningCurry powder, or a small pinch each of cumin and coriander powderSlightly different spice character; the purpose is just a background savory note
    Fresh corianderParsleyParsley is the more traditional pairing with garlic-butter sauces; the creator noted it specifically — use either, but go light either way

    Mise en Place Checklist

    This is a five-minute recipe once you start — but it moves quickly. Get all of this ready before turning on the flame.

    • 4 eggs cracked individually into a bowl, inspected
    • Salt, freshly crushed black pepper, and 1 tbsp milk measured alongside the bowl
    • Fork ready for beating the egg mixture
    • Garlic grated — about 3 cloves, finely done
    • ½ tsp maida or cornflour measured
    • ½ cup milk measured for the sauce
    • Chilli flakes and seasoning pinched out
    • Coriander or parsley lightly chopped, set aside
    • Pan on the hob, spatula nearby
    • A small plate for resting the scrambled eggs while you make the sauce

    Step-by-Step Method

    Here’s the trick that makes these eggs thick and fluffy instead of fine and crumbly — it happens in the first 30 seconds, before you even touch a spatula.

    1

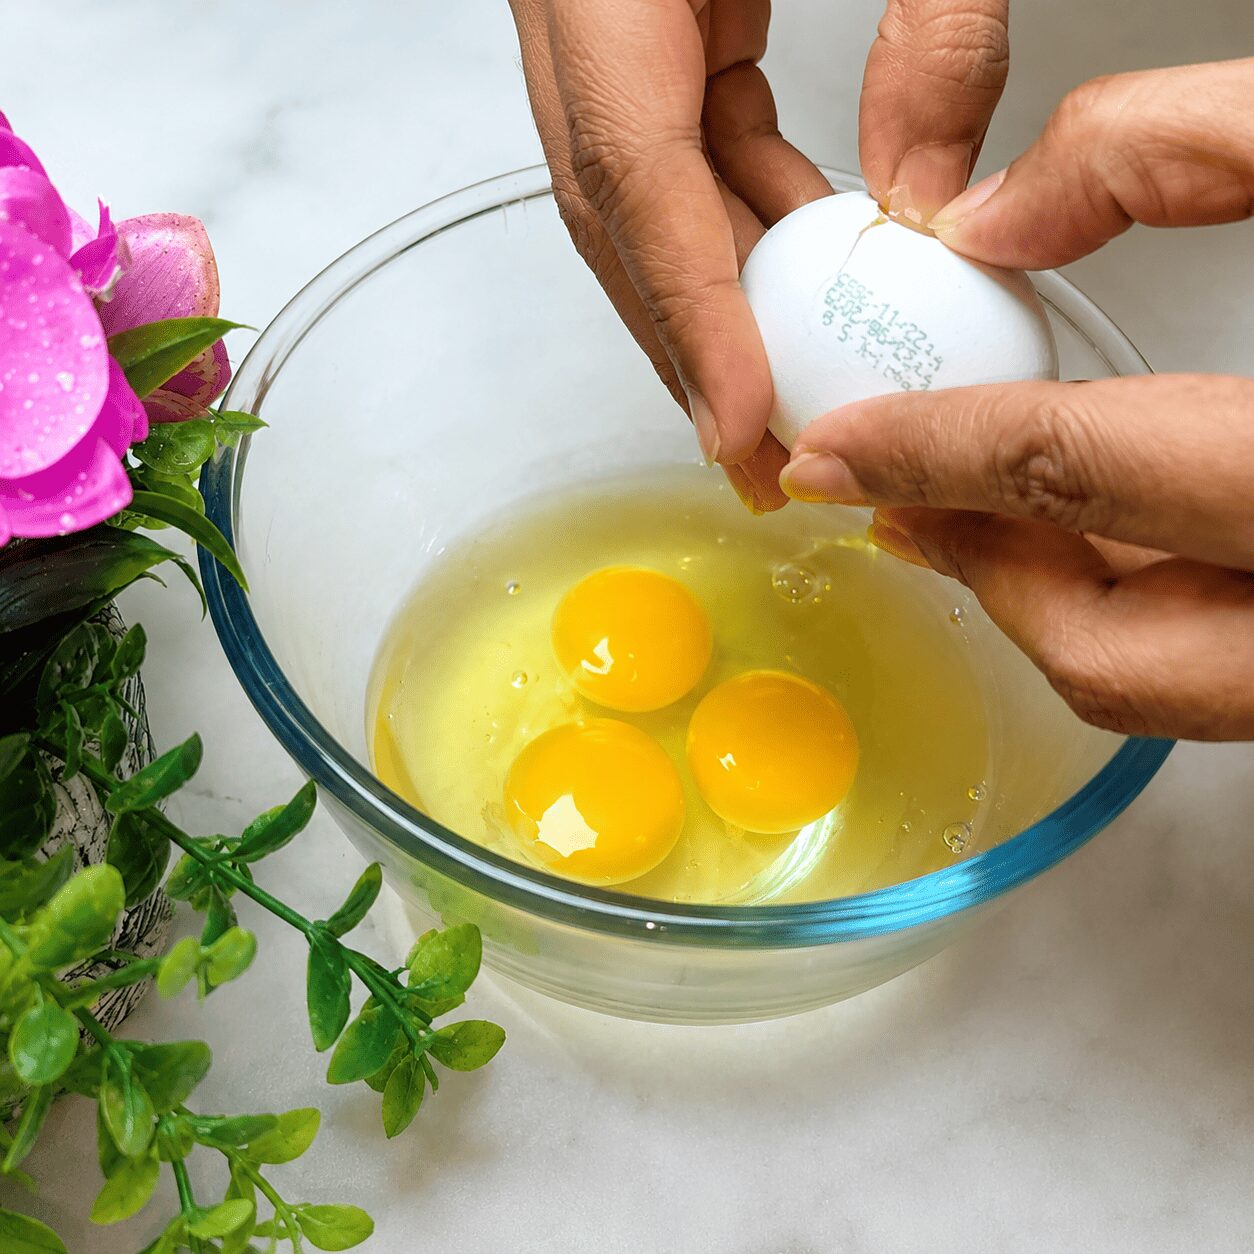
    Crack and inspect the eggs

    Crack each egg individually into your bowl — one at a time, not all together. Inspect each one before letting it join the others. In warm weather especially, eggs occasionally turn out bad inside, and a spoiled egg mixing into the whole batch is a much worse outcome than the extra few seconds this takes.

    Hot weather habitThe creator specifically calls this out for summer cooking — cracking eggs individually is a small step that protects the whole batch if one egg turns out to have gone off. Worth making it a standard practice year-round.
    Cracking eggs into a bowl one at a time for Butter Garlic Egg
    2

    Season and beat the eggs

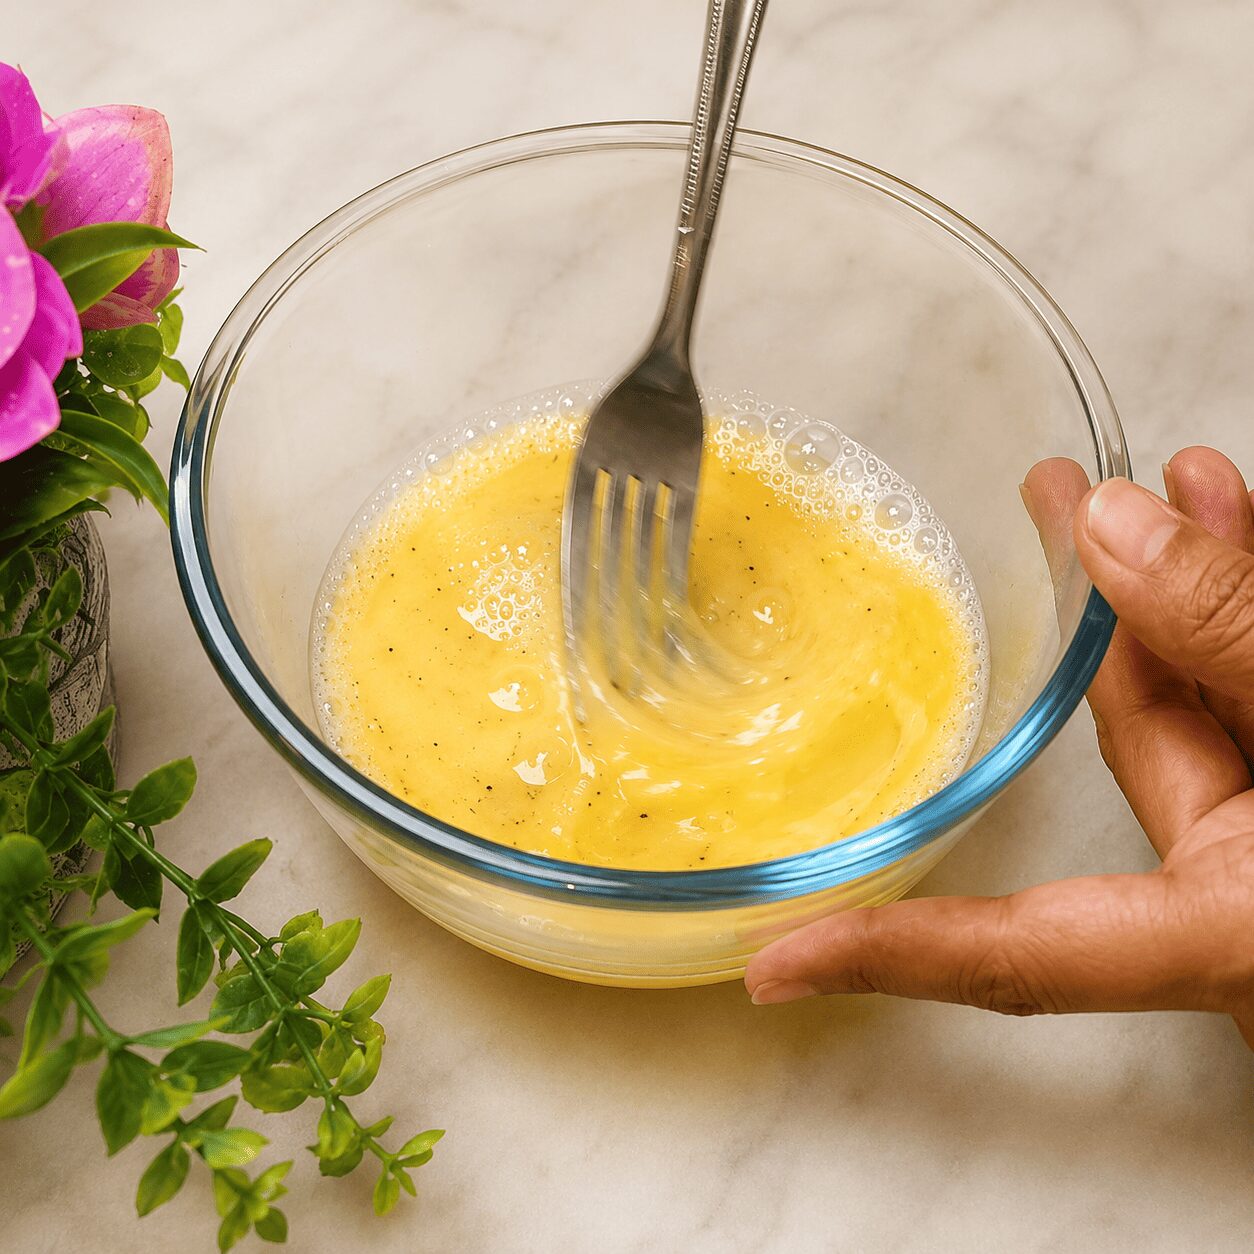
    Add salt to taste and freshly crushed black pepper directly to the eggs. Beat well with a fork. Then add 1 tbsp milk — this lightens the mixture and helps the finished scramble come out fluffier. Mix once more until everything is combined.

    Freshly crushed pepper matters hereThe creator specifically notes that freshly crushed black pepper tastes noticeably different from pre-ground. A small mortar and pestle or the flat of a knife does the job — the flavor difference in the finished eggs is real.
    Beating the egg mixture with milk for a fluffier Butter Garlic Egg
    3

    Scramble the eggs — with patience

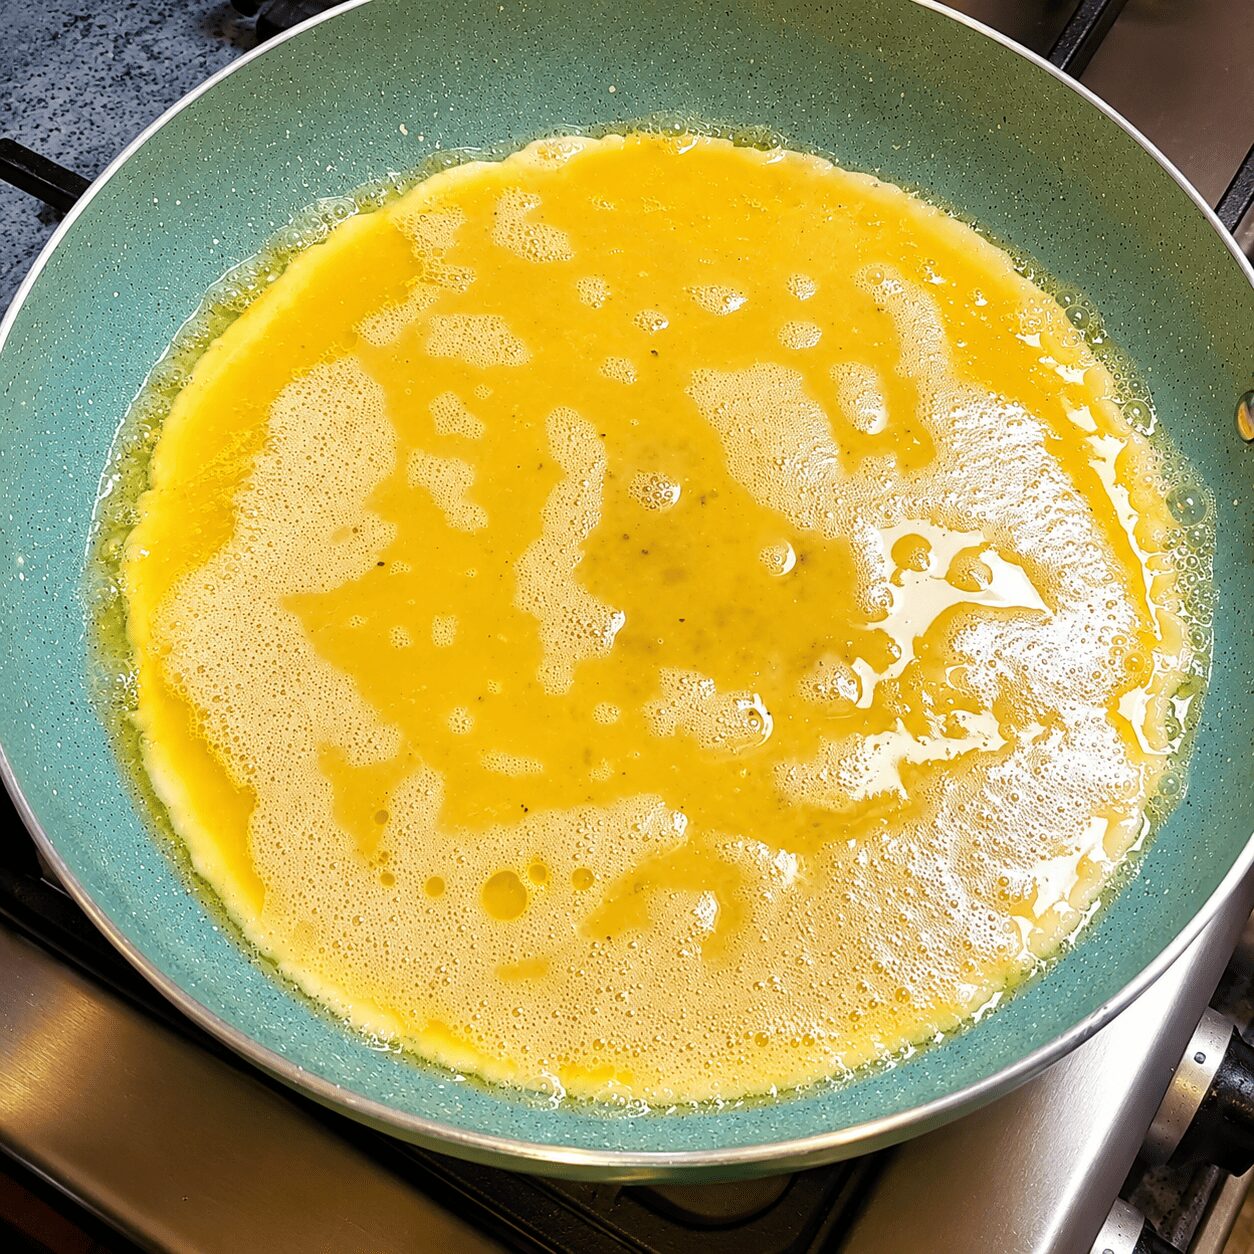
    Melt 1 tsp butter in your pan over medium flame and spread it evenly. Pour in the egg mixture. Now: don’t touch it. Leave the eggs completely alone for 30–40 seconds — you’ll see the edges and bottom begin to set.

    Then, using a spatula, gently scrape the set bottom in large, slow folds — like turning a book page rather than stirring a pot. Rest a few seconds. Fold again. You’re looking for thick, fluffy clumps — not small, fine pieces like a standard egg bhurji. Cook only until the raw runny part is gone, not until fully hard. The eggs will finish cooking once they go into the sauce.

    Transfer to a plate and set aside.

    Scrambled eggs cooked into thick, fluffy pieces for Butter Garlic Egg
    4

    Sauté the garlic — gently

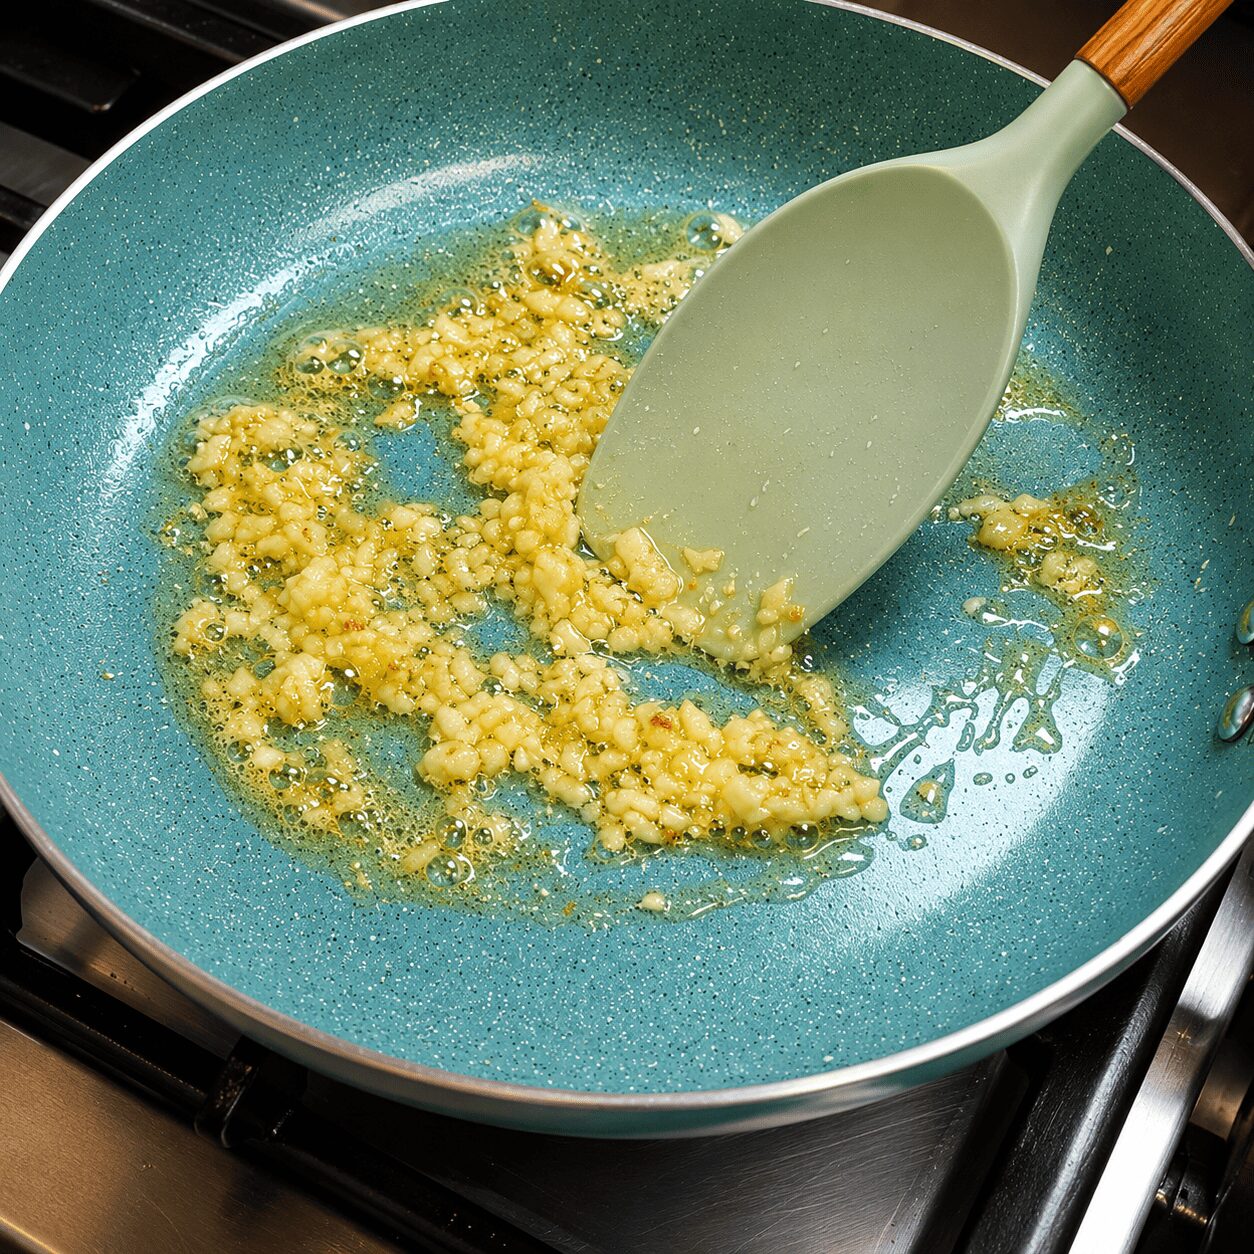
    In the same pan, melt another 1 tsp butter. Add the grated garlic — about 1 tsp, from 3 finely grated cloves. Sauté on medium-low flame for 30–40 seconds only. The garlic should turn fragrant but not visibly brown. Any real browning tips the garlic toward bitter and that smell carries directly into the final dish.

    Keep the garlic paleThe goal is fragrant, not golden. As soon as the garlic smells cooked — sweet, garlicky — move on. You’re sautéing it, not frying it to color. If you enjoy garlic-forward egg dishes, our Afghani Egg Curry recipe leans on the same principle in a full gravy.
    Sautéing grated garlic in butter for the Butter Garlic Egg sauce
    5

    Make the garlic sauce

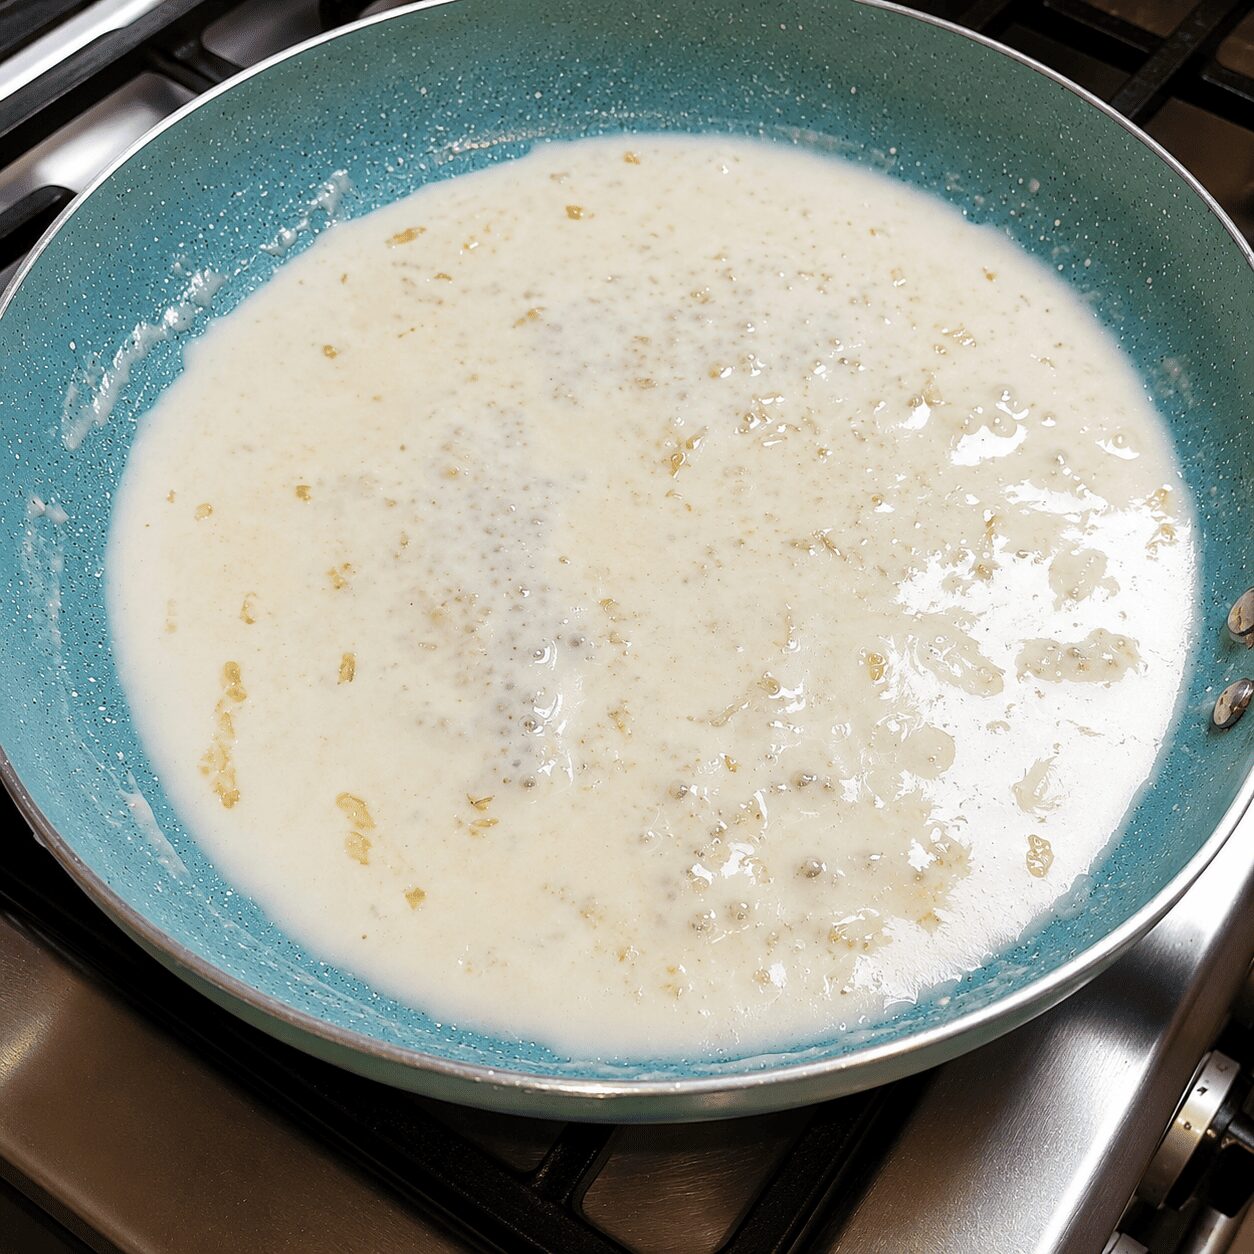
    Add ½ tsp maida or cornflour directly to the garlic and butter. Fry together for another 30–40 seconds, stirring constantly, until the flour just changes color slightly — it should smell nutty, not raw. This is a quick roux-style base that will thicken the sauce without leaving a floury taste.

    Pour in ½ cup milk and stir well to combine. Cook on medium flame for 2–3 minutes, stirring, until the sauce thickens noticeably. It should be glossy enough to coat the back of a spoon.

    Add ½ tsp chilli flakes, 2 pinches of all-purpose seasoning or curry powder, and a small pinch of salt. Stir through. Taste and adjust — keeping in mind there’s already salt in the scrambled eggs.

    Thickening the garlic milk sauce for Butter Garlic Egg
    6

    Fold the eggs into the sauce

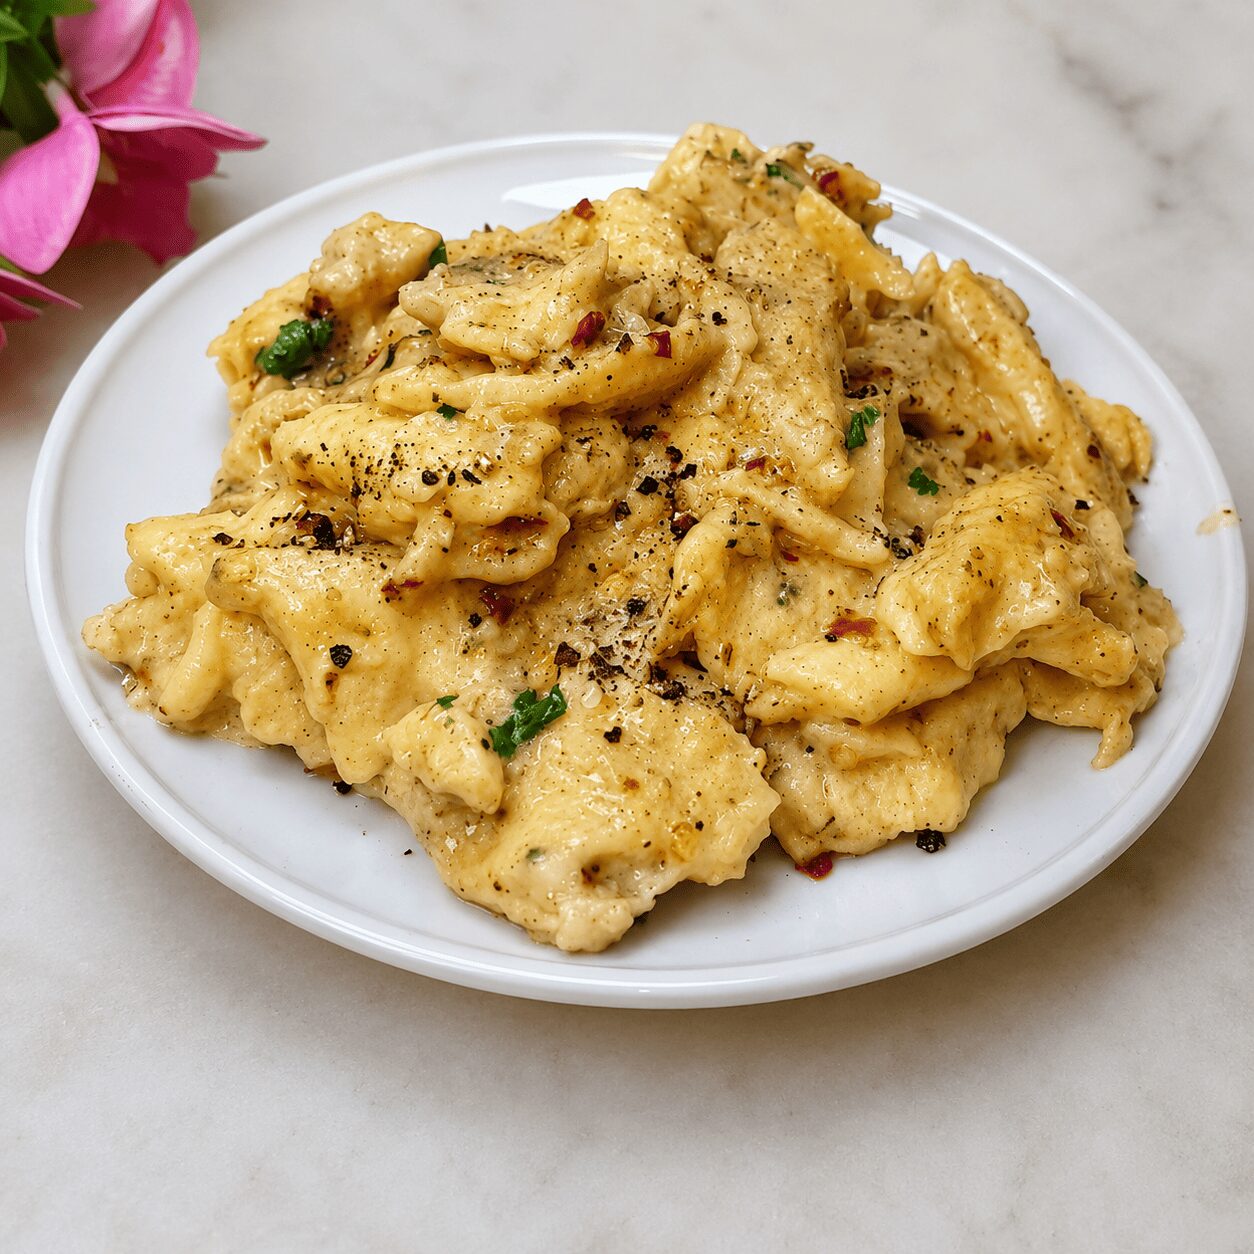
    Add the scrambled eggs back into the thickened sauce. Now fold — do not stir. Turn the egg pieces gently so the sauce coats each one, without breaking them down into smaller pieces. The eggs finish cooking here; the carry-over heat from the sauce is enough.

    Folding scrambled eggs into the garlic sauce, Butter Garlic Egg
    7

    Garnish and serve immediately

    Scatter 1 tsp fresh coriander or parsley over the top — just a light amount. This is a garnish, not a structural ingredient; too much will push the texture toward an omelette-like mixture rather than keeping the sauce-coated scrambled pieces distinct. Serve immediately.

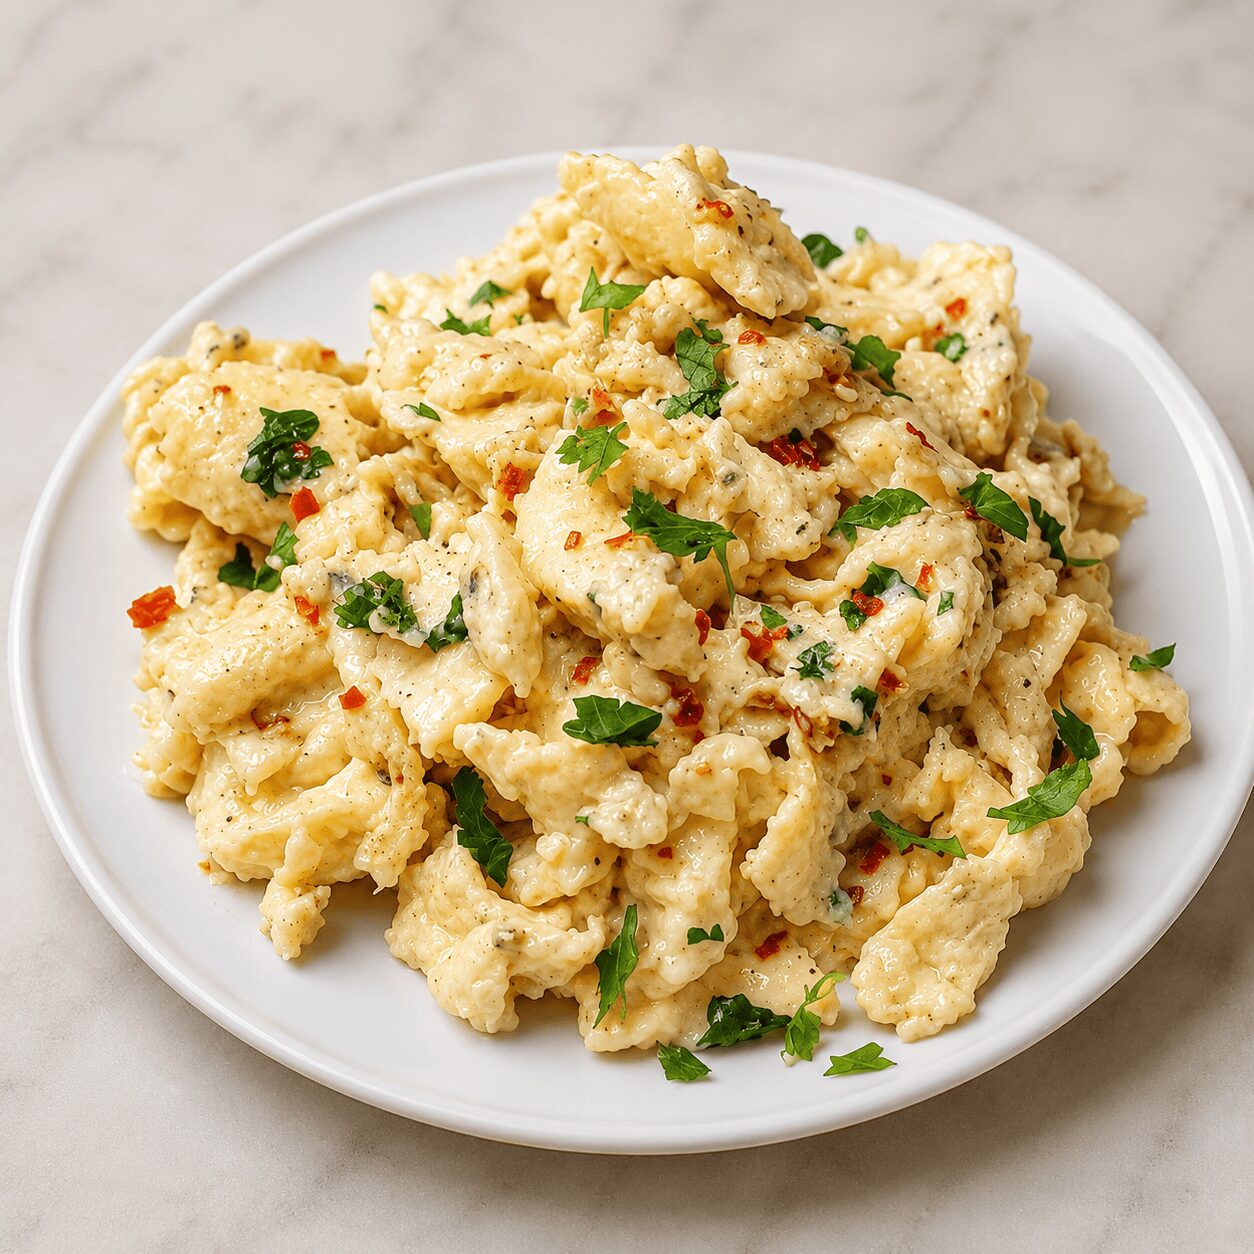
    Finished Butter Garlic Egg garnished with fresh coriander

    5 Things to Remember for Perfect Butter Garlic Egg

    1. Crack eggs individually into a bowl before mixing — especially in warm weather
    2. Use freshly crushed black pepper — the flavor difference from pre-ground is real
    3. Leave the eggs undisturbed for 30–40 seconds after pouring them in — that’s what makes them thick
    4. Don’t let the garlic brown — fragrant and pale is the goal
    5. Fold, don’t stir when combining the eggs and sauce at the end

    The Mistake That Turns These Into a Basic Bhurji

    Stirring the eggs as soon as they hit the pan.

    It feels counterintuitive to pour eggs into a hot buttered pan and then do nothing. But that first 30–40 seconds of leaving them completely alone is the entire foundation of the thick, fluffy texture. Start stirring immediately and you’ll get small, fine pieces — perfectly edible, but not what this recipe is going for. The same applies at the end: folding the eggs into the sauce gently, rather than stirring hard, keeps the pieces intact and lets the sauce coat rather than absorb them.

    The second common issue is over-browning the garlic. Once garlic starts to take on real color, it takes on a slightly acrid edge that no amount of milk and seasoning will mask in a dish this simple.

    For Beginners

    Don’t panic if the eggs look slightly underdone when you transfer them to the plate at step 3 — they’re meant to be. The sauce step (5–6) finishes the cooking gently with carry-over heat. Eggs that look just-set when you take them out will be perfectly cooked by the time they’re folded into the warm sauce and arrive on the plate.

    For Confident Home Cooks

    Cornflour instead of maida produces a slightly glossier, more translucent sauce with a different mouthfeel — worth trying once you’ve made the standard version. For more infused heat, add the chilli flakes at the garlic-sauté stage rather than at the end; they’ll bloom in the butter and carry more deeply through the finished sauce.

    What to Serve Butter Garlic Egg With

    The creator suggests pav or toasted, grilled bread — specifically grilled on a pan with a little butter so the surface gets lightly crunchy. The eggs scoop onto the bread naturally and the garlic sauce doesn’t make the bread soggy the way a wetter curry might. Pav works well for the same reason. If you’re looking for something a little more substantial for a weekend morning, our Anda Paratha Roll recipe pairs nicely and holds up better to the sauce.

    This isn’t a dish that needs a side — it’s a complete, five-minute breakfast on its own, or a quick snack if someone drops by unexpectedly. Serve it as soon as it’s done; the sauce starts to absorb into the eggs as it sits.

    Storage & Reheating

    SituationGuidance
    Best practiceEat immediately — this dish is at its best the moment it’s made
    Fridge storageUp to 1 day in an airtight container; texture degrades as the sauce absorbs into the eggs
    FreezingNot recommended — the sauce separates and egg texture becomes rubbery
    ReheatingGently on low flame with a splash of milk, or in very short microwave bursts — avoid high heat, which toughens the eggs quickly
    Make-aheadNot a great candidate; the quick prep time means it’s easier to make fresh each time

    This scramble is best fresh, but if you want a richer dish that actually improves with a day in the fridge, our Mughlai Shahi Egg Curry recipe is a good make-ahead option.

    Myth vs. Fact: Do Scrambled Eggs Need to Be Stirred Constantly?

    Good scrambled eggs require constant stirring — that’s how you get them evenly cooked.

    Constant stirring produces fine, small pieces — which is a valid style (it’s how a classic French scramble works on very low heat), but it’s not what this recipe is going for. The fold-don’t-stir technique used here — leaving the eggs undisturbed for 30–40 seconds before the first scrape — is specifically what produces thick, fluffy clumps with a softer, more substantial bite. Whether you’re after fine curds or thick folds depends on the dish, not on a single universal rule about how scrambled eggs should be cooked.

    Nutrition Snapshot (Estimated per serving)

    NutrientEstimated Amount
    Calories~220–260 kcal
    Protein~14–16 g
    Fat~14–18 g
    Carbohydrates~6–9 g
    SodiumVaries with salt added

    Figures are estimated and will vary based on butter quantity, milk used, and salt. These are not a substitute for individualised nutritional advice. Detailed per-egg and dairy nutritional data is available via USDA FoodData Central.

    Frequently Asked Questions

    What is butter garlic egg?

    Butter garlic egg is a scrambled-egg dish where thick, fluffy curds are folded into a quick garlic-butter-milk sauce. The sauce is made with a small roux base (butter, a little flour, and milk) flavored with grated garlic, chilli flakes, and a pinch of seasoning. The eggs are cooked separately using a fold-don’t-stir technique for a soft, substantial texture, then combined with the sauce just before serving. It takes about 5 minutes and is typically eaten with pav or grilled toast.

    How do I get thick, fluffy scrambled eggs instead of small curds?

    Leave the eggs completely undisturbed for 30–40 seconds after pouring them into the buttered pan. Once the bottom visibly sets, use a spatula to scrape in large, slow folds — like turning pages rather than stirring. Rest a few seconds between folds. The combination of not stirring immediately and using large, infrequent folds produces thick clumps rather than fine, small pieces. Adding 1 tbsp milk to the egg mixture before cooking also helps produce a fluffier result.

    Can I use water instead of milk in the egg mixture?

    Yes — the creator explicitly notes water as an acceptable substitute for milk in the egg mixture. It slightly reduces richness but still helps lighten the texture. In the sauce itself, milk is more important for body and the characteristic creamy character; water would produce a much thinner, less coatable sauce.

    Why shouldn’t I brown the garlic too much?

    In a dish this simple — just butter, garlic, milk, and eggs — over-browned garlic has nowhere to hide. The slightly bitter, acrid edge that comes from garlic taking on real color carries directly through the finished sauce and into the egg pieces. The goal is 30–40 seconds on medium-low heat until the garlic is fragrant but still pale. Once you smell it cooking, move to the next step.

    Can I use cornflour instead of maida for the sauce?

    Yes — the creator lists cornflour as an explicit alternative to maida (all-purpose flour) for thickening the sauce. Both work; cornflour produces a slightly glossier, more translucent sauce, while maida gives a slightly more opaque, creamier result. The quantity stays the same at ½ tsp either way.

    How long does this recipe take?

    About 5 minutes of actual cooking time, plus 2–3 minutes of prep — cracking, seasoning, and beating the eggs, and grating the garlic. If your mise en place is ready before you turn on the flame, you’re eating in under 10 minutes start to finish.

    What’s the best bread to serve with butter garlic egg?

    Pav or grilled, buttered toast — specifically grilled on a pan so the surface is lightly crunchy rather than soft. The creator suggests grilling the bread with a little butter before serving. The eggs scoop onto the bread naturally and the garlic sauce holds up without making the bread soggy. For something more substantial, our Anda Korma Biryani recipe works well too.

    Is this the same as the Spanish-style garlic fried eggs recipe on the channel?

    No — they share the garlic-and-egg idea but are genuinely different dishes. This butter garlic egg is a scrambled-egg-in-sauce format: the eggs are folded into a thickened garlic-butter-milk sauce. The Spanish garlic fried eggs made later are whole eggs fried and basted in garlic-herb-infused olive oil — a different technique, different texture, different result. The creator made the Spanish version as a direct follow-up to the positive reception this one received. Both are on the channel; the Spanish garlic fried eggs article covers that version in full.

    Conclusion

    Butter garlic egg is one of those small recipe discoveries that sticks — once you’ve had thick, fluffy scrambled eggs folded into a garlicky milk sauce rather than plain eggs on a plate, it’s hard to go back to the same rotation. Five minutes, one pan, ingredients you already have.

    The technique is straightforward once you’ve done it once: patience in the first 30 seconds, gentle folds, garlic kept fragrant rather than brown, and a light hand with the garnish at the end. Make it on a slow weekday morning, or make it when someone arrives unexpectedly and you need something that looks more considered than it actually was.

    Key takeaways: crack eggs individually into a bowl before mixing; use freshly crushed black pepper; leave the eggs undisturbed for those first 30–40 seconds; aim for thick, fluffy clumps not fine pieces; keep the garlic pale; fold the eggs back into the sauce rather than stirring; go light on the coriander. That’s the whole recipe.

    For more quick morning ideas, our Egg Kebab Curry recipe is another one worth adding to the rotation, and our silky Reshmi Anda Cashew Curry recipe is a good pick if you’re building out a fuller repertoire. And if you enjoy a more masala-forward scrambled egg dish with a completely different character, the Surti-style anda ghotala is worth trying next.

    Pinterest Description

    You don’t need to eat the same fried egg every morning. This butter garlic egg recipe takes 5 minutes and uses one pan — thick, fluffy scrambled eggs folded into a quick garlic-butter milk sauce, finished with chilli flakes and a touch of coriander. The trick is in the technique: leaving the eggs completely alone for the first 30 seconds before the first gentle fold. Serve with pav or grilled buttered toast and it feels like something you’d order rather than make on a Tuesday morning. Quick egg breakfast recipe | garlic scrambled eggs | 5-minute egg recipe | butter garlic egg | easy garlic egg sauce | breakfast egg ideas.

    Recipe demonstrated and filmed in the Zaika Mazedaar kitchen. Watch the full video on the Zaika Mazedaar YouTube channel for a step-by-step visual walkthrough.
  • Anda Dum Biryani

    Anda Dum Biryani

    Zaika Mazedaar · North Indian Rice & Biryani

    Scored, marinated, fried eggs; a tomato-yogurt masala; par-boiled rice layered and sealed with foil for a true dum — restaurant-style anda dum biryani at home, step by step.

    We make chicken biryani and mutton biryani often enough that egg biryani can feel like an afterthought — but a properly layered, foil-sealed anda dum biryani holds its own against either. There’s a moment, right after you lift the seal, where the steam rolls out carrying everything that’s been locked inside for twenty minutes, and the rice underneath is somehow still in separate, distinct grains. That moment is the whole point of this recipe.

    This recipe is demonstrated step-by-step in our video on the Zaika Mazedaar channel, filmed and cooked in a real kitchen, not assembled from a recipe database. If eggs for breakfast are more your speed, try our egg shakshuka recipe, and if a simpler weeknight version of this dish sounds better right now, we’ve also got a korma-style egg biryani that skips the layering entirely.

    What Is Anda Dum Biryani?

    Anda dum biryani is a layered, sealed egg biryani — distinct from a simple egg pulao in both technique and result. The eggs are boiled, scored, marinated in turmeric and chilli, and pan-fried before they’re folded into a tomato-yogurt masala. The rice is only par-boiled to 50–60%, then layered with the masala-coated eggs in alternating bands. The whole pot is sealed — traditionally with foil or a dough seal — and finished on dum: a slow, trapped-steam cook that finishes the rice and lets every layer’s aroma move through the dish. The result is rice where every grain stays separate, with a depth of flavour a one-pot version can’t fully replicate.

    Why This Recipe Works (and How It Differs From a One-Pot Egg Pulao)

    This is the second egg-biryani-style recipe on the site after our Anda Korma Biryani, and it’s worth being upfront about why both exist. The korma version uses a yogurt-only masala (no tomato) folded directly into the rice in one pot — no true layering, no foil seal. This recipe takes the more traditional route: a tomato-and-yogurt masala built separately, scored and marinated fried eggs, rice par-boiled and then genuinely layered in the pot, and a real foil seal before the final dum. They’re different techniques producing genuinely different results, not the same dish written up twice.

    The technique that does the most work here is the one most home cooks skip: scoring the boiled eggs with long cuts before marinating them in turmeric and chilli. Scoring the eggs before marinating felt like a small step the first time I tried it, but it’s the difference between masala sitting on the egg and masala actually getting into it.

    The second is the deliberate, intentional undercooking of the rice before it goes anywhere near the pot. Stopping the rice at 50–60% — grains visibly half-breaking when pressed — feels wrong the first time, like you’ve made a mistake. You haven’t. The dum finishes the remaining percentage gently, using steam instead of direct heat, which is exactly what keeps every grain separate instead of clumped or mushy.

    Everything up to this point is prep — the next few minutes are what actually make it biryani.

    Ingredients

    For the Eggs

    • 5 eggs, boiled (slightly underdone — not fully hard-boiled, since they finish cooking during the dum)
    • ¼ tsp red chilli powder
    • ¼ tsp turmeric powder

    For the Fried Onion (Birista)

    • ⅓ cup oil (or 4–5 tbsp desi ghee, for a richer biryani)
    • 1 medium onion, finely sliced

    Whole Spices

    • 1 bay leaf (tej patta)
    • 1-inch piece cinnamon (dalchini)
    • ½ tsp white cumin (safed jeera)
    • 1 javitri (mace) frond
    • 4–5 black peppercorns
    • 3–4 cloves (laung)

    Dry Spices

    • 1 tbsp ginger-garlic paste
    • 1 tsp coriander powder
    • ½ tsp cumin powder
    • 1 tsp red chilli powder (adjustable)
    • ½ tsp turmeric powder
    • 1 tsp chaat masala
    • 2–3 green chillies

    For the Yogurt Masala

    • 1 tbsp desi ghee
    • 1 medium onion, finely chopped (separate from the sliced onion above)
    • 2 medium tomatoes, finely chopped
    • 1 tsp salt (added to the tomatoes)
    • ½ cup yogurt, room temperature
    • A handful of fresh coriander, roughly chopped
    • A handful of fresh mint, roughly chopped

    For the Rice

    • 2 cups basmati rice (about ½ kg), soaked 30 minutes
    • 6 cups water
    • 4 tsp salt
    • 1 javitri (mace), 1 star anise (badiyan ka phool), 2 green cardamoms — for the boiling water
    • A few sprigs of coriander and mint leaves — for the boiling water
    • 2 tbsp oil (prevents sticking)
    • 1 tbsp + 2 capfuls vinegar (keeps the grains from breaking)

    For Layering & Garnish

    • About 1 cup reserved rice water (do not discard the rice water)
    • Fresh coriander and mint leaves
    • A few drops of food colour soaked in kewra water
    • Most of the reserved birista (a little held back for final garnish)
    • Aluminium foil, for sealing

    Ingredient Substitutions

    IngredientSubstituteEffect on Taste / Texture
    Chaat masalaA pinch of amchur + black saltClose in tang, but loses some of chaat masala’s rounder, more complex flavour
    Desi gheeRegular oilNoticeably less rich and aromatic; ghee is what gives the masala its rounded finish
    Foil sealFlour-dough seal on the lidMore traditional and slightly better at trapping aroma, but takes more effort; foil is the convenient, equally effective home option
    Basmati riceAny long-grain rice varietyWorkable, but basmati’s elongation and aroma are part of what makes biryani recognisable

    Mise en Place Checklist

    This recipe has four separate components — eggs, birista, masala, and rice — that all come together only at the layering step. Getting each one fully prepped before you start makes the actual cooking far less chaotic.

    • 5 eggs boiled (slightly underdone), peeled, and ready to score
    • Both onions prepped separately — one finely sliced for birista, one finely chopped for the masala
    • Tomatoes finely chopped
    • Ginger-garlic paste measured
    • Whole spices and dry spices each measured into their own small bowls
    • Yogurt removed from the fridge early so it reaches room temperature
    • Fresh coriander and mint washed and roughly chopped (extra needed for the rice water and the garnish, separate from the masala)
    • Rice rinsed and soaking for 30 minutes
    • Food colour soaking in a few tablespoons of kewra water
    • Aluminium foil cut and ready for sealing
    • An old, heavy pan set aside to use as a heat diffuser under the sealed pot

    Step-by-Step Method

    1

    Score and marinate the eggs

    Take your 5 boiled eggs (slightly underdone) and make 3–4 long cuts into each with a knife. Rub ¼ tsp red chilli powder and ¼ tsp turmeric powder over the scored eggs, mixing well so it coats them evenly. Set aside to rest for 5 minutes.

    Why score before marinatingThis is what lets the masala actually get into the egg, not just sit on the surface. It’s the same logic we use for scoring eggs in our Mughlai Shahi Egg Curry, applied here to a marinade instead.
    Scoring and marinating boiled eggs with turmeric and chilli for Anda Dum Biryani
    2

    Fry the birista (crispy fried onion)

    Heat ⅓ cup oil (or 4–5 tbsp desi ghee) in a pot. Add the finely sliced onion and fry on medium flame until golden brown. Remove and set aside on a plate. This is your birista, used both in layering and for the final garnish — skip this step entirely if you already have ready-made birista on hand.

    3

    Fry the marinated eggs

    In the same leftover oil, add the marinated eggs. Keep the flame medium and fry for 4–5 minutes, until the skin turns lightly crispy and a beautiful colour develops. Remove and set aside in a bowl.

    Fried marinated eggs with crispy skin for Anda Dum Biryani
    4

    Build the masala base

    In the same oil, add 1 tbsp desi ghee. Once melted, add the finely chopped onion (the second, separate one) and fry on medium flame for just 3–4 minutes, until lightly pink — don’t take it further at this stage.

    Add the whole spices (bay leaf, cinnamon, white cumin, javitri, peppercorns, cloves) and fry them together with the onion until the onion turns golden.

    Add 1 tbsp ginger-garlic paste and fry for 30 seconds, until the raw smell is gone.

    Two-stage onion, not oneUnlike a korma-style biryani, which typically takes its onion to a single dark-brown target, this masala deliberately passes through two visible stages — light pink first, with the whole spices, then golden after. Rushing past the pink stage skips a layer of aroma the whole spices are meant to pick up.
    5

    Cook down the tomatoes

    Add the finely chopped tomatoes along with 1 tsp salt — the salt helps them soften faster. Fry until oil just starts to separate at the edges.

    6

    Add the dry spices

    Add 1 tsp coriander powder, ½ tsp cumin powder, 1 tsp red chilli powder, ½ tsp turmeric powder, and 1 tsp chaat masala. Fry everything together with the tomatoes and onion until the masala smells fragrant and ready.

    Chaat masala is the ingredientthat makes this biryani genuinely chatpata (tangy). It’s easy to underrate next to the more familiar spices, but it does real work here.
    7

    Roast in the yogurt

    Add ½ cup room-temperature yogurt and mix it in immediately so it doesn’t split. Roast on low flame until the oil resurfaces on the top, with no curdling visible.

    Room temperature, mixed in fastAlways pull your yogurt out of the fridge ahead of time, and stir it in the moment it touches the hot pan. That’s the difference between a smooth masala and a split one.
    8

    Add the eggs, herbs, and green chillies

    Add the fried eggs into the now-ready masala along with a handful of fresh coriander and a handful of roughly chopped mint. Cover and cook for 2–3 minutes so the eggs absorb the masala’s flavour. Stir in the green chillies at this point (or earlier, if you want more heat from them — added here, they’re mainly for aroma).

    Cover and set this aside while you move to the rice.

    9

    Par-boil the rice

    In a separate pot, bring 6 cups water to a boil with 4 tsp salt — deliberately seasoned a little stronger than the final dish should taste, since rice absorbs proportionally less salt than a gravy does. Add the whole spices for aroma (javitri, star anise, green cardamoms) along with coriander and mint sprigs.

    Once boiling, add the soaked rice, 2 tbsp oil, and 1 tbsp + 2 capfuls vinegar. Cook on high flame for only 5–6 minutes, until the rice is about 50–60% cooked — grains visibly half-breaking when pressed. Turn off the gas. Do not discard the rice water — drain the rice but reserve the water.

    Vinegar in the rice waterkeeps the grains from breaking apart during this par-boil and the dum that follows — a small addition most biryani recipes skip entirely, including simpler rice dishes like our Muradabadi Anda Yakhni Pulao.
    10

    Layer the pot

    Take roughly half the egg-masala mixture out of the pot and set aside on a plate, leaving the other half at the bottom. Using a strainer, spread about half the par-boiled rice evenly over the masala layer. Spoon the reserved egg-masala over this rice layer. Top with the remaining rice, spread evenly via the strainer.

    Pour about 1 cup of the reserved rice water over the very top layer — this stops the bottom from sticking or burning and finishes cooking the remaining 40–50% of the rice. Scatter coriander and mint leaves over the top, drizzle in the kewra-soaked food colour for the classic streaks, and scatter most of the birista, holding a little back for final garnish.

    Layering rice, masala, and eggs for Anda Dum Biryani
    11

    Seal and set up for dum

    Seal the pot tightly with aluminium foil (or seal the lid with a flour-dough seal, if you’d rather go traditional). Place an old, heavy pan on the flame first, then set the sealed biryani pot on top of it — this protects the bottom rice layer from direct heat.

    12

    Dum: high, then low

    With the pot now on the flame, cook on high flame for 5 minutes, then reduce to low flame for 15 minutes. Turn off the gas, but don’t lift the foil yet — leave it sealed and undisturbed for a further 5 minutes.

    Don’t skip the heat diffuserThat old pan under the sealed pot isn’t optional — without it, the rice touching the bottom of the pot directly over the flame is very likely to scorch before the dum finishes.
    13

    Open, fluff, and serve

    Open the seal. The rice should be deeply aromatic, with every grain separate and distinct. Mix gently with a light hand so you don’t break the grains, then dish out, garnishing with the reserved birista.

    Finished Anda Dum Biryani after dum, lid just lifted

    7 Things to Remember for a Perfect Anda Dum Biryani

    1. Score the eggs before marinating, so the turmeric-chilli rub actually gets into the egg
    2. Take the masala onion through two stages — light pink with the whole spices first, golden after — not straight to brown
    3. Salt the rice water more than the final dish needs; rice absorbs proportionally less than gravy does
    4. Add vinegar to the rice water to keep the grains intact through the par-boil and dum
    5. Stop the rice at 50–60% cooked before layering — this is intentional, not undercooking
    6. Use a heat-diffuser pan under the sealed pot during the dum
    7. Rest 5 minutes after the dum, seal still on, before opening

    The One Mistake That Ruins Dum Biryani

    Fully cooking the rice before layering.

    It feels counterintuitive to pull rice off the heat when it’s only 50–60% done — every instinct says to keep cooking until it looks finished. But fully cooked rice has no more cooking left to do during the dum, which means it just sits in trapped steam and turns mushy and clumped instead of staying in separate grains. The half-broken grain you’re aiming for at the par-boil stage looks like a mistake. It isn’t.

    A close second: skipping the heat-diffuser pan under the sealed pot. Without it, the rice touching the bottom scorches well before the 20 minutes of dum are up, no matter how low the flame.

    For Beginners

    Trust the visual cues over the clock. Stove heat varies, and pot thickness varies even more — what matters is whether the onion has actually gone light pink before the whole spices go in, whether the rice grains are genuinely half-breaking when pressed, and whether oil has resurfaced on the masala. If your timings run a minute or two off the video, that’s normal.

    For Confident Home Cooks

    Try a flour-dough seal instead of foil for a more traditional dum — it traps aroma slightly more effectively, at the cost of a few extra minutes of prep. You can also push the chaat masala ratio up a little for more tang, or finish with an extra scatter of birista for crunch alongside the soft rice.

    What to Serve Anda Dum Biryani With

    This is a genuine weekend project, and it earns its place as a festive or party centrepiece — the kind of dish you bring to the table sealed, then open in front of everyone. Pair it with something creamy like our Egg Malai Curry as a cooling counterpart to all that layered spice, or round out the spread with our Egg Kebab Curry for a heartier festive table.

    It also makes a good make-ahead option for a gathering — the layering and dum can happen earlier in the day, with the final reheat done gently just before serving, so you’re not managing a sealed pot while guests are arriving.

    Storage, Reheating & Make-Ahead

    SituationGuidance
    Fridge storageUp to 2 days in an airtight container, cooled and refrigerated promptly
    Cooling before refrigeratingSpread into a shallow container rather than leaving it in a deep pot — this cools the rice faster and more evenly
    FreezingPossible for up to a month, though texture softens slightly on thawing; not ideal for the eggs
    ReheatingReheat gently with a splash of water, covered, until steaming hot all the way through; avoid reheating more than once
    Make-ahead strategyComplete the dum earlier in the day, leave sealed, then reheat the whole pot gently over low flame just before serving

    Rice dishes need prompt, careful cooling — leaving cooked rice out at room temperature for more than a couple of hours allows bacteria like Bacillus cereus to multiply, and reheating won’t undo that risk. Cleveland Clinic’s guidance on safely storing and reheating rice recommends refrigerating leftover rice within about two hours and reheating it thoroughly, just once.

    Myth vs. Fact: Does Dum Biryani Need a Dough Seal?

    A true dum biryani has to be sealed with a flour dough — anything else and it isn’t a real dum.

    Dough seals are the traditional method, and they do trap aroma slightly more effectively over very long cooks. But a tightly wrapped foil seal achieves the same fundamental goal — keeping steam from escaping the pot — and works perfectly well for a home dum of this length. The technique’s defining feature has always been the sealed, layered, slow steam-finish itself, not the specific material used to seal it. If you’d rather skip sealing altogether, our Turkish eggs çılbır recipe shows a completely different, no-seal approach to cooking eggs.

    Nutrition Snapshot (Estimated per serving)

    NutrientEstimated Amount
    Calories~420–470 kcal
    Protein~14–17 g
    Fat~16–20 g
    Carbohydrates~55–62 g
    SodiumVaries with salt added to both rice and masala

    Figures are estimated and will vary based on exact oil/ghee quantity, egg size, and rice-to-masala ratio in a given serving. These are not a substitute for individualised nutritional advice. Basmati rice nutrient data is available via USDA FoodData Central, and per-egg data via the same USDA database.

    Frequently Asked Questions

    What is anda dum biryani?

    Anda dum biryani is a layered, sealed egg biryani. Scored and marinated boiled eggs are pan-fried and folded into a tomato-yogurt masala, which is then layered with par-boiled rice in a pot. The pot is sealed — traditionally with foil or a dough seal — and finished with a slow, trapped-steam cook called dum, which completes the rice and lets every layer’s flavour move through the dish.

    How is dum biryani different from a one-pot egg biryani?

    A one-pot egg biryani, like our korma-style version, folds a yogurt-based masala directly into the rice in a single pot, with no true layering or seal. Dum biryani builds the masala separately, par-boils the rice on its own, layers both in alternating bands, and seals the pot for a final steam-finish. The two are genuinely different techniques, not the same dish under two names.

    Why do you only par-boil the rice instead of cooking it fully before layering?

    Stopping the rice at 50–60% cooked leaves it enough unfinished cooking to absorb the dum’s steam and aroma without turning mushy. Fully cooked rice layered into a sealed pot has nowhere left to go during the dum except to overcook and clump — the partial cook is intentional, not a shortcut or a mistake.

    Can I use a dough seal instead of foil?

    Yes, and it’s the more traditional option. Mix a simple flour-and-water dough, press it around the rim of the lid to form an airtight seal, and proceed with the same dum timing. Foil is simply the more convenient version of the same principle — keeping steam from escaping the pot.

    Why score the boiled eggs before frying and marinating?

    The long knife cuts let the turmeric-chilli marinade, and later the layered masala’s flavour, get into the egg itself rather than sitting only on the surface. Without scoring, the centre of the egg can taste noticeably plain even after all that layering and dum time.

    What does vinegar do in the rice water?

    A splash of vinegar in the rice’s boiling water helps the grains hold together through both the par-boil and the dum, reducing how much they break apart. It’s a small addition most biryani recipes skip, but it noticeably improves the final grain-by-grain texture.

    Can I make this less spicy?

    Yes. Reduce the red chilli powder in both the egg marinade and the masala, and either reduce or skip the green chillies — they’re added mainly for aroma in this version anyway. The chaat masala’s tang stays intact even at a much milder heat level. For a naturally gentler egg curry, our Reshmi Anda Cashew Curry is a good alternative.

    Can I make this ahead and reheat it for a gathering?

    Yes — this is genuinely one of the better make-ahead options for entertaining. Complete the full dum earlier in the day, leave the pot sealed, then reheat it gently over low flame with a splash of water just before guests arrive. Avoid reheating more than once, and make sure it’s cooled and refrigerated promptly if it’s sitting for more than a couple of hours.

    Conclusion

    Anda dum biryani rewards the steps that feel unnecessary the first time through — scoring eggs that are already going to be fried anyway, pulling rice off the heat before it looks done, sealing a pot you can’t peek inside. Every one of those steps is doing real work, and the reveal when you lift the foil after the rest period is the proof.

    This isn’t a fifteen-minute weeknight dish, and it isn’t trying to be. It’s a weekend project worth the extra components — eggs, birista, masala, and rice, each handled on its own before they ever meet in the pot — built using the same layering and dum technique restaurants rely on, just scaled down for a home kitchen. If this feels like too much for a weeknight, our Anda Korma and Egg Butter Masala deliver similarly comforting flavours in a fraction of the time.

    Pin it: Looking for an egg biryani recipe that actually tastes restaurant-style, not just rice with eggs stirred in? This anda dum biryani layers scored, marinated, pan-fried eggs with a tomato-yogurt masala and par-boiled basmati rice, then seals and finishes everything with a true dum for rice where every grain stays separate. No pressure cooker shortcuts, no skipping the seal — just the layering method that separates real dum biryani from a one-pot egg pulao. Save this restaurant-style anda biryani recipe for your next festive dinner, weekend cooking project, or whenever you’re craving egg dum biryani at home with real depth of flavour.

  • Anda Korma Biryani Recipe: One-Pot  done

    Anda Korma Biryani Recipe: One-Pot done

    Zaika Mazedaar · Rice & Biryani

    Flavour-rubbed fried eggs nestled into fragrant dum-cooked rice, built on a yogurt-korma masala instead of a tomato gravy — one pot, no layering, real kitchen-tested method.

    The first thing you notice is the onion — mahogany-dark, much deeper than anything you’d want in a curry — followed by a hit of kewra and toasted cardamom the moment the lid comes off. That’s anda korma biryani: a one-pot egg pulao built on a yogurt-korma base instead of the usual tomato gravy, with fried, spice-rubbed eggs nestled into the rice rather than cracked in raw.

    This recipe is demonstrated step-by-step on the Zaika Mazedaar channel, filmed and cooked in a real kitchen. This one belongs to a different family of egg recipes from a gravy dish like egg lababdar — it’s rice-forward, one-pot, and dum-finished rather than gravy-and-simmer. If you want the fully layered, foil-sealed version of an egg biryani instead, see our Anda Dum Biryani recipe, or for another rice-and-egg dish, our Muradabadi Anda Yakhni Pulao recipe.

    What Is Anda Korma Biryani?

    Anda korma biryani is a one-pot egg pulao that borrows the yogurt-based masala logic of a korma and folds it through par-cooked, dum-finished rice. What sets it apart from egg biryani in the strict, layered sense is the absence of any rice-meat-rice layering or dough-sealed pot — this is the absorption-and-dum method of a pulao, dressed in biryani-style whole spices and a deeply caramelised onion. Honestly framed, it’s a home-style twist that folds a korma-style yogurt masala into a one-pot egg pulao, rather than a traditionally layered biryani — the creator’s own original take, not a textbook recreation.

    The eggs are boiled, rubbed with turmeric and red chilli powder, and fried until the skin turns light golden — a step that pushes flavour into the egg itself rather than leaving it sitting on the surface. They go into the pot only at the very end, nestled into the rice for the final dum, so they stay tender rather than rubbery.

    Why This Recipe Works

    Two choices separate this from both a regular egg pulao and a gravy-style egg curry.

    First: the onion goes properly dark. Unlike the pale-pink onion you’d want for a gravy like egg lababdar, biryani wants a tez sunhara — deeply caramelised, almost mahogany — onion. That extra few minutes on the flame is what gives the rice its colour and backbone. Our Afghani Egg Curry recipe uses a similarly deep-fried onion base, if you want to see the technique applied to a gravy instead.

    Second: a yogurt-korma masala, not a tomato base. Whisked yogurt, cooked down with bhuna’d dry spices until the oil resurfaces, gives this dish its tangy, rounded depth — closer to what you’d expect from our Anda Korma recipe than a biryani gravy. A separately crushed aroma powder of cardamom, javitri, and nutmeg gets folded into the rice itself at the end, which is the detail most one-pot versions skip entirely.

    Ingredients

    For the Eggs

    • 5 eggs, hard-boiled and peeled
    • ¼ tsp turmeric powder, rubbed onto the eggs
    • ¼ tsp red chilli powder, rubbed onto the eggs
    • Oil — about ⅓ of the pan, for frying

    For the Onion & Whole Spices

    • 1 large onion, finely sliced (not chopped)
    • 1 bay leaf (tej patta)
    • ½ tsp cumin seeds (jeera)
    • 2–3 cinnamon sticks (dalchini)
    • ½ tsp black peppercorns
    • 4 cloves (laung)
    • A splash of water (to release the onion’s colour)
    • 1 tsp ginger-garlic paste

    Dry Spices

    • 1 tsp red chilli powder
    • 1 tsp coriander powder
    • ½ tsp turmeric powder
    • ½ tsp cumin powder
    • 1 tsp korma masala (any chicken or meat masala brand works — optional but adds depth)
    • 2–3 tbsp water (so the masala doesn’t burn while roasting)
    • ½ cup plain yogurt (dahi), whisked, at room temperature

    For the Korma Aroma Powder

    • 4 green cardamom pods
    • A little javitri (mace)
    • ¼ piece jaiphal (nutmeg)

    For the Rice

    • 2 cups rice, measured with a standard glass (roughly ½ kg), soaked 30 minutes (basmati) or 1 hour (sela/parboiled)
    • 3 cups water (same glass), boiled before adding rice
    • 1.5 tsp salt
    • ½ tsp (one capful) kewra water (kewda essence)

    For Garnish

    • Fried/crispy onions, for topping (optional but classic for biryani presentation)

    Ingredient Substitutions

    IngredientSubstituteEffect on Taste / Texture
    Plain yogurtThinned cashew creamDairy-light version; loses the tang, gains a slightly sweeter, richer body
    Sela (parboiled) riceBasmati riceShorter soak time (30 min vs. 1 hour); slightly softer grain after dum
    Korma masalaGaram masala + extra coriander powderClose approximation; slightly less depth, still works well
    Kewra waterSkip entirelyLoses the signature floral top note; cardamom-mace-nutmeg powder still carries most of the aroma
    Ginger-garlic pasteFresh grated ginger + garlic (equal parts)Stronger raw flavour; fry a little longer on low flame

    Mise en Place Checklist

    Get all of this ready before turning on the flame. This is a one-pot dish, but the steps move quickly once you start.

    • Eggs boiled, peeled, and rubbed with turmeric + chilli powder
    • Onion finely sliced (not chopped)
    • Whole spices (bay leaf, cumin, cinnamon, peppercorns, cloves) measured into one bowl
    • Dry spices + korma masala measured into another bowl
    • Yogurt whisked smooth and at room temperature
    • Cardamom, javitri, and nutmeg ready to crush
    • Rice soaked — 30 minutes for basmati, 1 hour for sela
    • Kewra water capful measured
    • Fried onions ready for garnish (if using)
    • A wide, heavy-bottomed pot with a tight-fitting lid, ready on the hob

    Step-by-Step Method

    1

    Rub and fry the eggs

    Rub ¼ tsp turmeric and ¼ tsp red chilli powder directly onto the boiled, peeled eggs. Heat oil in your pot — about a third of the base covered — and fry the eggs on medium flame until the skin turns light golden brown. Remove and set aside on a plate.

    Recipe tester’s tipRubbing the spices onto the egg itself — not just into the oil — is what pushes flavour into the egg, not just the skin. It’s a small step that makes a real difference once the egg is sliced into.
    2

    Fry the onion and whole spices until properly dark

    In the same leftover oil, add the bay leaf, cumin seeds, cinnamon sticks, black peppercorns, and cloves. Add the finely sliced onion and cook on medium-to-high flame, stirring, until it turns dark golden brown — noticeably darker than the pale-pink onion used for a gravy-style egg curry.

    Why this mattersBiryani wants a deeply caramelised onion for colour and backbone, unlike a curry base where a darker onion would taste bitter. This is the single biggest visual difference from a dish like egg lababdar.
    Onion frying to a deep golden brown with whole spices for biryani base
    3

    Splash of water, then ginger-garlic paste

    Once the onion is dark golden, add a splash of water — this releases the onion’s colour into the dish before the wet masala goes in. Add the ginger-garlic paste and fry for 1 minute, until the raw smell is gone.

    4

    Roast the dry spices and korma masala

    Add the red chilli powder, coriander powder, turmeric, cumin powder, and korma masala (if using). Add 2–3 tbsp water so the spices don’t burn, and roast on low flame for 3–4 minutes, until the oil visibly separates.

    5

    Cook in the yogurt

    Once oil has separated, add the whisked yogurt. Cover and cook on low flame for 5–6 minutes, stirring occasionally so it doesn’t catch at the bottom, until oil resurfaces and the raw yogurt smell is completely gone.

    Watch pointStir the covered yogurt-masala mixture occasionally — it can catch at the bottom if left completely undisturbed, and a scorched base will throw off the whole dish.

    While the yogurt cooks, coarsely crush the 4 green cardamom pods, a little javitri, and ¼ piece jaiphal into a fragrant aroma powder. Set this aside for the rice.

    Yogurt korma masala cooking until oil resurfaces for anda korma biryani
    6

    Boil the salted water for the rice

    In a separate pot, bring 3 cups of water to a boil. Add 1.5 tsp salt before the rice goes in — the rice needs to be seasoned at this stage, not after.

    7

    Par-cook the soaked rice

    Add the soaked rice (drained) to the boiling salted water. Cook uncovered, then covered, for 4–5 minutes — until only a thin film of water remains on the surface. This is the “dum-ready” stage, not fully cooked rice.

    The rice is ready for the next step when: just a thin layer of water is visible on top, and the grains are still firm in the centre.

    Rice par-cooking to the thin water film dum-ready stage
    8

    Fold in the aroma powder and kewra water

    Gently fold the freshly crushed cardamom-javitri-nutmeg powder into the par-cooked rice. Add a capful (about ½ tsp) of kewra water for the final korma aroma. Fold gently — you don’t want to break the grains at this stage.

    9

    Combine the yogurt masala with the rice

    Tip the cooked yogurt-korma masala into the rice pot, or vice versa, depending on pot size. Fold gently so the masala coats the rice without crushing the grains.

    10

    Nestle the fried eggs into the rice

    Place the fried, spice-rubbed eggs into the rice, spacing them evenly so each portion gets one.

    11

    Cover and dum on low flame

    Cover the pot with a tight-fitting lid and cook on low flame for 8–10 minutes. Do not lift the lid during this time — the trapped steam is what finishes the rice and seals in the aroma.

    Anda korma biryani covered and resting during final dum stage
    12

    Rest, fluff, and garnish

    After 8–10 minutes, turn off the gas and leave the lid on for a further 2–4 minutes before opening. Open the lid, fluff gently with a fork so every grain stays separate, and garnish with fried/crispy onions if using. Your anda korma biryani is ready.

    6 Things to Remember for Perfect Anda Korma Biryani

    1. Rub turmeric and chilli onto the eggs before frying — this is what gets flavour inside, not just on the surface
    2. Take the onion properly dark — deep golden brown, not the pale-pink onion you’d use for a gravy
    3. Stir the yogurt-masala while it cooks covered — it can catch at the bottom if left untouched
    4. Par-cook the rice only to the thin-water-film stage before the dum — not fully cooked
    5. Don’t lift the lid during the 8–10 minute dum
    6. Rest 2–4 minutes off the flame before opening and fluffing

    The One Mistake That Ruins Anda Korma Biryani

    Skipping the par-cook stage and going straight to dum with fully cooked rice.

    It’s tempting to just boil the rice until it’s done and call it ready — but anda korma biryani needs the rice par-cooked to the thin-water-film stage, not fully cooked, before the final dum. Fully cooked rice going into an 8–10 minute covered dum will overcook and turn mushy, losing the separate-grain texture the dish is known for. The second most common slip is letting the yogurt-masala sit unstirred while covered, which lets it catch at the bottom and adds a scorched edge to the whole pot.

    Thin film of water on the rice. Stir the yogurt occasionally. Keep these two cues in mind and the rest follows.

    For Beginners

    Don’t worry if your timings run a little different from the video — stovetop heat varies, and pot thickness changes how fast things cook. Trust the sensory cues over the clock: oil resurfacing from the yogurt masala, a thin film of water on the rice before the dum, and no raw yogurt smell. Those three checkpoints matter more than any timer.

    For Confident Home Cooks

    Scaling this up for a larger batch? Add 1–2 extra minutes to the dum time for every additional cup of rice, since the steam takes longer to penetrate a deeper pot. If you want a more intense korma flavour, increase the korma masala slightly and reduce the plain red chilli powder by the same amount to keep the heat level steady while deepening the spice profile.

    What to Serve Anda Korma Biryani With

    This is a complete one-pot meal on its own, but if you want to round out a bigger spread, our Egg Kebab Curry recipe makes a heartier addition, while our Anda Palak Butter Masala recipe brings a lighter, greener option to the table.

    It works well as a lunchbox-friendly option since it travels and reheats easily, and it’s a solid make-ahead choice for a small gathering since it’s genuinely one pot from start to finish.

    Storage, Reheating & Make-Ahead

    SituationGuidance
    Fridge storageUp to 2 days in an airtight container, cooled promptly after cooking
    FreezingUp to 1 month; cool completely first and store in a flat, airtight container
    ReheatingGentle reheat on low flame with a splash of water, covered; or microwave covered with a damp cover, stirring once. Reheat rice thoroughly and serve hot — avoid letting it sit out at room temperature for extended periods
    Make-ahead strategyThe yogurt-korma masala (through Step 5) can be made up to a day ahead and refrigerated. Fry the eggs and finish the rice fresh for the best texture

    Rice dishes need a little extra care when it comes to food safety — cool leftovers promptly and reheat thoroughly rather than leaving them at room temperature. The USDA’s guidance on leftovers and food safety covers the general principles that apply here. For another rice dish with similar storage needs, see our Muradabadi Anda Yakhni Pulao recipe.

    Myth vs. Fact: Does Biryani Always Need Layering and a Sealed Dum?

    If it isn’t layered and sealed with dough in a handi, it isn’t real biryani — it’s just pulao with extra spices.

    Layering and a dough-sealed pot are one classical method, not the only definition of what makes a dish taste like biryani. What actually carries the flavour is the deeply caramelised onion, whole biryani spices, and a properly steam-sealed dum finish — all of which this one-pot egg version delivers without ever layering rice and eggs separately. The aroma and the separate-grain texture come through just as clearly with a tight lid and a covered low-flame finish as they would with a dough seal.

    Nutrition Snapshot (Estimated per serving)

    NutrientEstimated Amount
    Calories~420–470 kcal
    Protein~14–17 g
    Fat~16–19 g
    Carbohydrates~55–62 g
    SodiumVaries with salt added

    Figures are estimated and will vary based on exact oil quantity, egg size, and rice type used. These are not a substitute for individualised nutritional advice. Per-egg nutritional data is available via USDA FoodData Central, and basmati rice data via USDA FoodData Central’s basmati rice entry.

    Frequently Asked Questions

    What is anda korma biryani?

    Anda korma biryani is a one-pot egg pulao built on a yogurt-based korma masala instead of a tomato gravy. Fried, spice-rubbed boiled eggs are nestled into dum-cooked rice along with a deeply caramelised onion, whole biryani spices, and a cardamom-mace-nutmeg aroma powder — no layering or dough-sealed pot required.

    How is this different from a regular layered biryani?

    Classic layered biryani alternates cooked rice and meat or eggs in stages inside a sealed pot. This version is one-pot throughout: the yogurt-korma masala is folded directly into par-cooked rice, the eggs go in at the end, and the whole thing finishes together on a single dum. For the true layered, foil-sealed method, see our Anda Dum Biryani recipe.

    Can I use raw eggs instead of pre-fried boiled eggs?

    Not for this method. The eggs are boiled, rubbed with turmeric and chilli, then fried before going into the rice — that’s what gives them their flavour and lets them hold together through the dum. Raw eggs cracked directly into rice would scramble unevenly rather than staying as distinct, sliceable pieces.

    Why does the onion need to be darker than in a curry recipe?

    Biryani relies on a deeply caramelised onion for colour and depth, while a gravy-style curry like our Egg Lababdar recipe wants a lighter, pale-pink onion to avoid bitterness. Cooking the onion to a dark golden brown here is intentional — it’s what gives the rice its characteristic biryani backbone.

    What’s the difference between basmati and sela rice soaking time?

    Basmati rice needs about 30 minutes of soaking before cooking, while sela (parboiled) rice needs a full hour. Sela rice has already been partially boiled and dried during processing, so it absorbs water more slowly and needs the extra soak time to cook evenly during the par-cook and dum stages.

    Can I make this ahead and reheat it?

    The yogurt-korma masala can be made up to a day ahead and refrigerated, but the rice and eggs are best finished fresh for the right texture. If reheating leftovers, cool them promptly, refrigerate within an hour, and reheat thoroughly with a splash of water rather than letting the dish sit at room temperature.

    Can I make it less spicy or skip the korma masala?

    Yes. The korma masala is explicitly optional in this recipe — it adds extra depth and a touch more heat, but the dish works without it. To reduce spice further, lower the red chilli powder slightly and rely more on the cardamom-mace-nutmeg aroma powder for flavour instead of heat.

    Why crush cardamom, javitri, and nutmeg separately instead of using ready-made garam masala?

    Freshly crushed cardamom, javitri (mace), and nutmeg release a brighter, more fragrant aroma than a pre-mixed garam masala, which often contains darker spices like cloves and black pepper already accounted for elsewhere in this recipe. Crushing them fresh right before folding into the rice keeps the korma’s signature aroma distinct rather than muddied.

    Conclusion

    Anda korma biryani earns its place in a one-pot rotation precisely because it doesn’t ask for layering, a dough seal, or a separate gravy pan — just a properly dark onion, a patiently cooked yogurt-korma masala, and rice taken only to the thin-water-film stage before the final dum.

    Rub the spices onto the eggs before frying. Take the onion properly dark, unlike a gravy base. Stir the yogurt masala so it doesn’t catch. Par-cook the rice only to that thin-film stage. Don’t lift the lid during the 8–10 minute dum. Rest 2–4 minutes before opening. Follow that sequence and the kewra-and-cardamom aroma that hits you when the lid finally comes off does most of the convincing on its own.
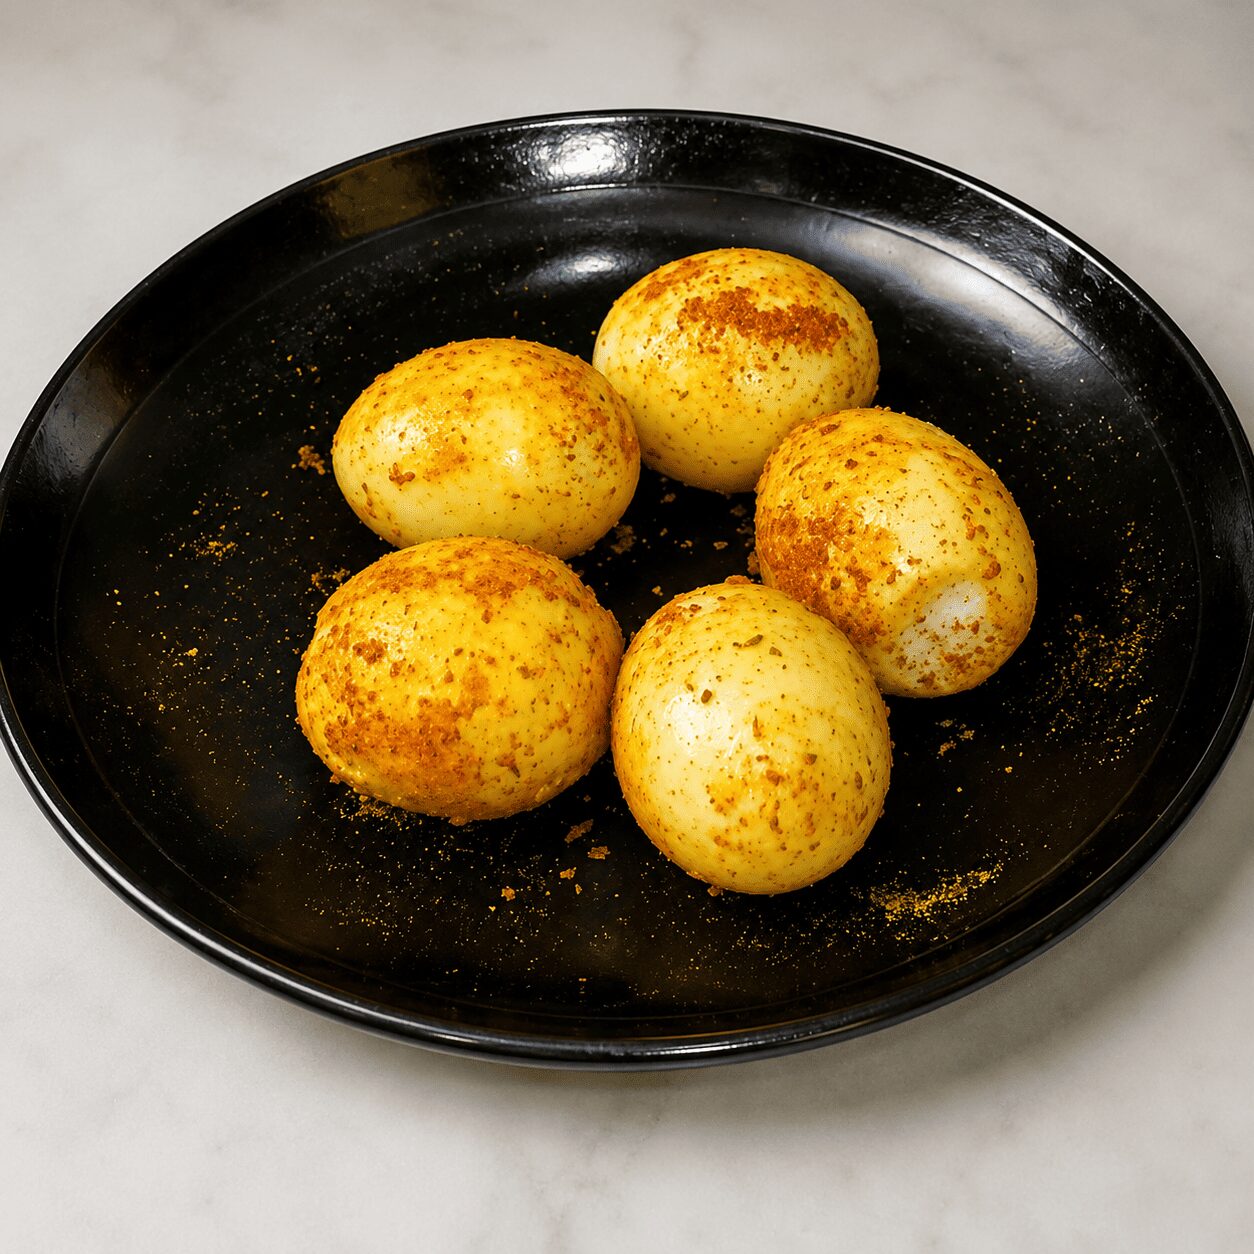
    It’s an easy fit for a quick weeknight dinner when you want something a little more festive than a regular pulao. If you’d rather skip rice altogether, our Butter Garlic Egg recipe and Turkish Eggs Cilbir recipe are both quick, satisfying alternatives worth trying next.

  • Egg Malai Curry Recipe

    Egg Malai Curry Recipe

    Zaika Mazedaar · Creamy Egg Curries

    A quick, creamy egg malai curry made with room-temperature milk instead of cream — fewer ingredients than you’d expect, ready in under 10 minutes of active cooking.

    Malai chicken gravy gets all the attention, but malai works just as well — arguably better, for a quick weeknight — with eggs. A pale gold, glossy gravy built on milk instead of cream, with halved boiled eggs soaking up flavour on both cut sides. It’s genuinely fast, and it doesn’t ask much of your spice shelf.

    This recipe is demonstrated step-by-step in our video on the Zaika Mazedaar channel, filmed and cooked in a real kitchen — not assembled from recipe databases. I always say this out loud while filming because it matters: let the milk come to room temperature first, or the gravy can split.

    What Is Anda Malai Curry?

    Anda malai curry, also called egg malai gravy or anda masala, is a creamy North Indian-style egg curry built on an onion-green chilli paste base, finished with room-temperature milk rather than cream. Halved hard-boiled eggs are placed yolk-side down into the finished gravy first, then flipped, so both cut sides absorb the masala flavour.

    Many home cooks find this a quicker, lighter stand-in for malai chicken on a busy night — not a replacement for every occasion, but a fair, honest comparison for when you want that same creamy, mellow gravy style without the extra cooking time chicken needs. If you want a slightly richer, ghee-fried version of the same comfort, our Anda Korma recipe is worth trying next.

    Why This Recipe Works

    Two details from the transcript explain why this comes together so fast and still tastes rich.

    First: room-temperature milk, not cream. The gravy gets its creaminess from milk added at room temperature to a hot, well-roasted onion-chilli base — no cream required. Cold milk straight from the fridge is the one thing that can cause it to split, which is why this step gets repeated as a standing tip.

    Second: a genuinely short spice list. Just cumin powder, black pepper powder, and a touch of garam masala — roasted until the oil separates before the milk goes in. It’s a short list for how flavourful the result actually is, and it’s part of why the whole dish is ready in under 10 minutes of active cooking. For an occasion that calls for a longer ingredient list and a richer result, our Mughlai Shahi Egg Curry recipe is the one to reach for instead.

    Ingredients

    For the Onion-Chilli Paste

    • 2 medium onions, roughly chopped
    • 3 green chillies
    • ⅓ cup oil
    • 1 tbsp butter
    • ½ tbsp ginger-garlic paste

    For the Eggs

    • 4 eggs, hard-boiled (adjust the count to your family’s needs)

    Dry Spices

    • ½ tsp cumin powder
    • ½ tsp black pepper powder
    • ¼ tsp garam masala

    For the Malai Gravy

    • 1 cup milk, at room temperature (not cold — this prevents splitting)
    • ½ tsp salt, adjustable to taste
    • ½ tsp kasuri methi (dried fenugreek leaves), crushed by hand

    For Garnish

    • 3 tbsp fresh coriander, chopped

    Ingredient Substitutions

    IngredientSubstituteEffect on Taste / Texture
    MilkLight creamRicher but less delicate; reduce quantity slightly since cream is thicker
    Kasuri methiA small pinch of dried oreganoNot the same flavour, but workable in a pinch as a distant aromatic stand-in
    Ginger-garlic pasteFresh grated ginger + garlic, equal partsStronger raw flavour; cook a little longer so it mellows
    ButterExtra oilLighter, slightly less rounded flavour
    Fresh corianderSkip or use less driedLoses some brightness; gravy still works without it

    If you’d rather lean fully into a cashew-cream richness instead of milk, our Reshmi Anda Cashew Curry recipe takes that route from the start.

    Mise en Place Checklist

    This gravy moves quickly once it starts — have everything below ready first.

    • Onion and green chillies ground into a fine paste
    • Ginger-garlic paste measured out
    • Cumin powder, black pepper powder, and garam masala measured into one small bowl
    • 4 eggs set to boil on a separate burner
    • 1 cup milk brought to room temperature ahead of time
    • Kasuri methi on hand, ready to crush between your palms
    • Fresh coriander washed and chopped
    • Pan ready on the hob, lid nearby

    Step-by-Step Method

    1

    Make the onion-green chilli paste and start frying

    Grind the 2 roughly chopped onions with the 3 green chillies into a fine paste. Heat ⅓ cup oil with 1 tbsp butter in a pan over medium flame — the butter makes the gravy noticeably more flavourful. Once the butter melts, add the onion-chilli paste.

    Fry on medium flame. You don’t want the onion golden brown here — just cook until the raw smell is gone and the paste’s moisture has dried up.

    Frying onion and green chilli paste in oil and butter for Anda Malai Curry
    2

    Boil the eggs on a separate burner

    While the onion paste fries, set 4 eggs to boil on a separate burner — adjust the count to your family’s needs. Let them cook through while you keep an eye on the onion paste on the other burner.

    3

    Add ginger-garlic paste

    Once the onion paste’s water has mostly dried up, stir in ½ tbsp ginger-garlic paste. Mix well and continue cooking until the raw smell from both the onion-chilli paste and the ginger-garlic paste is completely gone — about 4–5 minutes total at this stage.

    4

    Roast the spices until oil separates

    Add ½ tsp cumin powder, ½ tsp black pepper powder, and ¼ tsp garam masala — a short list, but it’s enough. Mix well and roast on medium-to-low flame for 4–5 minutes, until the oil visibly separates.
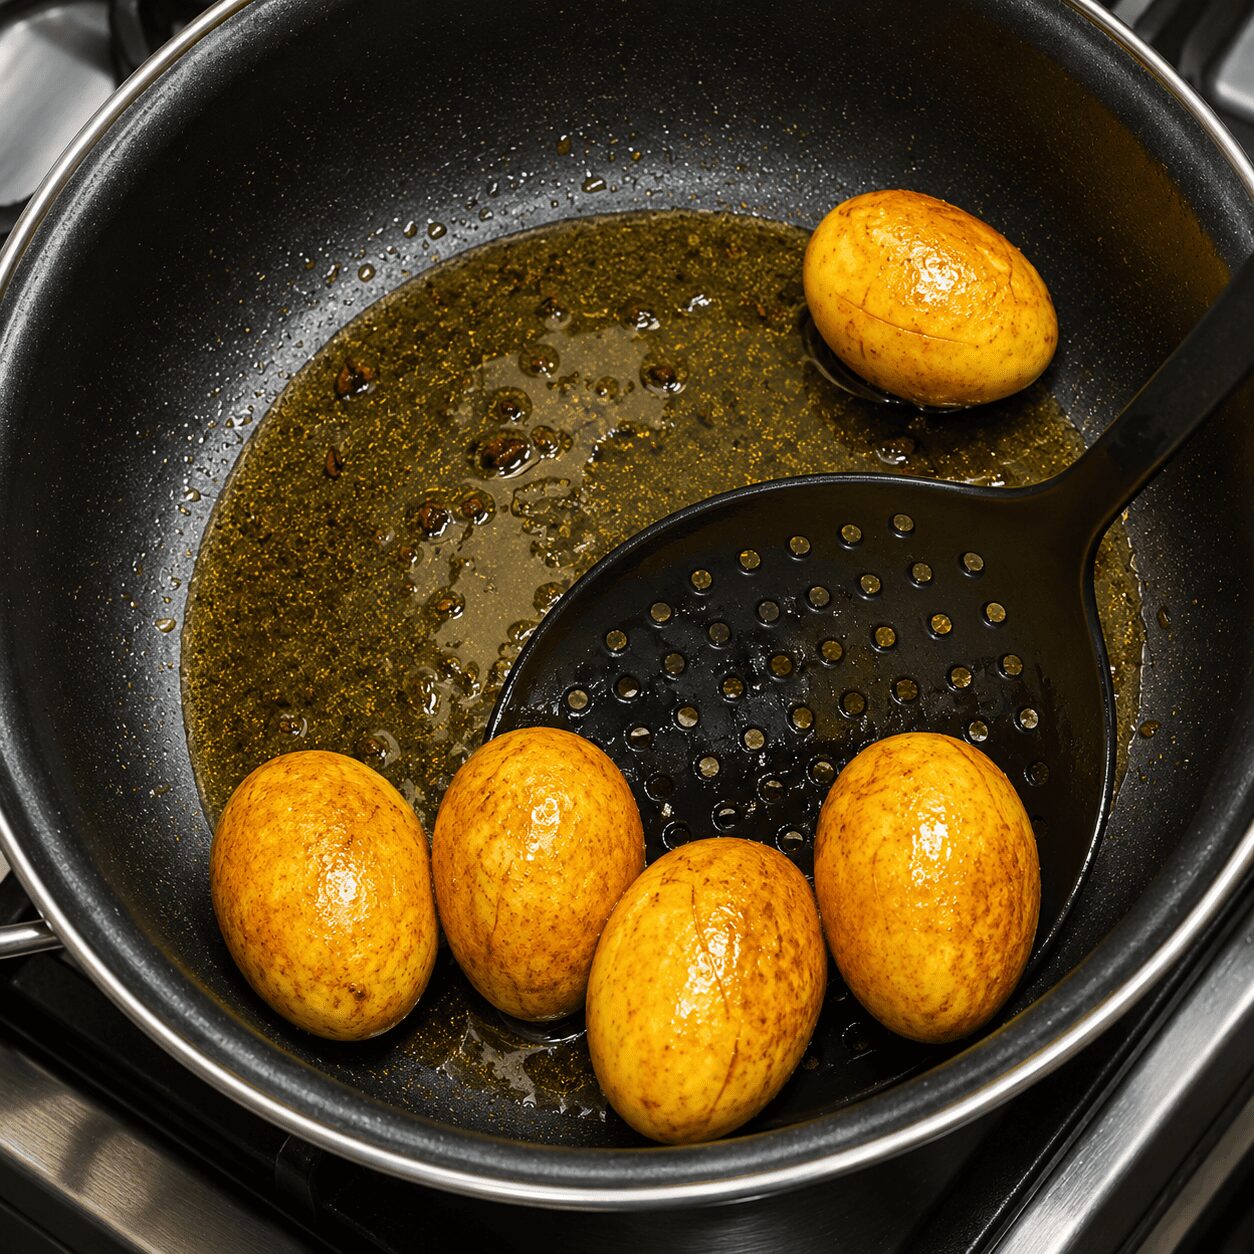
    Few spices, full flavourThis recipe uses very few spices for how flavourful the finished gravy is. Don’t be tempted to add more — the milk and the well-roasted base do most of the work.
    5

    Turn the gas off and add room-temperature milk

    Turn the gas off at this point. Pour in 1 cup of room-temperature milk — not cold — and mix it in well. Once it’s combined, turn the flame back on.

    Watch pointAlways bring milk to room temperature before adding it to a hot pan. Cold milk straight from the fridge can split or curdle the gravy — this is a tip worth repeating every single time you make this.
    Adding room-temperature milk to the Anda Malai Curry gravy
    6

    Add salt, cover, and cook

    Once the milk is mixed in and the gravy is almost ready, add ½ tsp salt to taste. Mix gently by hand-stirring, taste, and adjust if needed — the milk changes the overall balance, so it’s worth checking again here. Cover and cook for 5–6 minutes until the oil separates again.

    For BeginnersTaste and adjust salt again after the milk goes in. It genuinely shifts the flavour balance, and a second check here saves you from an under-salted gravy at the end.
    7

    Crush in kasuri methi and add coriander

    Once the gravy has cooked down and the oil has separated again, crush ½ tsp kasuri methi between your palms and add it in — this is optional, but it brings a noticeably better aroma. Mix well, then stir in 3 tbsp fresh coriander, chopped fairly generously.

    Crushing kasuri methi by hand into the Anda Malai Curry gravy
    8

    Add the eggs, yolk-side down first

    Halve the hard-boiled eggs. Place them into the gravy yolk-side down first. Cover and cook for 2–3 minutes, then flip each egg over and cook for another 2–3 minutes — this double-sided contact is what lets the masala flavour and aroma soak into the egg rather than just coating the outside.

    Yolk-down, then flipPlacing the cut side down first, then flipping, means both halves of the egg pick up flavour from the gravy instead of just one side resting in it.
    Halved boiled eggs placed yolk-down in the malai gravy
    9

    Rest, then dish out

    Once both sides have had their 2–3 minutes covered, let the curry rest briefly with the lid on, then dish it out. The entire gravy comes together in under 10 minutes of active cooking — quick enough for a regular weeknight, but it still tastes like something special.

    Finished Anda Malai Curry, creamy egg gravy recipe

    5 Things to Remember for a Perfect Egg Malai Curry

    1. Don’t brown the onion-chilli paste — cook only until the raw smell and moisture are gone
    2. Always use room-temperature milk, never cold straight from the fridge
    3. Turn the gas off before adding the milk, then turn it back on once mixed
    4. Taste and adjust salt again after the milk goes in
    5. Place eggs yolk-side down first, then flip so both sides absorb flavour

    Craving something a shade richer and more tomato-forward instead? Our Egg Butter Masala recipe is worth keeping in the same weeknight rotation.

    The One Mistake That Splits This Gravy

    Adding cold milk straight from the fridge.

    This is the single most repeated tip in the original recipe, and for good reason. Pouring cold milk into a hot, freshly roasted spice base is the most common way this gravy curdles or splits — the temperature shock is what causes it, not the milk itself. Bring the milk to room temperature ahead of time, and turn the gas off just before you add it, then back on once it’s mixed in.

    If your gravy does split slightly, it’s still edible, but the silky texture won’t fully come back — so it’s worth getting this one step right the first time. Gentle heat control matters just as much in other egg dishes — our Turkish Eggs Cilbir recipe is a good example of the same principle at play.

    For Beginners

    Taste and adjust salt again after the milk goes in, since it changes the overall balance of the gravy. It’s an easy step to forget, but a quick second taste right before the kasuri methi goes in will save you from a flat-tasting finish.

    For Confident Home Cooks

    A pinch more black pepper deepens the flavour nicely. If you want a richer finish, you can swap a portion of the milk for fresh cream — just know the gravy will turn out heavier and less delicate than the milk-only version, so it’s a trade-off rather than a straightforward upgrade.

    What to Serve Egg Malai Curry With

    A buttery paratha is the obvious pairing here — it soaks up the milk-based gravy beautifully, and our Anda Paratha Roll recipe is a good way to use up any leftover eggs the next day. Roti and naan both work just as well for a simpler weeknight plate. It’s mild enough to be kid-friendly, and quick enough to make for a small gathering when you want something a little special without the longer cook time malai chicken usually needs — if rice is more the occasion, our Anda Dum Biryani recipe is a heartier centrepiece option.

    Storage, Reheating & Make-Ahead

    SituationGuidance
    Fridge storageUp to 2 days in an airtight container
    FreezingNot recommended — milk-based gravies tend to separate on thawing
    ReheatingReheat gently on low flame, stirring occasionally; avoid high-power microwave reheating, which can cause the milk to split
    Make-ahead strategyThe gravy can be made ahead through the kasuri methi step and refrigerated; add the boiled eggs fresh and reheat gently just before serving

    Because this is a milk-based gravy, always reheat it on low flame rather than blasting it on high heat — slow and gentle is what keeps it silky instead of split. If you’d rather cook a fresh batch than reheat, our one-pan Egg Shakshuka recipe is a quicker option for a similar craving.

    Myth vs. Fact: Does a Creamy Egg Curry Need Cream?

    A truly creamy curry has to be made with cream — milk just won’t get you there.

    Not always. This gravy gets its creamy, glossy body from room-temperature milk added to a well-roasted onion-chilli-spice base — no cream involved. The key is technique, not the dairy itself: roasting the base until the oil separates first, then adding the milk at the right temperature so it doesn’t split. Cream can make the gravy richer, but it also makes it heavier and less delicate than the milk-only version. If you’re after a completely different comfort profile, our potato-forward Anda Aloo Salan recipe skips dairy richness altogether.

    Nutrition Snapshot (Estimated per serving)

    NutrientEstimated Amount
    Calories~260–300 kcal
    Protein~11–13 g
    Fat~19–22 g
    Carbohydrates~8–10 g
    SodiumVaries with salt added

    Figures are estimated and will vary based on exact oil quantity, egg size, and milk used. These are not a substitute for individualised nutritional advice. Per-egg and per-milk nutritional data is available via USDA FoodData Central.

    Frequently Asked Questions

    What is egg malai curry?

    Egg malai curry, also called egg malai gravy or anda masala, is a creamy North Indian-style egg curry built on an onion-green chilli paste base and finished with room-temperature milk rather than cream. Halved hard-boiled eggs are placed into the gravy yolk-side down, then flipped, so both sides absorb the masala flavour.

    Can I use cream instead of milk?

    Yes, light cream works as a substitute, and it produces a richer gravy. It will also be heavier and less delicate than the milk-based version, so think of it as a trade-off in texture rather than a straightforward improvement.

    Why did my gravy curdle or split?

    The most common cause is adding cold milk straight from the fridge to a hot pan. Always bring the milk to room temperature first, and turn the gas off right before pouring it in, then back on once it’s mixed through. This temperature management is the single biggest factor in keeping the gravy smooth.

    How is this different from malai chicken gravy?

    It follows a similar creamy, milk-based approach, but uses hard-boiled eggs instead of chicken, which makes it considerably faster — the entire gravy comes together in under 10 minutes of active cooking. Many home cooks find it a quicker, lighter stand-in for malai chicken on a busy weeknight.

    Can I make this less spicy?

    Yes — reduce the number of green chillies in the onion-chilli paste, or use a milder variety. The dry spice list here is already short (cumin, black pepper, a touch of garam masala), so the heat comes almost entirely from the green chillies and is easy to adjust.

    How long does this take to cook?

    The active cooking time is under 10 minutes once the onion paste and spices are roasted, plus the time needed to boil the eggs on a separate burner in parallel. Total time from start to finish is roughly 25 minutes including prep.

    Can I make the gravy ahead and add eggs later?

    Yes. Make the gravy through the kasuri methi step and refrigerate it for up to 2 days. When ready to serve, reheat it gently on low flame, then add freshly boiled and halved eggs, yolk-side down first, and proceed as usual.

    What’s the best bread to serve with egg malai curry?

    A buttery paratha is the obvious pairing — it soaks up the milk-based gravy well. Roti and naan are both equally good, simpler options for a regular weeknight plate.

    Conclusion

    Egg malai curry proves a creamy gravy doesn’t need cream, a long ingredient list, or a long cook time to taste genuinely good. A well-roasted onion-chilli base, a few dry spices, and milk added at the right temperature get you most of the way there — and the eggs do the rest, soaking up flavour on both cut sides once they go in yolk-down.

    Keep the onion-chilli paste from browning, always use room-temperature milk, taste and adjust salt after it goes in, and flip the eggs partway through. From start to finish, this is a genuinely quick weeknight option that holds its own next to malai chicken.

    A light, mild, kid-friendly gravy that’s ready in well under half an hour — and quick enough that you might just start making this instead of reaching for chicken.

    Want to keep exploring quick egg dinners? Our scrambled Anda Ghotala recipe and our pan-fried Butter Garlic Egg recipe are both worth adding to the same weeknight rotation.

    Recipe demonstrated and filmed in the Zaika Mazedaar kitchen. Watch the full video on the Zaika Mazedaar YouTube channel for a step-by-step visual walkthrough.

  • Anda Ghotala Recipe

    Anda Ghotala Recipe

    Zaika Mazedaar · Gujarati Breakfast & Egg Recipes

    Surti-style anda ghotala — soft sautéed onion, mashed pav bhaji masala, and grated boiled eggs folded into one glossy, mixed-up breakfast bowl.

    The name says it all — ghotala means a mix-up, a jumble, and that’s exactly what happens to the onion, tomato, and egg here. Everything gets mashed and mixed until you can’t pick out a single piece on its own, and somehow that’s the entire point.

    This recipe is demonstrated step-by-step in our video on the Zaika Mazedaar channel, filmed and cooked in a real kitchen — not assembled from recipe databases. It’s a quick, anytime dish: nashta with parathas (our Anda Paratha Roll recipe pairs especially well), a fast after-school snack, or an easy egg-for-dinner night.

    What Is Anda Ghotala?

    Anda ghotala, also known as Surti egg ghotala, is a Surti (Surat, Gujarat) street-food-style breakfast dish built on a mashed, pav-bhaji-spiced onion-tomato base with hard-boiled eggs grated directly into it. Rather than chopping the eggs the way you would for a standard bhurji, the eggs are grated on a box grater — fine egg “confetti” that blends almost seamlessly into the masala instead of sitting in separate chunks.

    The dish reflects the Surti street-food style of mashed, mixed egg dishes rather than being a generic catch-all “Indian egg recipe” — the pav bhaji masala, the deliberate mash, and the grated egg are all specific, regional choices, not shortcuts.

    Why This Recipe Works

    Two small technique choices do almost all of the work here, and both come straight from the transcript rather than a generic recipe template.

    First: the onion stays soft, never browned. Most egg curries push the onion toward golden or deep brown — the way our Anda Dum Biryani recipe does, for instance. Ghotala doesn’t — the onion is sautéed only until it softens, which keeps the base light and lets the pav bhaji masala stay the dominant flavour rather than competing with a caramelised onion note.

    Second: grated eggs, not chopped. Grating the hard-boiled eggs straight into the mashed masala is the defining “ghotala” move. It distributes egg through the entire dish instead of leaving it in bite-sized pieces, and it’s the single biggest textural difference between this and a familiar scrambled-egg bhurji. Our Egg Kebab Curry recipe takes egg reinvention even further, reworking the egg itself into a rolled, sliced omelette.

    Ingredients

    For the Masala Base

    • 2 tbsp oil
    • 2 tbsp butter (optional, but it noticeably enhances flavour)
    • 2 large onions, finely grated
    • 2 large tomatoes, seeds removed, finely chopped
    • 1 tbsp ginger-garlic paste
    • 1 tsp green chilli paste (or crushed green chillies)
    • 2–3 tbsp water, added once the masala is mashed

    Whole/Ground Spices

    • 1 tsp pav bhaji masala
    • ½ tsp red chilli powder, adjustable to taste
    • ¼ tsp turmeric powder
    • ¾ tsp salt, adjustable to taste

    For the Eggs

    • 3 hard-boiled eggs, grated (not chopped)
    • 1 additional whole egg, for the kadhai-serve style — cracked into a well
    • 1 separately fried egg, for the serving-dish style

    For Garnish

    • Fresh coriander (hara dhania), chopped
    • A little extra red chilli powder, for colour on top
    • A few coriander leaves, for the final garnish

    Ingredient Substitutions

    IngredientSubstituteEffect on Taste / Texture
    Pav bhaji masalaCoriander powder + garam masala + a pinch of amchurA near substitute, but loses the distinct tangy-spiced pav bhaji signature flavour
    ButterExtra oilLighter version; loses some of the rounded, restaurant-style richness
    Green chilli pasteFinely crushed fresh green chilliesSlightly sharper, fresher heat; nearly identical result
    Ginger-garlic pasteFresh grated ginger + garlic, equal partsStronger raw flavour; fry a little longer so it mellows
    Fresh corianderSkip, or use a smaller amount of driedLoses some brightness; the dish still works without it

    Mise en Place Checklist

    Have everything below ready before the pan goes on the flame — this recipe moves fast once it starts.

    • 2 onions, finely grated
    • 2 tomatoes, seeded and finely chopped
    • Ginger-garlic paste and green chilli paste measured out
    • Pav bhaji masala, red chilli powder, and turmeric measured into one small bowl
    • 3 eggs hard-boiled, cooled, and peeled
    • Box grater on hand, ready for the eggs
    • Fresh coriander washed and chopped
    • A masher, ready next to the kadhai
    • Decide in advance: kadhai-serve or serving-dish style

    Step-by-Step Method

    1

    Heat the oil and butter

    In a kadhai, heat 2 tbsp oil along with 2 tbsp butter over medium flame. The butter is optional, but it rounds out the flavour noticeably — skip it only if you want a lighter version.

    2

    Sauté the grated onion

    Once the butter has melted into the oil, add the 2 finely grated onions. Sauté on medium flame just until the onion turns soft — not golden brown, not caramelised. This lighter cook is intentional and is what keeps ghotala distinct from gravy-style egg recipes.

    Why this mattersBrowning the onion here pulls the flavour toward a gravy-style base. Ghotala wants the onion soft and almost invisible once mashed, so the pav bhaji masala stays front and centre.
    Sautéing grated onion in oil and butter for Anda Ghotala
    3

    Add and mash in the tomato

    Add the 2 finely chopped, seeded tomatoes. Cook on medium flame, mashing the tomato into the onion as it softens, until you can no longer tell the onion and tomato apart as separate pieces.

    Mashing tomato and onion together for Anda Ghotala masala base
    4

    Add ginger-garlic and green chilli paste, then cover and cook

    Stir in 1 tbsp ginger-garlic paste and 1 tsp green chilli paste. Mix well, lower the flame, cover the kadhai, and let it cook gently for 3–4 minutes until the tomatoes have softened completely.

    5

    Add the spices and mash, pav-bhaji style

    Uncover and mix once. Add 1 tsp pav bhaji masala, ½ tsp red chilli powder, and ¼ tsp turmeric powder. Now mash everything thoroughly with a masher — the same technique used for pav bhaji — until the onion and tomato are completely homogenous, with no separate pieces visible.

    Keep mashing on slow flame. The masala is ready for the next step once it’s visibly mashed smooth and the oil is separating at the edges.

    Watch pointDon’t rush the mash. A chunky, under-mashed base never quite comes together with the grated egg later — the whole appeal of ghotala is that everything disappears into one texture.
    Pav bhaji masala roasted until oil separates, Anda Ghotala recipe
    6

    Loosen with water and add salt

    Add a little water and mix well. Then stir in ¾ tsp salt, adjusting to your taste. Mix once more so the salt is evenly distributed through the mashed masala.

    7

    Grate the boiled eggs into the masala

    Take the 3 hard-boiled eggs and grate them directly into the masala using a box grater, instead of chopping them. This is the defining “ghotala” technique — it’s what gives the dish its name and its mixed-up texture.

    Mix the grated egg in gently and lightly by hand, not vigorously, so it doesn’t turn to total mush.

    Grate, don’t chopGrating distributes the egg through every spoonful instead of leaving it in separate bite-sized chunks — the single biggest reason ghotala feels different from a regular egg bhurji.
    Grating hard-boiled eggs into the masala for Anda Ghotala
    8

    Add water and coriander

    Add 2–3 tbsp water and mix well, so all the masala coats the grated egg evenly. Scatter in the fresh coriander and mix once more. The main ghotala mixture is now ready.

    9

    Choose your serving style — Style A: straight from the kadhai

    Using a spoon, make a few small wells/gaps in the mixture directly in the kadhai. Crack a whole egg into each well. Top with a little red chilli powder and coriander leaves for a yellow-red-green colour contrast.

    Cover and cook on low flame for 3–4 minutes, until the egg reaches a “half-fry” texture — set but with the yolk not fully hardened. Bring the kadhai straight to the table.

    Two valid ways to finishPick the kadhai-serve style for a quick, casual breakfast straight off the stove, or the serving-dish style below for a slightly more put-together presentation. Both come straight from the same mixture.
    Finished Anda Ghotala served straight from the kadhai
    10

    Style B: plated with a fried egg on top

    Spread the ghotala mixture around the edges of a serving dish in a ring. Separately fry one egg in very little oil, and place it in the centre. Garnish with a little chilli powder and coriander on top.

    Either way, your anda ghotala is ready to eat.

    Anda Ghotala plated in a serving dish with a fried egg on top

    5 Things to Remember for Perfect Anda Ghotala

    1. Keep the onion soft — never push it to golden brown
    2. Mash thoroughly, pav-bhaji style, until onion and tomato disappear into one texture
    3. Grate the boiled eggs — don’t chop them
    4. Mix the grated egg in gently by hand, not vigorously
    5. Pick your serving style — wells with a cracked egg, or plated with a fried egg on top

    The One Mistake That Ruins Anda Ghotala

    Browning the onion, or chopping the eggs instead of grating them.

    Either one quietly turns this into a different dish. A browned onion pushes the flavour toward a deeper, gravy-style base instead of the light, mashed pav-bhaji profile ghotala is built on. And chopped eggs sit as separate chunks rather than blending through the masala — which is, after all, what “ghotala” (a mix-up) is named for.

    Keep the flame moderate on the onion, mash the masala properly before the eggs go in, and reach for the box grater instead of a knife.

    For Beginners

    Mash thoroughly — the texture should be fully homogenous, not chunky. If you can still pick out a distinct piece of onion or tomato after mashing, keep going a little longer on low flame before the eggs go in. It’s the one step worth being patient with.

    For Confident Home Cooks

    Try the whole-egg-cracked-into-a-well kadhai-serve style for a more dramatic presentation — the yellow yolk against the red-flecked masala and green coriander makes for a genuinely good-looking plate, and it takes only a few extra minutes covered on low flame.

    What to Serve Anda Ghotala With

    Anda ghotala is at its best with hot parathas — the soft, layered bread is the classic pairing for a Surti-style breakfast. Toasted bread slices work well too, especially for a quicker morning. It also holds up nicely as an easy breakfast-for-dinner (“brinner”) option on a busy weeknight.

    If you’re packing it for an after-school snack, the kadhai-serve style travels less well than the serving-dish version — plan accordingly if it needs to sit before eating.

    Storage, Reheating & Make-Ahead

    SituationGuidance
    Fridge storageBest eaten fresh; if needed, refrigerate briefly in an airtight container and eat within a day
    FreezingNot recommended — the mashed egg-and-masala texture degrades on thawing
    ReheatingReheat gently on low flame with a splash of water; avoid high-power microwave reheating, which can toughen the egg
    Make-ahead strategyThe masala base (through step 6) can be made ahead and refrigerated briefly; grate in fresh eggs and finish just before serving for the best texture

    Because this dish contains mashed boiled egg, it’s a good idea to treat it like any cooked-egg dish — eat fresh or refrigerate briefly, and reheat gently rather than letting it sit at room temperature for long.

    Myth vs. Fact: Is Anda Ghotala the Same as Egg Bhurji?

    Anda ghotala is just another name for egg bhurji.

    Not quite. A standard egg bhurji typically scrambles raw egg directly into a sautéed onion-tomato mix. Anda ghotala uses hard-boiled eggs, grated (not chopped) into a masala that’s been mashed pav-bhaji style until completely smooth. The name itself — “ghotala,” a mix-up or jumble — describes that deliberate mashing of onion, tomato, and grated egg into one texture, which is a meaningfully different technique and result from a quick bhurji scramble. If you’d like another breakfast egg dish with a completely different technique, our Turkish Eggs Cilbir recipe is worth trying too.

    Nutrition Snapshot (Estimated per serving)

    NutrientEstimated Amount
    Calories~220–260 kcal
    Protein~9–11 g
    Fat~16–19 g
    Carbohydrates~9–12 g
    SodiumVaries with salt added

    Figures are estimated and will vary based on exact oil/butter quantity, egg size, and serving style chosen. These are not a substitute for individualised nutritional advice. Per-egg nutritional data is available via USDA FoodData Central.

    Frequently Asked Questions

    What is anda ghotala?

    Anda ghotala, also called Surti egg ghotala, is a Surti (Surat, Gujarat) street-food-style breakfast dish made from a mashed pav-bhaji-spiced onion-tomato base with hard-boiled eggs grated directly into it. The name “ghotala” means a mix-up or jumble — describing how everything is mashed and mixed until no single ingredient is separately distinguishable.

    How is anda ghotala different from egg bhurji?

    Egg bhurji scrambles raw egg directly into a sautéed onion-tomato mix. Anda ghotala instead uses hard-boiled eggs, grated rather than chopped, folded into a masala that’s been thoroughly mashed pav-bhaji style. The result is a more uniform, mixed-up texture rather than the looser scramble you’d get with a bhurji.

    What does “ghotala” mean?

    “Ghotala” literally translates to a mix-up, scramble, or jumble. In this dish, it refers to the technique of mashing the onion, tomato, and spices, then grating boiled eggs into that mashed base — everything gets mixed together until it’s no longer possible to pick out a single ingredient on its own.

    Can I make this without pav bhaji masala?

    You can get close with a mix of coriander powder, garam masala, and a small pinch of amchur, though you’ll lose some of the distinct tangy-spiced flavour that pav bhaji masala specifically brings. If pav bhaji masala is available, it’s worth using for an authentic result. For a differently spiced, heartier egg dish, our Chicken Egg Dak Bungalow recipe is worth a look.

    Should I chop or grate the boiled eggs?

    Grate them, using a regular box grater. Grating is the defining technique of anda ghotala — it distributes the egg through every spoonful of masala instead of leaving it in separate chopped pieces, which is what gives the dish its name and its characteristic mixed texture.

    Can I serve this with a whole fried egg on top?

    Yes — that’s one of the two serving styles demonstrated in the original recipe. Spread the ghotala mixture in a ring around a serving dish and place a separately fried egg, cooked in very little oil, in the centre, garnished with a little chilli powder and coriander. Our Butter Garlic Egg recipe uses a similar quick-fried-egg approach if you want to explore that technique further.

    Is anda ghotala spicy?

    It’s mildly spiced by default — ½ tsp red chilli powder and 1 tsp green chilli paste, both adjustable. Reduce either if you’d like it milder, or add an extra green chilli if you prefer more heat. The pav bhaji masala itself contributes warmth rather than sharp heat.

    What’s the best bread or roti to pair with it?

    Hot parathas are the classic pairing for a Surti-style breakfast, and toasted bread slices work well for a quicker morning. Plain roti is a simpler, equally good option if that’s what you have on hand. If you’d rather pair it with a gravy-style dish for a bigger spread, our Egg Malai Curry recipe is a good addition.

    Conclusion

    Anda ghotala earns its playful name honestly — every element here, onion, tomato, spice, and grated egg, gets mashed and mixed until it’s genuinely one dish rather than several ingredients sitting next to each other. It reflects the Surti street-food style of mashed, mixed egg dishes, and it comes together in well under half an hour.

    Keep the onion soft rather than browned, mash the masala properly before the eggs go in, grate rather than chop the eggs, and mix gently once they’re folded through. From there, it’s just a question of which serving style you’re in the mood for.

    A genuinely quick breakfast that also works as a fast after-school snack or an easy brinner — straight from the kadhai or plated up with a fried egg on top, both ways earn the name ghotala. For more Surti and North Indian egg dishes, try our Egg White Korma recipe or Anda Aloo Salan recipe next.

  • Egg Kebab Curry Recipe

    Egg Kebab Curry Recipe

    Zaika Mazedaar · North Indian Curries

    A genuinely new style of egg curry — rolled, sliced omelette “kebabs” simmered in a quick, dhaba-style gravy with a butter-paneer-like finish. No boiled eggs here.

    Egg curry, in most kitchens, means one thing: boiled eggs sitting in a gravy. This egg kebab curry recipe breaks that pattern entirely. The egg here isn’t boiled at all — it’s beaten, poured thin into a hot pan, rolled while still half-set into a soft log, then sliced into rounds that look and behave like little kebabs once they’re nestled into a quick, dhaba-style gravy.

    This recipe is demonstrated step-by-step in our video on the Zaika Mazedaar channel, filmed and cooked in a real kitchen — not assembled from recipe databases. The creator is upfront about why this version exists: there are already plenty of boiled-egg recipes on the channel, and this one was made specifically to do something different with the egg itself.

    What Is Egg Kebab Curry?

    Egg kebab curry (also called anda kebab curry) is a North Indian egg curry where the egg component is a rolled, sliced omelette — styled and shaped like a kebab — rather than a whole or halved boiled egg. The omelette is beaten with onion, green chilli, and coriander, cooked only until half-set, rolled into a log while still soft, cooled, and cut crosswise into rounds. Those rounds are then simmered in a light, fast-building gravy modelled on how butter paneer or butter chicken is typically made at a dhaba.

    The gravy itself is deliberately simple: onion, tomato, ginger, garlic, and green chilli softened together, blended into a paste, tempered with whole spices, and finished with cream and kasuri methi. It’s lighter and quicker than a cashew-based gravy, but it still lands with that familiar butter-paneer warmth — just built around a completely different egg format.

    Why This Recipe Works (no boiled eggs here — and that’s the point)

    Every other egg-gravy recipe on this site — Egg Lababdar, Egg Malai Curry, Egg Butter Masala, Anda Korma, Egg Shakshuka, Reshmi Anda Curry — uses whole or halved boiled eggs. This is the only one where the egg itself is reworked into a rolled, sliced omelette. That’s not a renamed version of an existing dish; it’s a real textural and conceptual difference, and it’s worth saying plainly rather than implying this is somehow the “best” way to do egg curry. It’s a genuinely different way to bring egg into a curry, for when you want a change from the usual.

    First: the omelette is rolled while only half-cooked. This is the single technique the whole dish hinges on. If the omelette is left to fully set in the pan, it loses the flexibility to roll, and once it hits the gravy, the roll will simply unravel. Rolling it early, while the top is still slightly underdone and the edges are just starting to lift off the pan, is what holds the kebab shape together.

    Second: the gravy stays deliberately light. Because the dish is built as a quick, dhaba-style butter-paneer-type base, the dry spice list is short and the chilli is kept moderate. This isn’t a heavily spiced curry — it’s meant to come together fast and taste familiar, with the omelette doing the textural work instead of the gravy doing the heavy lifting.

    Ingredients

    For the Gravy Base

    • 1 tbsp oil (for softening the vegetables)
    • 1 small onion, roughly sliced
    • 1 tomato, roughly chopped
    • Ginger, roughly chopped
    • Garlic, roughly chopped
    • 1–2 green chillies, roughly chopped
    • 3 tbsp oil (for the gravy itself)

    Whole Spices

    • A pinch of white cumin seeds (jeera)
    • 1 bay leaf (tej patta)
    • 1-inch cinnamon stick (dalchini)
    • 2 green cardamom pods

    Dry Spices

    • 1 tsp coriander powder (dhania powder)
    • ½ tsp turmeric powder
    • ¾ tsp red chilli powder (adjust to taste)
    • Salt, to taste

    For the Egg Kebabs

    • 3–4 eggs (use 3–4 depending on how many servings you’re making)
    • 1 small onion, finely chopped
    • 1–2 green chillies, finely chopped
    • Fresh coriander, finely chopped
    • Salt, to taste
    • Black pepper powder (optional)
    • 1 tbsp milk (water works as a substitute)
    • 1 tsp oil, for the pan

    For Finishing

    • ½ cup water (to adjust gravy consistency)
    • 1 tbsp fresh cream (or malai / skimmed cream from milk)
    • 1 tsp kasuri methi (dried fenugreek leaves), roasted and crushed
    • Fresh coriander, for garnish

    Ingredient Substitutions

    IngredientSubstituteEffect on Taste / Texture
    Milk (in the egg mixture)WaterLightens the mixture the same way, slightly less richness in the omelette itself
    Fresh creamMalai / skimmed cream from milkNearly identical; whisk it smooth first so it blends evenly into the gravy
    Regular/refined oilMustard oilAdds a sharper, more traditional dhaba-style pungency — use per personal preference
    Onion in the egg mixtureSkip itMilder flavour, slightly less texture in the rolled omelette
    Red chilli powderReduce or skip entirelyKeeps the gravy true to its light, dhaba-style intent with minimal heat

    Mise en Place Checklist

    This dish has two prep tracks running side by side — the gravy and the egg kebabs — so getting everything measured out first matters even more here than usual.

    • Onion, tomato, ginger, garlic, and green chilli roughly chopped for the base
    • Whole spices measured: cumin, bay leaf, cinnamon, cardamom
    • Dry spices measured into one small bowl
    • Eggs cracked into a bowl, with finely chopped onion, chilli, coriander, and salt ready to beat in
    • Milk measured (1 tbsp), or water as a substitute
    • Cream measured (1 tbsp), or malai whisked smooth
    • Kasuri methi roasted and crushed, ready to add
    • A pan for the omelette and a kadhai for the gravy, both ready on the hob

    Step-by-Step Method

    1

    Soften the onion-tomato base

    Heat 1 tbsp oil in a pan. Add the sliced onion, chopped tomato, ginger, garlic, and green chilli all together. Cover and cook on medium flame for 4–5 minutes, stirring once or twice, until the tomato turns completely soft and the onion goes soggy and mushy. There’s very little oil or water here, so don’t skip the occasional stir — that’s what keeps everything from catching at the bottom.

    Softening onion, tomato, ginger, garlic, and chilli for Egg Kebab Curry gravy
    2

    Cool and blend into a paste

    Tip the softened mixture onto a plate and let it cool slightly. Once cool enough to handle, blend it into a fine paste using as little water as possible — you want a thick, concentrated paste, not a watery purée.

    TipIf the gravy ever needs thinning later in the process, use warm or hot water rather than cold — cold water shocks a hot gravy and can make the oil split unevenly.
    3

    Temper the whole spices

    In the same pan, heat 3 tbsp fresh oil for the gravy. Once warm, add a pinch of cumin seeds, the bay leaf, cinnamon stick, and green cardamom pods. Fry for about 30 seconds until fragrant — just enough to release the aroma, no longer.

    Tempering whole spices before adding the masala paste, Egg Kebab Curry
    4

    Add the onion-tomato paste and roast

    Add the blended onion-tomato paste back into the pan. Since it’s already half-cooked from the first stage, it only needs another 2–3 minutes on medium flame to roast down further.

    5

    Add dry spices and bhuna until oil separates

    Add a splash of water first, specifically so the dry spices don’t catch and burn. Then stir in the coriander powder, turmeric powder, red chilli powder, and salt. Mix well, cover the pan, and let it cook on low flame until the oil visibly separates and rises to the surface and the raw spice smell is completely gone. This is a deliberately light gravy — don’t over-spice it.

    This is also your cue to start the egg kebab component in parallel, while the gravy roasts away on its own.

    Dark, thickly roasted masala before water is added, Egg Kebab Curry
    6

    Beat the eggs for the kebab mixture

    In a bowl, beat 3–4 eggs with the finely chopped onion, green chilli, fresh coriander, and salt — black pepper powder is a good optional addition here. Beat well for about a minute. The mixture will look a little thick at this stage, so whisk in 1 tbsp milk (or water) to lighten it, since it needs to roll cleanly rather than sit as a soft scramble.

    Whisking the omelette mixture with milk for Egg Kebab Curry
    7

    Cook the omelette half-set, then roll

    Heat a pan on medium flame and spread 1 tsp oil thoroughly across the surface — this matters more than it sounds, since a well-oiled pan is what lets the omelette release cleanly and roll without tearing. Pour in about half the egg mixture and spread it thin across the pan.

    Let it cook only until half-done — the top surface should not be fully dry, and the edges should just be starting to lift on their own. Scrape the edges gently with a spatula first, then roll the omelette up while it’s still soft. Cook for one more minute after rolling, then remove it to a plate.

    Watch pointIf you let the omelette fully set before rolling, it won’t hold the roll shape — it’ll come apart once it’s simmered in the gravy later. Roll it while it’s still slightly underdone, not after.
    Rolling the half-cooked omelette into a log for Egg Kebab Curry
    8

    Repeat, cool, and slice into rounds

    Add a little more oil to the pan, spread it well, and repeat the same process with the remaining egg mixture for a second log. Once both logs have cooled slightly, use a knife to cut each one crosswise into rounds — about 4 pieces per log, adjusted to whatever size you’d like the kebab rounds to be.

    Slicing the rolled omelette into kebab rounds for Egg Kebab Curry
    9

    Loosen the gravy and finish it

    By now the gravy should look visibly darker and thicker than it did at the start, with the oil well separated. Add ½ cup water and mix well to bring it to the consistency you’d like — add a little more if you prefer it runnier. Stir in 1 tbsp cream and the roasted, crushed kasuri methi. Remove the bay leaf now, since its job is done.

    Why kasuri methi matters hereThis is what gives the gravy its familiar butter-paneer warmth, even though the spice list itself stays short and light.
    10

    Nestle the kebabs, garnish, and simmer

    Gently nestle the egg kebab rounds into the gravy one at a time, then spoon a little gravy over the top rather than stirring — stirring hard can break the rolls apart. Sprinkle fresh coriander over the top, cover, and cook on low flame for 2–3 minutes, just until the oil resurfaces and the gravy’s flavour soaks into the egg kebabs.

    Open the lid. Your egg kebab curry is ready.

    Nestling egg kebab rounds into the finished gravy

    6 Things to Remember for Perfect Egg Kebab Curry

    1. Cook the onion-tomato base fully mushy before blending it into a paste
    2. Keep the dry spice list light — this is meant to be a quick, dhaba-style gravy
    3. Roll the omelette only while it’s half-cooked — never after it’s fully set
    4. Oil the pan thoroughly before pouring in the egg mixture
    5. Slice the cooled log into rounds once it’s had a few minutes to firm up
    6. Nestle the kebab rounds gently and spoon gravy over rather than stirring hard

    The One Mistake That Ruins Egg Kebab Curry

    Fully cooking the omelette before rolling it.

    It feels safer to let the omelette set all the way through before attempting to roll it — but that instinct works against you here. A fully-set omelette is too stiff to hold a roll shape; it’ll crack as you try to roll it, and even if it looks fine on the plate, it will unravel completely once it hits the hot gravy later.

    Watch for the top surface staying slightly underdone and the edges just starting to lift on their own — that’s the window to roll, not after.

    For Beginners

    Don’t panic if your first roll isn’t perfectly neat — a slightly uneven log or a small tear at one end won’t show once it’s sliced into rounds and sitting in gravy with garnish on top. The gravy and the kasuri methi finish cover a lot of small imperfections. Focus on the half-cooked cue rather than the shape.

    For Confident Home Cooks

    Try a slightly thicker omelette if you’d like heartier kebab rounds — just give it a touch longer before rolling so it still holds together. A pinch of chaat masala whisked into the egg mixture adds a nice tangy edge that plays well against the butter-paneer-style gravy.

    What to Serve Egg Kebab Curry With

    This was served with paratha in the original kitchen test — our Anda Paratha Roll recipe is a good place to look if you want to make your own from scratch — and it’s an easy pairing to recommend, since the bread holds up well against the gravy without getting lost in it. Plain white rice works just as well for a simpler weeknight plate, letting the gravy and the egg kebabs do the talking. If you’d rather skip the gravy altogether, our Butter Garlic Egg recipe is a quicker, drier alternative worth keeping in rotation.

    Because it comes together quickly and travels well, this is also genuinely tiffin-friendly — a good option for a packed lunchbox or a fast breakfast that doesn’t feel like leftovers.

    Storage, Reheating & Make-Ahead

    SituationGuidance
    Fridge storage (gravy only)Up to 2 days in an airtight container
    Fridge storage (with egg kebab rounds)Best eaten the same day — the rolled omelette texture firms up and toughens after a day in the fridge
    FreezingNot recommended — the egg kebab rounds lose their soft, rolled texture on thawing
    ReheatingGently on low flame with a splash of water; avoid a high-power microwave, which toughens the rolled omelette
    Make-ahead strategyMake the gravy ahead and refrigerate. Prepare the egg kebab rounds fresh and add them to the reheated gravy just before serving

    Making the egg kebabs fresh each time genuinely makes a difference — the soft, just-rolled texture is most of what makes this dish work, and it’s worth not skipping.

    Myth vs. Fact: Does Egg Curry Always Mean Boiled Eggs?

    Egg curry has to be made with boiled eggs — that’s just what the dish is.

    Not in this version. The egg component here is a beaten, half-cooked omelette that’s rolled into a log and sliced into rounds before it ever touches the gravy. It’s a real change in technique, not just a different shape — the egg cooks differently, holds a different texture, and absorbs the gravy’s flavour in a different way than a boiled egg ever could. Boiled-egg curries remain the more familiar format, but they’re not the only legitimate way to bring egg into a curry.

    Nutrition Snapshot (Estimated per serving)

    NutrientEstimated Amount
    Calories~230–270 kcal
    Protein~10–13 g
    Fat~17–20 g
    Carbohydrates~7–9 g
    SodiumVaries with salt added

    Figures are estimated and will vary based on exact oil quantity, egg size, and cream used. These are not a substitute for individualised nutritional advice. Per-egg nutritional data is available via USDA FoodData Central.

    Frequently Asked Questions

    What is egg kebab curry?

    Egg kebab curry is a North Indian egg curry where the egg component is a rolled, sliced omelette — shaped and styled like a kebab — rather than a whole or halved boiled egg. The rounds are simmered in a quick, dhaba-style gravy finished with cream and kasuri methi for a butter-paneer-like flavour.

    How is this different from a regular boiled egg curry?

    Regular egg curry uses whole or halved boiled eggs sitting in a gravy. This version uses a beaten omelette cooked only until half-set, rolled into a log, cooled, and sliced into rounds before going into the gravy — a genuinely different texture and technique, not just a different shape of the same egg.

    Why roll the omelette while it’s still half-cooked?

    A fully-cooked omelette is too set to hold a roll shape — it will crack while rolling and unravel later once it’s simmered in the gravy. Rolling it while the top is still slightly underdone and the edges are just lifting off the pan is what lets it hold together.

    Can I make the egg kebabs ahead and add them to gravy later?

    It’s best to make the egg kebab rounds fresh, since the soft, just-rolled texture is a big part of what makes this dish work. The gravy, on the other hand, can be made up to 2 days ahead and reheated gently before the fresh egg kebabs go in.

    Can I make this less spicy?

    Yes — this gravy is already kept deliberately light. Reduce the red chilli powder further or skip the green chillies in the egg mixture entirely for a milder version. The dish still works well with minimal heat, since the focus is on the texture of the egg kebabs rather than spice intensity.

    Is this good for a lunchbox or tiffin?

    Yes — it comes together quickly and holds up reasonably well for a few hours, which makes it a practical tiffin or packed-lunch option. Just note that the egg kebab texture is best enjoyed fresh, so try to make and pack it the same day.

    Can I use water instead of milk in the egg mixture?

    Yes. Water works as a direct substitute for lightening the egg mixture before rolling — the result is just very slightly less rich than using milk, but the texture and rollability stay the same.

    What’s the best way to reheat egg kebab curry without toughening the egg?

    Reheat gently on low flame with a small splash of water rather than using a high-power microwave. Low, slow heat warms the gravy through without overcooking the rolled omelette rounds, which toughen quickly under high heat.

    Conclusion

    Egg kebab curry is a genuinely different way to bring egg into a curry, not just a fresh coat of paint on the same boiled-egg formula. The gravy comes together fast, the spice list stays light on purpose, and the real technique to focus on is timing — rolling the omelette while it’s still half-cooked, not after.

    The moment that decides whether these egg rolls hold together in the gravy happens before the gravy is even ready — it’s all in how long the omelette stays on the pan. Get that timing right once, and the rest of the dish comes together easily.

    A fun twist for a weekday dinner, genuinely tiffin-friendly as demonstrated, and a good way to use up a familiar dhaba-style gravy with a completely different egg format than you’re probably used to. For more ways to break from the boiled-egg formula, try our Turkish Eggs Cilbir recipe or our deeply spiced Afghani Egg Curry recipe.

  • Egg Lababdar Recipe

    Egg Lababdar Recipe

    Zaika Mazedaar · North Indian Curries

    Restaurant-style anda lababdar at home — rich cashew-tomato gravy, eggs set right in the pan, and the finishing layer most recipes skip entirely.

    There’s a reason egg lababdar disappears off the table faster than almost any other egg curry — that cashew-rich, restaurant-style gravy clinging to a perfectly set egg is genuinely hard to resist. The colour alone, deep red from degi mirch with oil rising at the edges, tells you something good is happening in that pan.

    This recipe is demonstrated step-by-step in our video on the Zaika Mazedaar channel, filmed and cooked in a real kitchen — not assembled from recipe databases. If restaurant-style North Indian curries have ever felt out of reach at home, this one will change your mind.

    What Is Egg Lababdar?

    Egg lababdar (also called anda lababdar) is a North Indian egg curry distinguished by its rich, creamy cashew-tomato gravy — a style historically associated with Mughlai restaurant cooking. What makes it different from a standard egg curry is the base: grated onion cooked to a soft, pale gold, blended with a fine cashew-tomato paste and bhuna’d (slow-roasted) until the oil separates and rises visibly to the surface. The result is a gravy that’s neither thin nor thick — exactly the body lababdar is known for.

    The word lababdar roughly signals “indulgent, full-flavoured” in the context of North Indian restaurant menus, and the dish earns that description honestly. The eggs are cracked raw into the finished gravy, then cooked covered on low flame until just set — producing a silky egg with gravy clinging to every edge.

    Why This Recipe Works

    The secret is in two things that most everyday egg curry recipes skip entirely.

    First: grated onion, not chopped. Finely grating the onion means it dissolves almost entirely into the gravy, giving lababdar its characteristic smooth, velvety body without needing to blend the whole curry after cooking. It’s the same technique used in our Egg Butter Masala recipe — and it makes a bigger difference than you’d expect.

    Second: soaked cashews blended with tomato. The cashew-tomato paste, ground together into a fine slurry, creates both the body and the richness of the gravy before a drop of cream ever touches the pan. Cashews thicken without starch, add natural sweetness to balance the tomato’s acidity, and contribute that slightly creamy mouthfeel that sets lababdar apart from a basic egg curry. Our Reshmi Anda Cashew Curry recipe leans on the same cashew-based richness, if you’d like to see it taken even further.

    Ingredients

    For the Base

    • Oil — a little less than ½ cup (in a wide-bottomed kadhai)
    • 1 bay leaf (tej patta), torn before adding
    • ½ tsp white cumin seeds (safed jeera)
    • 2–3 green cardamom pods
    • 1 large onion, finely grated (not sliced, not roughly chopped)
    • 1 tsp ginger-garlic paste
    • A splash of water (to prevent over-browning)

    Dry Spices

    • ½ tsp turmeric powder
    • A little more than ½ tsp red chilli powder (spicy variety)
    • ½ tsp cumin powder
    • 1 tsp coriander powder (heaped)
    • ¾ tsp Kashmiri / degi mirch (deep restaurant-red colour, minimal heat)
    • Salt, to taste

    Tomato-Cashew Paste

    • 2 medium tomatoes (one can be slightly larger)
    • 10–12 cashews, soaked in water for 20–30 minutes before grinding

    Finishing Layer

    • ½ cup water (for consistency)
    • Fresh coriander (hara dhania), a generous handful
    • 2 tsp fresh cream — or whisked malai
    • ½ tsp sugar (optional — adds restaurant-style balance)
    • ½ tsp garam masala powder
    • 1 tsp kasuri methi (dried fenugreek leaves)

    For the Eggs

    • 4–5 eggs, cracked individually into a small bowl first
    • Black pepper powder, for sprinkling
    • 4–5 green chillies, roughly chopped
    • Fresh coriander, for garnish

    Ingredient Substitutions

    IngredientSubstituteEffect on Taste / Texture
    Fresh creamWhisked malaiNearly identical; whisk malai first so it blends smoothly
    CashewsSoaked blanched almondsSlightly drier body; less sweetness — still works well
    Degi mirchKashmiri chilli + tiny pinch paprikaSimilar colour; slightly different flavour depth
    Ginger-garlic pasteFresh grated ginger + garlic (equal parts)Stronger raw flavour; fry a little longer on low flame
    Fresh corianderSkip or use driedLoses freshness; add kasuri methi slightly earlier to compensate

    Mise en Place Checklist

    Get all of this ready before turning on the flame. Ten minutes of prep makes the stove time flow with no scrambling.

    • Onion finely grated, set aside
    • Cashews soaking in water
    • Tomatoes + soaked cashews blended into a fine paste
    • All dry spices measured into one small bowl
    • Ginger-garlic paste measured (1 tsp)
    • Fresh coriander washed and roughly chopped
    • Cream measured (2 tsp), or malai whisked smooth
    • Small bowl or ramekin nearby for cracking eggs individually
    • Wide-bottomed kadhai, ready on the hob

    Step-by-Step Method

    1

    Temper the whole spices

    Heat the oil in your kadhai over medium flame. When warm, add the torn bay leaf, ½ tsp white cumin seeds, and 2–3 green cardamom pods. Fry for 30 seconds, swirling gently, until fragrant.

    Temper the whole spices for Egg Lababdar
    2

    Cook the grated onion

    Add the finely grated onion. Cook on medium flame for 5–6 minutes, stirring occasionally, until the onion turns light pink and faintly golden — not deep brown, not caramelised. This lighter cook is intentional.

    Beginner noteGrating the onion instead of chopping it is the single most important technique in this dish. A grated onion cooks faster, breaks down more evenly, and leaves no chunky bits in the finished gravy.
    Cooking grated onion for Egg Lababdar
    3

    Add ginger-garlic paste

    Reduce to low flame. Add 1 tsp ginger-garlic paste directly to the softened onion. Cook for 1 minute until the raw smell is gone, then add a small splash of water — enough to prevent the onion deepening further in colour and to stop the dry spices from burning in the next step.

    4

    Bhuna the dry spices

    Add all the dry spices (turmeric, red chilli, cumin powder, coriander powder, degi mirch) in one go. Stir to combine and cook on low flame for 2–3 minutes, until the oil begins to separate at the edges and the spices smell fragrant rather than raw.

    Bhuna the dry spices
    5

    Add tomato-cashew paste and cook it down

    Pour in the entire tomato-cashew paste along with salt. Add a splash of water to your blender jar, swirl, and pour that in too — nothing goes to waste. Stir, cover the kadhai, and cook on low flame for 7–8 minutes, stirring once or twice.

    Watch pointStir the covered masala at least once or twice while it cooks — the cashews sink and can catch on the bottom very quickly. One or two stirs is all it takes to prevent this.

    The masala is ready when: oil has visibly separated and risen to the surface, there is no moisture left in the pan, and the raw tomato smell is completely gone. No shortcuts — this bhuna step is what gives the gravy its depth.

    Add tomato cashew paste and cook it down
    6

    Adjust consistency with water

    Add ½ cup water and stir well. Lababdar gravy sits between thin and thick — not soupy, not paste-like. Add a few extra tablespoons if you prefer it slightly looser.

    7

    Add coriander and cream

    Scatter in the fresh coriander. Add 2 tsp cream (or whisked malai). Stir gently and cook for 1–2 minutes so the cream integrates fully — you’ll see the gravy shift to a slightly richer, more unified colour.

    Add coriander and cream
    8

    Finish the gravy

    Add ½ tsp sugar (optional), ½ tsp garam masala powder, and 1 tsp kasuri methi. Stir everything together. Taste for salt and adjust. Remove the bay leaf now — it’s done its job, and you don’t want it sitting awkwardly under a set egg when you serve.

    Why kasuri methi matters hereIts subtle bitterness lifts the richness of cream-based sauces in a way that’s hard to replicate with anything else. This finishing layer — sugar, garam masala, kasuri methi — is what takes this from “a very good home egg curry” to restaurant-style.
    9

    Clean the edges and set the eggs

    Use a spatula to clean the kadhai edges neatly. This is a make-and-serve dish that goes to the table in the same pan, so presentation matters.

    Working one at a time, crack each egg into a small bowl or ramekin, inspect it, then slide it gently into the gravy. Space them evenly.

    Egg safety habitCracking eggs into a separate bowl first lets you catch a spoiled egg before it touches the curry, and check for shell fragments. A 30-second step that’s always worth it.
    10

    Garnish, cover, and cook

    Sprinkle black pepper powder over the eggs. Scatter the chopped green chillies and more fresh coriander on top.

    Cover the kadhai and cook on low flame for 6–7 minutes. Do not lift the lid. The trapped steam finishes the eggs gently and evenly. After 6–7 minutes, turn off the gas — then leave the lid on for a further 2–3 minutes before opening. This resting time continues the cooking without the risk of rubbery whites.

    Open the lid. Your egg lababdar is ready.

    Garnish cover and cook Egg Lababdar

    5 Things to Remember for Perfect Egg Lababdar

    1. Grate the onion — never slice or roughly chop it
    2. Bhuna the tomato-cashew paste until oil fully separates — no shortcuts
    3. Crack each egg into a bowl first before sliding into the gravy
    4. Don’t lift the lid during the 6–7 minute egg-cooking phase
    5. Rest 2–3 minutes after turning off the flame before opening

    The One Mistake That Ruins Lababdar Gravy

    Over-browning the onion.

    It’s tempting to cook the onion until deeply golden — that’s what most curry recipes call for. But lababdar gravy needs a light, sweet onion base, not a bitter, dark one. The target is pale gold with just a blush of pink. If your onion goes deep brown before the ginger-garlic paste goes in, the gravy will have a slightly acrid edge that no amount of cream will fix.

    Medium flame. Five to six minutes. Keep moving.

    For Beginners

    Don’t worry if your first lababdar gravy looks slightly darker or lighter than the video — stovetop heat varies, and kadhai sizes differ. The sensory cues matter more than the clock: pale golden onion, oil separating from the tomato paste, and no raw smell from the spices. Trust your nose as much as your timer.

    For Confident Home Cooks

    For an even deeper red without adding heat, increase the degi mirch to 1 tsp and reduce the regular red chilli powder slightly. A small pinch of smoked paprika alongside the degi mirch adds a subtle smoky undertone — it doesn’t appear in the original recipe but works well with the cashew base.

    What to Serve Egg Lababdar With

    Egg lababdar is flexible when it comes to pairing. A soft hand-rolled roti is the best way to mop up this gravy. Puri gives a more festive feel — the slightly puffed, golden bread is wonderful with the richness of the lababdar. Paratha works especially well for weekend brunch, and our Anda Paratha Roll recipe is worth trying if you want to make your own.

    Plain white rice or jeera rice works beautifully here — the understated base lets the gravy do all the talking. For a rice-forward alternative on another night, our Muradabadi Anda Yakhni Pulao recipe is worth adding to the rotation. For a full spread, egg lababdar sits naturally next to a dal and a simple raita.

    Storage, Reheating & Make-Ahead

    SituationGuidance
    Fridge storage (gravy only)Up to 2 days in an airtight container
    Fridge storage (with set eggs)Best eaten the same day — egg texture degrades noticeably after 24 hours
    FreezingNot recommended — cashew-cream gravy separates on thawing, and egg texture becomes rubbery
    ReheatingGentle reheat on low flame with a splash of water; avoid microwave on high, which toughens the eggs
    Make-ahead strategyMake the gravy (steps 1–8) up to 2 days ahead. Refrigerate. When ready to serve, reheat gently, then add fresh eggs and cook covered on low flame for 6–7 minutes

    The make-ahead option is genuinely useful for dinner parties — the gravy deepens slightly overnight, and fresh eggs take less than 10 minutes to set in a warm, already-flavoured base.

    Myth vs. Fact: Does Lababdar Need Cream?

    You can’t make a proper lababdar gravy without cream — it’s the defining ingredient.

    The cashew-tomato paste does the real structural work. The cream (just 2 tsp in this recipe) adds a final layer of richness and helps unify the gravy’s colour, but it’s genuinely optional. Whisked malai is a perfectly good substitute — and if you skip both entirely, the cashew base still produces a gravy that’s rich, smooth, and recognisably lababdar in style. The sugar and kasuri methi in the finishing layer arguably matter more than the cream for achieving that restaurant-like flavour balance.

    Nutrition Snapshot (Estimated per serving)

    NutrientEstimated Amount
    Calories~280–320 kcal
    Protein~12–15 g
    Fat~20–24 g
    Carbohydrates~10–13 g
    SodiumVaries with salt added

    Figures are estimated and will vary based on exact oil quantity, egg size, and cream used. These are not a substitute for individualised nutritional advice. Per-egg nutritional data is available via USDA FoodData Central.

    Frequently Asked Questions

    What is egg lababdar?

    Egg lababdar is a North Indian egg curry with a rich, creamy cashew-tomato gravy. The name lababdar refers to its indulgent, restaurant-style character — a thick, velvety gravy that’s neither thin nor heavy, typically finished with cream, garam masala, and kasuri methi. It’s associated with Mughlai-influenced cooking and is a popular menu item across North Indian restaurants and dhabas.

    How is lababdar gravy different from regular egg curry?

    Regular egg curry uses a straightforward onion-tomato base and produces a thinner, more rustic sauce. Lababdar gravy uses grated (not chopped) onion, a cashew-tomato paste ground together, and a finishing layer of cream, garam masala, and kasuri methi — producing a smoother, richer, restaurant-style result with a distinctive medium-bodied consistency.

    Can I make egg lababdar without cream?

    Yes. The cashew-tomato paste is what gives lababdar gravy its richness and body — the cream is a finishing touch, not a structural ingredient. Whisked malai is a direct substitute. If you skip dairy entirely, the gravy will be slightly less rich but still recognisably lababdar in style, especially with the kasuri methi and garam masala finishing layer in place.

    Why is my onion turning brown instead of staying pink?

    The flame is likely too high, or the onion cooked too long. Lababdar requires a light, pale-golden onion — not the deep caramelised brown you’d want for a biryani base like our Anda Dum Biryani recipe. Cook on medium flame for 5–6 minutes maximum, and stop as soon as you see a light blush of gold. If it tips into deep brown, the base will have a bitter undertone that cream and cashews won’t fully mask.

    Can I make the gravy ahead and add eggs later?

    Yes — and this is actually the recommended approach for meal prep or dinner parties. The gravy keeps well in the fridge for up to 2 days. Reheat gently on low flame with a splash of water, then proceed with fresh eggs. The gravy actually deepens slightly overnight, and fresh eggs set in under 10 minutes in a warm base.

    What’s the best bread to serve with egg lababdar?

    Hand-rolled roti or puri are the most natural pairings — the bread soaks up the medium-bodied gravy without overwhelming it. Paratha works especially well for weekend brunch. Plain white rice is also great for a simpler weeknight plate, and the gravy works beautifully with all of them. For something more substantial, our Chicken Egg Dak Bungalow recipe is worth trying next.
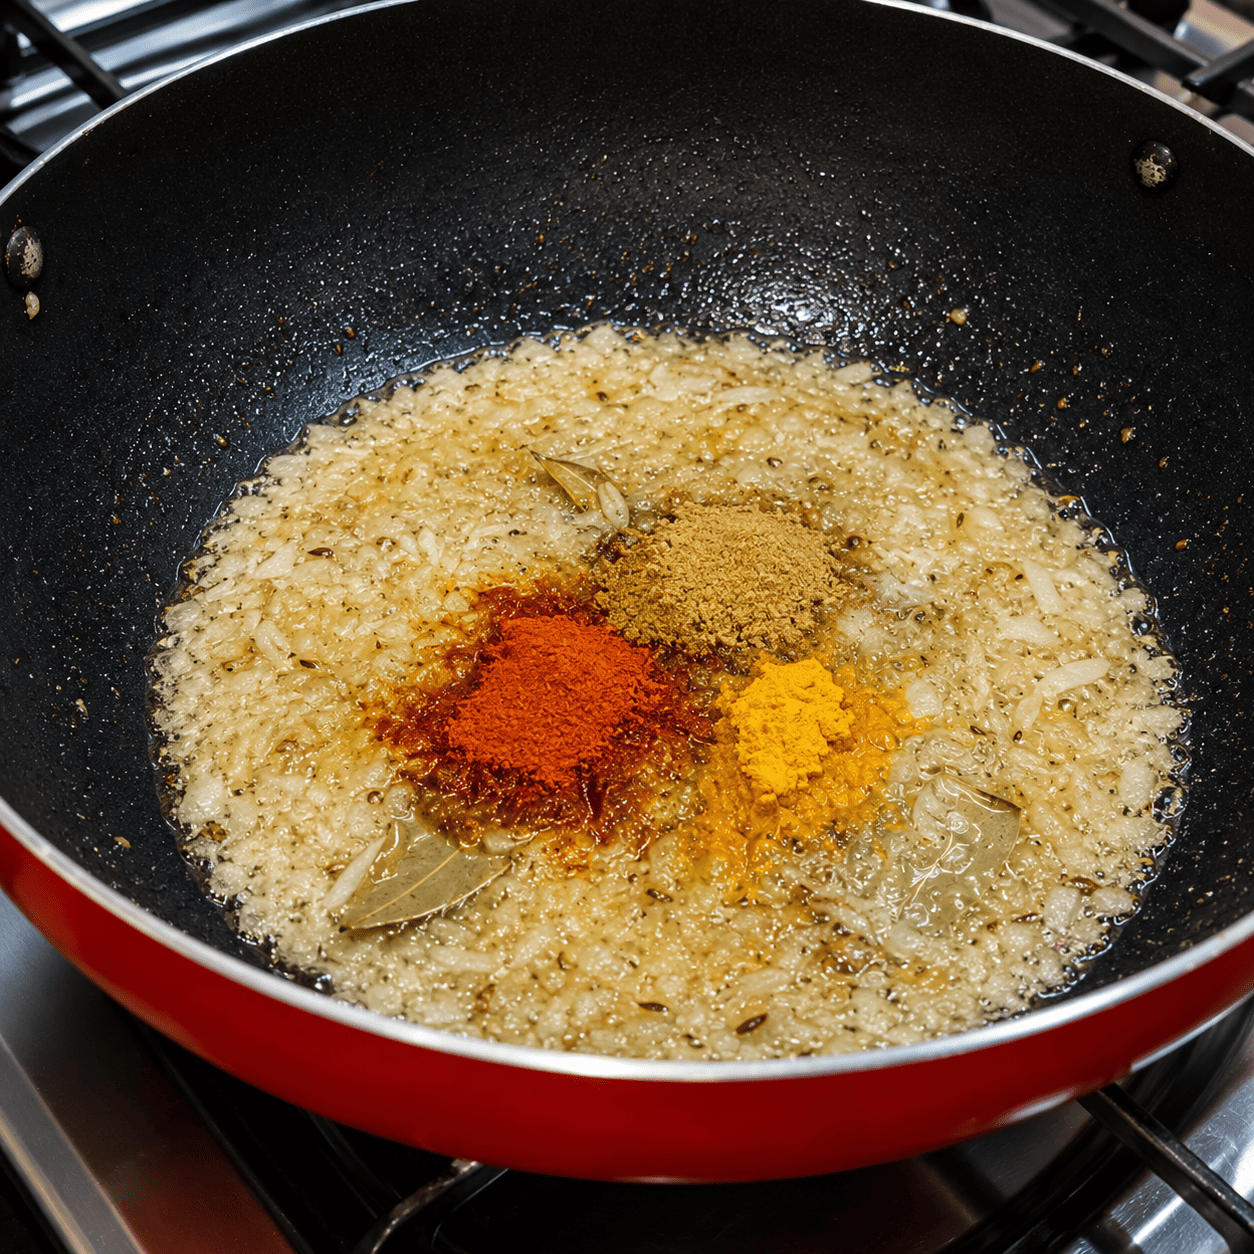
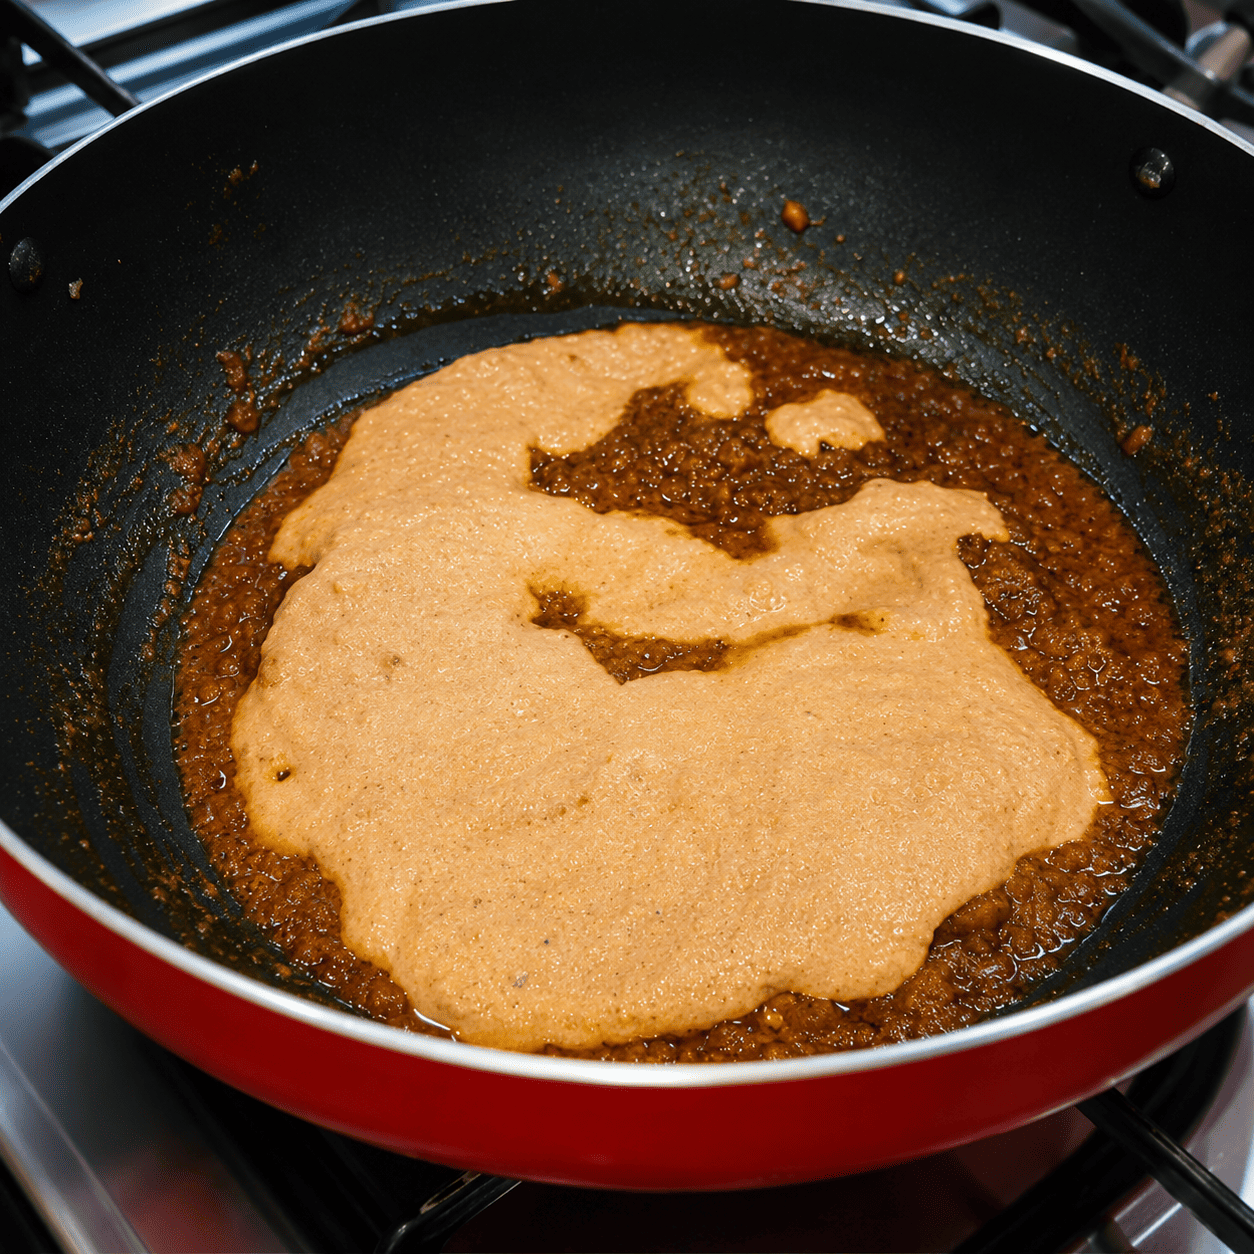
    Can I make this less spicy?

    Easily. Reduce or skip the regular red chilli powder (the spicy variety) and rely entirely on degi mirch / Kashmiri chilli, which contributes colour without significant heat. The green chillies added over the eggs are also optional — leave them out or replace with a milder variety. The finished dish will still have the full lababdar flavour.

    Why should I crack eggs into a bowl before adding them to the curry?

    Because occasionally an egg is spoiled inside — and discovering that after it’s already sitting in your gravy is a far worse outcome than the extra 30 seconds of cracking into a bowl first. It also lets you check for shell fragments and inspect the egg before it touches hot food. Good standard practice whenever cooking eggs directly into a sauce.

    Conclusion

    Egg lababdar is one of those dishes that punches well above its prep time. Forty-five minutes from mise en place to table, one kadhai, no special equipment — and the result tends to look and taste like something you’d order rather than cook yourself.

    The key is trusting the process: the grated onion that looks like extra effort but takes two minutes, the cashew-tomato paste that bhuna’s down slowly, the lid you resist lifting during those final minutes while the eggs set quietly. Follow the sequence, follow the sensory cues — pale golden onion, oil separating from the masala, no raw smell — and you’ll have a gravy that genuinely earns the name lababdar.

    Ideal for a weeknight dinner when you want something a little special without two hours of cooking. Make the gravy ahead, set the eggs fresh before serving, bring it to the table in the same kadhai it cooked in. If you enjoy this rich, restaurant-style approach, our Afghani Egg Curry recipe and Surti-style Anda Ghotala are both worth exploring next.