Category: Egg Recipes

  • Egg White Korma Recipe

    Egg White Korma Recipe

    Zaika Mazedaar · Mughlai Egg Recipes

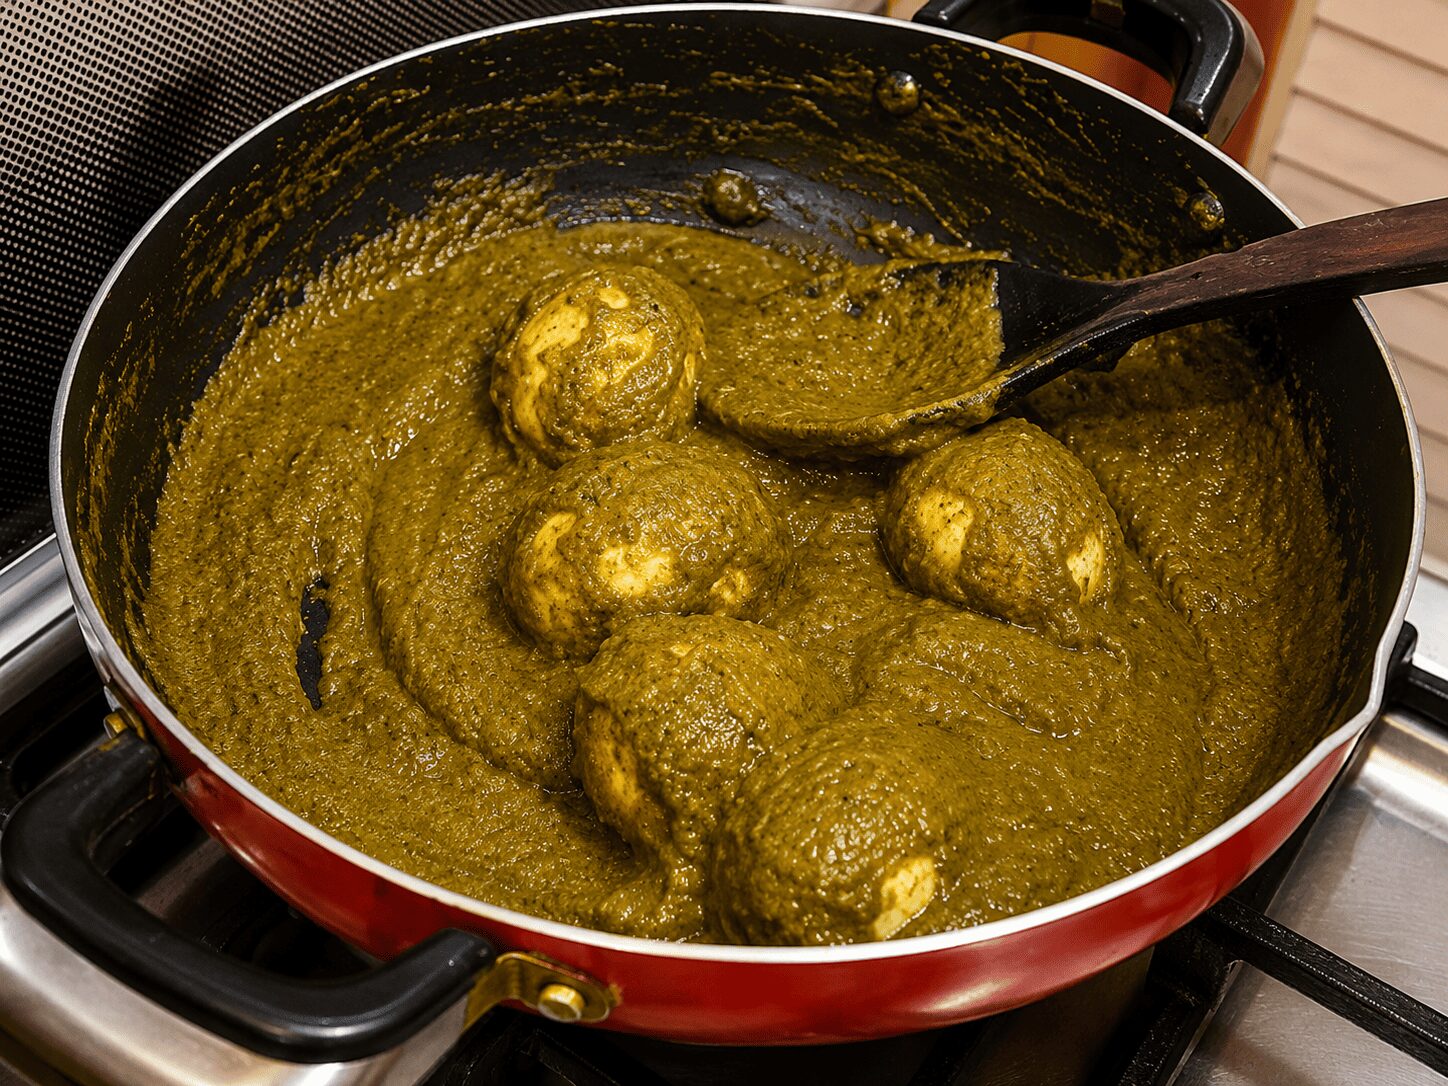
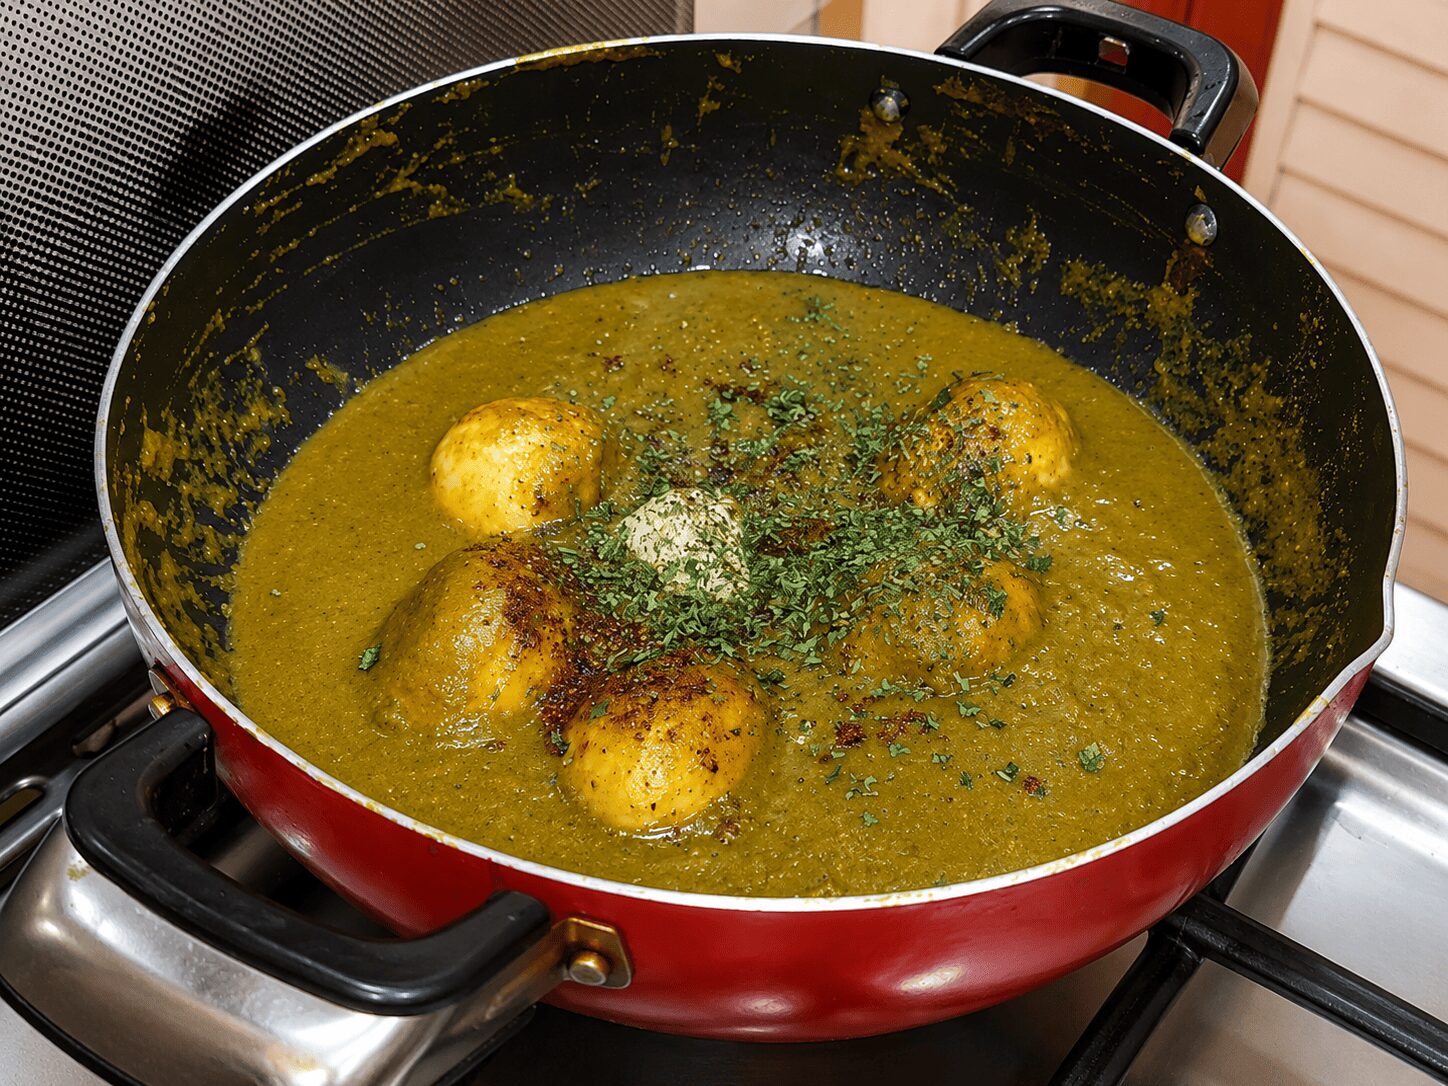
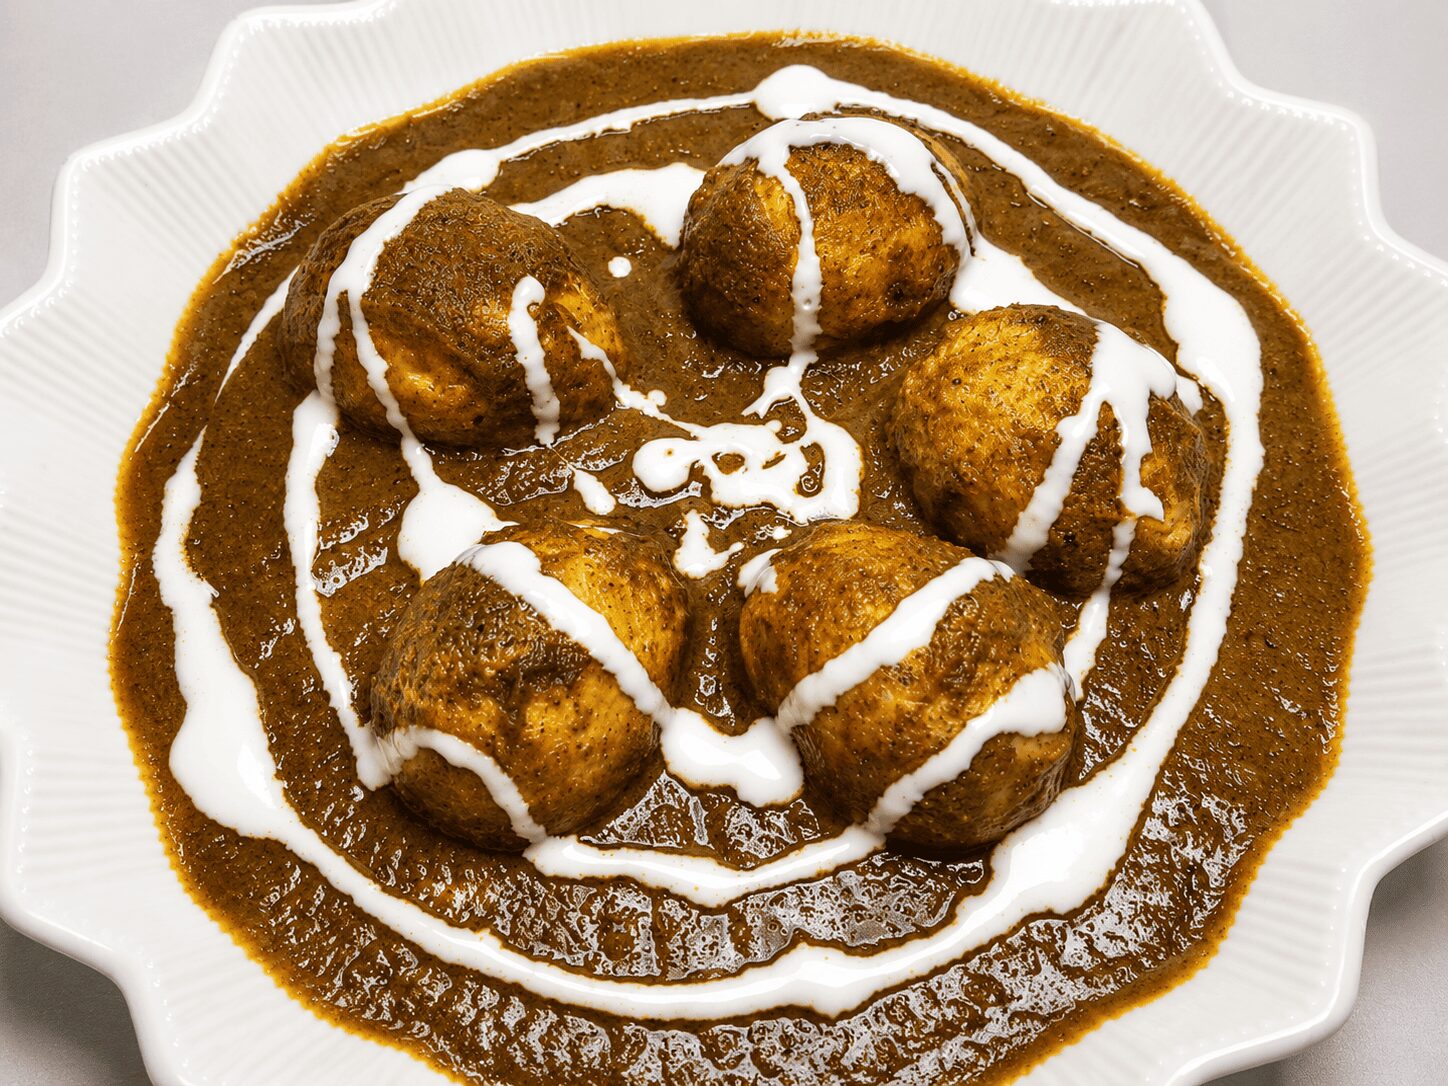
    Mughlai-style Anda Malai Korma — a pale, ivory gravy built on cashew-almond paste, white pepper, and cream, with no red chilli and no tomato anywhere in sight.

    There’s one moment in this recipe where most home cooks go wrong — and it’s the twenty seconds where the onion paste starts to turn. Let it brown even slightly, and the whole gravy shifts from a pale, restaurant-style ivory to something that just looks like an ordinary korma. Catch that moment with a splash of water, and you get the real thing: a gravy that stays genuinely white, even as it thickens around cashews, almonds, and cream.

    This recipe is demonstrated step-by-step in our video on the Zaika Mazedaar channel, filmed and cooked in a real kitchen — not assembled from recipe databases.

    What Is Egg White Korma?

    Egg White Korma — also called anda malai korma — is a Mughlai-style egg curry defined by what it deliberately leaves out: no red chilli, no tomato, nothing that would push the gravy toward red or orange. The colour comes entirely from a pale onion-garlic-ginger-chilli paste cooked just until its raw smell disappears, then deliberately stopped with a splash of water before it can brown, plus a cashew-almond paste and a finish of fresh cream. White pepper stands in for red chilli, adding warmth without adding colour — the Mughlai choice for exactly this reason.

    Why This Recipe Works (and How It Differs from Our Egg Malai Curry and Reshmi Anda Cashew Curry)

    The site already has a few other white-and-creamy egg dishes, and it’s worth being upfront about how this one is different. Our Egg Malai Curry uses an onion and green chilli paste base with room-temperature milk stirred in — no cream, no cashews, no yogurt — making it the lighter, faster, more everyday option of the group. Our Reshmi Anda Cashew Curry blends an onion-cashew-garlic-ginger paste smooth and builds on a yogurt base, landing somewhere silky and medium-rich — its name, reshmi, literally means silky, chosen specifically to avoid confusion with Malai Curry. If you’d rather stay closer to a classic restaurant-style gravy, our Anda Korma is the more traditional, tomato-based cousin of this white version.

    Egg White Korma is the most deliberately restrained of the three. There’s no red colour at all, from any source. The onion paste is cooked only to a pale gold, stopped early with a splash of water rather than left to brown. White pepper replaces red chilli entirely. And the richness comes from a cashew-and-almond paste plus a proper finish of fresh cream — the genuine Mughlai restaurant korma profile, built on richness rather than heat or colour.

    First: the pale-onion technique. The onion-garlic-ginger-chilli paste is cooked on medium flame only until it just begins to change colour — at that exact point, 2–3 tablespoons of water go in to stop the cooking dead. Skip this step, or wait too long, and the paste browns, taking the whole gravy with it.

    Second: room-temperature yogurt, added only on low flame. Both conditions are required together. Cold yogurt added to a hot pan splits almost immediately; yogurt added on anything above low flame does too, regardless of temperature.

    There’s one small trick that makes a noticeable difference here: cooking the cream for a full 2–3 minutes once it’s stirred in, rather than just folding it through and moving on. Skip that, and a faint raw-cream taste lingers under everything else.

    Ingredients

    For the Nuts Paste

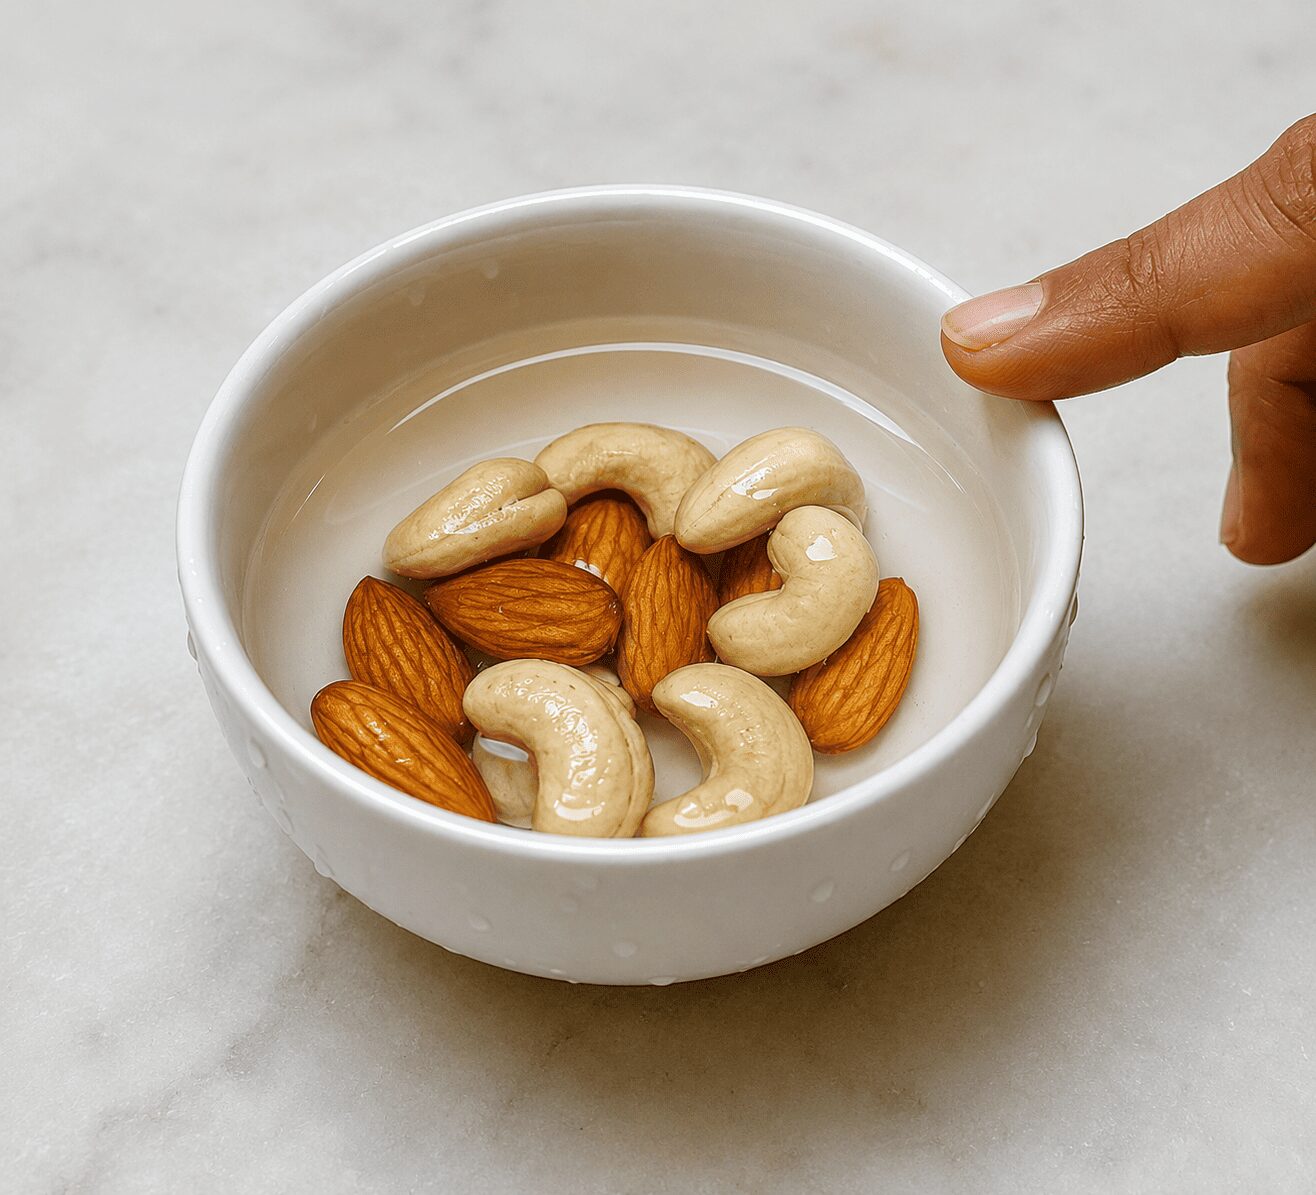
    • Cashews (kaaju), soaked 15–20 minutes
    • Almonds (badam), soaked 15–20 minutes, skin removed after soaking (roughly equal parts cashew to almond — exact ratio isn’t critical)

    For the Eggs

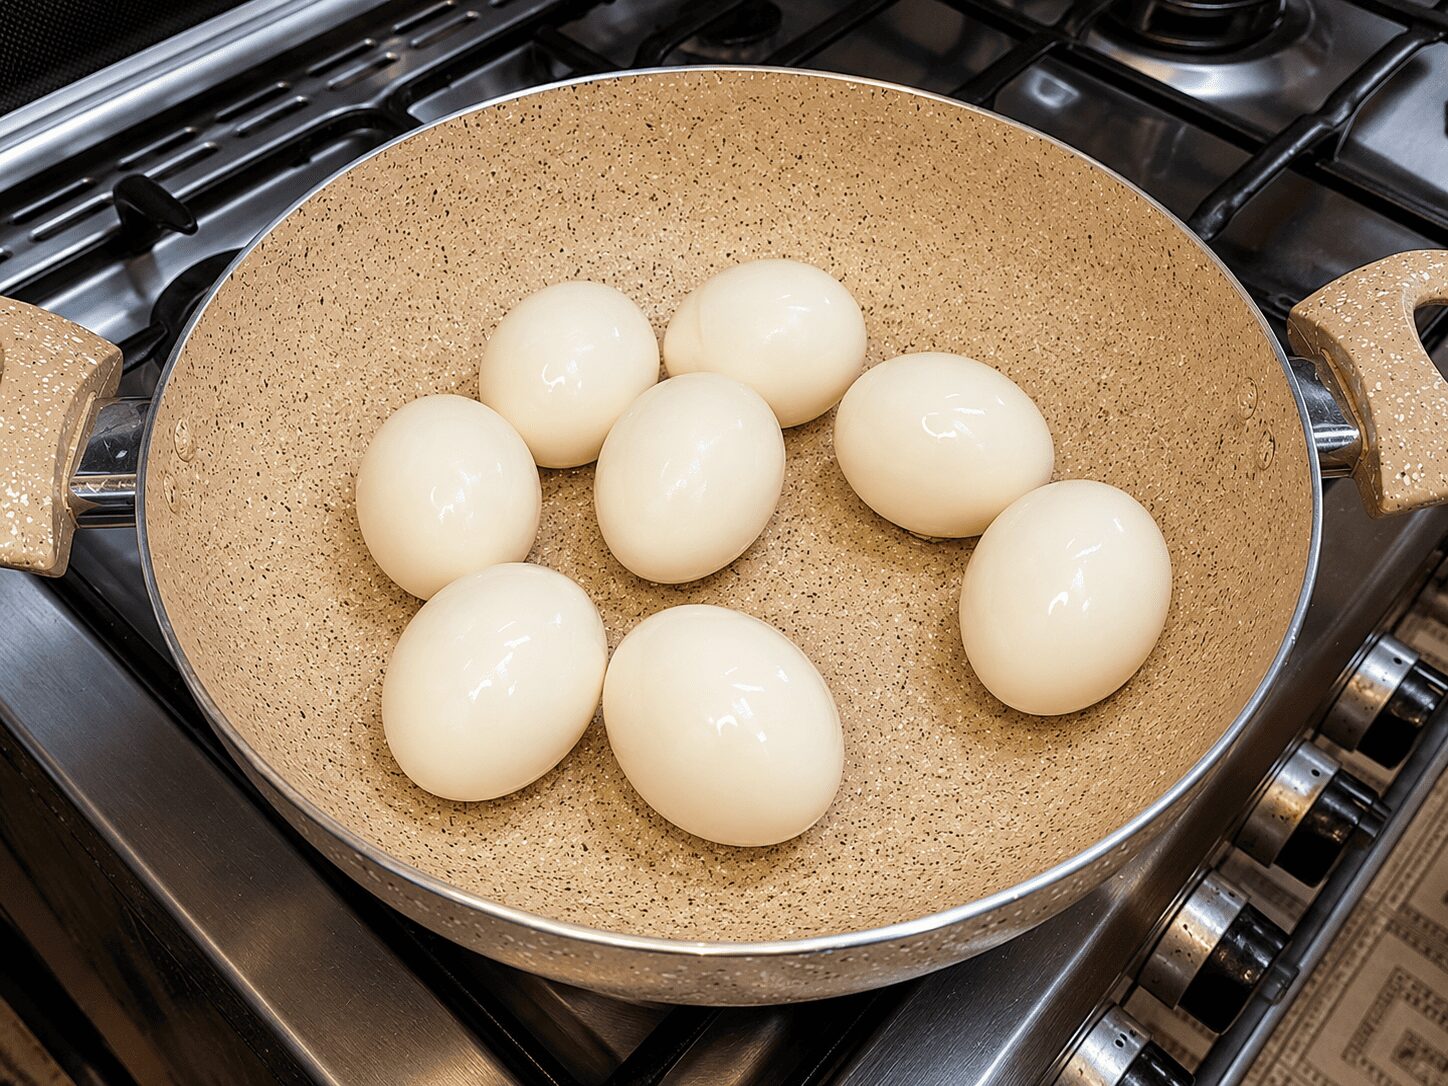
    • 4–5 boiled eggs, scored (cut) before frying
    • 2 tbsp oil, for frying the eggs (frying is optional, but the eggs hold up better visually in the gravy this way)

    Whole Spices

    • ½ tsp cumin seeds (jeera)
    • A few black peppercorns (kali mirch)
    • Cloves (laung), a few
    • Green cardamom (hari elaichi), a few pods
    • 1 bay leaf (tez patta)
    • Cinnamon (daalchini), a small piece

    Dry Spices

    • 1 medium onion, blended with a little garlic, ginger, and green chilli into a paste
    • 1½ tsp coriander powder (dhaniya powder)
    • ½ tsp cumin powder (jeera powder)
    • ½ tsp white pepper (safed mirch) (black pepper powder works as a substitute — no red chilli goes into this recipe at all)
    • 3 tbsp yogurt, well-beaten, at room temperature
    • Salt, to taste
    • Water, as needed for consistency

    For the Finish

    • 3 tsp fresh cream (or home-made malai)
    • ½ tsp garam masala powder
    • 1 tsp kasuri methi (dried fenugreek leaves), crushed by hand
    • A tiny pinch of sugar (completely optional — rounds out the flavour, restaurant-style)
    • Fresh coriander, for garnish

    Ingredient Substitutions

    IngredientSubstituteEffect on Taste / Texture
    Cashew + almond pasteCashew paste onlyAlmonds add a slightly different creaminess; a single-nut version is fine
    Fresh creamHome-made malaiFunctionally identical — use the same quantity
    White pepperBlack pepperFlavour is similar, but black pepper adds visible dark specks — an aesthetic difference in a dish defined by staying pale
    Kasuri methiFresh fenugreek leaves, very sparinglyFresh fenugreek is much stronger than dried — use far less than the dried equivalent
    Both nuts (if unavailable)Skip entirely, add a little extra creamTexture and richness will differ slightly, but the gravy is still recognisably a korma

    Mise en Place Checklist

    Get all of this ready before turning on the flame. Soaking the nuts and bringing the yogurt and cream to room temperature ahead of time genuinely matters here — both protect against a split or grainy gravy later.

    • Cashews and almonds soaking (15–20 minutes), almond skins removed after soaking
    • Onion-garlic-ginger-chilli paste blended and set aside
    • Eggs boiled and scored
    • Yogurt taken out of the fridge early so it reaches room temperature
    • Cream taken out of the fridge early too
    • All dry spices measured into one small bowl
    • Kasuri methi crushed by hand, ready to add
    • Fresh coriander washed and chopped
    • Pan ready on the hob

    Step-by-Step Method

    1

    Blend the pastes, then fry the eggs

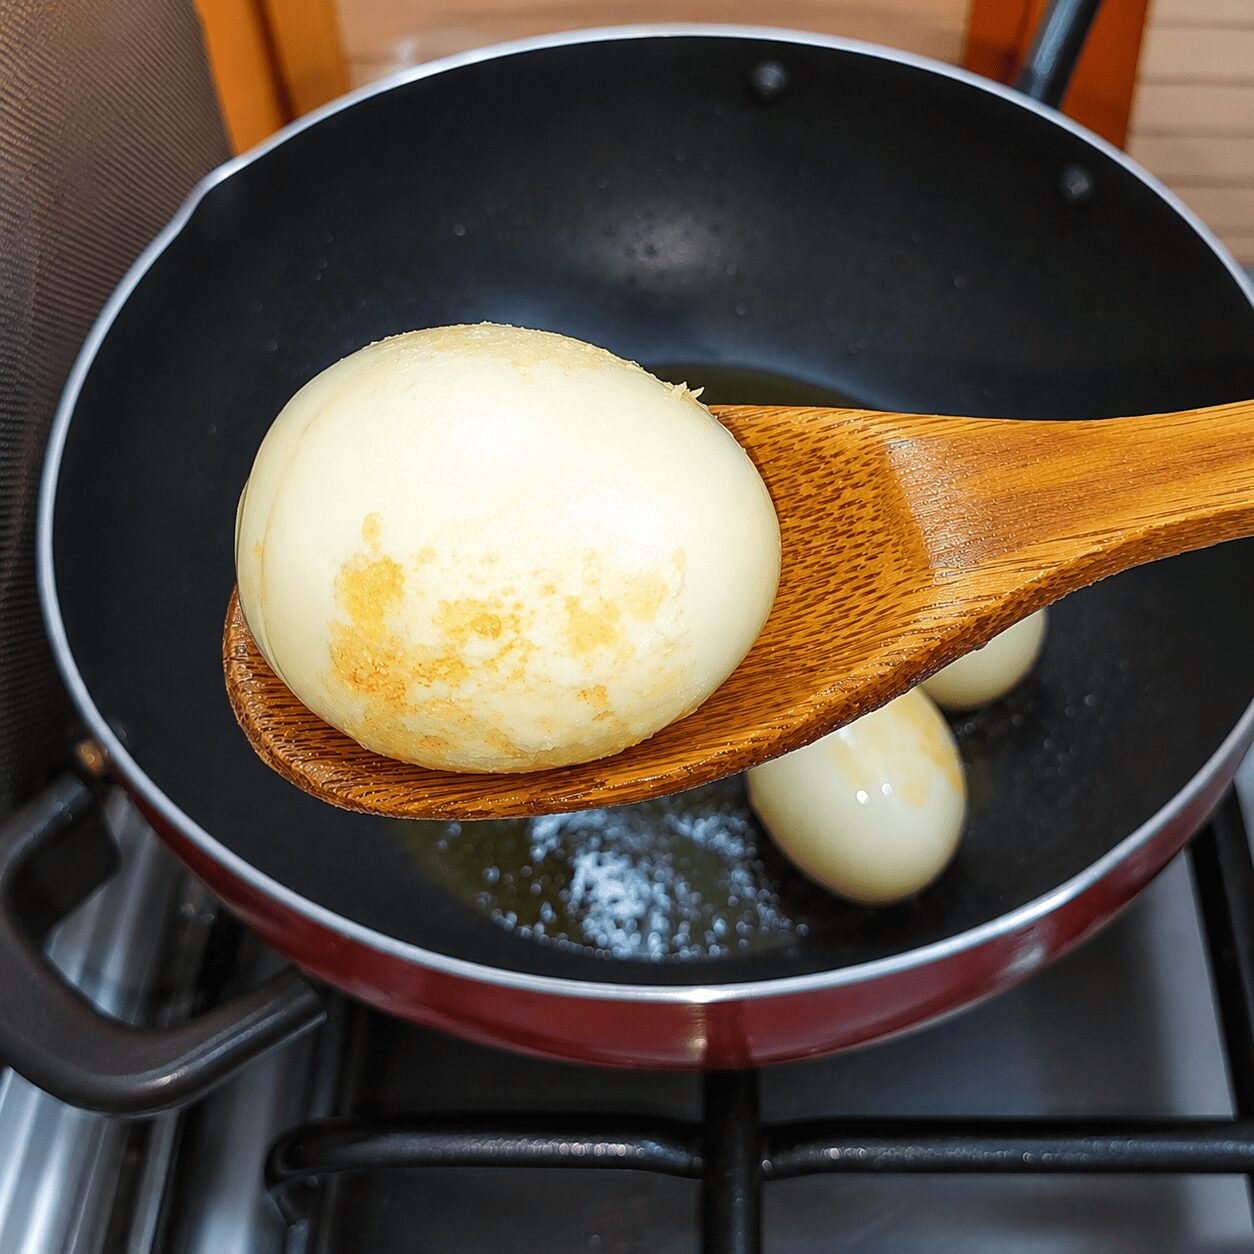
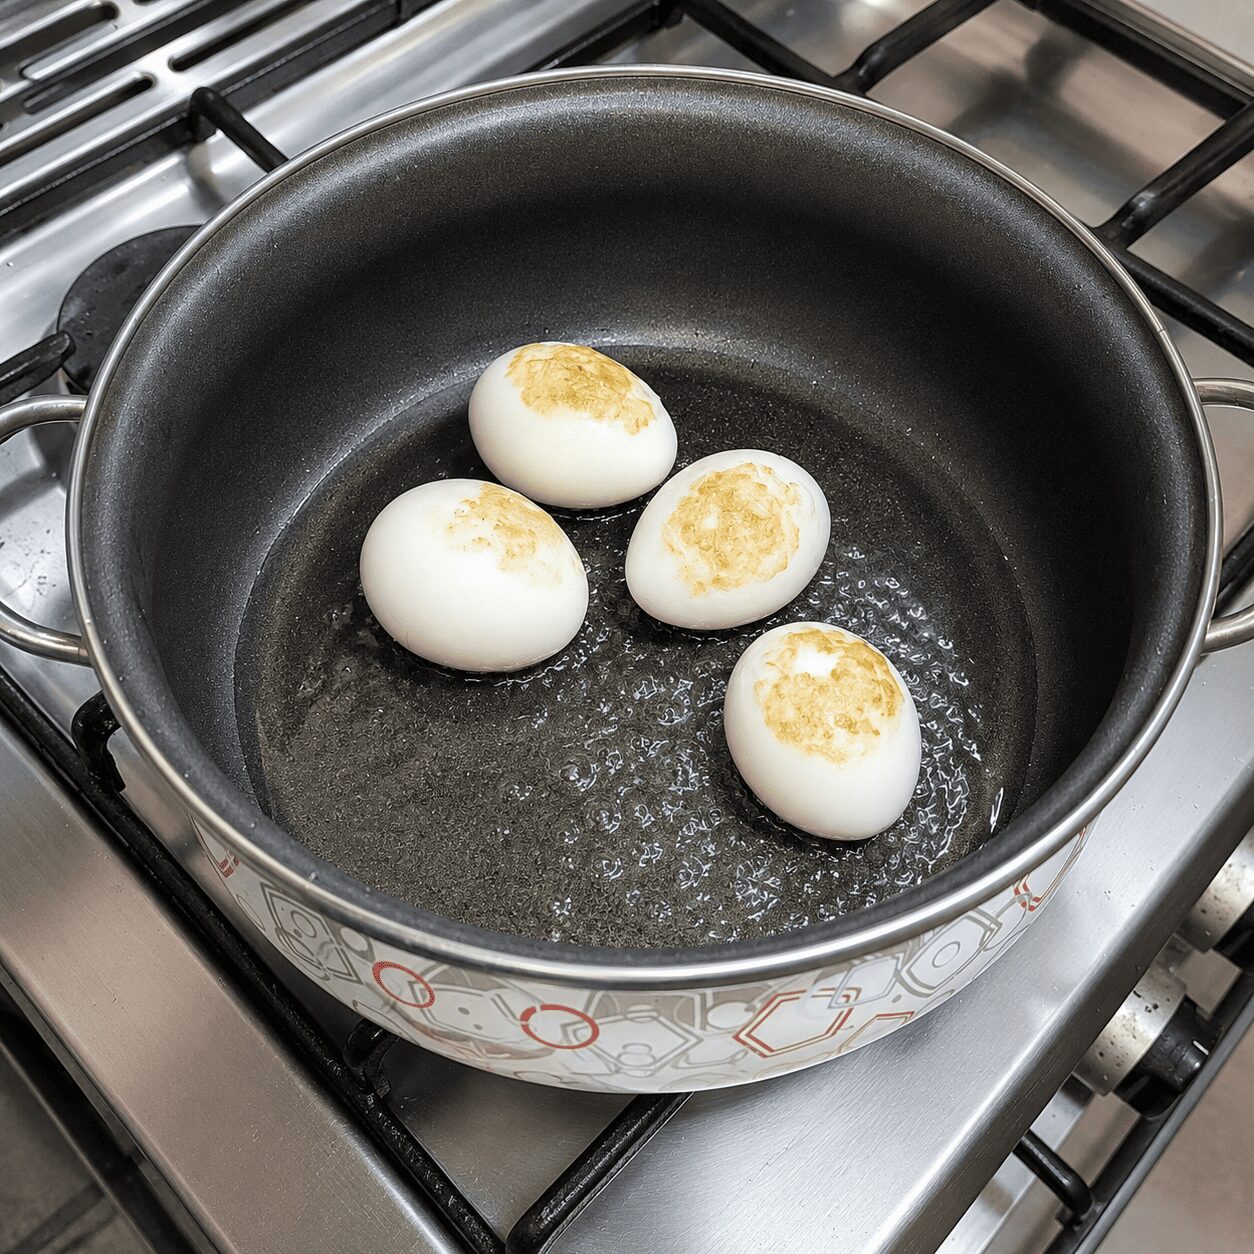
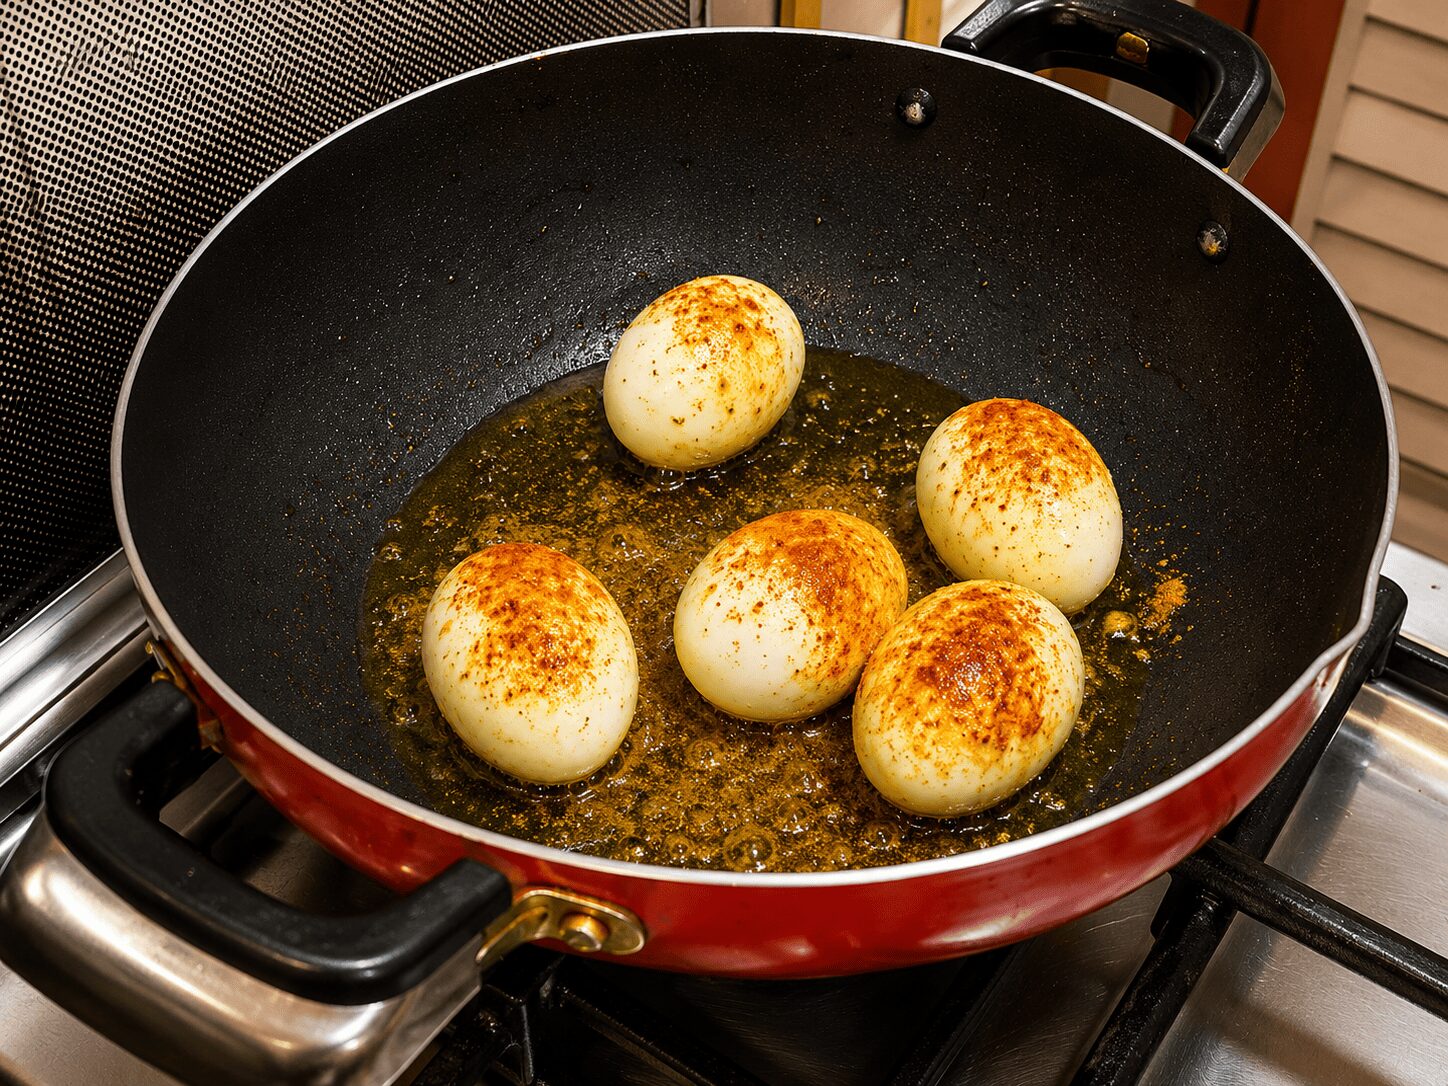
    Blend the onion, garlic, ginger, and green chilli with a little water into a paste; set aside. Blend the soaked, skinned cashews and almonds into a separate paste; set aside. Heat 2 tbsp oil in a pan, fry the scored eggs on medium flame for 4–5 minutes until a light brown coating forms. Remove to a plate.

    Frying the eggs is optionalIt doesn’t change the flavour, but a lightly fried, scored egg holds the gravy in its cuts better and looks more refined on the plate.
    Scored boiled eggs frying lightly golden for Egg White Korma
    Soaked cashews and blanched almonds ready to blend for Egg White Korma paste
    2

    Temper the whole spices

    Add 2 tbsp more oil to the same pan. Add the cumin seeds, black peppercorns, cloves, green cardamom, bay leaf, and cinnamon. Fry for 30–40 seconds, until the cumin just changes colour.

    3

    Cook the onion paste — and stop it before it browns

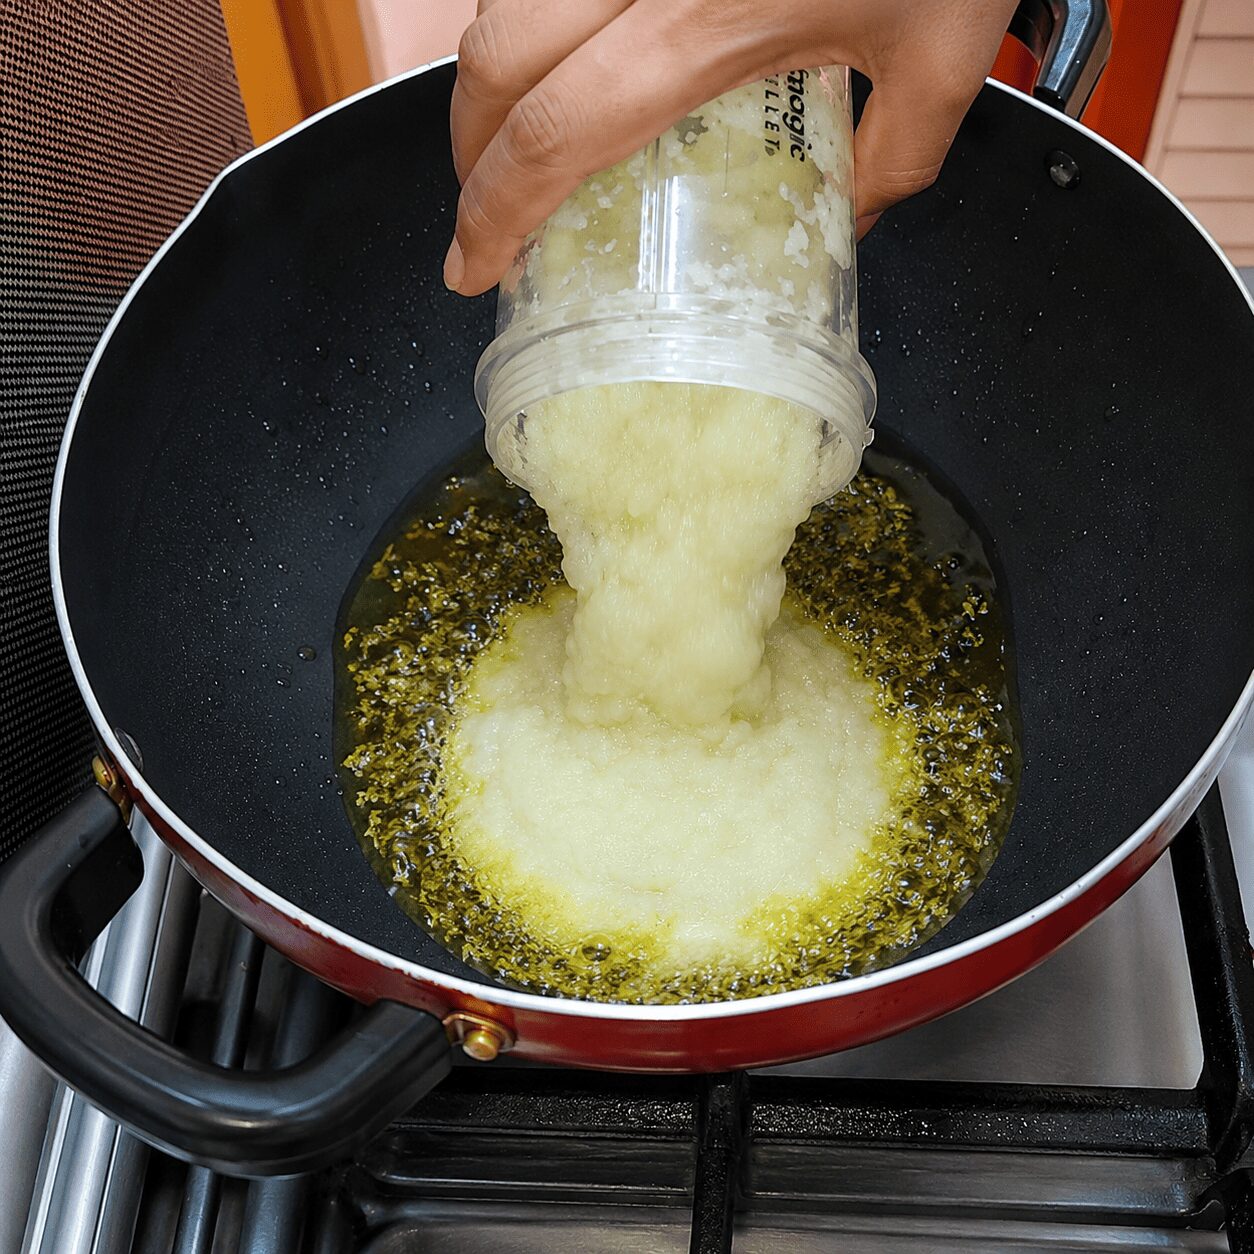
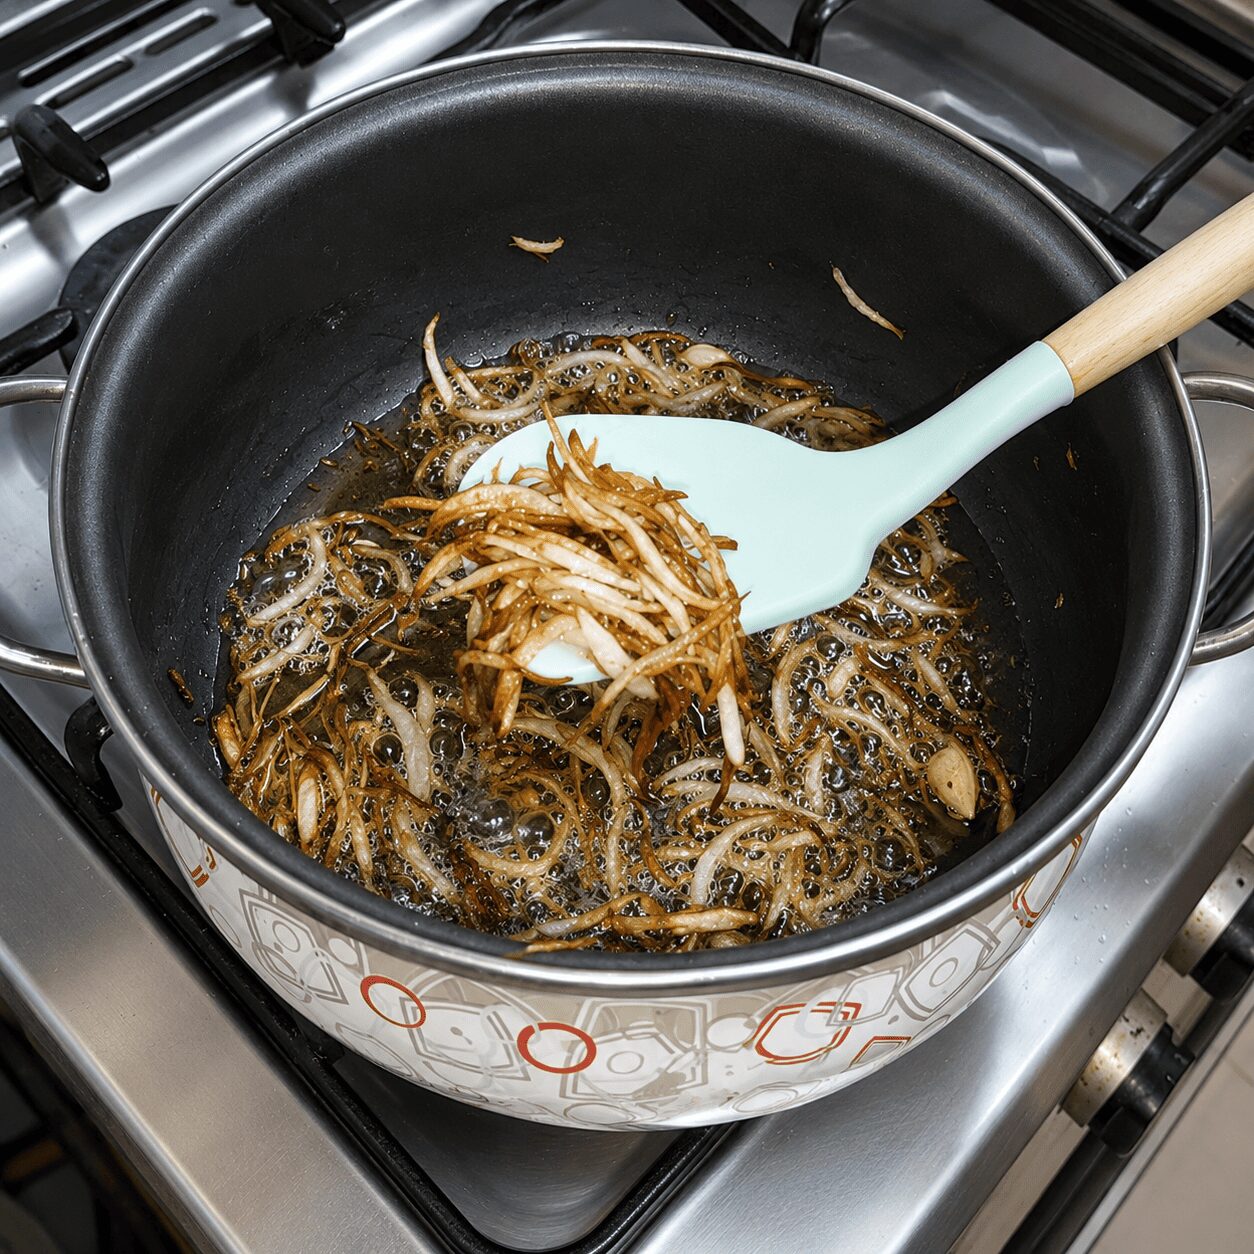
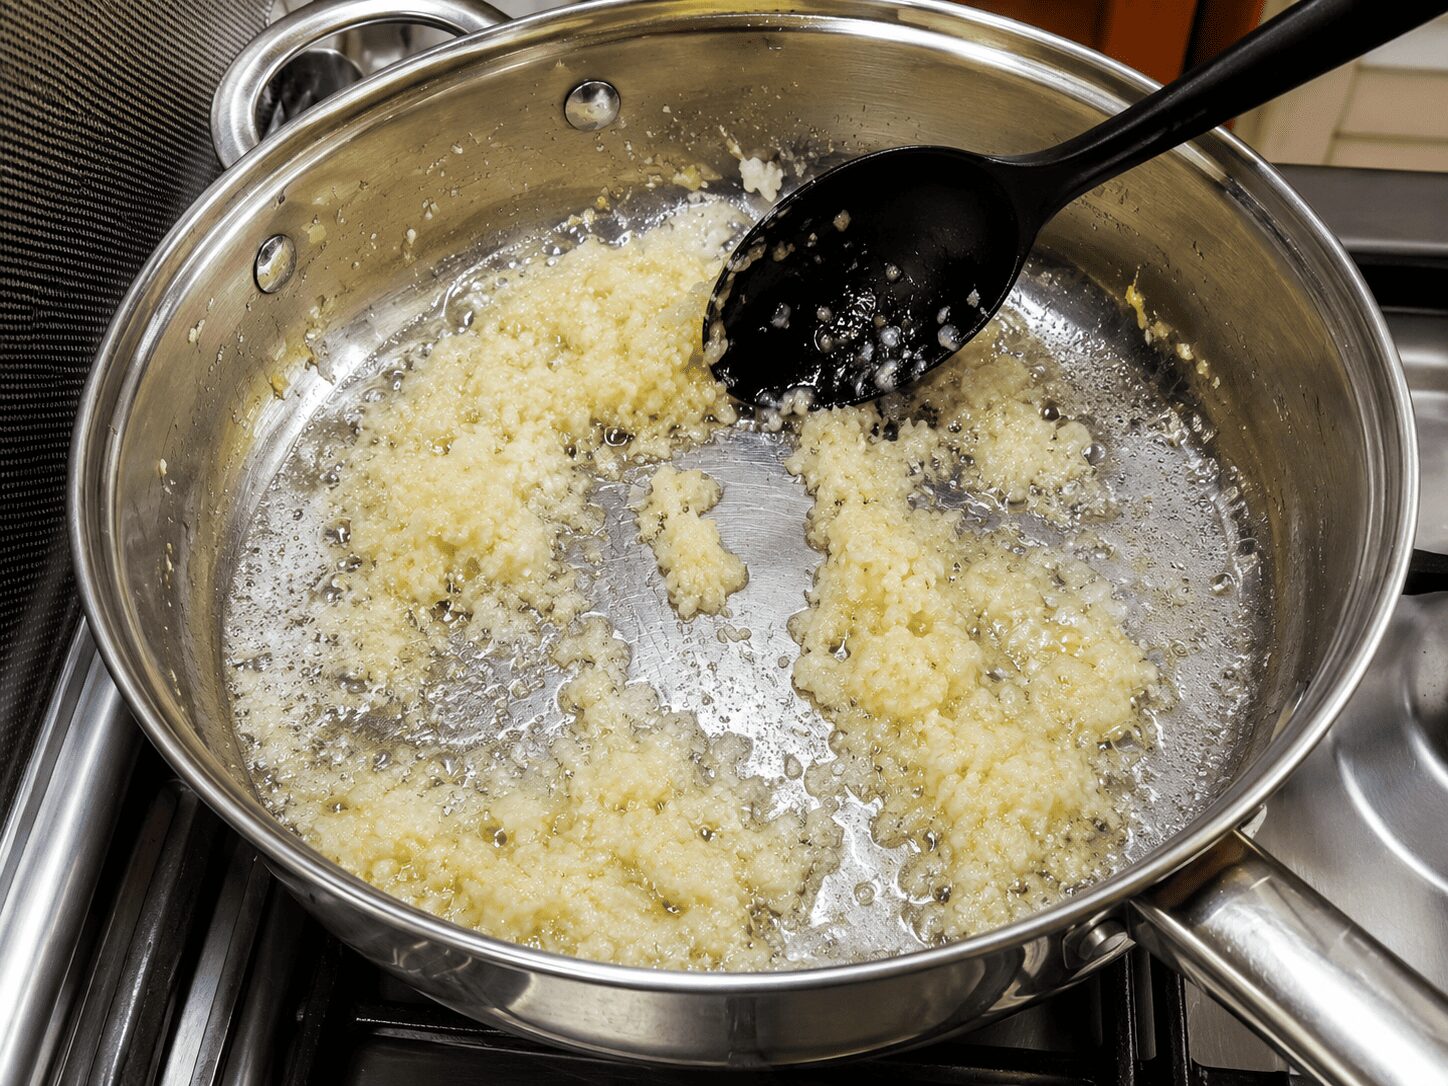
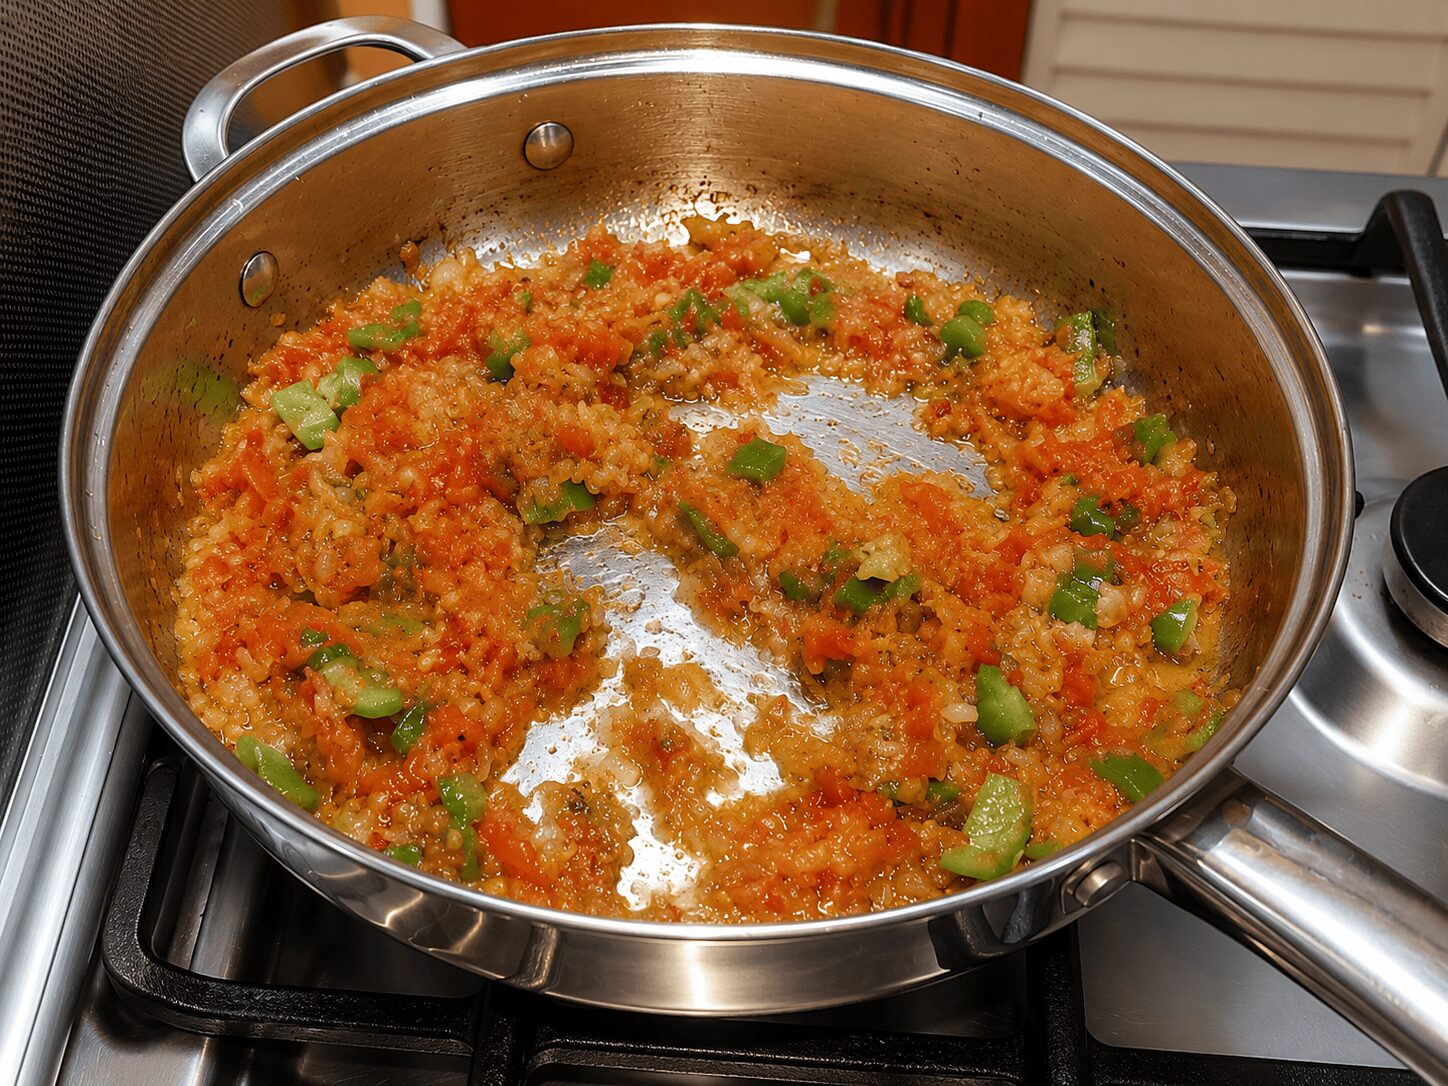
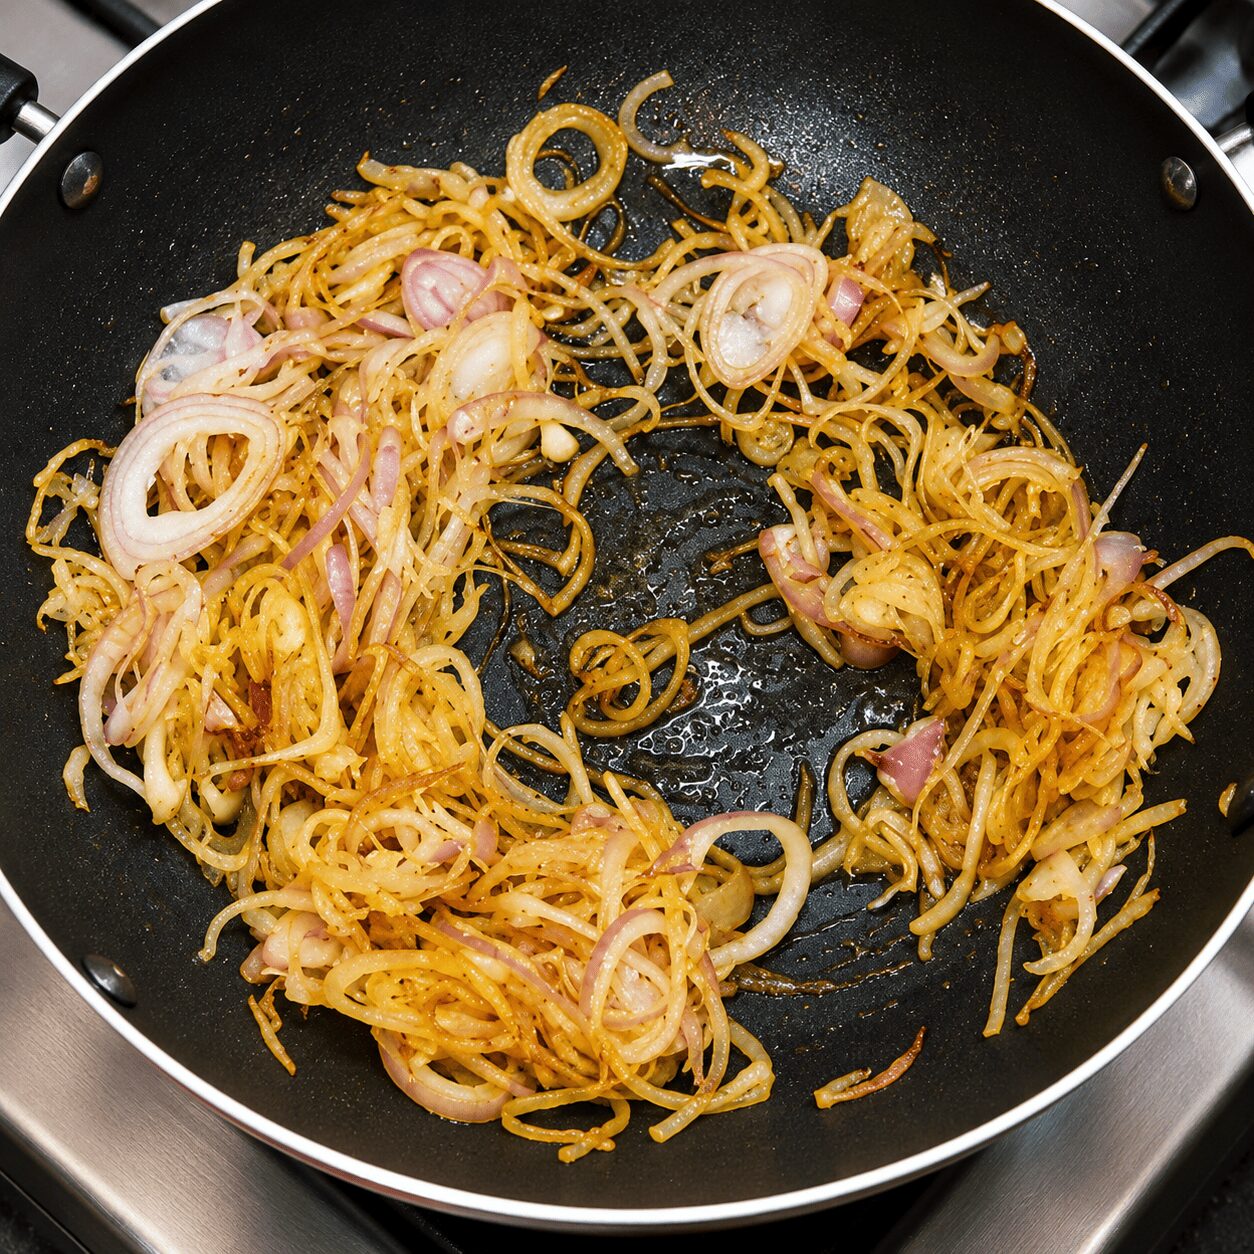
    Add the onion-garlic-ginger-chilli paste. Cook on medium flame, watching closely. As soon as it begins to change colour, add 2–3 tbsp water immediately to stop the cooking. This is the step that keeps the korma white.

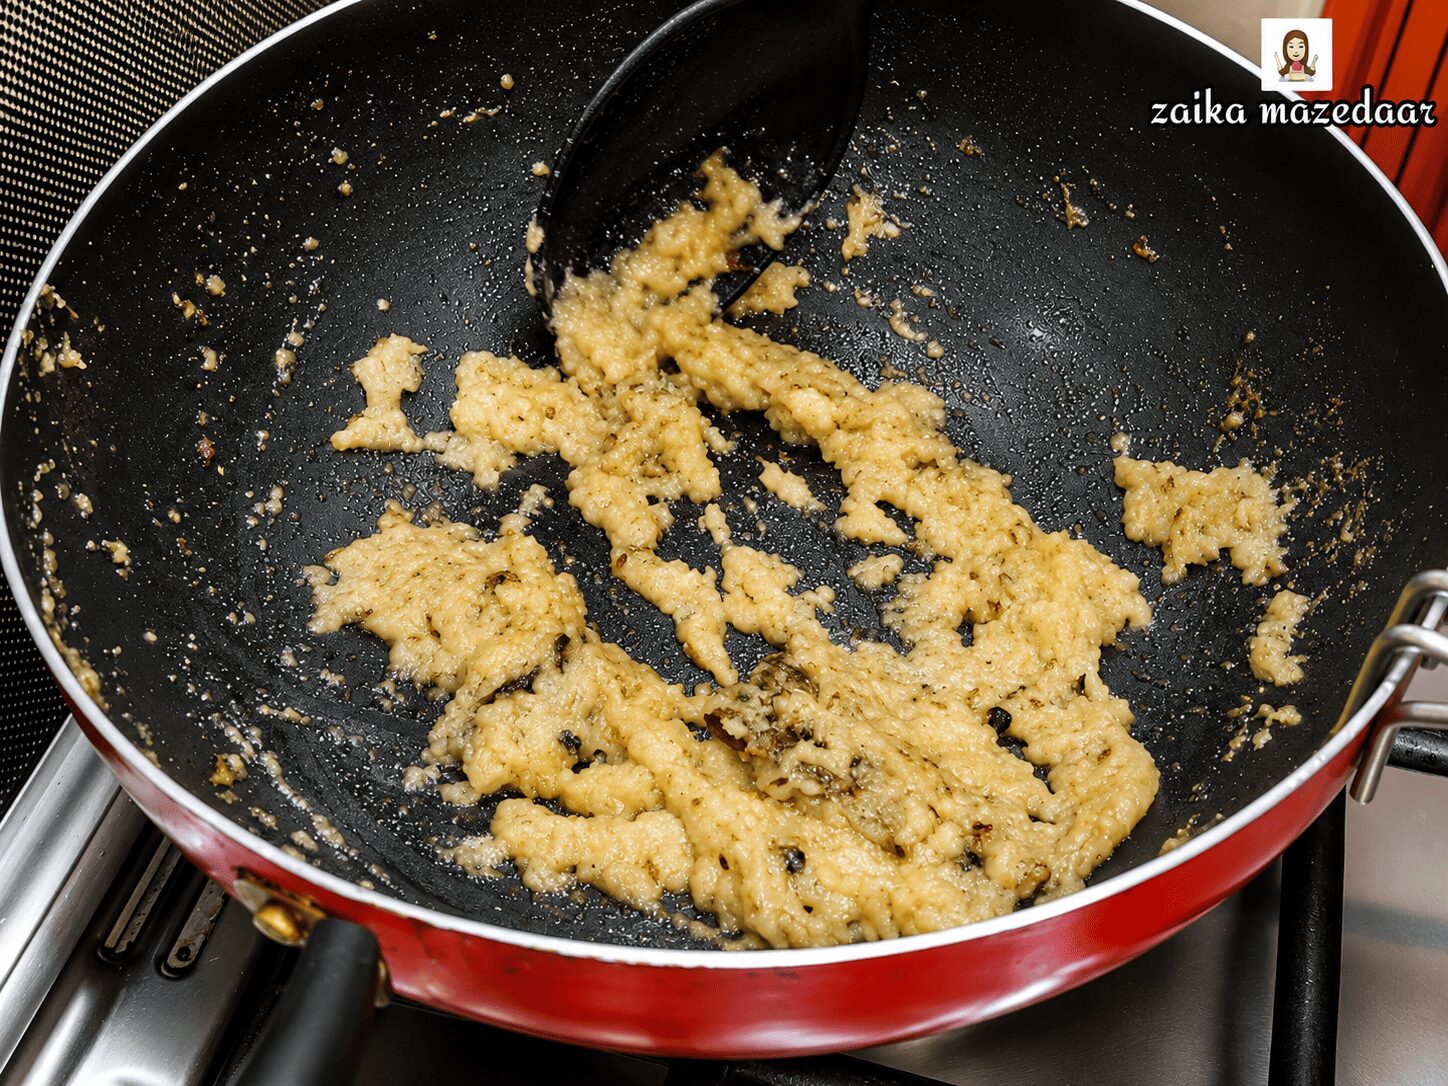
    This is the moment that matters mostLet the onion paste brown even slightly past this point, and the whole gravy shifts from white korma to an ordinary-looking korma. Watch for the very first hint of colour change, then add water right away.
    Onion paste cooked to pale golden — kept light for white korma base
    4

    Add the dry spices

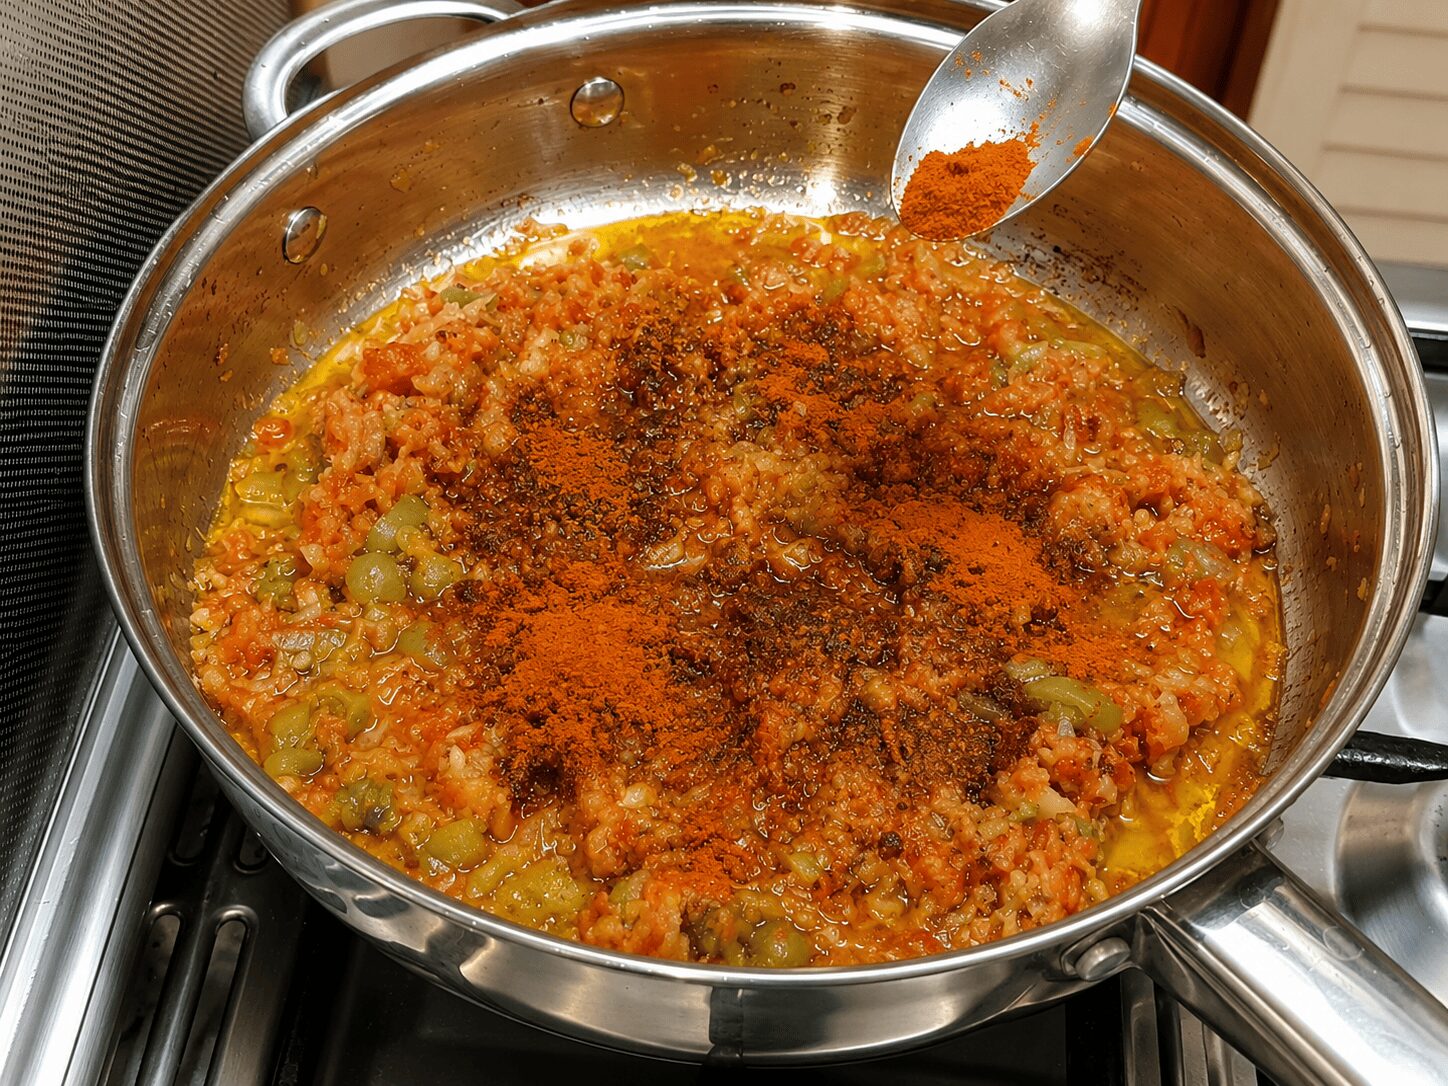
    Stir in the coriander powder, cumin powder, and white pepper. No red chilli powder and no tomato go into this recipe at all. Roast briefly until fragrant.

    5

    Add room-temperature yogurt on low flame

    Lower the flame fully. Add the well-beaten, room-temperature yogurt, stirring constantly. Cook until the raw yogurt smell is gone and the oil begins to separate.

    Both conditions, togetherRoom-temperature yogurt and low flame both have to be true at the same time. Either one alone isn’t enough to reliably prevent the gravy from splitting.
    6

    Add the cashew-almond paste and bhuno

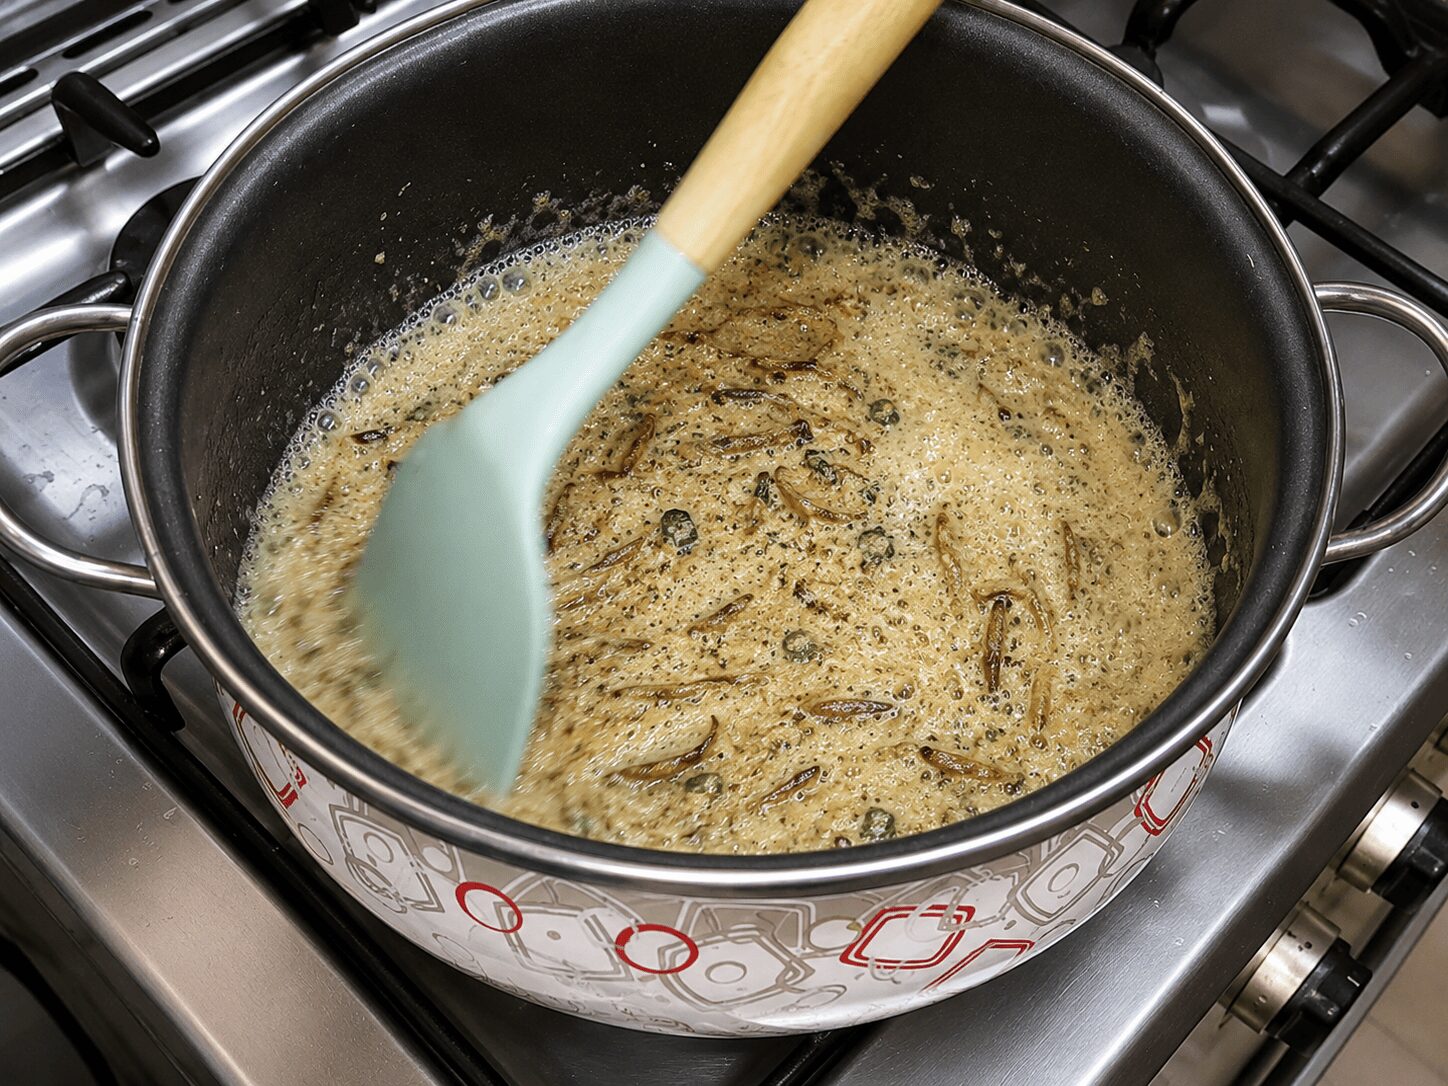
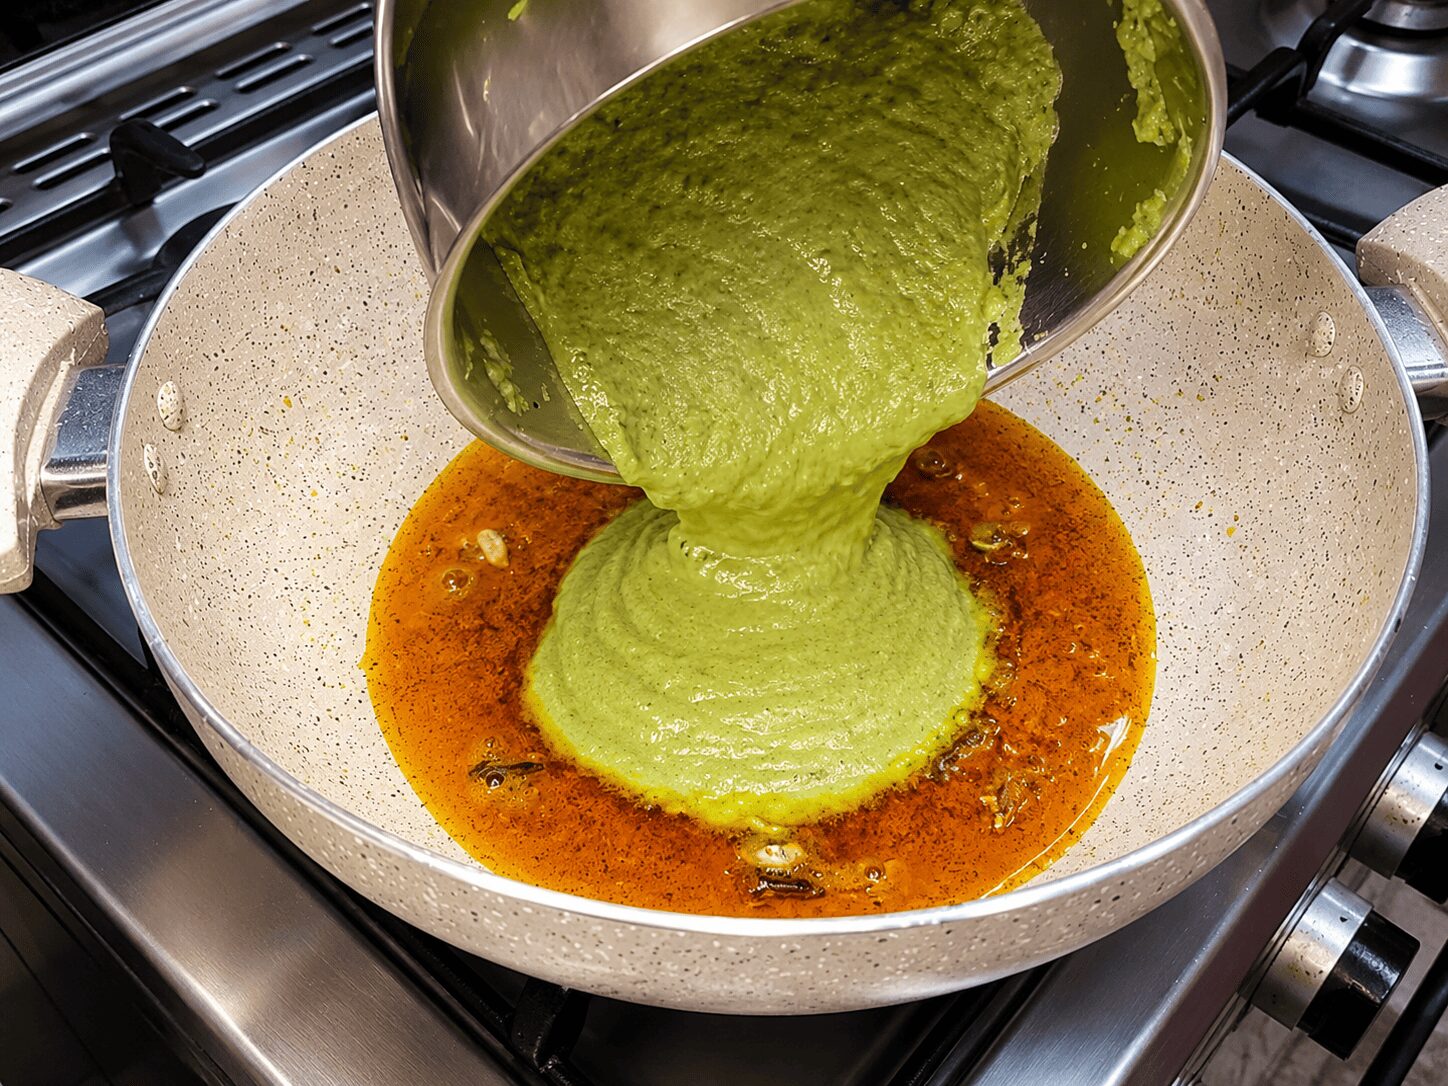
    Add the cashew-almond paste, a little water to adjust consistency, and salt to taste. Cover and cook on medium flame for 7–8 minutes, until the masala is well-cooked, the oil resurfaces, and the whole-spice aroma fully develops.

    7

    Loosen the gravy and add the cream

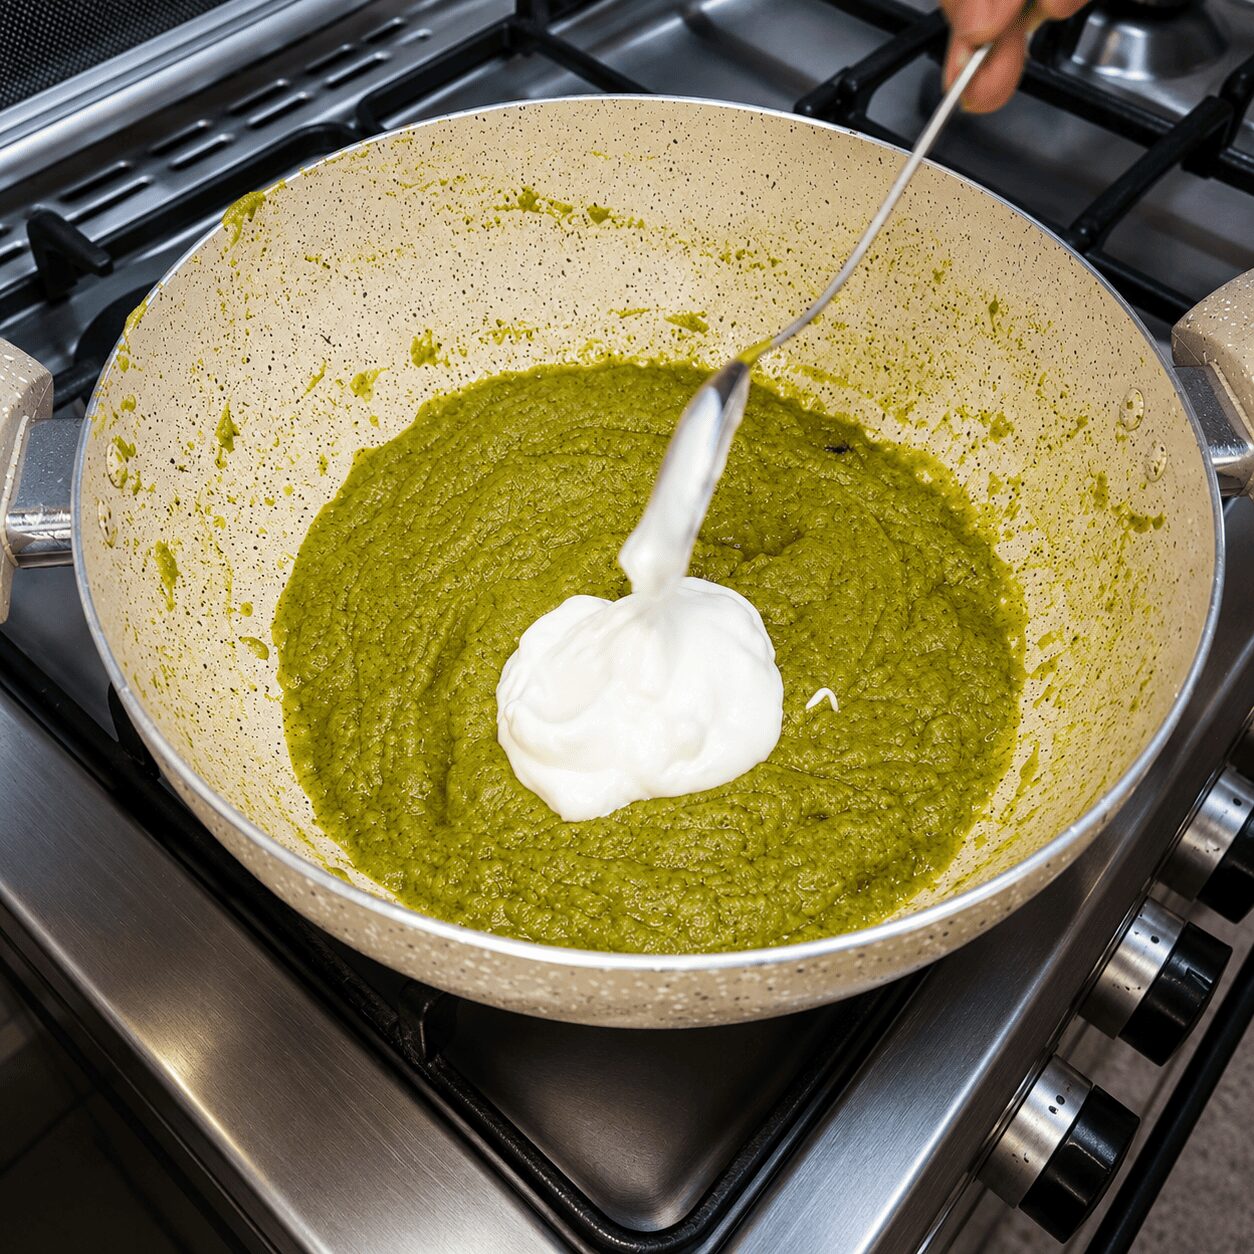
    Add water again to reach your preferred gravy thickness. Stir in the cream, garam masala powder, kasuri methi, and the optional pinch of sugar. Mix well and cook the cream for a full 2–3 minutes — don’t skip this.

    Cook the cream, don’t just stir it inFolding cream through cold and serving immediately leaves a faint raw, cloying taste behind. Two to three full minutes of cooking removes it completely.
    8

    Add the eggs and finish

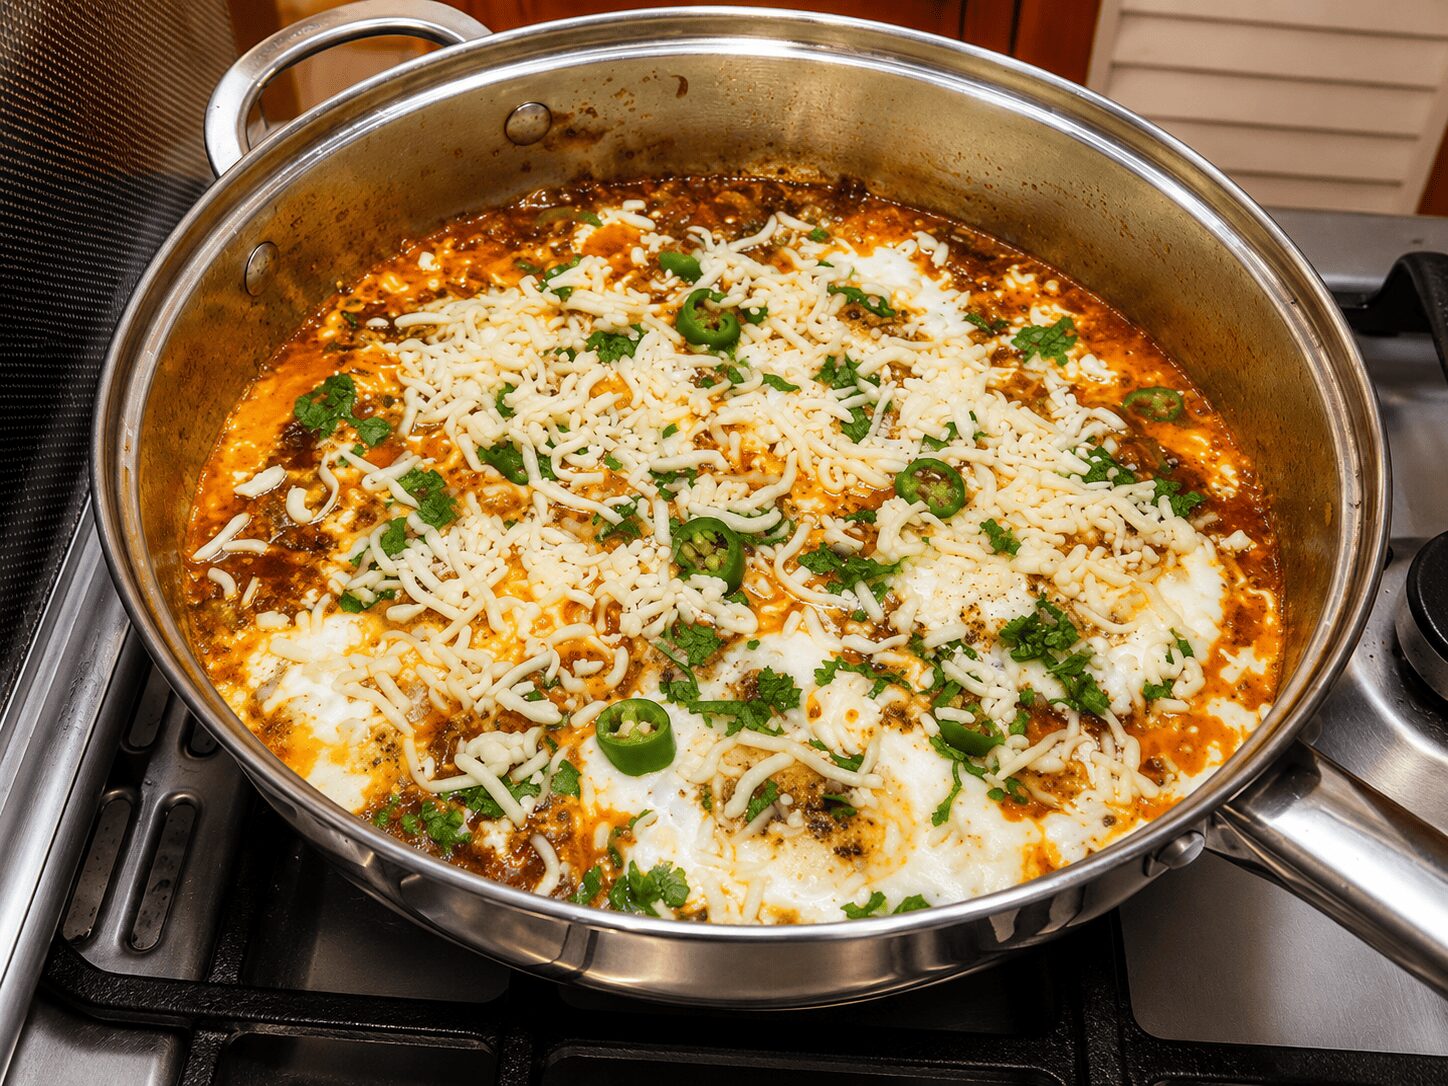
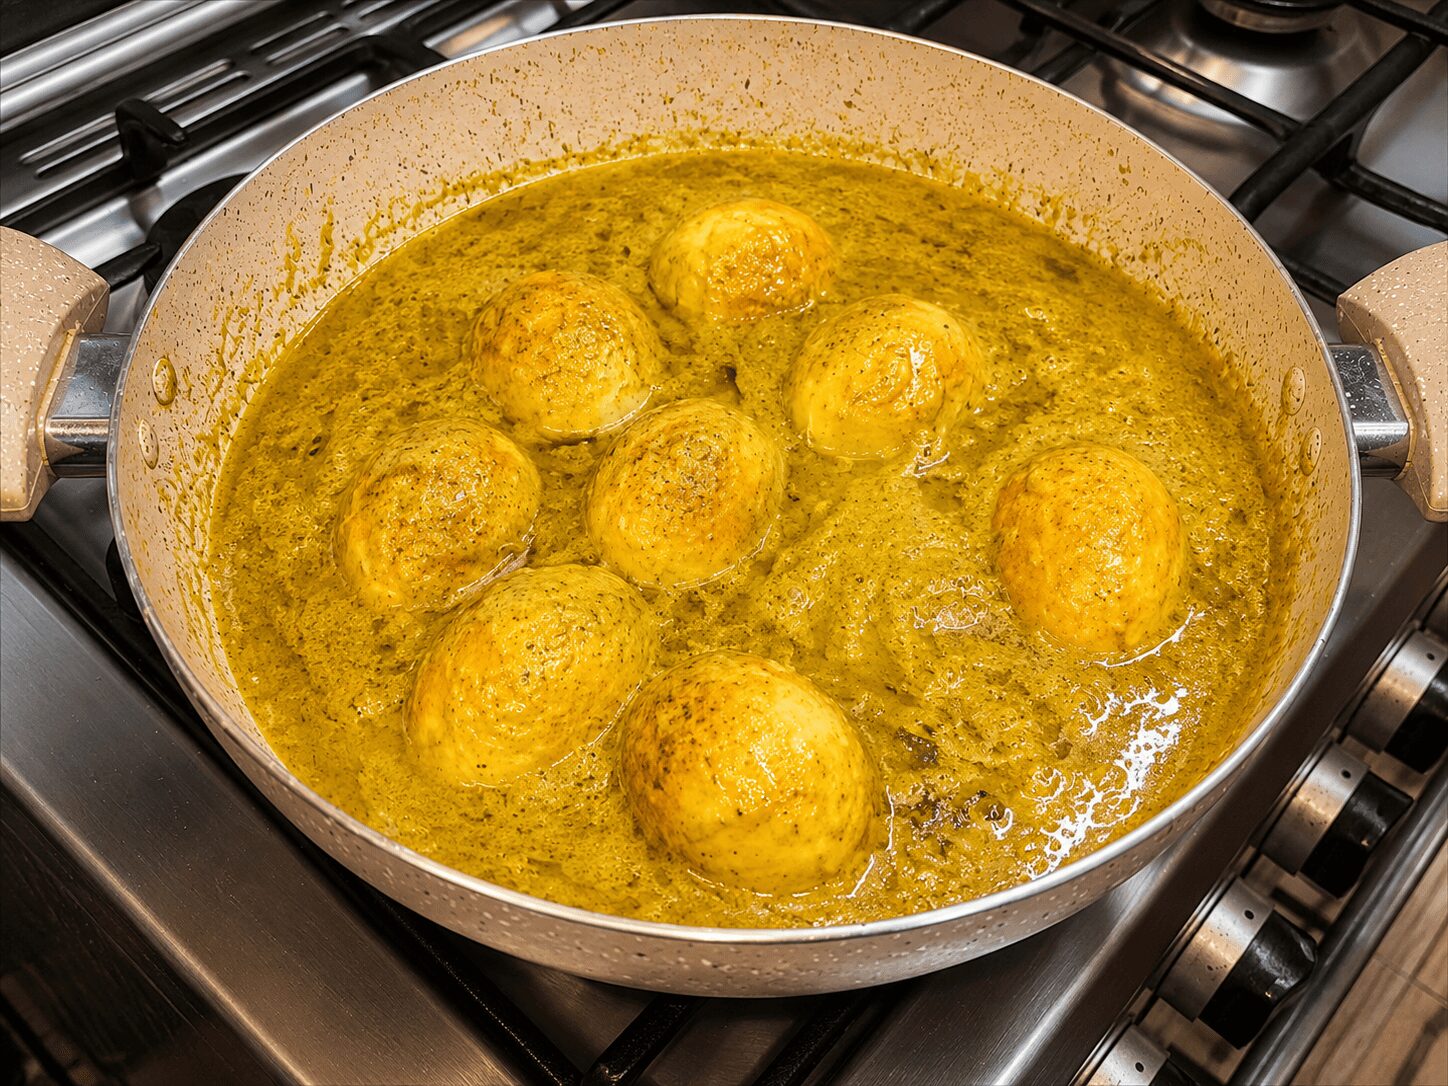
    Add the fried eggs and fresh coriander. Mix gently. Cover and cook on low flame for 3–4 minutes, so the gravy absorbs into the cuts in the eggs and the oil resurfaces. Dish out.

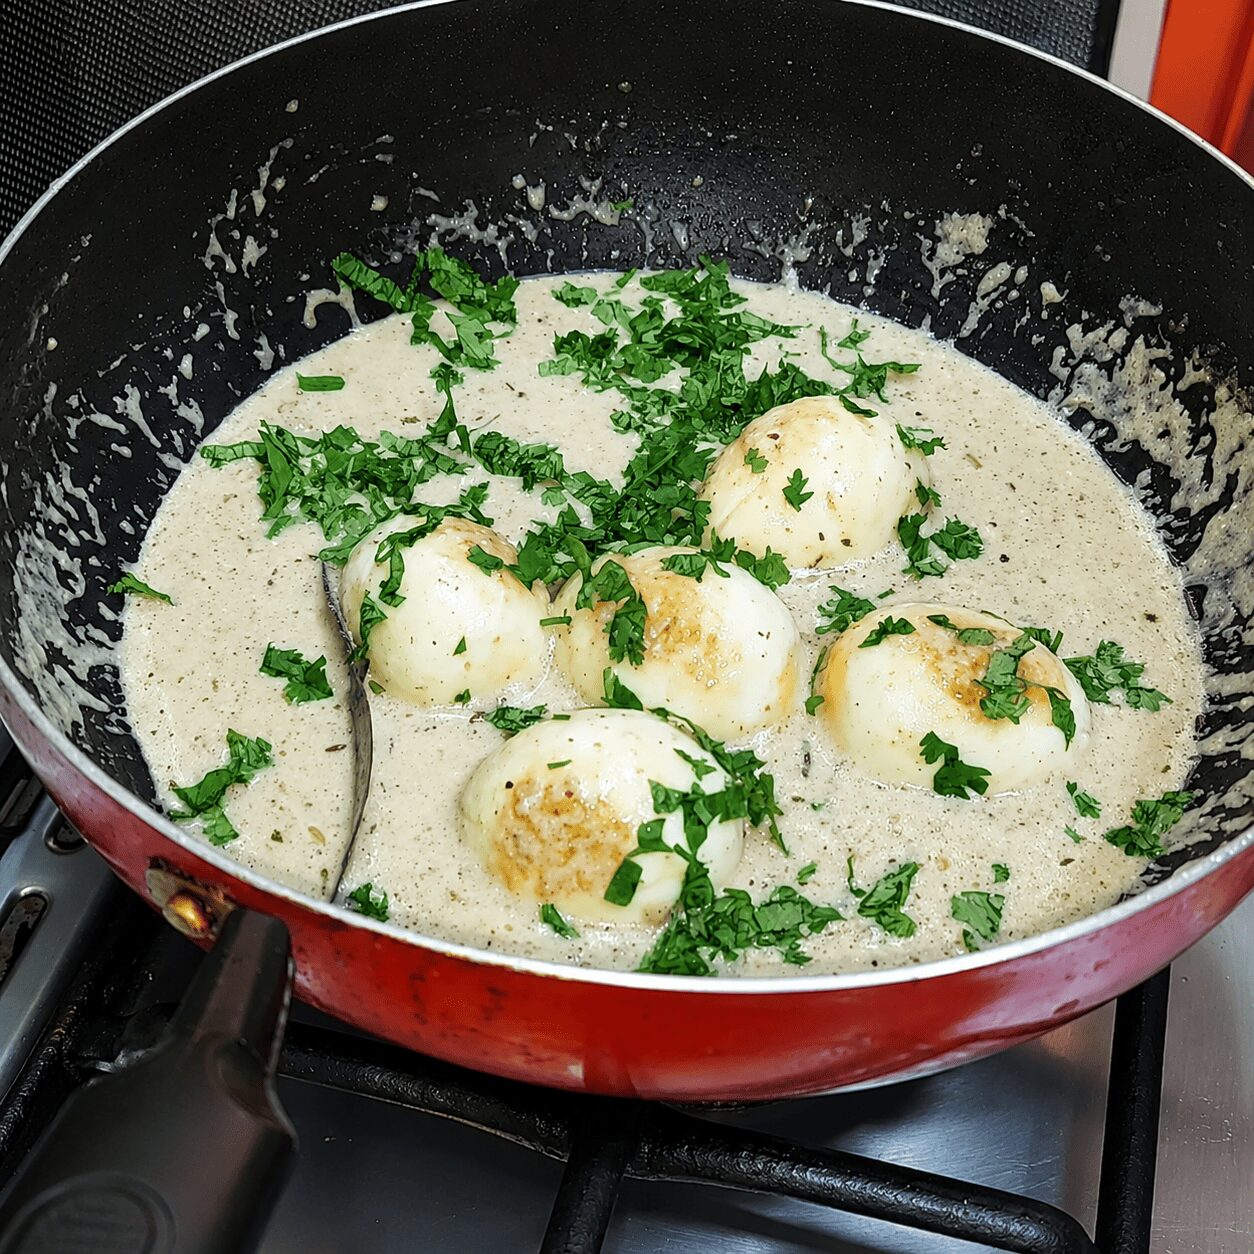
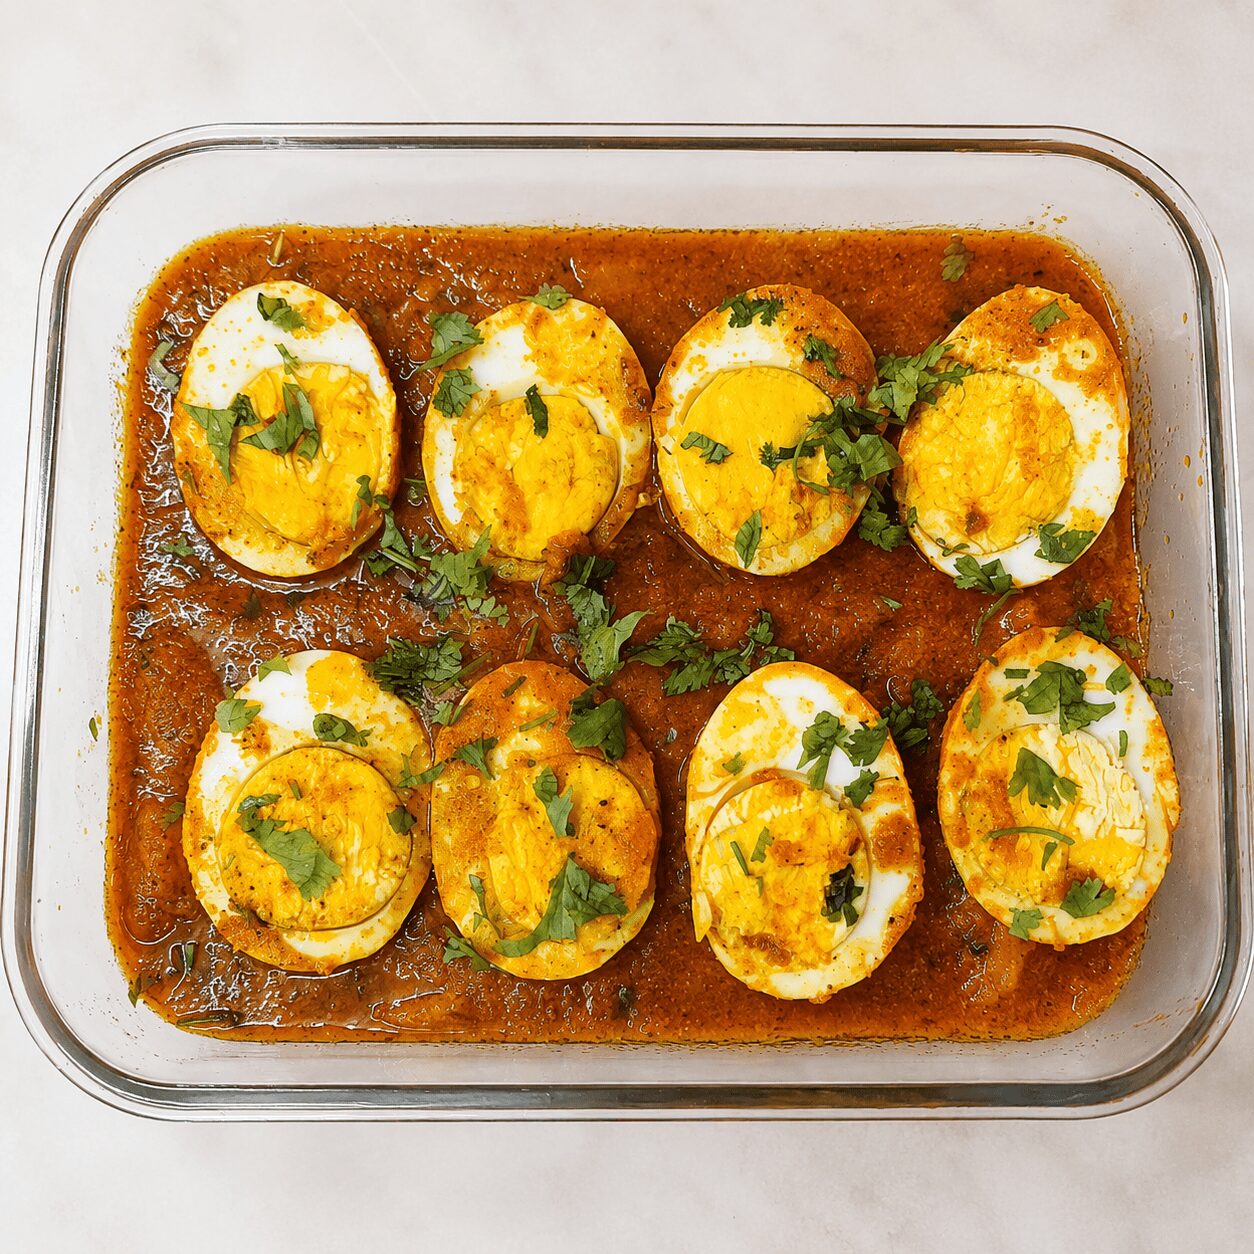
    Finished Egg White Korma garnished with fresh coriander — Zaika Mazedaar

    6 Things That Keep This Korma White and Silky

    1. Soak the nuts before you start anything else — 15–20 minutes
    2. Take yogurt and cream out of the fridge early, so they reach room temperature
    3. Stop the onion paste from browning with a splash of water the moment it starts to deepen
    4. Use white pepper, not red chilli — anywhere in this recipe
    5. Add yogurt on LOW flame only, never higher
    6. Cook the cream for 2–3 full minutes before adding the eggs

    The One Mistake That Turns White Korma Beige

    Letting the onion paste brown.

    Most curries actively want a browned onion base — this one specifically doesn’t. The water-stop technique exists precisely to interrupt that browning the moment it begins. Wait too long, even by twenty or thirty seconds, and the whole gravy shifts from a genuine pale ivory to a beige that just looks like an ordinary korma.

    Two related mistakes round this out: adding cold yogurt on anything above low flame, which splits the gravy almost immediately, and skipping the 2–3 minute cream-cooking step, which leaves a raw, cloying smell behind in the finished dish.

    For Beginners

    If sourcing or soaking nuts feels like too much for a first attempt, skip the cashew and almond paste entirely and add a touch more cream instead. The gravy will be slightly less rich and the texture a little smoother rather than velvety, but it will still be a genuine white korma.

    For Confident Home Cooks

    Add a small pinch of javitri (mace) along with the whole spices at the start for a more complex, layered Mughlai aroma. It’s not used in the original recipe, but it sits naturally alongside the existing whole-spice blend.

    What to Serve Egg White Korma With

    Naan is the natural match for a gravy this rich, and sheermal — the slightly sweet, saffron-tinted Mughlai flatbread — is an even more fitting pairing if you want to lean fully into the dish’s restaurant-style identity. Plain basmati or jeera rice both work well too, especially for a quieter weeknight version of the same meal.

    This is genuinely a dinner-party dish — it looks and tastes restaurant-level while staying entirely home-cooked, and it makes a graceful non-meat alternative to a white chicken korma when you’re planning a mixed-diet table. If you’re building out a bigger spread, our Anda Dum Biryani pairs beautifully alongside it, and Anglo-Indian fans may also enjoy our Chicken Egg Dak Bungalow for a second rich, egg-forward main on the table.

    Got leftover gravy the next day? Don’t waste it — spoon it into a roti or paratha the way we do in our Anda Paratha Roll, which turns a small amount of leftover curry into a completely different, portable meal.

    Storage, Reheating & Make-Ahead

    SituationGuidance
    Fridge storageUp to 2 days in an airtight container
    FreezingNot recommended — the cream-and-nut gravy tends to separate on thawing
    ReheatingGentle reheat on the stovetop with a splash of water; avoid microwaving on high, since cream-based gravies can split under high, uneven heat
    Make-ahead strategyThe base gravy (through the cashew-almond and cream stage) can be made a day ahead and refrigerated; reheat gently, then add fresh fried eggs just before serving

    Always reheat on the stovetop rather than the microwave if you can — it gives you the control needed to keep a cream-based gravy from splitting.

    Myth vs. Fact: Do You Need Both Cashews AND Almonds, or Can You Use Just One?

    A proper korma absolutely needs both cashews and almonds together — that’s what makes the paste work.

    Either nut works fine on its own. If you only have one of the two, use just that one — the gravy will still come together with good body and richness. If you have neither, skip both entirely and add a little extra cream instead. The flavour and texture will differ slightly each way, but none of these variations stops the dish from being a recognisable, genuine white korma.

    Egg Malai Curry vs. Reshmi Anda Cashew Curry vs. Egg White Korma

    If none of these three feel quite right for the occasion, our Mughlai Shahi Egg Curry is worth a look too — it leans further into whole-spice richness with a fuller, more festive gravy, sitting alongside this trio as a fourth Mughlai-style option.

    FeatureEgg Malai CurryReshmi Anda Cashew CurryEgg White Korma
    BaseOnion + green chilli pasteOnion-cashew-garlic-ginger paste, blended smoothOnion-garlic-ginger-chilli paste, deliberately kept pale
    Chilli typeGreen chilliGreen chilliWhite pepper — no red chilli at all
    NutsNoneCashewCashew + almond
    Cream / dairyRoom-temperature milkYogurtYogurt + fresh cream
    ColourLight, milkySilky, medium-richPale ivory, no red or orange tones
    ComplexitySimple, quickModerateMore involved — two pastes, two temperature-sensitive stages
    Best served withRoti, plain riceNaan, jeera riceNaan, sheermal, basmati rice

    Nutrition Snapshot (Estimated per serving)

    NutrientEstimated Amount
    Calories~310–350 kcal
    Protein~12–15 g
    Fat~24–28 g
    Carbohydrates~9–12 g
    SodiumVaries with salt added

    Figures are estimated and will vary based on exact oil quantity, egg size, and the cashew-to-almond ratio used. These are not a substitute for individualised nutritional advice. Per-egg and cashew/almond nutritional data is available via USDA FoodData Central.

    Frequently Asked Questions

    What is egg white korma?

    Egg white korma — also called anda malai korma — is a Mughlai-style egg curry built on a pale onion base, cashew-almond paste, white pepper, and a fresh cream finish. It contains no red chilli and no tomato, which is what keeps the gravy pale ivory rather than red or orange.

    Why is this korma “white” — what keeps the colour pale?

    Three things, together: the onion-garlic-ginger-chilli paste is cooked only until it just starts to change colour, then stopped immediately with a splash of water; white pepper replaces red chilli entirely; and no tomato goes into the gravy at any stage. Remove any one of those three, and the gravy starts drifting toward a more typical korma colour.

    Why use white pepper instead of red chilli?

    White pepper adds genuine warmth and a mild background heat without contributing any colour at all, which is exactly why it’s the traditional Mughlai choice for a dish meant to stay pale. Red chilli would add both heat and a reddish tint, undoing the entire point of a white korma.

    Can I skip the cashew and almond paste?

    Yes. If you only have one of the two nuts, use just that one. If you have neither, skip both entirely and add a little extra cream in their place. The texture and richness will differ slightly, but the gravy will still be a genuine white korma.

    How do I stop the yogurt from splitting when I add it?

    Two conditions, both required at once: bring the yogurt to room temperature before adding it, and make sure the flame is on low when it goes in. Either condition alone isn’t reliable — you need the yogurt warm enough and the heat gentle enough at the same time, with constant stirring as it goes in.

    What’s the difference between this, egg malai curry, and reshmi anda curry?

    Egg Malai Curry uses an onion-green chilli base with room-temperature milk — no cream, no cashews, no yogurt — making it the lightest and quickest of the three. Reshmi Anda Cashew Curry blends an onion-cashew-garlic-ginger paste with a yogurt base for a silky, medium-rich result. Egg White Korma is the most restrained: no red colour anywhere, a deliberately pale onion base, white pepper instead of red chilli, and cashew-almond paste plus cream for richness.

    Can I use store-bought cream or does it have to be fresh?

    Store-bought fresh cream works perfectly well, and home-made malai is an equally good substitute in the same quantity. What matters more than the source is cooking the cream for a full 2–3 minutes once it’s added, regardless of which one you use, to cook off any raw or cloying taste.

    What’s the best bread to serve with a white korma?

    Naan is the easy, reliable choice, and sheermal — a slightly sweet, saffron-tinted Mughlai flatbread — is the more traditional match if you want to lean into the dish’s restaurant-style identity. Plain basmati or jeera rice both work well too, for a simpler weeknight version.

    Conclusion

    Egg White Korma is a good reminder of an older Mughlai instinct: building depth through richness — nuts, cream, white pepper — rather than through heat or colour. Once you understand the pale-onion technique, the water-stop that keeps it from browning, it opens up a register of Indian cooking that most home cooks never quite get to, because most recipes don’t ask you to actively resist the urge to brown your onions.

    Forty-five minutes from mise en place to table, two pastes, two temperature-sensitive moments to watch for — and a dish that looks and tastes like something from a Mughlai restaurant menu while staying entirely home-cooked. Follow the sequence — pale onion stopped with water, room-temperature yogurt on low flame, cream cooked properly rather than just stirred in — and the gravy will stay exactly as ivory and silky as it’s meant to be.

    Score the eggs before frying, let the cream cook its full two to three minutes, and trust the pale colour even when every instinct says to brown things further. That restraint is the entire dish.

    Recipe demonstrated and filmed in the Zaika Mazedaar kitchen. Watch the full video on the Zaika Mazedaar YouTube channel for a step-by-step visual walkthrough.

  • Chicken Egg Dak Bungalow Recipe

    Chicken Egg Dak Bungalow Recipe

    Zaika Mazedaar · Bengali-Style Chicken Curries

    Chicken Egg Dak Bungalow: Chicken, fried eggs, and potatoes simmered in mustard oil and a special whole-spice masala dry-roasted from scratch — genuinely unique, genuinely Bengali.

    Most chicken curry recipes lean on a pre-made masala blend — a spoonful from a box, stirred in somewhere near the middle of cooking. This one doesn’t, and that’s really the entire point of Chicken Dark Bunglow. A small batch of whole spices gets dry-roasted and ground from scratch while the chicken bhunoes, then added at the very end, so the aroma hits the gravy at its freshest instead of fading out over an hour on the stove.

    This recipe is demonstrated step-by-step in our video on the Zaika Mazedaar channel, filmed and cooked in a real kitchen — not assembled from recipe databases. A quick honest note before you start: this is a chicken recipe, but eggs and potatoes aren’t an afterthought here. They’re fried in the same mustard oil as the chicken from the very first step, which is exactly why this dish sits comfortably in both our chicken recipes collection and our egg recipes collection — eggs aren’t a garnish here, they’re fried in the same mustard oil as the chicken from the very beginning.

    What Is Chicken Dark Bunglow?

    Chicken Dark Bunglow is a Bengali-influenced chicken curry built around three core components — chicken, fried eggs, and fried potatoes — all simmered together in a single gravy. “Bunglow” is a regional recipe term used in this Bengali-influenced style, and the “dark” in the name refers to the deep, almost brown-red colour the gravy takes on from the dry-roasted whole-spice masala and the mustard oil base, not to any single dominant spice. The defining element is that special masala: Kashmiri chillies, whole coriander, cumin, cloves, black peppercorns, cinnamon, green cardamom, and mace, dry-roasted together and ground fresh for this exact recipe, then folded in near the end of cooking.

    Why This Recipe Works

    The site already has Anda Aloo Salan, an egg-and-potato curry — but Chicken Dark Bunglow is different in every meaningful way. Anda Aloo Salan is a North Indian homestyle curry with no chicken at all. This dish leads with chicken as the primary protein, carries a distinctly Bengali spice profile, and is built on a freshly ground whole-spice masala made from scratch rather than any pre-mixed blend. Mustard oil is also the explicitly authentic choice here, which gives the gravy a sharper, more pungent base note that mellows as it cooks. If you’d rather keep things purely egg-based, our Egg Malai Curry is a gentler, creamier alternative without any chicken at all.

    First: eggs and potatoes get the exact same treatment as the chicken. Both are dusted with turmeric, a pinch of hing, and red chilli powder, then fried together in the same mustard oil until they pick up a light brown coating. That shared treatment is what ties the whole dish together — by the time everything meets in the gravy, the flavours are already aligned.

    Second: the special masala is added at the end, not the beginning. Most curries bloom their whole spices early and let them simmer for the better part of an hour. Here, the dry-roasted masala goes in only after the chicken has bhunoed for ten minutes and the potatoes have rejoined the pot — which means its aromatic top-notes are still intact when the dish reaches the table.

    Most chicken curry recipes use a pre-made masala blend — this one doesn’t, and that’s the entire point.

    Ingredients

    For the Chicken Marinade

    • 1 kg chicken, large pieces
    • 1 tsp coriander powder (heaped)
    • 1 tsp red chilli powder (this is a legitimately spicy recipe — adjust to your taste)
    • 1 tsp turmeric powder
    • 1 tsp cumin powder
    • Salt, to taste
    • 2 tbsp garlic-ginger paste
    • 4 tbsp yogurt (dahi)

    For Frying

    • ½ cup mustard oil (the authentic Bengali choice — refined oil works as a substitute)
    • 3 medium potatoes, cut into large pieces
    • Boiled eggs (4–5, to match the chicken quantity)
    • Turmeric powder, a pinch, for dusting eggs and potatoes
    • Hing (asafoetida), 2 pinches
    • ¼ tsp red chilli powder, for dusting eggs and potatoes

    For the Gravy Base

    • 3 green cardamom pods
    • 2 small pieces cinnamon
    • 2 large onions, finely sliced
    • 2 medium tomatoes, roughly chopped
    • 1 tsp garlic-ginger paste (in addition to the marinade)
    • ½ tsp turmeric powder
    • Red chilli powder, to taste (adjust for cumulative heat across marinade, frying, and gravy)
    • 1 tsp salt, plus more to adjust later
    • 1–1½ cups water (more for a thinner gravy with rice, less for roti or naan)

    For the Dark Bunglow Special Masala

    • 3 Kashmiri red chillies (use regular dried red chillies for a more intensely spicy, traditional Bengali heat)
    • 1 tbsp coriander seeds (sabut dhaniya)
    • 1 tbsp cumin seeds (jeera)
    • A few cloves (laung)
    • A few black peppercorns (kali mirch)
    • Cinnamon, a small piece
    • Green cardamom (hari elaichi), a few pods
    • Mace (javitri), a small piece
    • 1–2 tbsp water, only if needed to help grinding

    For the Finish

    • Fresh green chillies, for aroma
    • Fresh coriander, chopped

    Ingredient Substitutions

    IngredientSubstituteEffect on Taste / Texture
    Mustard oilRefined oilThe distinctive pungent-mellow character of mustard oil changes significantly; flavour will be noticeably milder
    Kashmiri red chilliesRegular dried red chilliHeat increases dramatically; colour stays roughly similar
    Mace (javitri)A small pinch of nutmegSimilar warmth profile, slightly different aromatics
    Freshly ground special masalaCommercial garam masalaWorks in a pinch, but the depth of a freshly ground masala is genuinely different — the article won’t pretend otherwise

    Mise en Place Checklist

    Get all of this ready before turning on the flame. The special masala can actually be dry-roasted and ground a day or two ahead and stored in an airtight container — useful if you’d rather not multitask while the chicken bhunoes.

    • Chicken marinated, minimum 1 hour (2–3 hours in the fridge if time allows)
    • Potatoes cut into large pieces
    • Eggs boiled
    • Onions finely sliced
    • Tomatoes roughly chopped
    • Extra garlic-ginger paste measured (1 tsp, separate from the marinade)
    • Special masala ingredients measured into one bowl, ready to dry-roast
    • Fresh coriander and green chillies chopped
    • Wide kadhai or pan, ready on the hob

    Step-by-Step Method

    1

    Marinate the chicken

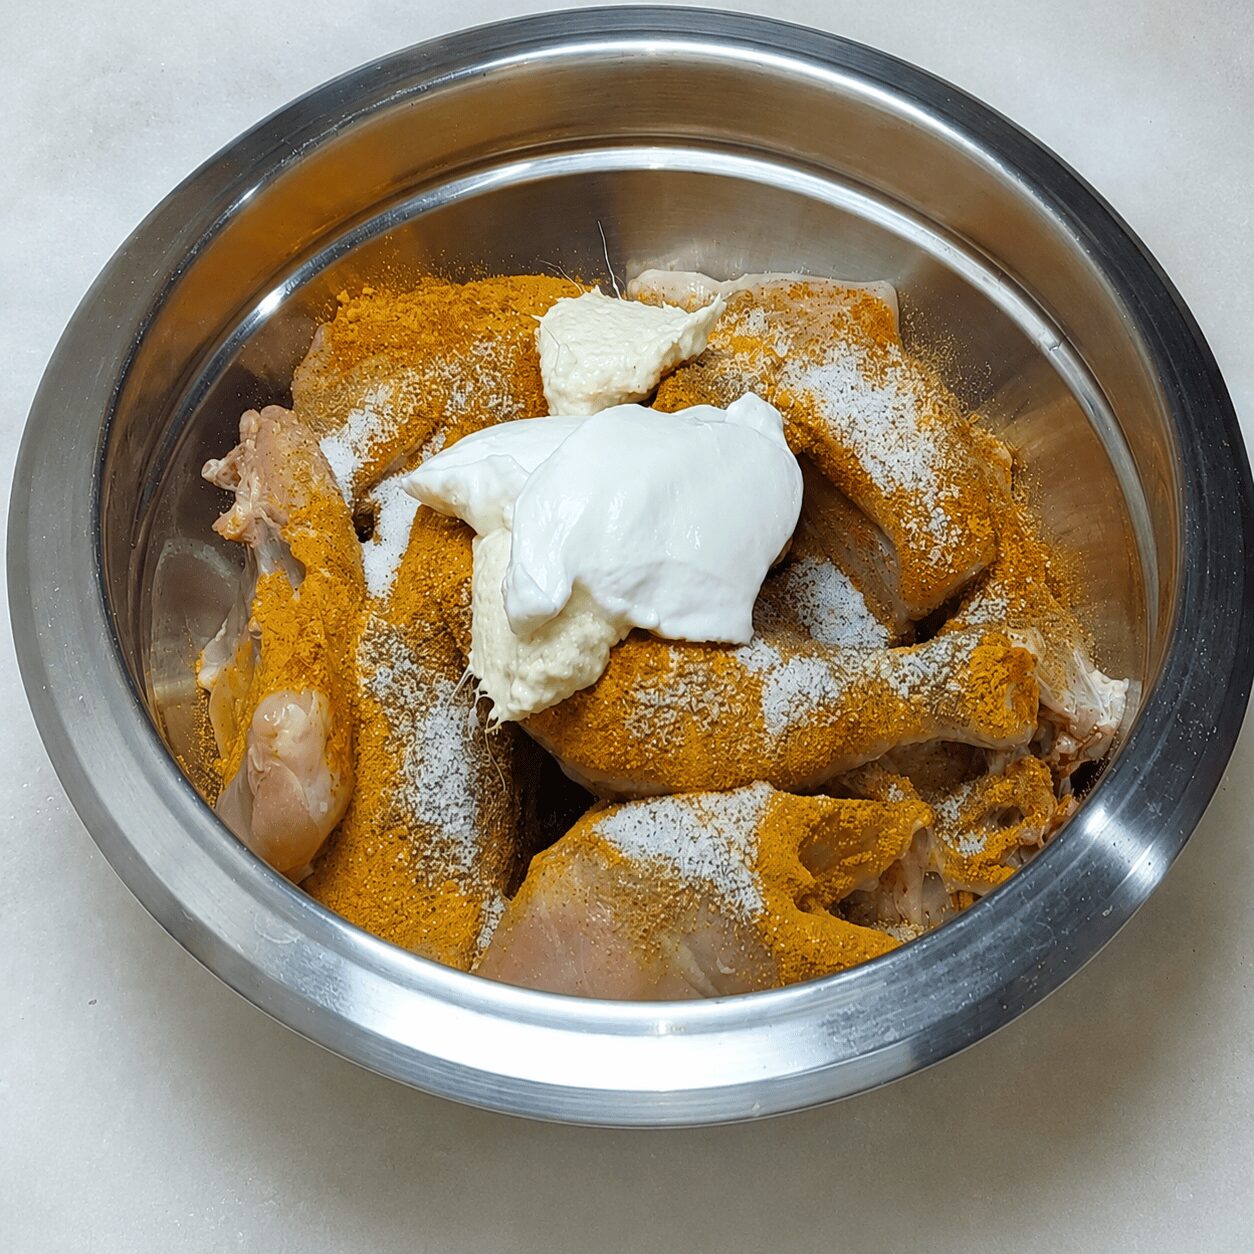
    Combine the chicken with coriander powder, red chilli powder, turmeric, cumin powder, salt, garlic-ginger paste, and yogurt. Coat well. Marinate for a minimum of 1 hour at room temperature, or 2–3 hours in the fridge if you have more time.

    Heat warningThis is a legitimately spicy recipe — the creator repeats this warning more than once. Scale the chilli powder back at every stage (marinade, frying, special masala) if you prefer it milder.
    Chicken marinating with yogurt, garlic-ginger paste, and spices for Chicken Dark Bunglow
    2

    Fry the eggs and potatoes together

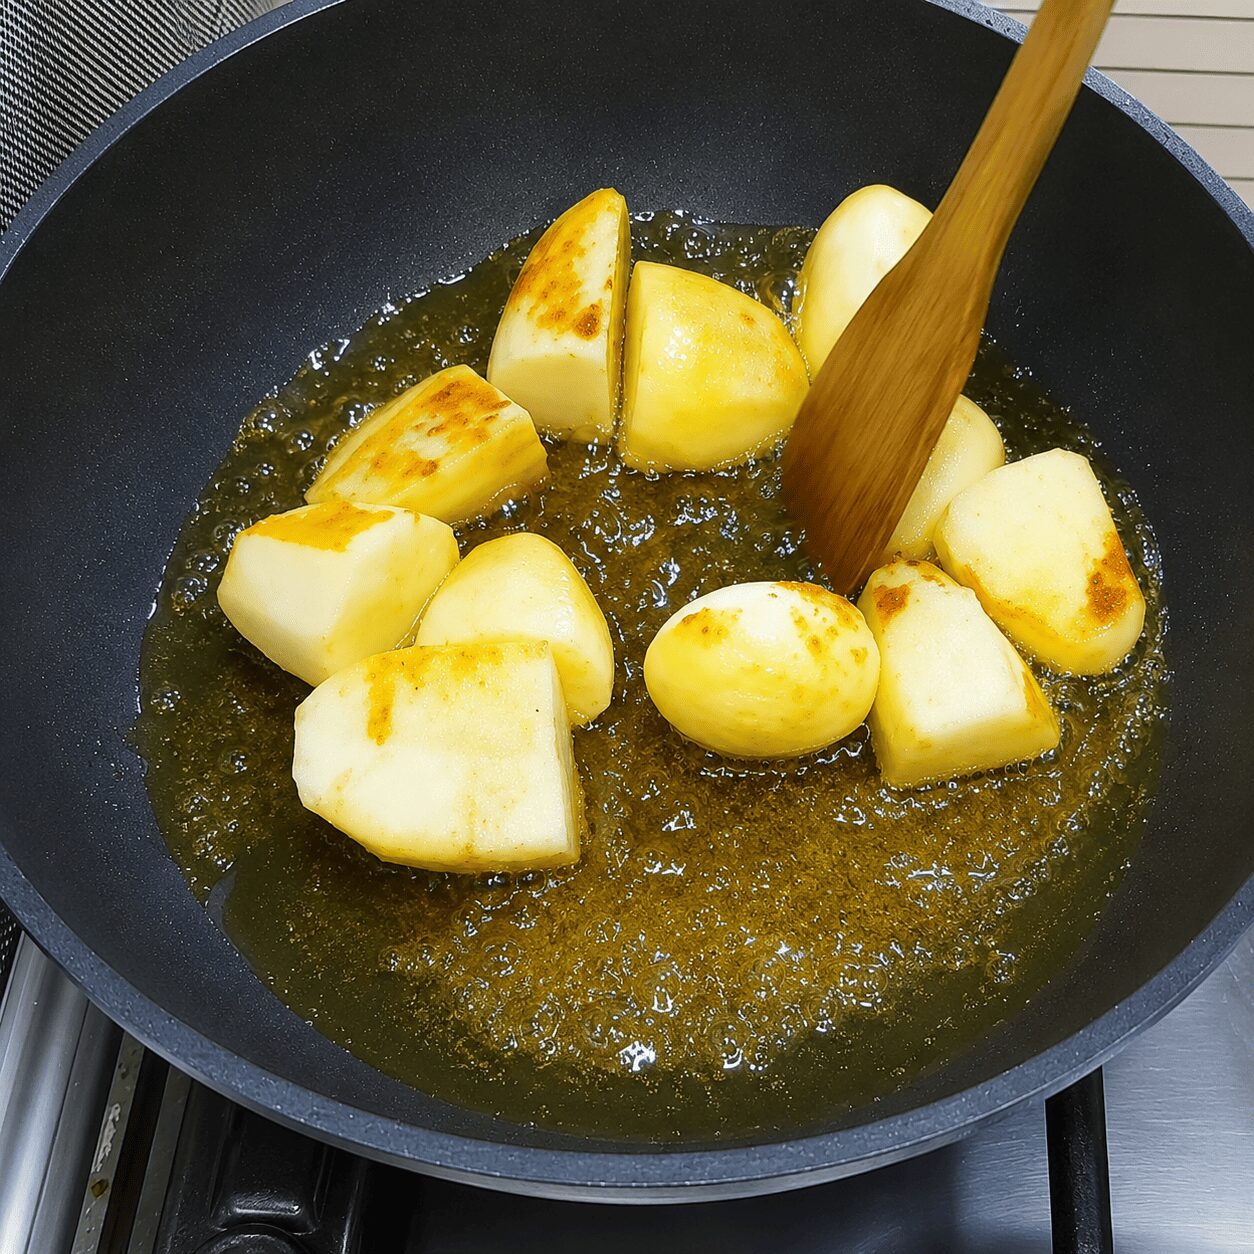
    Heat ½ cup mustard oil in a kadhai. Dust the boiled eggs and potato pieces with turmeric, hing, and red chilli powder. Fry both together on medium-to-high flame for 6–7 minutes, until a light brown coating forms on each. Remove and set aside on a separate plate.

    Same dusting, same oilEggs and potatoes get an identical turmeric-hing-chilli treatment in the same mustard oil. That shared coating is what ties their flavour to the chicken once everything meets in the gravy later.
    Boiled eggs and potato pieces frying together in mustard oil for Chicken Dark Bunglow
    3

    Temper whole spices, then brown the onions

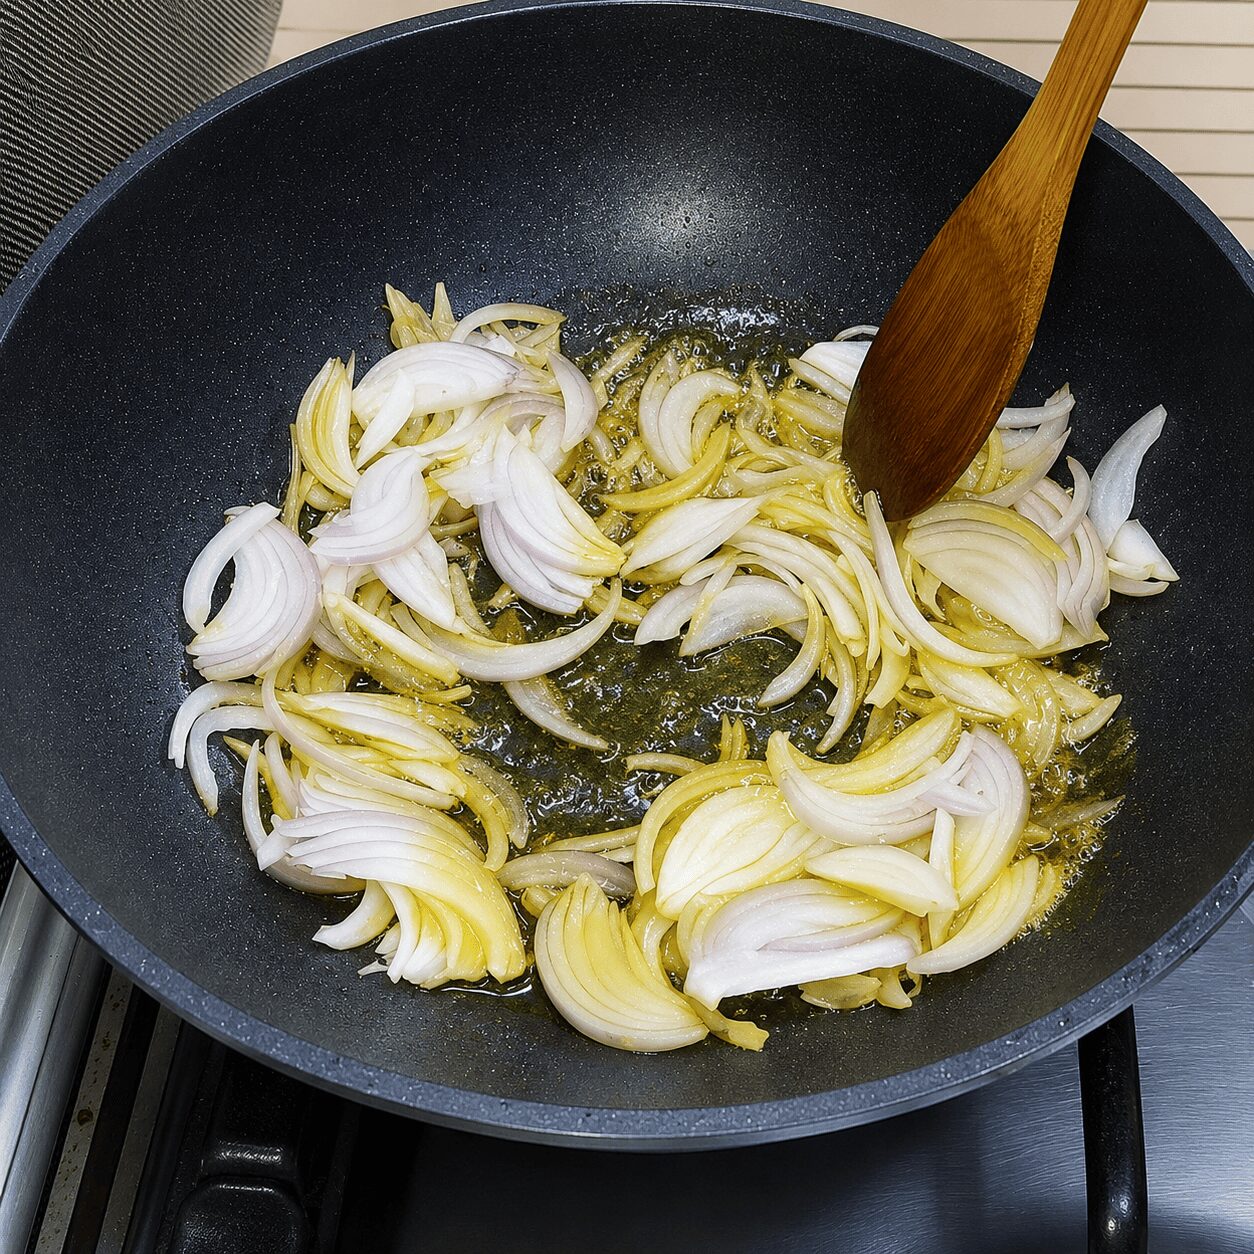
    In the same leftover oil, add the green cardamom and cinnamon. Fry for 30 seconds. Add the finely sliced onions and fry on medium-to-high flame until light golden.

    Sliced onions turning golden with green cardamom and cinnamon for Chicken Dark Bunglow
    4

    Cook the tomatoes down completely

    Add the chopped tomatoes along with the extra 1 tsp garlic-ginger paste — this second addition boosts the aroma beyond what the marinade alone provides. Add 1 tsp salt to help the tomatoes break down faster. Cover and cook until the tomatoes are completely musky and soft, mashing any stubborn pieces with the back of a spoon.

    5

    Bloom the gravy spices and add the chicken

    Stir in ½ tsp turmeric powder and red chilli powder to taste, keeping in mind the chilli already in the marinade and the special masala still to come. Add the marinated chicken. Bhuno on medium-to-high flame for 10 minutes, since the chicken pieces here are cut large.

    Use those 10 minutes wellWhile the chicken bhunoes, this is exactly when to dry-roast and grind the special masala in the next step — efficient time management, not an extra task tacked on afterward.
    6

    Dry-roast the special masala

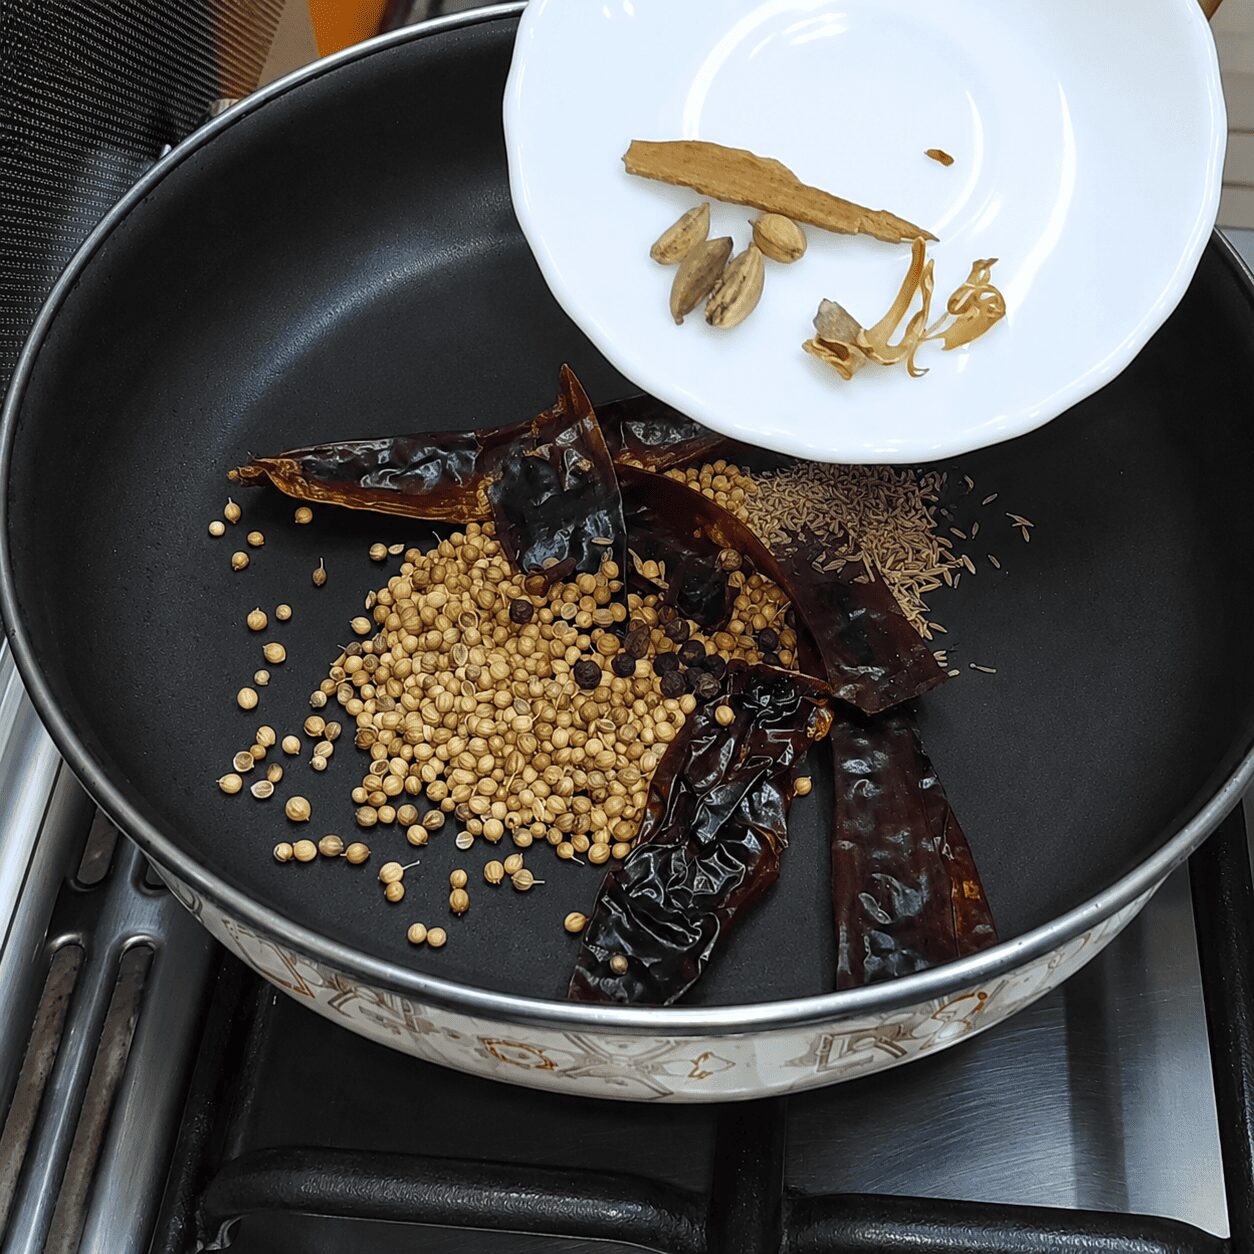
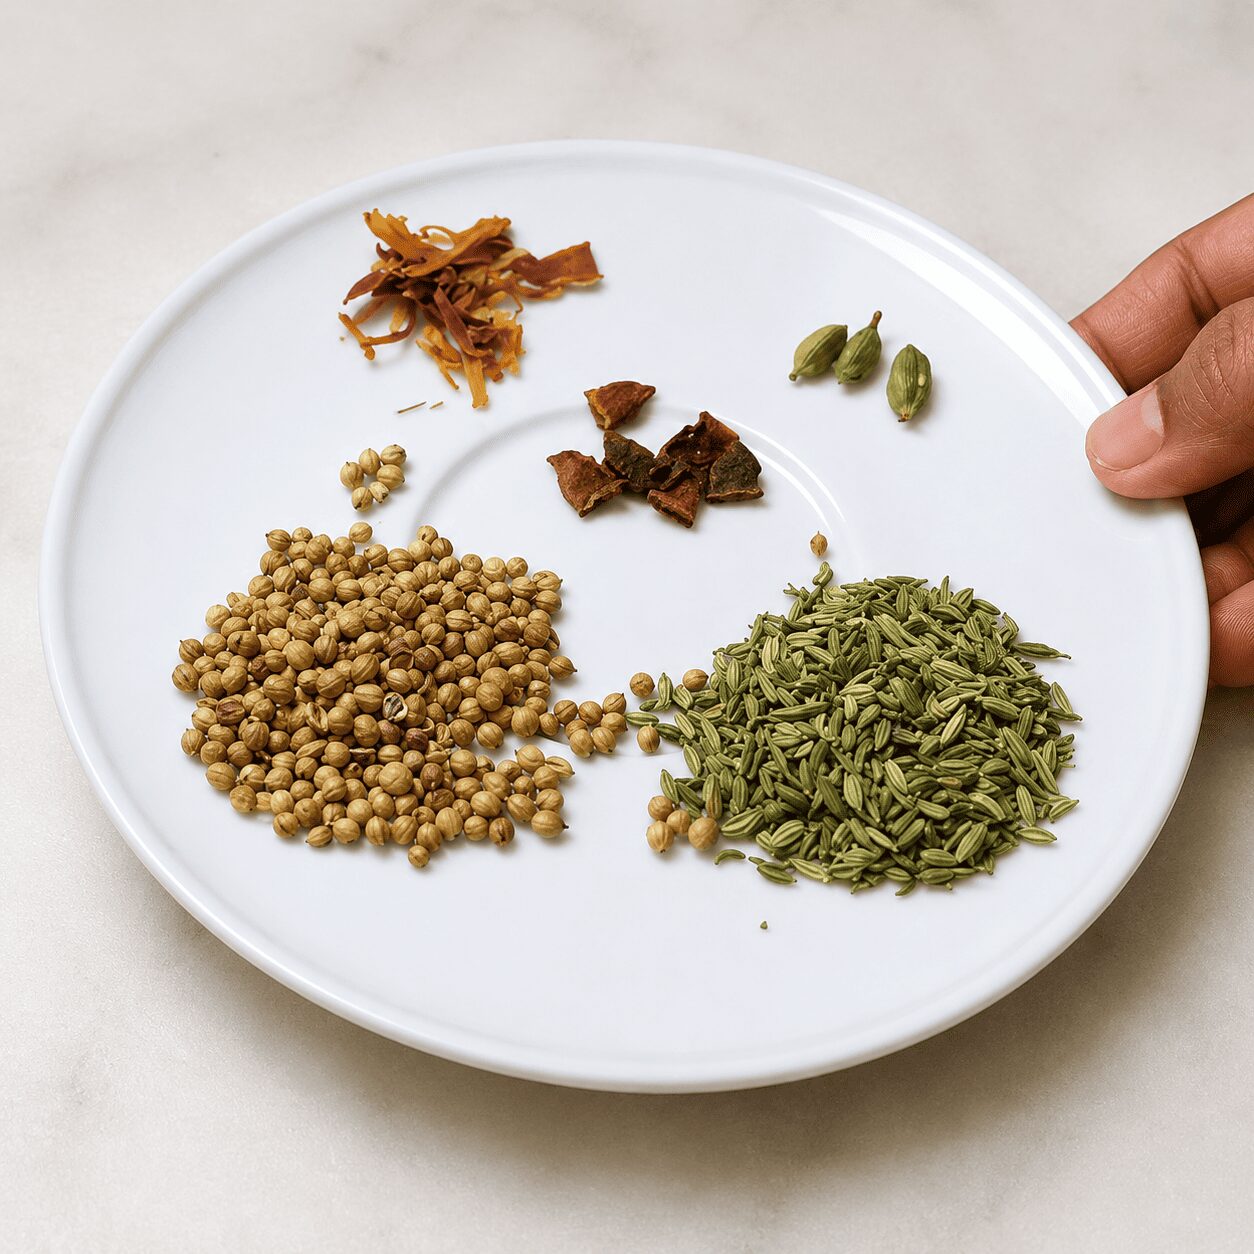
    In a separate small pan, dry-roast the Kashmiri red chillies, coriander seeds, cumin seeds, cloves, black peppercorns, cinnamon, green cardamom, and mace on low flame for 4–5 minutes, until the colour changes, the chilli skin crisps up, and the aroma develops.

    Don’t rush this stageAn under-roasted masala stays pale and tastes raw in the finished gravy. Wait for the visible colour change and the crisp chilli skin — that’s the real doneness cue, not the clock.
    Whole spices dry-roasting for the freshly ground Chicken Dark Bunglow special masala
    7

    Cool and grind the masala

    Let the roasted spices cool, then grind to a fine powder. If grinding is difficult, add 1–2 tbsp water to help it along — that’s a fine adjustment, not a problem.

    Freshly ground Chicken Dark Bunglow special masala powder
    8

    Add the potatoes and the full masala

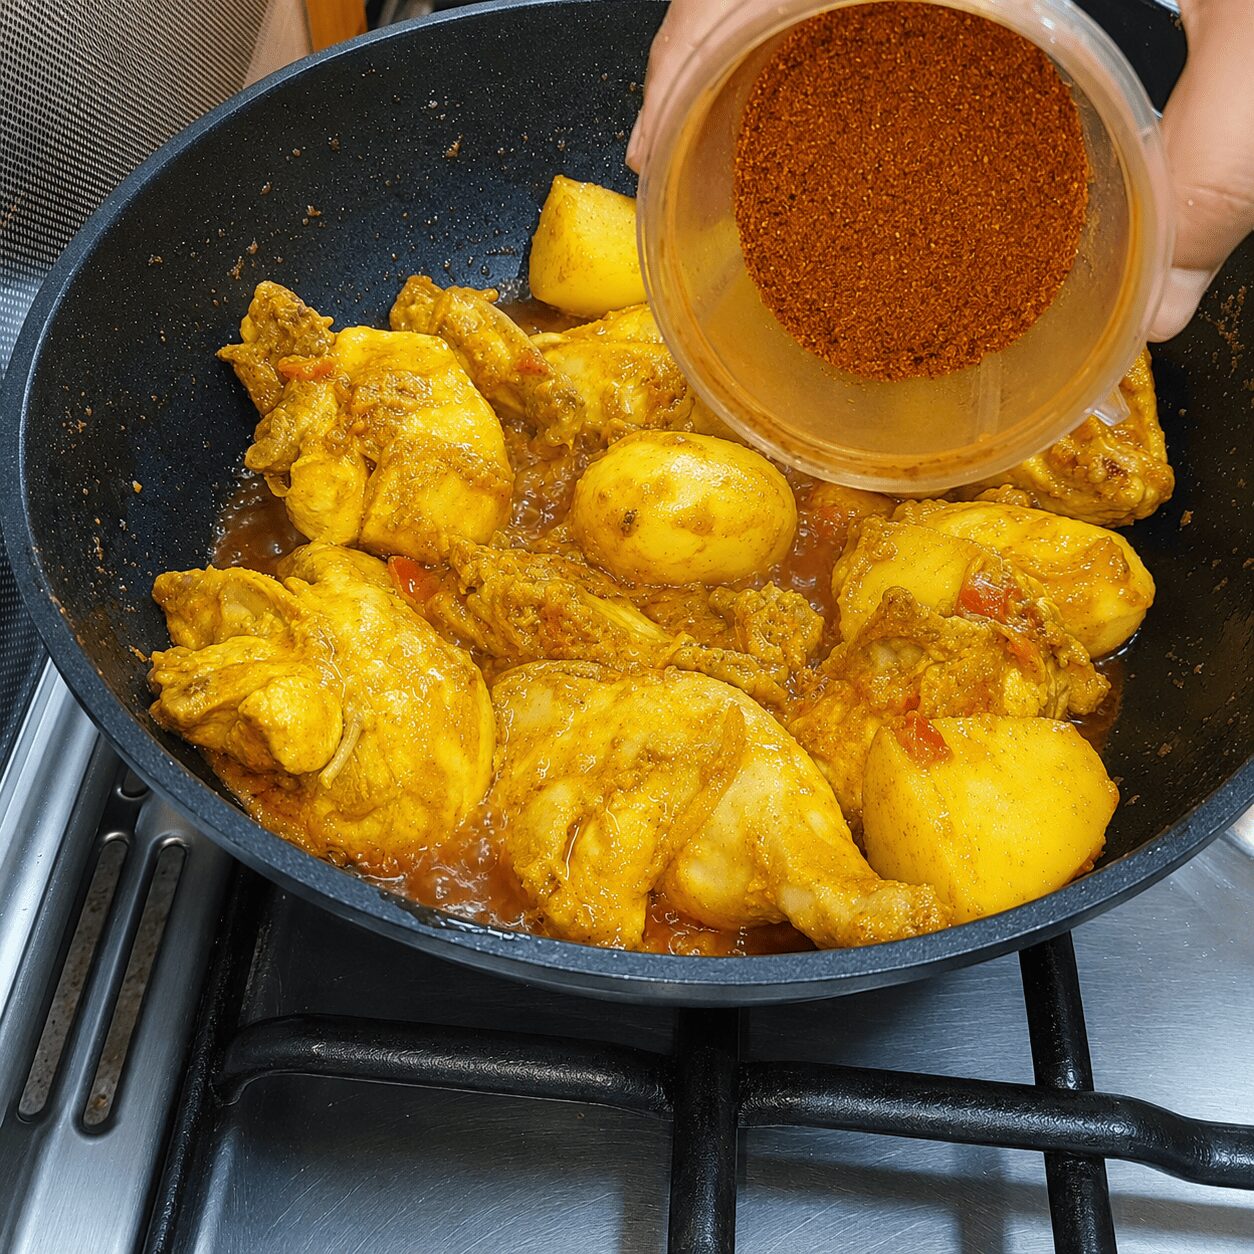
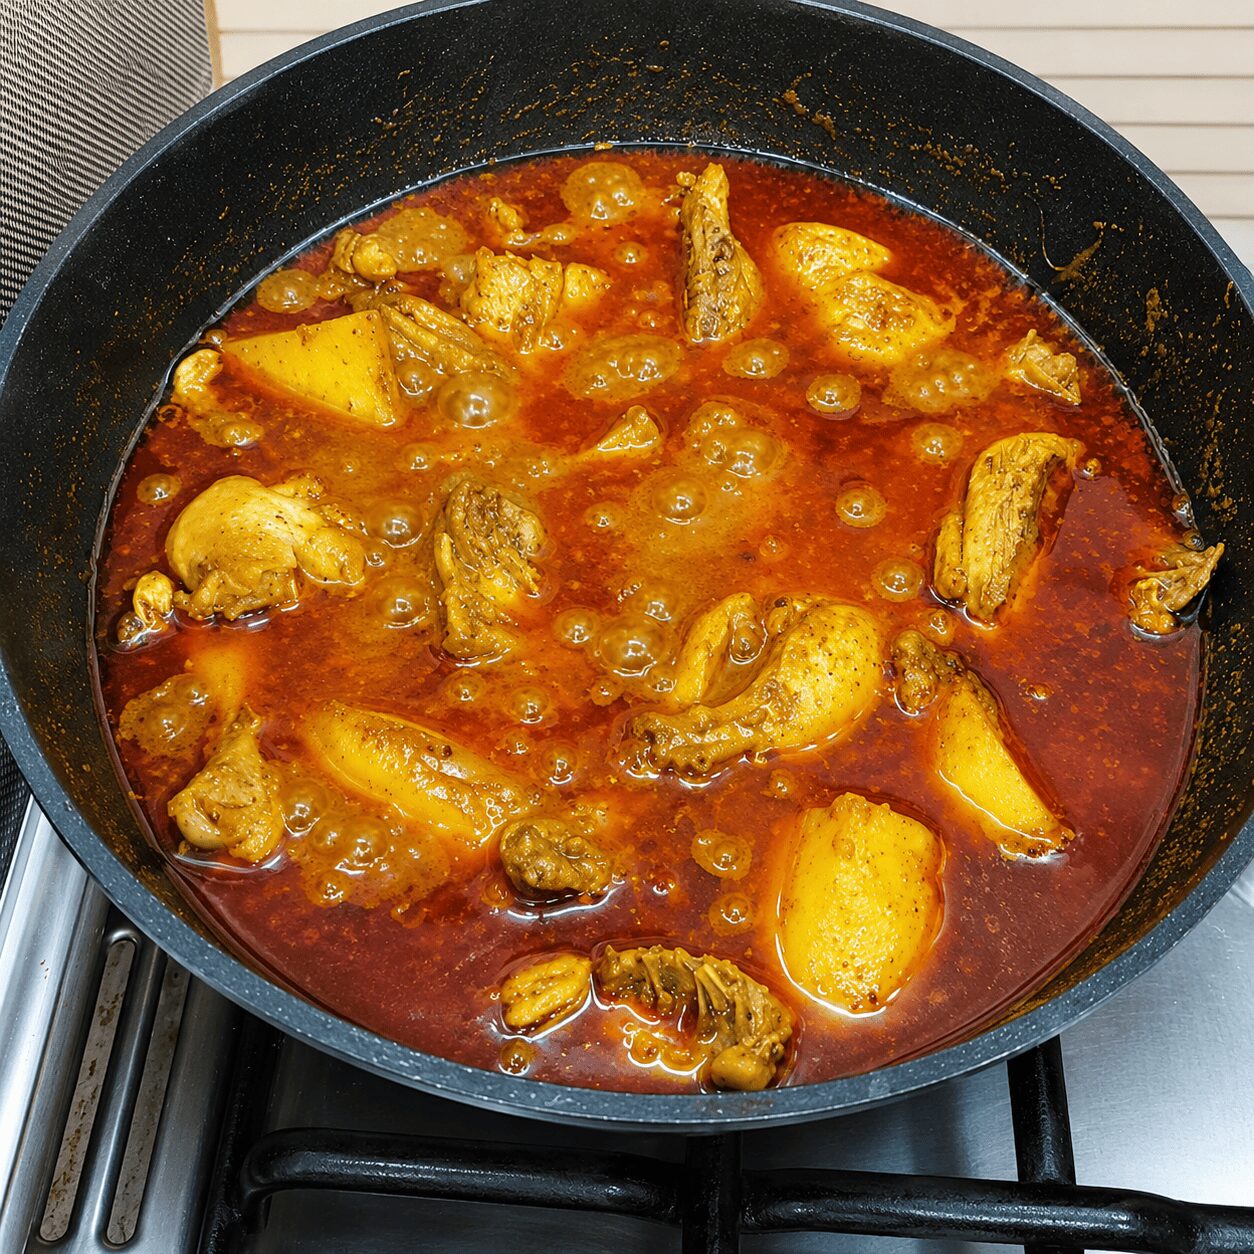
    Once the chicken has bhunoed for 10 minutes, add the fried potatoes back in. Add the entire quantity of the freshly ground special masala. Pour in 1–1½ cups water — more if you’re serving with rice, less for roti or naan — and adjust salt.

    Chicken simmering in the thick spiced gravy for Chicken Dark Bunglow
    9

    Cover and simmer until tender

    Cover and cook on low flame for 7–8 minutes, until the chicken is fully tender — you’ll see it starting to release from the bone — and the potatoes have softened through.

    10

    Add the eggs and finish

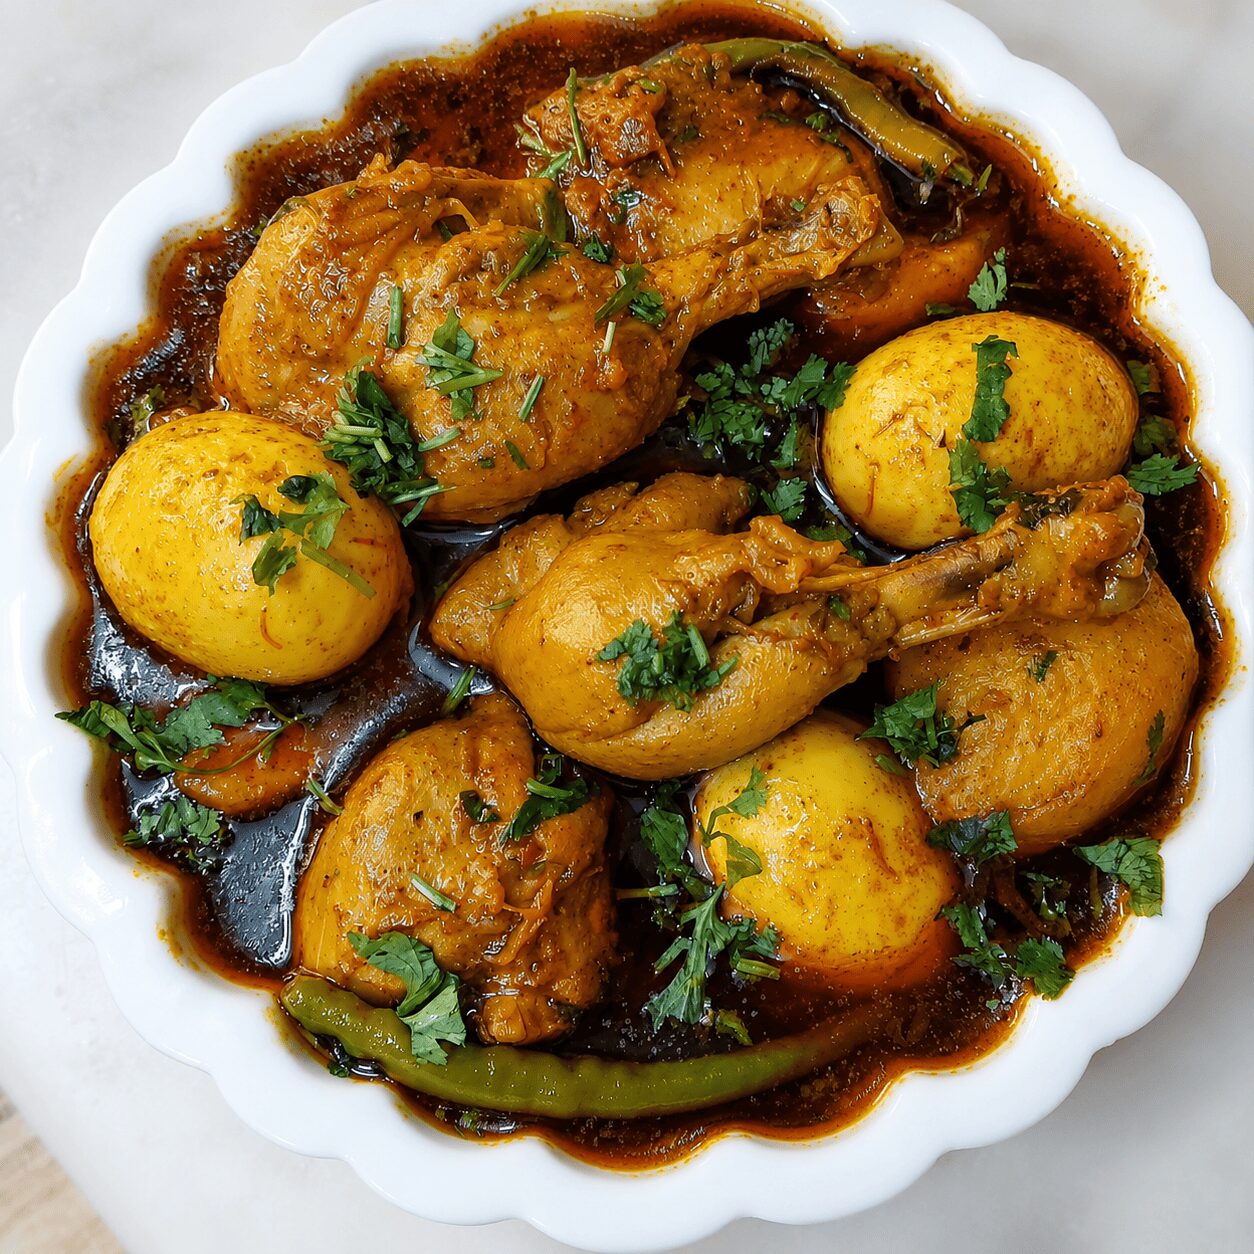
    Add the fried eggs back in, along with fresh green chillies (for aroma) and chopped coriander. Mix gently so the eggs don’t break. Cover and cook a further 2–3 minutes, until the flavours come together and the oil resurfaces. Turn off the gas and let the steam settle for a minute before serving.

    Finished Chicken Dark Bunglow with fried eggs, potatoes, and fresh coriander

    5 Things That Make This Dark Bunglow Turn Out Right

    1. Marinate the chicken properly — minimum 1 hour
    2. Fry egg and potato with the same turmeric-hing-chilli treatment, in the same mustard oil
    3. Use Kashmiri chilli in the special masala if you want colour without maximum heat
    4. Make the special masala while the chicken bhunoes — that 10 minutes is exactly when to do it
    5. Add the ground masala at the end, not the beginning

    The One Mistake That Flattens This Dish’s Aroma

    Under-roasting the special masala, or adding it too early.

    An under-roasted masala stays pale and tastes raw in the finished gravy — the dry-roasting stage needs to run its full 4–5 minutes, until the chilli skin crisps and the colour visibly deepens. The second version of this mistake is timing: the special masala is meant to go in after the chicken has bhunoed for 10 minutes, not at the very start of cooking. Add it too early and its aromatic top-notes burn off over the remaining simmer time, which defeats the entire reason for grinding it fresh in the first place.

    One more thing worth getting right: the water quantity. Adjust it for what you’re serving — more for rice, less for roti or naan — rather than following a fixed amount regardless of the meal.

    For Beginners

    Don’t worry if your masala doesn’t grind to a perfectly smooth powder on the first try — a splash of water (1–2 tbsp) helps it along with no downside. The sensory cues matter more than precision: visible colour change, crisp chilli skin, no lingering moisture.

    For Confident Home Cooks

    If you want this genuinely Bengali-spicy rather than moderated, swap the Kashmiri chillies in the special masala for regular dried red chillies (teekhi sukhi lal mirch) — the heat increases noticeably while the colour stays roughly similar.

    What to Serve Chicken Dark Bunglow With

    Plain white rice is the creator’s own choice for this dish, and the gravy is deliberately loosened with a little extra water at the cooking stage specifically to suit rice. Naan or a plain paratha also work well if you’d rather mop up a slightly thicker gravy with bread. If you’re planning a bigger spread, our Anda Dum Biryani makes a great second egg-forward dish to serve alongside it.

    This is the kind of dish that’s substantial enough on its own — no side dal required — though a simple cucumber salad on the side cuts nicely through the richness of the mustard oil and the deep, dry-roasted masala. For a lighter, quicker egg side another day, our Butter Garlic Egg is worth keeping in rotation too.

    Storage, Reheating & Make-Ahead

    SituationGuidance
    Fridge storageUp to 2 days in an airtight container
    Room temperatureChicken-and-egg gravies should not sit out for more than 2 hours
    FreezingThe gravy freezes reasonably well for up to 1 month; egg texture softens further once thawed
    ReheatingGentle reheat on low flame with a splash of water; avoid high heat, which can toughen the eggs and dry out the potatoes
    Make-ahead strategyThe special masala can be dry-roasted and ground 1–2 days ahead and stored in an airtight container, ready to add when you cook the chicken

    Having the special masala pre-made genuinely speeds up cooking day, since it’s the one component that otherwise needs your direct attention while the chicken bhunoes.

    Myth vs. Fact: Can I Skip the Freshly Ground Masala and Use Store-Bought Garam Masala Instead?

    Any garam masala from the shelf will do the same job as grinding your own — it’s all just “spice powder” in the end.

    You can substitute commercial garam masala in a pinch, and the dish will still taste like a curry. But the depth of a freshly dry-roasted, freshly ground masala — made specifically from Kashmiri chillies, whole coriander, cumin, cloves, peppercorns, cinnamon, cardamom, and mace, toasted just minutes before grinding — is genuinely different. That freshness, added at the very end of cooking rather than simmered for an hour, is the entire identity of Chicken Dark Bunglow. A pre-made blend will get you a good curry. It won’t get you this one.

    Nutrition Snapshot (Estimated per serving, with 1 egg)

    NutrientEstimated Amount
    Calories~390–440 kcal
    Protein~28–32 g
    Fat~24–28 g
    Carbohydrates~14–18 g
    SodiumVaries with salt added

    Figures are estimated and will vary based on exact oil quantity, chicken cut, and potato size. These are not a substitute for individualised nutritional advice. Per-serving chicken and egg nutritional data is available via USDA FoodData Central.

    Frequently Asked Questions

    What is Chicken Dark Bunglow?

    Chicken Dark Bunglow is a Bengali-influenced chicken curry built around chicken, fried eggs, and fried potatoes, all simmered together in a gravy finished with a freshly dry-roasted and ground whole-spice masala. The eggs and potatoes are fried in mustard oil alongside the chicken from the start, not added as an afterthought.

    Why is it called “Dark Bunglow”?

    “Bunglow” is a regional recipe term used in this Bengali-influenced style. “Dark” refers to the deep, almost brown-red colour the gravy develops from the dry-roasted whole-spice masala and the mustard oil base — not to any single dominant spice or ingredient.

    Do I have to use mustard oil?

    Mustard oil is the authentic choice for this Bengali-style dish and is what gives the gravy its distinctive pungent-mellow base note. Refined oil works as a substitute, but the flavour will be noticeably milder and less distinctive.

    How spicy is this recipe, and how do I make it milder?

    This is a genuinely spicy recipe by design — the creator repeats the warning more than once. To moderate it, reduce the red chilli powder in the marinade, the frying dust, and the gravy, and use Kashmiri chillies (rather than regular dried red chillies) in the special masala, since Kashmiri chillies add colour without nearly as much heat.

    Why make a special masala from scratch — can I use store-bought?

    You can substitute commercial garam masala, and the dish will still work. But the depth of a freshly dry-roasted, freshly ground masala — added at the very end of cooking rather than simmered for an hour — is what gives this dish its identity. It takes about 5 minutes to make and is the single thing that makes this recipe genuinely different from a typical chicken curry.

    Can I make this without the eggs or potatoes?

    You can, though it changes the dish’s character somewhat, since both are fried in the same mustard oil as the chicken and are core components rather than garnishes. If you skip them, you’ll want to reduce the water slightly, since there will be less volume in the final gravy.

    How long do I need to marinate the chicken?

    A minimum of 1 hour at room temperature. If you have more time, 2–3 hours in the fridge gives the marinade more time to work, but always refrigerate if marinating longer than an hour, especially in warmer weather.

    What’s the best thing to serve Chicken Dark Bunglow with?

    Plain white rice is the creator’s own choice, and the gravy is loosened with a bit of extra water specifically to suit rice. Naan or plain paratha also work well for a thicker-gravy, bread-forward meal instead.

    Conclusion

    Chicken Dark Bunglow earns the description its own creator gives it: a different recipe, but a thoroughly delicious one. The freshly ground whole-spice masala — dry-roasted from scratch and added at the end rather than the beginning — is what genuinely sets it apart from a typical chicken curry built on a pre-made blend. Chicken, eggs, and potatoes, all carrying the same mustard-oil base and spice treatment, come together into a gravy that’s deep, fragrant, and unmistakably its own thing.

    About an hour and forty-five minutes from marinating to table, most of that hands-off marination time — and a dish unusual enough for a home-cook channel that it’s worth the slightly longer prep. Follow the sequence — marinate properly, fry egg and potato together, build the special masala while the chicken bhunoes, add it at the end — and you’ll end up with a gravy that genuinely tastes like nothing else in your usual rotation.

    Serve it with rice the way it was made here, let it rest a minute under the lid once the gas is off, and let the masala’s aroma do the rest of the talking.

    Recipe demonstrated and filmed in the Zaika Mazedaar kitchen. Watch the full video on the Zaika Mazedaar YouTube channel for a step-by-step visual walkthrough.

  • Anda Paratha Roll Recipe

    Anda Paratha Roll Recipe

    Zaika Mazedaar · Breakfast & Street Snacks

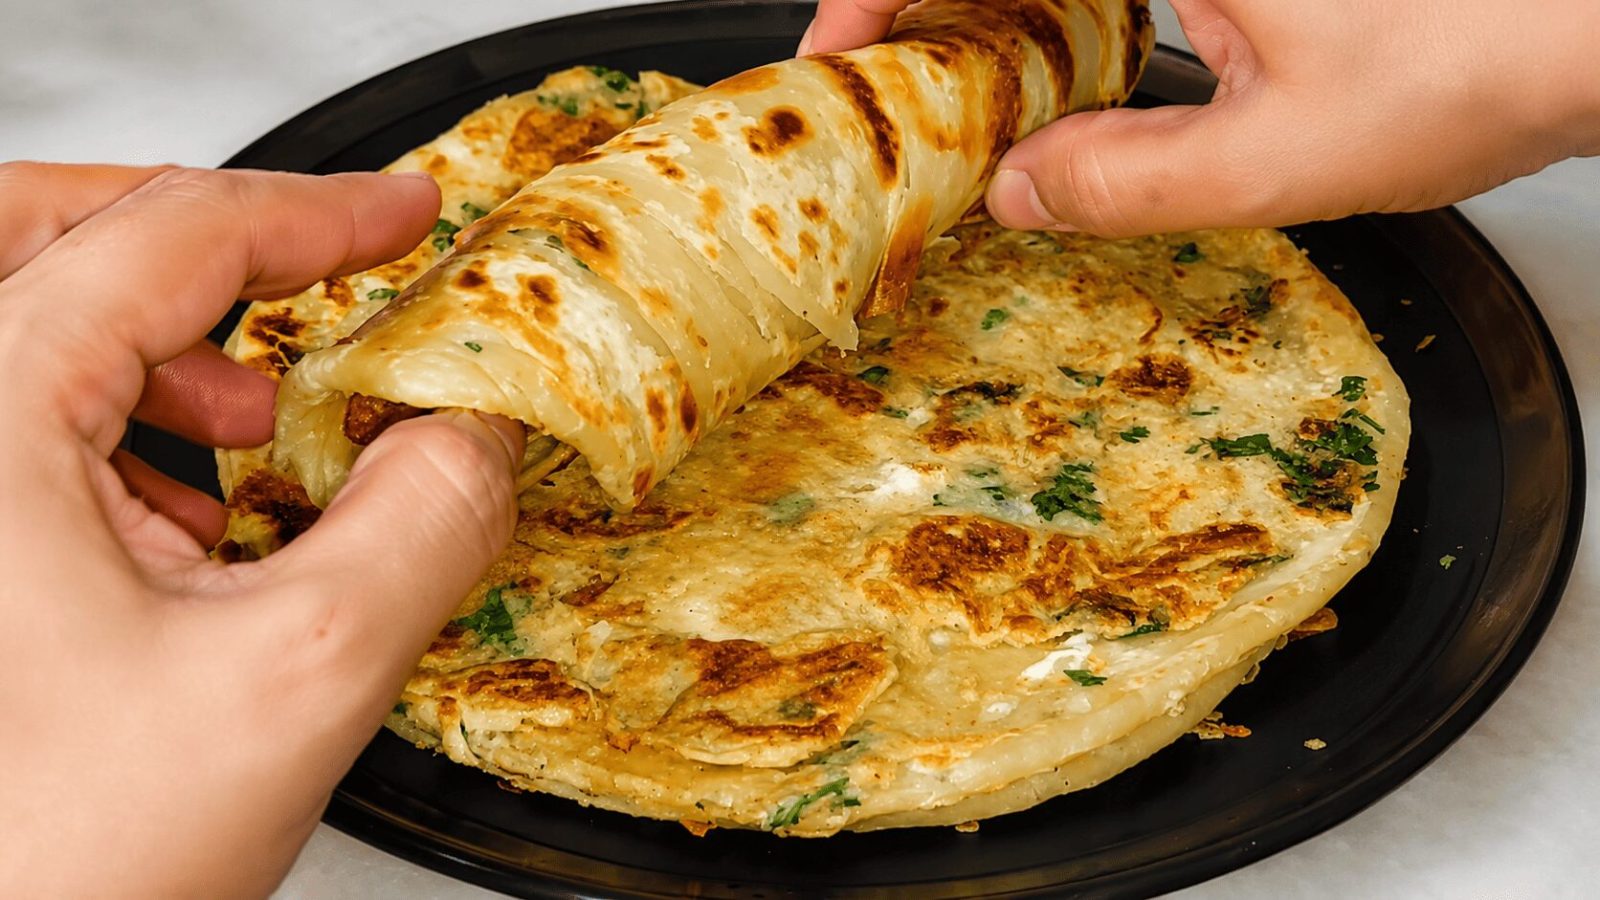
    Crispy, flaky, street-style anda paratha roll with a double-roll layering trick for bazar texture — egg spread on the pan first, paratha pressed in. The right way.

    The first bite of a properly made anda paratha roll is something specific — the crackle of layered, ghee-kissed paratha, the soft egg bonded to the surface rather than sitting loose inside, the whole thing hot and slightly crisp in your hands. It’s the bazar version, and most home attempts don’t quite get there. Not because it’s difficult, but because of one thing that happens before the egg ever touches the pan: the double-roll peda technique that creates the flaky, thick layers in the first place. Get that right, and everything else follows.

    This recipe is demonstrated step by step in our video on the Zaika Mazedaar channel, filmed and cooked in a real kitchen. It’s also, as the creator points out, the ideal tiffin recipe — perfect for children’s lunchboxes and office meals alike. Browse the full egg recipes collection or the tiffin recipes cluster for more ideas in this style.

    What Is Anda Paratha Roll?

    Anda paratha roll (also called egg paratha roll or anda roll) is a North Indian and Pakistani street-food dish: a crispy, layered paratha with an egg cooked directly onto its surface, then rolled or folded and served hot. What makes this version distinct from a stuffed egg paratha — where egg goes inside the dough before rolling — is that the egg is cooked on the outside, bonded to the paratha’s surface by pressing the paratha down onto beaten egg spread on the pan. The result is a unified, crispy-edged paratha with egg as part of its outer layer, not a hidden filling. It’s a street-food category of its own, and the layering technique from scratch is what gives it the thick, flaky, bazar-style texture that separates it from a plain egg-coated flatbread.

    Why This Recipe Works

    Two things make the difference — and both are specific to this recipe.

    First: the double-roll peda technique. Each portion of dough is rolled into a very thin roti, spread with ghee, dusted with a little maida and kalonji, rolled up, then the process is repeated — a second layer of ghee and maida applied, rolled up again, the roll slightly stretched and tucked to form the final peda. This creates multiple fat-and-flour layers in the dough ball that separate during cooking into the thick, flaky, bazar-style paratha layers. Skip this, or do only one roll, and the paratha cooks up soft and layerless. A quick, replicable technique once you’ve done it once.

    Second: egg on the pan first, paratha pressed into it. This is the detail most home recipes reverse — spreading egg on top of an already-cooking paratha and hoping it bonds. The bazar method works the other way: beaten egg is spread on the hot, ghee-coated pan first, and the paratha is pressed directly on top. The egg cooks from below and adheres to the paratha’s surface. When flipped, the egg layer is fully bonded, golden, and slightly crisp. Not an afterthought — part of the paratha’s outer surface. For a different quick egg-pan recipe that takes under 15 minutes, the Butter Garlic Egg is worth bookmarking too.

    Ingredients

    For the Paratha Dough

    • 2 cups maida (all-purpose flour) — or use only atta (wholewheat), or a 50-50 atta-maida mix
    • 1 tsp salt
    • ~1½ cups room-temperature water (start with 1 cup; add more as needed — quantity depends on flour quality)
    • 1 tsp oil (applied over the kneaded dough to prevent drying)
    • Extra maida for dusting and layering
    • Ghee (desirable) or oil — for brushing between layers and cooking; ghee produces a khasta (flaky, crisp) finish
    • Kalonji (nigella seeds) — to taste, optional

    For the Egg Mixture

    • 4 eggs (one per paratha)
    • ½ tsp salt (adjust to taste)
    • Black pepper (kali mirch), to taste
    • A little green chilli paste, or finely chopped green chilli
    • Fresh coriander (hara dhania), a small handful
    • Optional: finely chopped onion, or other vegetables to personal preference

    For Cooking

    • 1½ tsp desi ghee per paratha (or oil, though ghee gives a better result)

    Ingredient Substitutions

    IngredientSubstituteEffect on Taste / Texture
    Maida (all-purpose flour)Atta (wholewheat) or 50-50 mixAtta absorbs more water — adjust hydration accordingly. Texture is slightly denser and less flaky but still good; 50-50 mix is a good middle ground
    Ghee (between layers and for cooking)OilOil works, but ghee produces a notably more khasta (flaky, crisp) result — worth using if you have it
    Kalonji (nigella seeds)Ajwain (carom seeds) or sesame seedsBoth optional — ajwain adds a slightly different aromatic note; sesame is milder. Skip entirely if preferred
    Green chilli paste in egg mixtureFinely chopped green chilli or red chilli flakesAdjust heat level to preference; chopped fresh chilli adds texture as well as heat
    Fresh coriander in egg mixtureSkip or use driedLoses a layer of freshness; the egg mixture works without it but is brighter with it

    Mise en Place Checklist

    The dough needs 15–20 minutes to rest — start there. Everything else follows while it rests.

    • Dough mixed, kneaded 3–4 minutes, oil applied on top, covered with kitchen towel — resting 15–20 minutes
    • Egg mixture beaten with salt, pepper, green chilli, and coriander — set aside
    • Ghee measured (1½ tsp per paratha) and at hand
    • Extra maida for dusting and layering, in a small bowl
    • Kalonji in a small dish if using
    • Flat pan (tawa) on the hob, ready to heat to medium flame
    • Brush for spreading ghee on the thin roti

    Step-by-Step Method

    1

    Make the dough

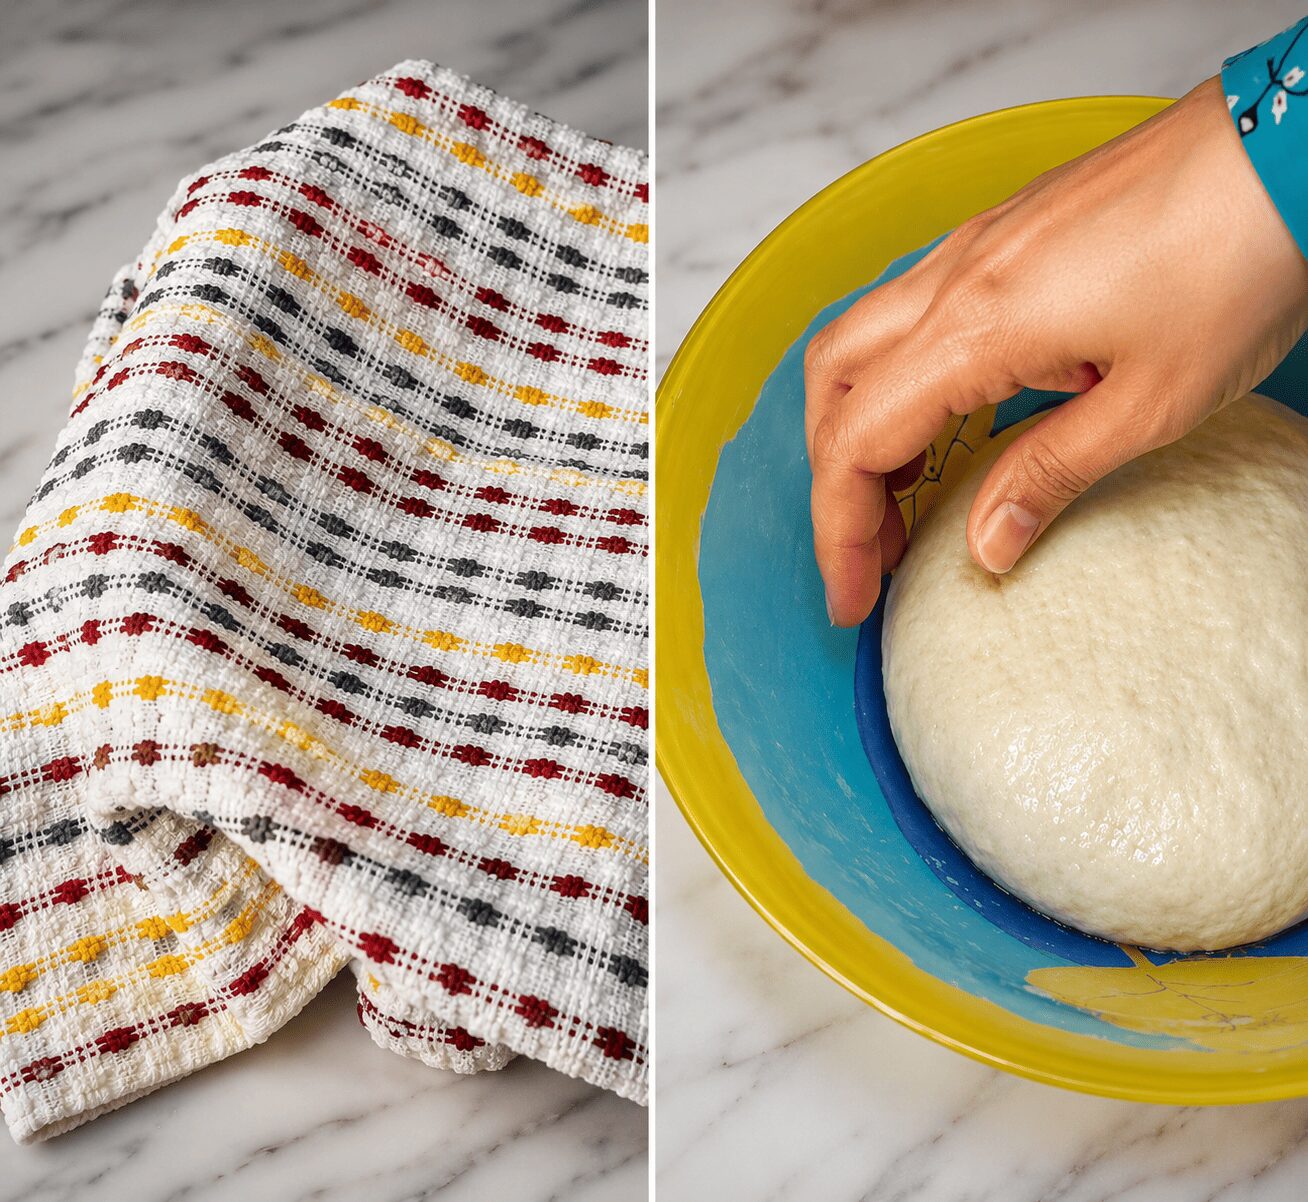
    In a mixing bowl, combine 2 cups maida and 1 tsp salt. Mix dry. Add 1 cup room-temperature water and begin combining. Add more water in stages — roughly ½ cup more — until the dough comes together into a medium consistency: not stiff, not sticky. Knead for 3–4 minutes until the dough is smooth and slightly elastic. Rub 1 tsp oil over the surface. Cover with a kitchen towel and rest for 15–20 minutes — this step is not optional. Under-rested dough tears when rolled and doesn’t layer properly.

    Dough hydration varies Flour quality differs between brands and batches — the exact amount of water isn’t fixed. Add water in stages rather than all at once, and stop when the dough feels medium-soft and doesn’t stick to your hands. 3–4 minutes of kneading until smooth is the goal.
    2

    Make the egg mixture

    While the dough rests, beat 4 eggs with ½ tsp salt, black pepper, green chilli paste (or chopped green chilli), and fresh coriander. Add any optional vegetables here — finely chopped onion works well. Each paratha uses approximately ¼ cup (one-fourth cup) of beaten egg mixture. Set aside.

    3

    Divide and make the double-rolled pedas

    After the dough has rested, punch it down once to smooth it further. Divide into 4 equal portions (pedas). Work one peda at a time. Roll it out into a large, very thin roti — as thin as you can without tearing. A few tears in the middle are fine since you’re rolling it up anyway.

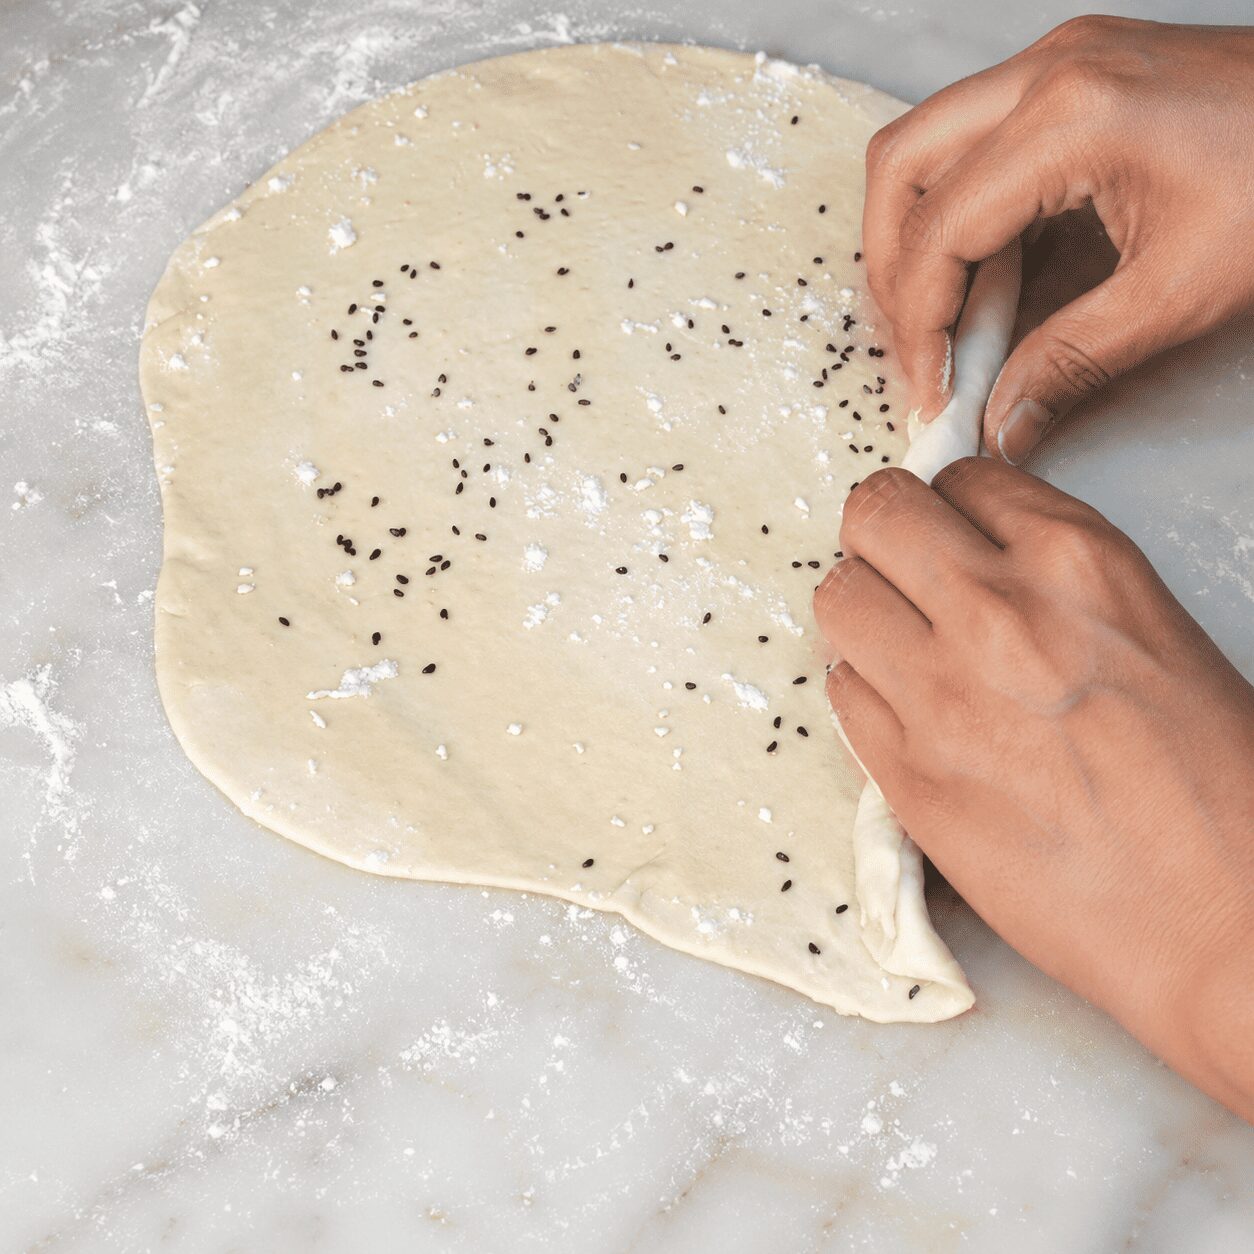
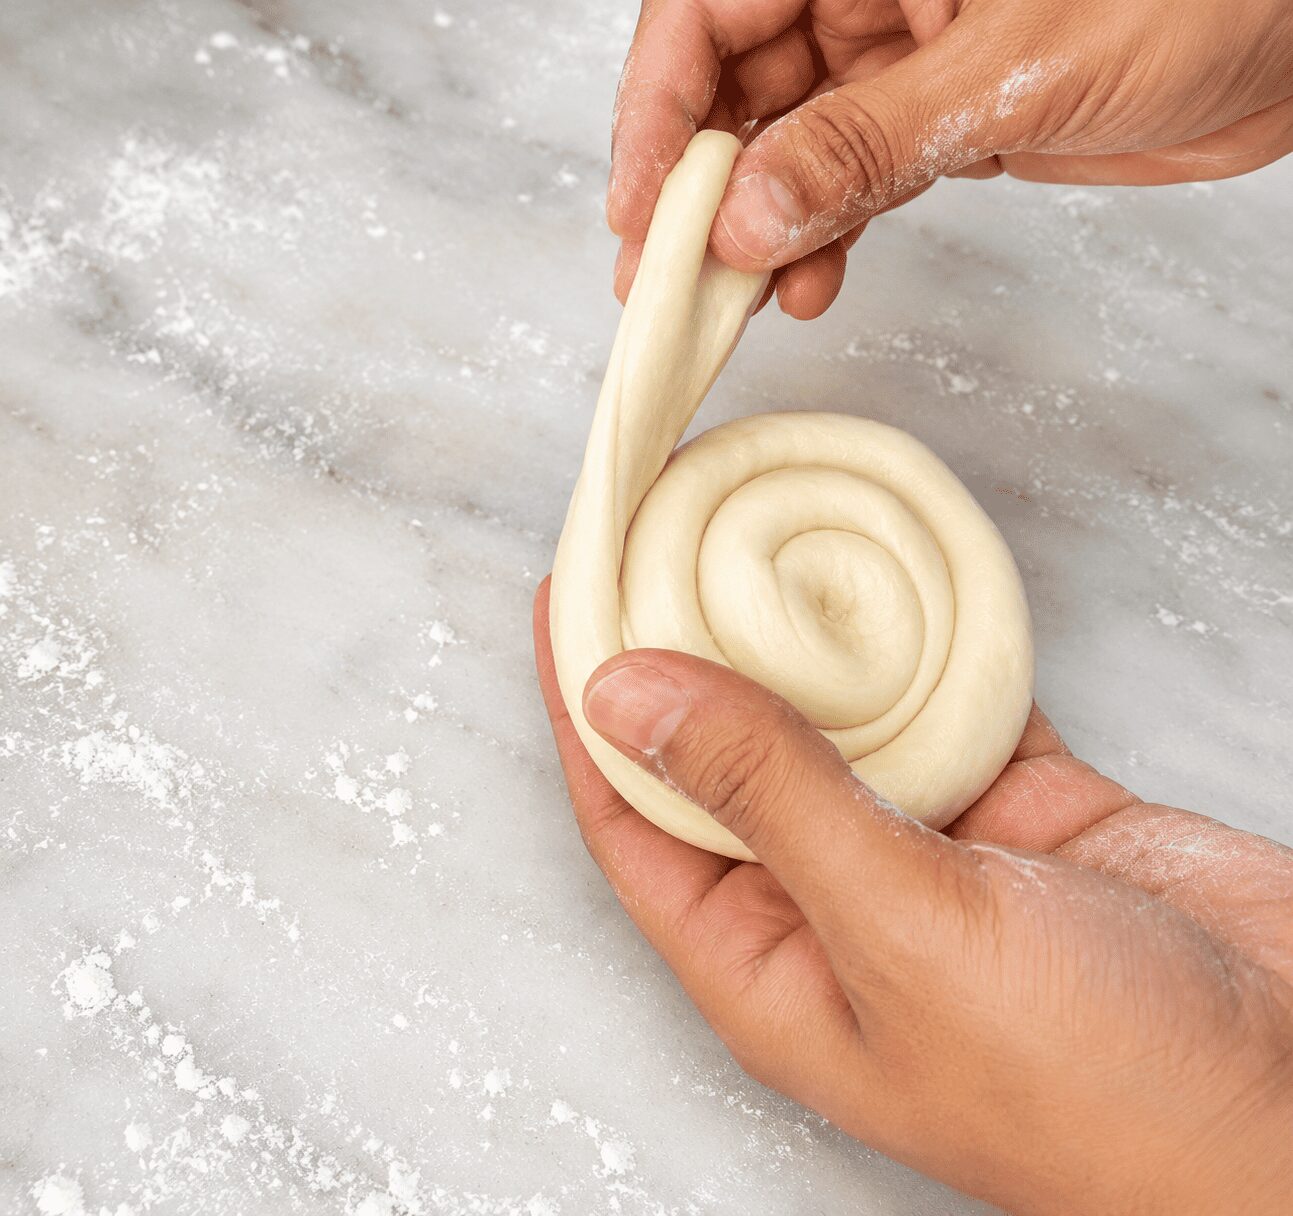
    Using a brush, spread ghee generously across the entire surface. Sprinkle a light dusting of maida over the ghee. Scatter kalonji if using. Now, from one edge, roll the roti up tightly into a log. Press down gently to flatten the log slightly. Apply another thin layer of ghee on the flattened log, dust lightly with maida again. Roll the log up a second time from one end — as you near the end, stretch the log slightly and tuck the final end underneath. This is your peda. Set it aside and cover with the kitchen towel while you form the other three.

    Don’t skip the second roll The double-roll is what creates the stacked fat-and-flour layers inside the peda. When you roll this peda out and cook it, those layers separate in the heat and produce the thick, flaky bazar-style texture. One roll gives a plain paratha; two rolls gives you the street version.
    Smooth maida dough resting under a kitchen towel for Anda Paratha Roll
    4

    Roll each peda into a paratha (medium thickness)

    Dust the work surface with a little maida. Take one peda and roll it out to a medium-thickness paratha. Do not roll it too thin — a thin paratha tears when you press it into the egg on the pan, and it won’t hold up to flipping. Thicker than you might instinctively go. Bazar parathas are thick.

    Rolling dough thin and spreading ghee, maida, and kalonji for layered paratha
    5

    Partial dry-sear — and freeze here if needed

    Heat a flat pan (tawa) on medium flame. Place the rolled paratha on the dry pan — no ghee at this stage. Cook for 1 minute on the first side, then flip and cook for 1 minute on the second side. No colour, no browning — partial cooking only. Remove from the pan.

    This is the freeze point If you want to freeze these parathas for later, this partial-cook stage is when to do it. Let them cool fully, stack with parchment between each, wrap, and store in the freezer. To finish from frozen: let thaw slightly, then proceed from Step 6 with ghee and egg in the pan. The creator has a separate video on freezing parathas — link your cross-reference here once it’s live on the site.

    Repeat Steps 4 and 5 for all four pedas.

    Double-rolled peda resting before final rolling for Anda Paratha Roll
    6

    Spread egg on the pan first, then press the paratha in

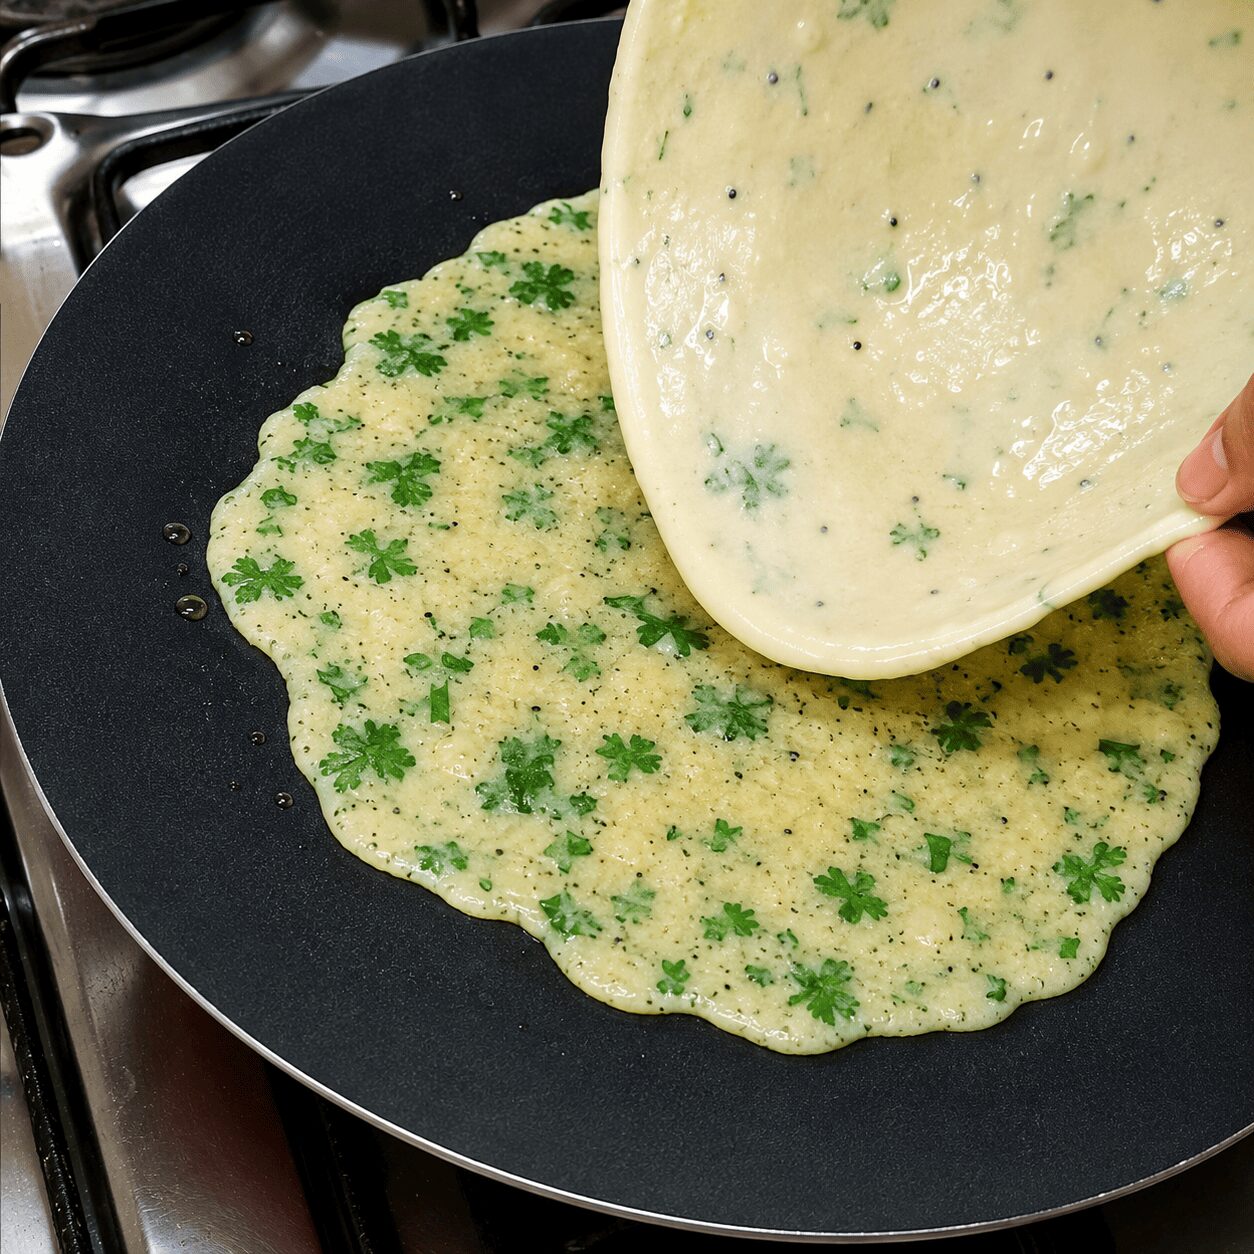
    Add 1½ tsp desi ghee to the pan on medium flame. Pour approximately ¼ cup beaten egg mixture into the pan. Using a spoon or spatula, spread the egg into a circle roughly the size of the paratha. Move quickly — you want the egg spread before it sets.

    Now, place one partially cooked paratha directly on top of the egg, pressing it down gently so the paratha and egg make full contact across the surface. Reduce to low flame. Let the egg cook from below and bond to the paratha’s underside for 1–2 minutes — do not rush this. The egg needs to set and adhere before you flip.

    Egg on the pan first — always This is the detail most home versions reverse. Spreading egg on top of an already-cooking paratha means the egg sits loose and slides off when you flip. Egg spread on the pan first, paratha pressed into it — the egg bonds to the surface as it cooks from below, and when you flip, it’s part of the paratha, not a separate layer.
    Egg mixture spread on the tawa and paratha pressed into it for Anda Paratha Roll
    7

    Apply ghee to the top, flip, and finish

    After 1–2 minutes on low flame, brush the top surface of the paratha with desi ghee. Flip the paratha so the egg side is now facing up, and the ghee-coated side is on the pan. Cook on medium flame, flipping as needed, until the paratha reaches your preferred golden colour — the layers should be visible at the edges, slightly pulling apart, the surface golden and crisp in places. The total finish time is 3–4 minutes of flipping on medium flame after the initial egg-setting stage.

    Flipped Anda Paratha Roll showing golden egg layer and crispy flaky layers
    8

    Repeat for all four parathas, then serve

    Finish all four anda parathas following the same process. Serve immediately — hot, straight from the pan. Roll them up to eat as a street-food roll, slice into pieces for a plated serve, or pack into a tiffin box for children or office. Fresh mint chutney alongside is the classic accompaniment, or a cooling yogurt raita if you want something more substantial.

    Finished crispy Anda Paratha Roll from Zaika Mazedaar

    6 Steps That Give You the Bazar-Style Result

    1. Rest the dough for 15–20 minutes — under-rested dough tears and won’t layer
    2. Double-roll the peda (two rounds of ghee + maida + rolling) — this is what creates the layers
    3. Roll the final paratha to medium thickness — too thin and it tears when you press it into the egg
    4. Spread the egg on the pan first, then press the paratha on top — never the other way around
    5. Low flame when the egg is cooking beneath the paratha — gives it time to set and bond properly
    6. Apply ghee to the top side before the second flip — this is what finishes the exterior crisp

    The Mistakes That Prevent Bazar-Style Results

    Rolling the paratha too thin for the finishing stage.

    It feels intuitive to roll thin — thinner seems easier to cook through. But a thin paratha tears when you press it onto the egg in the pan, loses its structural integrity on the first flip, and doesn’t produce the thick, visible layers that bazar anda parathas are known for. The peda technique creates those layers internally; rolling too thin collapses them. Keep it medium-thick.

    Not letting the egg set fully before flipping. If you flip too early, the egg hasn’t bonded to the paratha — it slides off as a separate, half-cooked layer. Low flame, 1–2 minutes, patience. The egg is set when it no longer looks wet at the edges and the paratha lifts cleanly from the pan.

    Skipping the dough rest. 15–20 minutes isn’t a suggestion — under-rested dough has tight gluten that snaps back when rolled, doesn’t extend properly, and tears more easily during the layering stage. Set a timer and use that time to make the egg mixture.

    For Beginners

    The double-roll peda technique looks involved on paper but takes under two minutes per peda once you’ve done it once. The key thing to remember is sequence: thin roti → ghee + maida + kalonji → roll up → press down → ghee + maida → roll up again → stretch slightly → tuck end under. Don’t worry if the second roll isn’t perfectly tight — the layers form regardless of how neat the peda looks. And use oil instead of ghee on your first attempt if that’s what you have — it works fine, the texture is just a little less khasta.

    For Confident Home Cooks

    Try adding a layer of very finely chopped onion between the ghee and maida layers during the first roll — it adds a subtle savoury flavour into the paratha itself, not just the egg mixture. Keep the quantity small so it doesn’t tear the thin roti during rolling. You can also experiment with adding a pinch of ajwain (carom seeds) alongside the kalonji for a more complex aromatic note in the layers.

    What to Serve Anda Paratha Roll With

    Straight as a rolled street-food style paratha is the most natural way to eat this — fold it in half or roll it lengthways, hold it in your hand, eat it hot. Fresh mint chutney alongside is the classic pairing and cuts through the richness of the ghee, and a cooling yogurt raita works if you want something to dip or serve alongside for a more complete meal. If you want a saucier egg breakfast another day, our Egg Shakshuka is worth trying too.

    For tiffin — the creator specifically calls this one out as perfect for children’s lunchboxes and office meals — slice into pieces rather than rolling, which travels better. It holds well for a couple of hours after cooking. For a quick pan-egg recipe that takes under 15 minutes with a similar approach, see our Spanish Garlic Fried Eggs, or for a Turkish take on eggs on the pan, our Turkish Eggs (Cilbir).

    Storage, Freezing & Make-Ahead

    SituationGuidance
    Freeze at partial-cook stage (Step 5)Cool fully, stack with parchment between each paratha, wrap in foil or plastic, freeze up to 1 month. Finish from frozen in a ghee-hot pan — no need to fully thaw first
    Fridge storage (fully cooked)Up to 2 days; reheat on low flame tawa with a drop of ghee to restore some crispiness
    Reheating fully cooked parathasLow flame tawa with a little ghee — microwave makes them soft and steam-cooked rather than crispy; tawa is always better
    Tiffin (same day)Holds well for 2–3 hours after cooking; slice into pieces for packing rather than rolling
    Make-ahead strategyPartial-cook and freeze the parathas (Step 5) up to 1 month in advance. Make fresh egg mixture on the day. Finish in 5–6 minutes per paratha from frozen

    The freeze-ahead option genuinely transforms this into a weekday breakfast or tiffin recipe. Do the dough, layering, and partial-cook on the weekend; finish fresh on school mornings in under 10 minutes. For more egg-forward breakfast ideas, browse the egg recipes collection, or if you’re planning dinner instead, our Anda Korma makes a good, richer follow-up recipe.

    Myth vs. Fact: Egg On Top, or Egg Underneath?

    You can spread the egg on top of the paratha while it’s cooking on the pan and flip it — the egg will bond just as well.

    It won’t — and this is the one technique difference that separates a genuinely bazar-style anda paratha from most home versions. Spreading egg on top of an already-cooking paratha means the egg sits on a moving, steam-releasing surface and doesn’t have the heat or pressure to bond properly. When you flip, it slides or detaches. Spreading the egg on the ghee-coated pan first and pressing the paratha into it reverses the dynamic: the egg cooks from below against a hot surface and bonds to the paratha’s underside under its own weight. Low flame for the bonding phase is what gives the egg time to set into the paratha’s surface before any flipping happens. The order matters, and it’s not interchangeable.

    Nutrition Snapshot (Estimated per 1 anda paratha roll)

    NutrientEstimated Amount
    Calories~340–390 kcal
    Protein~11–14 g
    Fat~16–20 g (varies significantly with ghee quantity)
    Carbohydrates~38–44 g
    SodiumVaries with salt added

    Figures are estimated and will vary based on ghee/oil quantity, egg size, and flour type used. These are not a substitute for individualised nutritional advice. Per-egg data is available via USDA FoodData Central; flour/maida nutritional data is also available via FoodData Central.

    Frequently Asked Questions

    What is anda paratha roll?

    Anda paratha roll is a North Indian and Pakistani street-food dish: a thick, flaky layered paratha with egg cooked directly onto its surface, rolled or folded and served hot. It’s distinct from a stuffed egg paratha — the egg isn’t inside the dough, it’s bonded to the paratha’s outer surface by spreading beaten egg on the pan and pressing the paratha into it. The layering technique used to make the paratha dough — the double-roll peda method — is what creates the thick, flaky, bazar-style texture that distinguishes it from a plain flatbread.

    Why do you press the paratha into the egg rather than putting egg on top?

    Because it bonds properly. Spreading egg on the pan first and pressing the paratha on top means the egg cooks from below against a hot surface and adheres to the paratha’s underside under its own weight. When you flip, the egg is part of the paratha — golden, set, slightly crisp. Spreading egg on top of an already-cooking paratha reverses the dynamic: the egg doesn’t bond well and tends to slide off or remain loose when flipped. The order is not interchangeable.

    Can I use only atta instead of maida?

    Yes. Atta absorbs more water than maida, so add water in stages and expect to use slightly less. The dough texture is a little denser and the finished paratha is slightly less flaky — but the double-roll peda technique still creates good layers even with wholewheat flour. A 50-50 atta-maida mix gives a good middle ground between texture and nutrition.

    What can I add to the egg mixture?

    The base is eggs, salt, pepper, green chilli, and coriander. The creator mentions onion as a good addition, and notes that any vegetables can be added to personal preference. Finely chopped onion, capsicum (bell pepper), or even grated carrot all work — keep the add-ins finely chopped so they don’t interfere with the egg spreading evenly on the pan.

    How do I make the paratha layers flaky like a bazar?

    The double-roll peda technique is the answer. Roll the dough very thin, apply ghee + maida + kalonji, roll it up into a log, press down, apply ghee + maida again, roll up a second time, stretch slightly, tuck the end under, and form the peda. This creates stacked fat-and-flour layers inside the dough ball. When you roll the peda out and cook it, those layers separate under heat into the thick, visible flaky layers. One roll gives a plain result; two rolls gives you bazar texture.

    Can I freeze anda parathas? When is the right stage to freeze?

    Yes — and the creator explicitly recommends it. The right stage to freeze is after the partial dry-sear (Step 5): cook 1 minute each side on a dry pan with no ghee and no colour, then cool fully, stack with parchment between each paratha, wrap, and freeze for up to 1 month. To finish from frozen, go straight to Step 6 — ghee in the pan, egg spread, paratha pressed in. No need to thaw first if finishing within a few days; for longer-frozen parathas, a brief thaw at room temperature helps.

    Is anda paratha roll good for kids’ tiffin?

    The creator specifically calls this out as perfect for children’s tiffin — and it genuinely is. It holds well for 2–3 hours after cooking, packs easily when sliced into pieces rather than rolled, and most children enjoy it. For general guidance on safe handling of egg dishes for children, see the USDA food safety guidance on eggs. The partial-cook freeze method makes it practical as a weekday morning recipe — do the dough and layering on the weekend, finish fresh in under 10 minutes each morning.

    What chutney goes best with anda paratha roll?

    Fresh mint chutney is the classic accompaniment and the most natural pairing — its sharpness cuts through the richness of the ghee and egg. A cooling yogurt raita works if you want something milder and more filling alongside. Ketchup is a common children’s choice. The anda paratha roll is also good plain, straight from the pan — the seasoned egg and ghee layers are flavourful enough on their own.

    Conclusion

    Anda paratha roll sounds more involved than it is. The dough is a standard maida dough. The double-roll peda takes two minutes once you’ve done it once. The egg-first pan method is a technique shift, not a skill — you do it differently once and it’s immediately obvious why it works better. Forty-five minutes from start to table for four parathas; under ten minutes per paratha from frozen for weekday mornings.

    The creator frames this honestly: this is the kind of recipe that sounds restaurant-level to someone who hasn’t made it, but is genuinely accessible once you understand the two principles — the layering technique that produces the texture, and the egg-first method that produces the bond. Both are replicable on any home stovetop with a flat pan and a kitchen towel.

    If you want an egg and potato dish that works as a curry rather than a bread, the Anda Aloo Salan is ready in 30 minutes and follows a similar flavour-forward philosophy. The full egg recipes collection has more starting points across curry, breakfast, and street-food styles.

    Recipe demonstrated and filmed in the Zaika Mazedaar kitchen. Watch the full video on the Zaika Mazedaar YouTube channel for a step-by-step visual walkthrough.

  • Anda Korma Recipe

    Anda Korma Recipe

    Zaika Mazedaar · Restaurant-Style Egg Curries

    Spicy, silky anda korma — crispy fried eggs in a roasted onion-cashew gravy, built the way a proper degi korma mixture is made.

    There’s a particular kind of gravy that looks silky before you’ve even tasted it — ghee pooling at the surface, a deep, even colour, no separate grains of spice floating loose. That’s what’s happening here. The eggs get a crispy, golden coating from a quick fry, then sit in a roasted onion-cashew gravy until every bit of masala has soaked through.

    This recipe is demonstrated step-by-step in our video on the Zaika Mazedaar channel, filmed and cooked in a real kitchen — not assembled from recipe databases. A quick note before you start: this is not our anda korma biryani — that one’s a rice dish, this is a gravy.

    What Is Anda Korma?

    Anda korma is a rich, restaurant-style egg curry built on a roasted onion-cashew-yogurt gravy, made the way a proper degi korma mixture is made — a specific, named technique rather than a generic “restaurant-style” label. The eggs are boiled, pricked, and fried first for a crispy coating, then simmered briefly in the finished gravy purely to absorb flavour.

    It’s worth being clear about where this sits next to the other egg curries on this site, since the names can blur together. Egg lababdar uses a tomato-cashew base roasted to a thicker gravy. Our egg malai curry uses milk and very few spices for a light, fast gravy. Our Egg White Korma takes the pale, no-tomato route instead, built on cashew-almond paste and cream rather than roasted onion. And anda korma biryani is a rice dish, not a gravy at all. This anda korma is its own thing — a ground onion-cashew paste with whole spices, roasted in two stages, for a richer, silkier result than any of the others.

    Why This Recipe Works

    There’s a reason this gravy turns out silky instead of just thick — and it’s not the cashews alone.

    First: the masala is roasted in two separate stages. The yogurt-and-whole-spice base is roasted on its own first, until the ghee separates. Only then does the blended onion-cashew-green chilli paste go in, for a further roast. This staged approach — rather than grinding everything together and adding it all at once — is what gives a korma its specific character, distinct from a straightforward onion-tomato curry.

    Second: small habits that protect the gravy. The cold yogurt goes in with the gas off, so it doesn’t split the moment it hits the hot ghee — a smaller, quicker version of the room-temperature-milk principle used elsewhere on this site. I mix the cold yogurt in with the gas off; it’s a small habit, but it keeps the gravy from splitting before it’s even started.

    Ingredients

    For the Eggs

    • 5 eggs, hard-boiled, pricked all over with a fork
    • ¼ tsp red chilli powder, for frying the eggs
    • ¼ tsp turmeric powder, for frying the eggs

    For the Onion-Cashew Paste

    • 2 medium onions, finely sliced, layers loosened by hand before frying
    • 10–15 cashews, soaked in water until soft
    • 2 green chillies

    For the Yogurt-Spice Base

    • ½ cup cold yogurt (deliberately not brought to room temperature for this recipe)
    • 1 tsp red chilli powder
    • ½ tsp turmeric powder
    • ½ tsp cumin powder
    • 2 tsp coriander powder
    • 1 tsp Kashmiri red chilli powder, for colour
    • 1 tsp salt, adjustable to taste

    Whole Spices

    • 1 bay leaf (tej patta)
    • 1-inch piece cinnamon (dalchini)
    • 2–3 green cardamom pods
    • 3–4 cloves

    For Garnish

    • ½ tsp garam masala powder
    • Fresh coriander, chopped

    Fat

    • ⅓ cup desi ghee (oil is an acceptable substitute)

    Ingredient Substitutions

    IngredientSubstituteEffect on Taste / Texture
    Desi gheeOilLighter, less rounded flavour; the gravy will still turn out silky, just less rich
    CashewsSoaked almondsSlightly drier, less creamy body; still gives a good paste-based gravy
    Kashmiri red chilli powderA small pinch of paprikaAdds colour only — paprika contributes little to no heat, unlike Kashmiri chilli
    YogurtWhisked curd of the same consistencyNearly identical; still add it cold, with the gas off
    Fresh corianderSkip or use less driedLoses some brightness on top; the gravy itself is unaffected

    Mise en Place Checklist

    This gravy is roasted in two stages, so getting everything measured out ahead of time genuinely helps it move smoothly.

    • 5 eggs hard-boiled, peeled, and pricked all over with a fork
    • 2 onions, sliced, layers loosened by hand
    • 10–15 cashews soaking in water
    • Yogurt-spice mix (chilli, turmeric, cumin, coriander, Kashmiri chilli) combined in one bowl, kept cold
    • Whole spices measured into a small bowl
    • 2 green chillies, ready for the blender
    • Garam masala and fresh coriander set aside for the finish
    • Kadhai or pan, ready on the hob

    Step-by-Step Method

    1

    Fry the pricked eggs

    Heat 1 tbsp of the ghee in a kadhai over medium flame. Add the pricked boiled eggs along with ¼ tsp red chilli powder and ¼ tsp turmeric powder. Fry on medium flame until a crispy coating forms — about 3–4 minutes. Remove and set aside on a plate.

    Why prick the eggs firstPricking the boiled eggs with a fork before frying lets the masala flavour actually penetrate the egg later, rather than just sitting on the surface.
    Frying pricked boiled eggs in ghee with turmeric and chilli for Anda Korma
    2

    Fry the onion to light golden, not deep

    Add another 1 tbsp ghee to the same pan. Add the sliced onion (layers loosened by hand before slicing — this helps it fry faster and more evenly with less oil). Fry on medium-to-high flame until light golden brown, not deep or crispy — it’s going to be ground afterward, so taking it further isn’t necessary. Remove, tilt the pan to drain excess ghee back in, and set the onion aside.

    Loosen the layers firstSeparating the onion layers by hand before slicing makes them fry faster and more evenly, even with less oil — a small habit that genuinely saves time.
    Crushed onion fried light golden brown for Anda Korma
    3

    Mix in cold yogurt and spices with the gas off

    Add the remaining ghee to the pan. Turn the gas off. Add the ½ cup cold yogurt directly — no need to bring it to room temperature for this recipe. Mix in the red chilli powder, turmeric, cumin powder, coriander powder, Kashmiri red chilli powder, and the whole spices (bay leaf, cinnamon, cardamom, cloves). Combine everything well while the flame is still off.

    Watch pointMixing cold yogurt into hot ghee with the gas still on is the fastest way to split this gravy before it’s even started. Turn the gas off first, mix everything in, then turn the heat back on.
    Mixing cold yogurt and spices off the heat before roasting, Anda Korma
    4

    Roast the masala, degi-korma style

    Turn the gas back on. Cook on medium flame, stirring frequently and adding small amounts of water as needed, the way a degi korma mixture is made — roasted thoroughly rather than just simmered. While this roasts, blend the reserved fried onion with the soaked cashews and green chillies into a fine paste.

    The masala is ready for the next stage once the ghee visibly separates and the aroma develops — give this stage your full attention.

    5

    Blend the onion-cashew-green chilli paste

    While the masala roasts in step 4, blend the reserved fried onion together with the soaked cashews and green chillies into a fine, smooth paste. This staged grinding — separate from the yogurt-spice base — is what gives this gravy its specific korma character.

    Blending onion, cashew, and green chilli into a fine paste for Anda Korma
    6

    Stir the paste into the masala and roast further

    Add the onion-cashew-chilli paste to the roasted masala. Use a little water to rinse the last of the masala out of the grinder jar, and pour that in too — nothing goes to waste. Combine and roast together on low flame for a further 8–10 minutes, stirring every couple of minutes.

    Stir often once the cashews are inCashews sink and stick to the bottom quickly if left too long. Stirring every couple of minutes during this stage is what prevents burning.

    Add 1 tsp salt, adjusting to taste, and mix in well.

    Roasting the onion-cashew paste into the korma masala
    7

    Cover and cook until the gravy turns silky

    Cover and cook for about 10 minutes total at this stage, stirring 2–3 times, until the ghee separates again and the gravy looks genuinely beautiful — silky, with no raw masala smell left.

    8

    Add the fried eggs

    Add the fried eggs into the gravy and mix gently. Cover and cook for just 2–3 minutes — the eggs are already fully cooked from boiling and frying, so this step is purely to let them absorb the surrounding masala flavour.

    9

    Finish with garam masala and coriander

    Sprinkle ½ tsp garam masala powder over the top, then scatter on fresh coriander to taste. Mix gently into the gravy and let it rest for 2 minutes on low flame before serving.

    Finished Anda Korma with eggs in a silky restaurant-style gravy

    6 Things to Remember for a Perfect Anda Korma

    1. Prick the eggs before frying so the masala can penetrate later
    2. Fry the onion only light golden — it’s getting ground, not eaten as-is
    3. Mix the cold yogurt in with the gas off, then turn the heat back on
    4. Roast the masala in two stages — the yogurt-spice base first, then the onion-cashew paste
    5. Stir often once the cashews go in — they stick and burn easily
    6. Rest the gravy 2 minutes before serving

    The One Mistake That Keeps This Gravy From Turning Silky

    Adding the cold yogurt with the gas still on, or under-roasting the onion-cashew paste.

    Either one leaves you with a gravy that’s thick but not silky. Cold yogurt hitting a hot pan with the gas still running is the fastest way to split it before the cooking has even properly started. And rushing past the second roasting stage — the 8–10 minutes after the onion-cashew paste goes in — leaves a gravy that tastes raw at the edges, no matter how long it simmers afterward.

    Turn the gas off before the yogurt goes in. Wait for the ghee to visibly separate, twice — once after the base roasts, once after the paste goes in.

    For Beginners

    Don’t rush the bhuna stage. Wait for the ghee to visibly separate before moving on — and that happens twice in this recipe, once after the yogurt-spice base roasts, and again after the onion-cashew paste is stirred in. If you’re unsure, give it another minute or two rather than moving on early.

    For Confident Home Cooks

    Adjust the Kashmiri chilli ratio slightly upward for a deeper red colour without adding more heat. You can also swap the ghee for oil for a lighter version of this gravy — it loses some of the rounded, restaurant-style richness, but the degi-korma technique still comes through.

    What to Serve Anda Korma With

    Jeera rice is the pairing the creator herself recommends, and it’s an easy match for this richer gravy. Plain white rice works just as well if you’d rather keep things simple. Naan or paratha are both great for scooping up the silky gravy, especially for a weekend dinner where you want something a little more indulgent than a quick weeknight curry. If you want something much faster on a weeknight instead, our Butter Garlic Egg is ready in under 15 minutes.

    Storage, Reheating & Make-Ahead

    SituationGuidance
    Fridge storageUp to 2 days in an airtight container
    Ghee solidifyingThe gravy may solidify slightly when chilled, since it’s ghee-based — this is normal and resolves on reheating
    FreezingNot recommended — the yogurt-cashew gravy can separate on thawing
    ReheatingReheat gently on low flame with a splash of water; avoid high-power microwave reheating
    Make-ahead strategyThe gravy is actually a good make-ahead option — it reheats well, and the flavour deepens slightly overnight

    Because this gravy contains both dairy and egg, treat leftovers the way you would any dairy-and-egg dish — refrigerate promptly, and reheat thoroughly rather than letting it sit out.

    Myth vs. Fact: Is Egg Korma the Same as Anda Korma Biryani?

    Anda korma and anda korma biryani are basically the same dish with different names.

    No — one’s a gravy, one’s a rice dish. This anda korma is a roasted onion-cashew-yogurt curry with crispy fried eggs sitting in the gravy, eaten alongside rice or bread. Anda korma biryani folds a yogurt-only masala directly into the rice itself, with no separate gravy at all. They share a name and a few spices, but the technique, texture, and the way you’d actually eat each one are genuinely different.
    Nutrition Snapshot (Estimated per serving)

    NutrientEstimated Amount
    Calories~320–360 kcal
    Protein~13–15 g
    Fat~24–28 g
    Carbohydrates~11–14 g
    SodiumVaries with salt added

    Figures are estimated and will vary based on exact ghee quantity, egg size, and cashew amount. These are not a substitute for individualised nutritional advice. Per-egg and per-cashew nutritional data is available via USDA FoodData Central.

    Frequently Asked Questions

    What is anda korma?

    Anda korma is a rich, restaurant-style egg curry built on a roasted onion-cashew-yogurt gravy, made using the same technique used for a proper degi korma mixture. Boiled eggs are pricked, fried until crispy, and then simmered briefly in the finished gravy purely to absorb flavour.

    Is egg korma the same as anda korma biryani?

    No. Anda korma is a gravy-style curry eaten with rice or bread. Anda korma biryani is a rice dish where a yogurt-based masala is folded directly into the rice, with no separate gravy. They share some spices and a name, but the technique and the way each is served are genuinely different.

    Why fry the onion lightly instead of deep golden?

    Because the onion gets ground into a paste afterward, along with cashews and green chillies. Taking it to deep, crispy brown isn’t necessary for that purpose and can actually add a slightly bitter edge once blended — light golden is enough.

    Why add yogurt with the gas turned off?

    Cold yogurt added to hot ghee while the flame is still on can split or curdle almost immediately. Turning the gas off, mixing the yogurt and spices in fully, and then turning the heat back on gives the dairy a gentler start and keeps the gravy smooth.

    Can I use oil instead of ghee?

    Yes. The gravy will turn out a little lighter and less rich in flavour, but the degi-korma roasting technique still works the same way, and the result is still recognisably anda korma.

    Can I make this less spicy?

    Yes — reduce the green chillies in the onion-cashew paste, or use a milder variety. You can also lower the red chilli powder in the yogurt-spice base slightly while keeping the Kashmiri chilli powder, which mainly affects colour rather than heat.

    Why does the cashew paste get added separately, later in the recipe?

    Roasting the yogurt-spice base first, then stirring in the blended onion-cashew-green chilli paste afterward for a second roast, is what gives this gravy its specific korma character. Adding everything together at once, the way you might for a simpler onion-tomato curry, produces a noticeably different, less silky result.

    What’s the best side to serve with egg korma?

    Jeera rice is the pairing the creator herself recommends. Plain white rice, naan, or paratha all work well too — any of them are good at soaking up the silky gravy.

    Conclusion

    Anda korma earns its richer, more indulgent identity honestly. Compared to the lighter egg curries on this site, this one asks for a bit more patience — two roasting stages, a staged paste, frequent stirring once the cashews are in — but the payoff is a gravy that’s genuinely silky, not just thick, with crispy-fried eggs sitting in it rather than just simmered raw.

    Prick the eggs before frying, keep the onion light since it’s getting ground, mix the cold yogurt in with the gas off, and don’t rush either roasting stage. From there, it’s a proper weekend dish, built using the degi-korma technique that gives it its name.

    Good for a slightly special weekend dinner with naan, and a solid make-ahead option too — the gravy reheats well, and the flavour only deepens overnight.

    Recipe demonstrated and filmed in the Zaika Mazedaar kitchen. Watch the full video on the Zaika Mazedaar YouTube channel for a step-by-step visual walkthrough.

  • Anda Aloo Salan Recipe

    Anda Aloo Salan Recipe

    Zaika Mazedaar · Pakistani & North Indian Curries

    Both the potato and the egg fried first — in the same oil, one after the other — then simmered in a spiced tomato-onion gravy. No cream, no cashews. Just a fast, homestyle salan that’s ready in under 35 minutes.

    There are two things that are almost always in the fridge — eggs and potatoes. And this anda aloo salan recipe is one of the most satisfying things you can do with both of them. Two ingredients, one pan, under 35 minutes, and a gravy that clings to rice and soaks into roti in equal measure.

    What sets this apart from other egg recipes on the site is exactly what the name describes: it’s a potato-and-egg curry — both in the same dish, both fried first, both doing something specific before they ever touch the gravy. This isn’t a cream curry, a cashew curry, or a slow-cooked restaurant-style dish. It’s a weeknight workhorse, the kind you can have on the table before the hunger tips into impatient. If you’re looking for something richer and more indulgent, our Egg Lababdar uses a cashew-tomato base with cream for a restaurant-style finish — but this one runs in a completely different lane.

    This recipe is demonstrated step-by-step in the Zaika Mazedaar YouTube channel video — cooked and filmed in a real home kitchen, not assembled from a recipe database. Every timing and technique detail below comes directly from that video.

    What Is Anda Aloo Salan?

    Anda aloo salan — also called tale hue ande aloo ka salan — is a subcontinental home curry built on a tomato-onion gravy, with both fried egg and fried potato as the main ingredients. The word salan refers to a curry with a lighter, more liquid gravy than a dry masala — specifically what you’d call a shorbay-waali gravy: one that flows, pools under rice, and soaks into bread. Unlike the site’s cream-based egg dishes (Egg Lababdar, Egg Butter Masala, Egg Malai Curry, Anda Korma), this has no cream, no cashews, no yogurt, and no slow-roasted onion purée. It’s a simpler, faster, more homestyle cook — and honestly, one of the most satisfying versions of an egg curry there is.

    The thing that most recipes don’t explain — and this one does — is why both the potato and the egg are fried before they go into the gravy. That frying step is not optional dressing. It is the technique, and the flavour difference is significant.

    Why This Recipe Works

    Most quick-cook egg curry recipes do one of two things: they either add raw potato directly to the gravy (which gives you a soft, mushy result with no textural contrast), or they skip potato entirely and go straight to egg. This recipe does something different — and older.

    The potatoes are fried first, for 6–7 minutes on medium-to-high flame, until light golden at the edges. That frying creates a light crispy layer on the outside. They go into the gravy only half-cooked — finishing inside the sauce, absorbing every bit of the masala flavour while the outside layer holds its shape. As our creator Nazia puts it: “frying creates a crispy layer that gives a really good flavour when you eat it.” It genuinely does.

    The eggs are then fried in the same leftover oil. Same rationale: a golden, slightly crispy exterior that holds the egg together visually and texturally once it’s placed on the finished gravy. No mushiness, no falling apart, no boiled-egg blandness.

    That same oil runs the entire recipe — potato frying, egg frying, the jeera tadka, the onion paste, the tomato and spices. Nothing is discarded. Each stage of cooking leaves something in the oil, and every subsequent stage picks it up. That’s layered flavour in the most literal sense, and it’s the old subcontinental technique that most modern quick-cook recipes quietly skip. If you want a richer, cream-and-butter egg gravy, Egg Butter Masala takes that approach — but the one-pan flavour layering here is its own reward.

    Ingredients

    For Frying

    • 2 tbsp mustard oil (sarson ka tel) — refined oil works as a substitute, see notes
    • 3 medium potatoes, cut into small cubes (size is up to you)
    • 4 boiled eggs, whole

    For the Onion Paste

    • 1 medium onion
    • A little garlic (3–4 cloves)
    • A small piece of fresh ginger
    • 1–2 green chillies
    • A splash of water (for blending)

    For the Tomato Base & Spices

    • 2 medium tomatoes, blended into a paste
    • ½ tsp cumin seeds (jeera) — for the tadka
    • 1 tsp salt (adjusted in two stages — start conservatively)
    • 1 tsp red chilli powder
    • 1½ tsp coriander powder (dhaniya powder)
    • ½ tsp turmeric powder (haldi)
    • Approximately ½ cup water (plus the rinse water from the grinding jar)

    For the Finish

    • 1 tsp kasuri methi (dried fenugreek leaves), crushed by hand
    • ½ tsp garam masala powder
    • Fresh coriander (hara dhaniya), a generous handful — “gravy ki jaan hoti hai, bilkul must hota hai”
    • A little extra water if serving with rice (for a looser consistency)

    Ingredient Substitutions

    IngredientSubstituteEffect on Taste / Texture
    Mustard oilRefined vegetable oilMilder flavour overall — mustard oil’s pungency mellows beautifully when heated, giving a depth refined oil can’t replicate; still a perfectly good result
    Fresh tomatoesCanned crushed tomatoesMay need less roasting time and slightly less water added; a touch more acidic — balance with a tiny pinch of sugar if needed
    Kasuri methiFresh fenugreek leaves (methi)Use very sparingly — fresh fenugreek is significantly stronger and more bitter than dried; a small pinch goes a long way
    Boiled + fried eggsBoiled eggs added directly (not fried)You lose the crispy skin and the flavour it brings to the oil — the result is softer and less layered; the frying is genuinely worth doing
    Green chilli (in paste)Skip or reduceMilder result; adjust red chilli powder for heat if you skip green chilli entirely

    Mise en Place Checklist

    Get all of this ready before the oil goes on. Ten minutes of prep and the whole cook flows without stopping.

    • Potatoes peeled and cut into small cubes — your preferred size
    • Eggs hard-boiled and peeled, ready to fry whole
    • Onion + garlic + ginger + green chilli blended into a smooth paste with a splash of water; set aside
    • Tomatoes blended into a smooth paste; set aside in a separate bowl
    • All dry spices measured into one small bowl (salt, red chilli, coriander, turmeric)
    • Fresh coriander washed and roughly chopped
    • Kasuri methi and garam masala measured and set near the stove
    • A small cup of water within reach for consistency adjustments

    Step-by-Step Method

    1

    Fry the potato cubes until light golden

    Heat 2 tbsp mustard oil in a kadhai or deep pan over medium-to-high flame. When the oil is hot, add the potato cubes. Fry for 6–7 minutes, turning occasionally, until the edges are light golden and a crispy layer has formed on the outside. They won’t be fully cooked through yet — that happens in the gravy. Remove with a slotted spoon and set aside on a plate.

    Why fry the potatoes first? That golden crust isn’t just for colour — it holds the potato cube’s shape during the gravy simmer, creates a textural contrast in the finished dish, and leaves behind potato-flavoured oil that carries through every subsequent step.
    Potato cubes frying to light golden in mustard oil for Anda Aloo Salan
    2

    Fry the boiled eggs in the same oil

    In the same leftover oil (do not add more or discard any), add the 4 whole boiled eggs over medium-to-high flame. Fry, turning gently, until a light golden, crispy skin forms all around each egg. No specific time — watch for the colour and texture visually. Remove and set alongside the potatoes.

    Same oil, same logic. The eggs pick up the potato-seasoned oil, develop their own crispy layer, and in turn leave behind yet more flavour for the tadka and onion paste that come next. Nothing in this recipe is wasted.
    Boiled eggs frying until crispy golden skin for Anda Aloo Salan
    3

    Tadka: splutter cumin, then add the onion paste

    Add ½ tsp cumin seeds to the same oil. Let them splutter and turn lightly brown for about 30 seconds. Add the blended onion-garlic-ginger-chilli paste directly. Cook on medium flame, stirring regularly, until the colour changes slightly — a gentle shift from raw white to a soft, light golden — the excess water evaporates and the oil just begins to separate at the edges. This usually takes 4–6 minutes.

    Don’t rush the onion paste. Raw onion paste that hasn’t been properly cooked will make the gravy taste sharp and unfinished. Wait for the colour shift and the oil-release cue before moving on.
    Cumin spluttering and blended onion paste added to the pan for Anda Aloo Salan
    4

    Add tomato paste and all dry spices; roast until oil separates

    Add the blended tomato paste. Then add all the dry spices: 1 tsp salt (hold some back to adjust later), 1 tsp red chilli powder, 1½ tsp coriander powder, and ½ tsp turmeric. Stir everything together and cook on low flame for 4–5 minutes. Then add the rinse water from the grinding jar (roughly ½ cup plus a little), stir, and continue cooking on low flame for another 6–7 minutes — until the tomatoes are fully roasted, the raw smell is completely gone, and the oil has visibly separated from the masala.

    Salt in two stages. Add less now than you think you need and adjust after the potatoes go in. As Nazia notes: “if it gets too salty once, making it milder again takes more effort.” Smart habit across all curries.
    Tomato paste roasted with spices until oil separates for Anda Aloo Salan
    5

    Add the fried potatoes; simmer covered until fully tender

    Add the fried potato cubes to the masala. Add a little water to help them finish cooking — just enough to keep the gravy moving. Stir gently to coat. Cover the kadhai and cook on low flame for approximately 5 minutes, stirring once or twice, until the potatoes are completely tender (they should cut without resistance) and the oil has risen to the surface again.

    Test before moving on. Press a potato cube against the side of the kadhai with the back of a spoon. If it yields easily, they’re done. If there’s still any firmness in the centre, give them another minute or two covered.
    Fried potato cubes simmering in the masala gravy for Anda Aloo Salan
    6

    Finish the gravy: kasuri methi, garam masala, fresh coriander

    Add 1 tsp kasuri methi, crushing it between your palms first as you add it. Add ½ tsp garam masala. Add the fresh coriander generously. Stir everything gently. Taste for salt and adjust now if needed. Then adjust the consistency: if serving with rice, add a little more water and stir through for a looser, more pourable salan. If serving with roti, paratha, or puri, leave it thicker — no extra water needed.

    7

    Halve the eggs, place cut-side-up on the gravy, and cover

    Cut each fried egg in half lengthways. Arrange the halves cut-side-up across the surface of the finished gravy — do not stir them in. Scatter a little fresh coriander on top. Cover the kadhai and leave on low flame for 1–2 minutes only, just enough for the oil to come back to the surface and the eggs to warm through. Open, serve immediately in the same pan.

    Cut-side-up matters. Placing the halved eggs yolk-side-up is both visually distinctive and practical — the yolk stays intact, the crispy outer layer stays visible, and the egg holds its shape when served.
    Finished Anda Aloo Salan garnished with fresh coriander, served with white rice

    5 Things That Make This Salan Turn Out Right Every Time

    1. Fry the potato until light golden at the edges — not just until opaque; the colour means the crispy layer has actually formed
    2. Fry the eggs in the same leftover oil — that oil is now carrying potato flavour; pouring it out loses that
    3. Don’t rush the tomato-roasting stage — wait for the oil to fully separate before adding anything else
    4. Add salt in two stages — conservative at first, adjusted after the potatoes have absorbed some; far easier than correcting an over-salted curry
    5. Adjust gravy consistency after the eggs go in — not before; the eggs change how thick it looks and feels, and it’s easier to loosen at the end than earlier

    The Two Mistakes That Most Often Affect This Dish

    Not frying the potato long enough.

    This is the most common one. If the potato cubes don’t get their full 6–7 minutes in hot oil, no crispy outer layer forms — and without that layer, they tend to break apart during the gravy simmer. You end up with a mashed-potato texture instead of distinct, flavourful pieces. The visual cue is clear: you want to see light gold at the edges, not just opacity. Let the colour tell you when they’re ready.

    Leaving the eggs on the gravy too long after placing them.

    Once the halved eggs go onto the gravy, they need 1–2 minutes covered on low flame — nothing more. The egg is already cooked (boiled and fried); you’re only warming it through and letting the oil return to the surface. More time than that and the yolk turns rubbery and the crispy skin softens away.

    For Beginners

    The most important thing to remember is the sequence: everything happens in the right order, in the same oil. Don’t be tempted to skip the frying steps or swap them around. The frying takes an extra 5 minutes compared to a no-fry method — but what it adds to the finished dish is worth far more than the time. Trust the sensory cues over the clock: light golden potato, separated oil in the tomato masala, a finger-test on the finished potato to check it’s fully tender. The clock is a guide; your eyes and hands are the actual tool.

    For Confident Home Cooks

    Mustard oil is worth using here if you can get it. Its flavour when raw is sharp and pungent, but once it heats past its smoke point it mellows into something quite different — warmer, slightly nutty, with a depth that refined oil simply doesn’t have. For even more layered complexity, try adding a small pinch of whole black peppercorns to the tadka alongside the cumin. And if you want to explore a dish that takes potato AND eggs AND rice all in one pot, our Muradabadi Anda Yakhni Pulao takes exactly that route.

    What to Serve Anda Aloo Salan With

    The gravy consistency you finish with determines the best pairing. For white rice — the creator’s own preference for this dish — loosen the salan with a little extra water at the finish for a pourable, shorbay-waali consistency. It’s excellent alongside plain jeera rice, where the cumin in the rice echoes the tadka in the salan. If you’d rather build a full rice-based meal around eggs instead, our Anda Dum Biryani is worth trying next.

    For roti, skip the extra water entirely — the thicker gravy clings to bread in exactly the right way. Paratha is even better: the layered, slightly oily bread is a natural match for a salan with this much going on. And for something more festive, puri — puffy, golden, straight from the oil — elevates a simple weeknight salan into something that feels like a proper occasion.

    Storage, Reheating & Make-Ahead

    SituationGuidance
    Fridge storage (complete dish)Up to 2 days in an airtight container — do not leave at room temperature for more than 2 hours (egg-and-potato dishes are perishable)
    ReheatingReheat gently on low flame with a splash of water to loosen the gravy; do not microwave the eggs for more than 30 seconds or the texture suffers noticeably
    FreezingNot recommended — potato texture becomes grainy and egg texture turns rubbery after thawing
    Make-ahead strategyMake the gravy (steps 3–6) up to 2 days ahead without the eggs; refrigerate. When ready to serve, reheat the gravy, add the fried eggs (fry fresh), cover and rest 1–2 minutes

    For detailed food-safety guidance on storing and reheating egg and potato dishes, see USDA FSIS egg safety guidelines.

    Myth vs. Fact: Do You Need to Fry the Potato and Egg, or Can You Just Boil Them?

    You can skip the frying — boiled potatoes and boiled eggs in a gravy are the same thing.

    They’re not. The frying step creates a crispy outer layer on both the potato and the egg that serves three distinct purposes: it provides textural contrast (soft inside, slightly firm outside) in the finished dish; it prevents both ingredients from breaking apart during the gravy simmer; and — most importantly for this recipe — it builds flavour into the oil itself that then carries through every subsequent step. A boiled potato dropped straight into a tomato gravy absorbs the gravy’s flavour passively. A fried potato that’s half-cooked in hot oil before it meets the gravy absorbs actively, from a position of already having built its own outer layer. That’s the difference between a dish that tastes like the sum of its parts and one that tastes like it was cooked by someone who knows what they’re doing.

    Nutrition Snapshot (Estimated per serving — 2 eggs + potato)

    NutrientEstimated Amount
    Calories~320–380 kcal
    Protein~14–18 g
    Fat~18–22 g
    Carbohydrates~22–28 g
    SodiumVaries with salt added

    This is a home-cooked curry — nutrient figures are estimates based on standard ingredient data and will vary based on exact oil quantity, egg size, and potato weight. These are not a substitute for individualised nutritional advice. Per-egg and per-potato nutritional data is available via USDA FoodData Central.

    Frequently Asked Questions

    What is anda aloo salan?

    Anda aloo salan is a subcontinental home curry combining fried egg and fried potato in a spiced tomato-onion gravy — a shorbay-waali (lighter, more liquid) gravy with no cream, cashews, or yogurt. The name translates literally as “egg potato curry,” and the dish is a staple weeknight recipe across Pakistani and North Indian home cooking. You can explore the full range of egg dishes on the site in our egg recipes collection.

    Why do you fry the egg and potato before adding them to the gravy?

    Frying first creates a crispy outer layer on both — which holds their shape during the gravy simmer, adds textural contrast to the finished dish, and builds flavour directly into the oil that then carries through the entire recipe. It’s an old subcontinental technique that most modern quick-cook recipes skip, but the flavour difference is real and significant. For a broader look at why par-frying vegetables before braising them matters, Serious Eats has covered the technique science in depth.

    Can I use raw potato instead of frying it first?

    Technically yes, but the result will be noticeably different. Raw potato added directly to a gravy tends to become soft and slightly mushy without the structural layer frying provides — you lose the textural contrast and some of the flavour complexity. If you’re in a real rush, par-boil the potatoes first (until just barely cooked through) and add them to the gravy, but skip frying entirely only if you have to. For an even faster egg dish on busy nights, our Butter Garlic Egg is ready in under 15 minutes.

    What’s the best oil to use — mustard or refined?

    Mustard oil (sarson ka tel) is the traditional choice and genuinely worth using if you can find it. Its flavour is sharp and pungent when raw, but once heated past its smoke point it mellows into something warm and nutty — a depth refined oil simply doesn’t replicate. That character carries through the entire dish since you’re cooking everything in the same oil. Refined oil produces a perfectly good salan, just a milder one. For more on mustard oil’s flavour transformation when heated, Bon Appétit has a useful overview of its role in South Asian cooking.

    How do I adjust the gravy thickness depending on what I’m serving it with?

    Add the extra water at the very end — after the kasuri methi, garam masala, and coriander are in, and after you’ve tasted for salt. For rice: add a splash of water and stir through for a looser, pourable salan. For roti, paratha, or puri: leave it as is — the thicker consistency is exactly right for bread. Don’t try to adjust thickness before the eggs go in; the eggs change the appearance slightly and it’s easier to fine-tune at the very end.

    Can I make this without tomatoes?

    You can, but the tomato is doing significant structural work here — providing acidity, body, and the base of the gravy’s colour. Without it, you’d need a different acid (a little tamarind paste or dried mango powder could substitute) and the gravy would be thinner and paler. The dish would still be edible but would lose a lot of what makes a salan a salan. Tomato substitution works better in richer gravies where cream or yogurt provides body independently — this lighter-style curry really does rely on it.

    How long does anda aloo salan keep in the fridge?

    Up to 2 days in an airtight container — but don’t leave it at room temperature for more than 2 hours before refrigerating. Egg-and-potato dishes are more perishable than pure meat curries. Reheat gently on low flame with a splash of water; avoid microwaving on high for more than 30 seconds if you want to preserve the egg texture.

    What’s the difference between salan and regular curry?

    Salan in the subcontinental context typically refers to a curry with a thinner, more liquid gravy — shorbay-waali — as opposed to a thick, dry masala or a restaurant-style sauce. A regular “egg curry” could mean almost any gravy style; salan implies a specific lightness and fluidity that makes it especially good over rice. The site’s other egg gravies — Egg Lababdar, Egg Butter Masala, Anda Korma — are all richer, thicker, cream- or cashew-based dishes. This one is genuinely different in character.

    Conclusion

    Anda aloo salan is proof that the two most reliable things in any kitchen — eggs and potatoes — don’t need embellishment to be genuinely delicious. They need technique. Frying both first, in sequence, in the same oil, is an old subcontinental method that most modern quick-cook recipes quietly skip. This one doesn’t skip it, and that’s the whole point.

    Six things to take away: fry the potatoes 6–7 minutes until light golden before the gravy; fry the eggs in the same oil for layered flavour; use the rinse water from the grinding jar when adding tomato — nothing gets wasted; add fresh coriander generously, it genuinely is the gravy’s jaan; adjust consistency last, after the eggs are set; and cover for only 1–2 final minutes so the eggs stay intact. That’s the whole recipe in six lines.

    Make it on a weeknight with rice. Make it on a Sunday with paratha. Pack the leftovers into a tiffin with roti the next day. It works across all of them. And if you want to go further with egg curries, the egg recipes collection has everything from quick weeknight cooks to restaurant-style gravies worth saving for a special occasion.

    Recipe demonstrated and filmed by Nazia in the Zaika Mazedaar kitchen. Watch the full video on the Zaika Mazedaar YouTube channel for a step-by-step visual walkthrough.

  • Turkish Eggs Cilbir Recipe

    Turkish Eggs Cilbir Recipe

    Zaika Mazedaar · International Egg Recipes

    A four-step Turkish breakfast — garlic yogurt, herb oil, chilli butter, and soft eggs — made simple, no poaching required. Filmed and tested at home.

    Cool, garlicky yogurt on the plate. A drizzle of herb-scented olive oil. A pool of butter that’s been sitting with chilli flakes just long enough to turn a deep, fragrant red. And on top of everything, two eggs with fully set whites and yolks that are still deliberately, unapologetically soft. That’s Turkish eggs — Çılbır — and it’s one of those dishes where the sum is considerably more than its parts.

    The garlic in that yogurt is doing more work than four ingredients should reasonably be able to do — it’s the first thing people notice. Combined with the way the chilli butter blooms into the olive oil and soaks slowly into the yogurt beneath, the whole plate becomes something you’ll want to eat with bread and absolutely nothing else. For more egg recipes to explore, the site’s egg recipes collection covers everything from quick weeknight cooks to international dishes.

    This recipe is demonstrated step-by-step in the Zaika Mazedaar YouTube channel — filmed and tested in a real home kitchen. The version here uses a gently-cooked egg method instead of the traditional poached egg, which makes the dish genuinely accessible for anyone who finds poaching difficult or unreliable.

    What Is Çılbır (And How It Compares to Our Shakshuka)?

    Çılbır (pronounced roughly “chul-BUR”) is a traditional Turkish breakfast dish: eggs served over garlicky yogurt, drizzled with spiced butter, often with fresh herbs. It appears in Ottoman culinary records as far back as the 15th century and has been part of Turkish breakfast culture for a very long time. For more on its origins and traditional presentation, The Spruce Eats has a good overview of the dish’s background and traditional context.

    Çılbır is the site’s second Turkish-origin dish, after Egg Shakshuka — which takes a completely different, gravy-based approach. Both genuinely represent Turkish breakfast and egg traditions, but they are nothing alike to cook or eat. Shakshuka is a tomato-and-pepper gravy with eggs poached directly into a cooked sauce. Çılbır has no gravy and no cooking-down stage at all — it’s four separate components (garlic yogurt, herb oil, chilli butter, and softly-cooked eggs) assembled together on a plate. Same country of origin, completely different dish. Worth being clear about that for anyone exploring both.
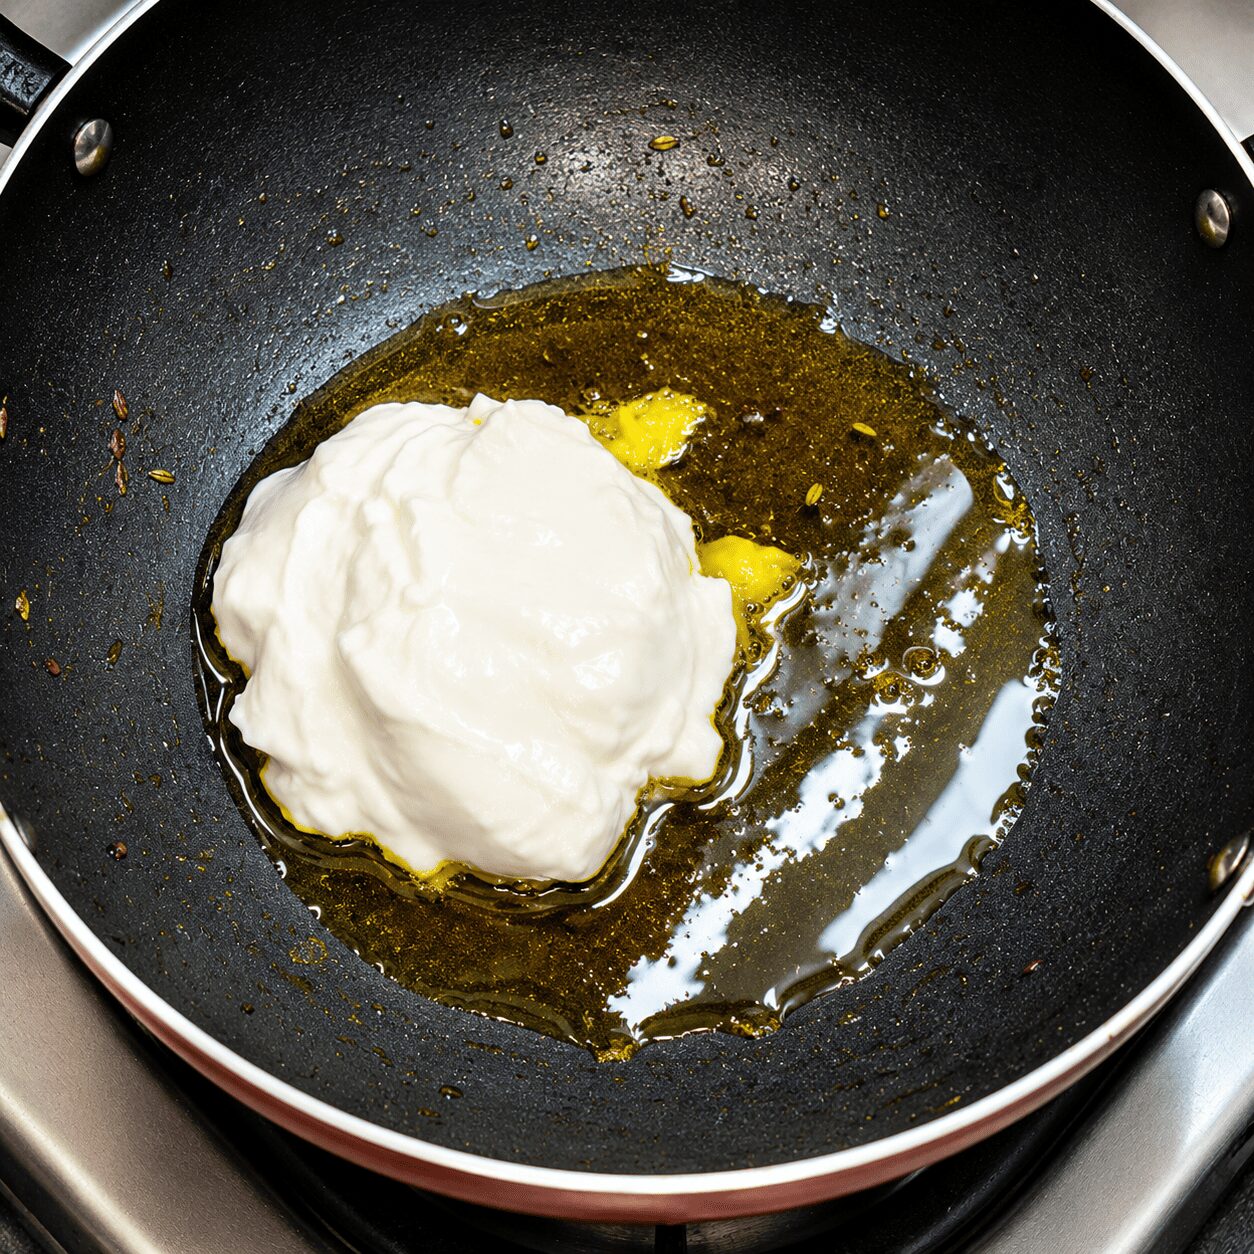
    Why This Recipe Works

    Çılbır’s four-component structure looks elaborate on paper, but each component takes less than three minutes to prepare — and three of them can be made well ahead of the eggs. The yogurt base is just mixing. The herb oil is just mixing. The chilli butter is just melting. The eggs are the only time-sensitive part, and they take two minutes on low flame. If you have all three other components ready before you start the eggs, this dish is practically impossible to get wrong.

    The traditional version uses poached eggs — a technique that gives a beautiful, membrane-less egg that sits cleanly in the yogurt. This recipe deliberately demonstrates an easier alternative: eggs gently cooked covered on low flame in a little olive oil, until the whites are fully set and the yolk stays soft. The result is just as good to eat, considerably more reliable to produce, and — importantly — doesn’t require the specific skill set that poaching demands. If you’d like to try the traditional poached-egg method, the site will cover that technique separately; this version is offered specifically for readers who want Çılbır without the learning curve.

    One other note: unlike every gravy-style egg dish on this site, Çılbır is not a curry. There’s no masala, no cooking-down stage, no tadka. It’s an assembly dish with a very short cooking window. That distinction matters both for how you approach it and for how you’ll want to eat it — immediately, with good bread, while everything is still at the right temperature.

    Ingredients

    For the Garlic Yogurt Base

    • 3 tbsp thick yogurt — not thin or watery; see tip below if that’s all you have
    • 1 garlic clove, finely grated
    • 2 pinches salt
    • A little paprika powder (mild heat — black pepper or Kashmiri/degi chilli powder works as a substitute)

    For the Parsley Oil

    • 1 tbsp olive oil (Turkish cooking uses olive oil specifically)
    • 1 tsp finely chopped fresh parsley — or fresh coriander (a direct, genuinely workable substitute)

    For the Chilli Butter

    • 1 tbsp unsalted butter (if using salted butter, reduce salt elsewhere in the dish accordingly)
    • ½ tsp crushed red chilli flakes
    • ½ tsp paprika powder (same substitutes as above apply)

    For the Eggs

    • A little olive oil (for the pan)
    • 2 eggs
    • A light sprinkle of salt

    To serve: Good bread or a soft bun — Turkish eggs want something to soak up the yogurt and oils. Nothing else is needed.

    Ingredient Substitutions

    IngredientSubstituteEffect on Taste / Texture
    Fresh parsleyFresh coriander (hara dhaniya)The creator’s own suggested substitute — genuinely works; flavour is different but complementary to the yogurt base; not a compromise to apologize for
    Paprika powderBlack pepper or Kashmiri/degi chilli powderBlack pepper adds sharpness without colour; Kashmiri chilli adds colour with minimal heat — a slightly closer match to paprika’s mild character
    Thick yogurtThin yogurt, strained through a sieve until thickenedWorks perfectly once strained — see tip below; don’t use thin yogurt un-strained as it makes the base watery and the dish collapses visually
    Unsalted butterSalted butterFine to use — simply reduce or skip the pinch of salt in the yogurt base to compensate
    Olive oil (herb oil)Any mild-flavoured oilOlive oil is specifically traditional here and its fruity flavour contributes to the dish’s character; a neutral oil will be blander but functional
    Straining thin yogurt. If your yogurt is thin and watery, set a fine sieve or a piece of muslin over a bowl, add the yogurt, and leave it for 20–30 minutes to let the excess water drip through. What remains in the sieve is the thick, creamy yogurt you need. This is the same process used to make Greek-style yogurt — it genuinely thickens it, and the result is exactly right for Çılbır.

    Mise en Place Checklist

    Three of the four components can be prepared completely before the eggs start. The eggs are the last thing made — always. Get everything else ready first.

    • Yogurt confirmed thick — or already straining if needed
    • Garlic clove finely grated, ready to mix into yogurt
    • Parsley (or coriander) finely chopped
    • Olive oil measured for both the herb oil and the egg pan
    • Butter measured and in a small saucepan
    • Chilli flakes and paprika measured together
    • Yogurt brought to room temperature (not fridge-cold — it should be cool but not cold when plated)
    • Serving plate or bowl ready on the counter before the eggs start
    • Bread ready to serve immediately once the eggs are done

    Step-by-Step Method

    Four short components. The first three are made in sequence and set aside. The eggs are made last, always — they are the most time-sensitive part.

    Component 1 — Garlic Yogurt Base

    1

    Mix the garlic yogurt

    Add 3 tbsp thick yogurt to a small bowl. Finely grate in 1 garlic clove and add it directly to the yogurt. Add 2 pinches of salt and a little paprika powder. Mix everything together well until fully combined and smooth. Set aside at room temperature — not in the fridge.

    Thick yogurt is non-negotiable. Thin, watery yogurt will pool and separate on the plate the moment the warm eggs hit it. If your yogurt is thin, strain it first (see the substitution note above). The whole dish depends on the yogurt holding its shape as a base.
    Mixing thick yogurt with garlic, salt, and paprika for Turkish Eggs Çılbır

    Component 2 — Parsley Oil

    2

    Mix the herb oil

    Combine 1 tbsp olive oil and 1 tsp finely chopped fresh parsley (or coriander) in a small bowl or ramekin. Mix and set aside. This is purely an infusion — the oil sits with the herb long enough to absorb its fragrance before it goes on the plate.

    Parsley-infused olive oil prepared separately for Turkish Eggs Çılbır

    Component 3 — Chilli Butter

    3

    Melt the butter with chilli and paprika

    Place 1 tbsp unsalted butter in a small saucepan over low flame. Once the butter has melted, add ½ tsp crushed red chilli flakes and ½ tsp paprika powder. Stir once and cook only until everything is combined and the butter has taken on a deep red-orange colour. Turn off the heat immediately. Do not let it brown or burn.

    Low flame and no further. The butter needs only to melt and combine with the chilli and paprika — not cook further. Overheated butter will turn brown and bitter; the chilli flakes will go from fragrant to acrid. Once it’s melted and coloured, it’s done.
    Melting butter with chilli flakes and paprika for Turkish Eggs Çılbır

    Component 4 — The Eggs

    4

    Gently cook the eggs — covered, on low flame

    Heat a little olive oil in a small pan over low flame. Once warm, crack in 2 eggs directly. Add a light sprinkle of salt. Cover the pan and cook on low flame for 2 minutes. The whites should be fully set; the yolks must remain soft and still slightly runny. Do not cook further than this — the soft yolk is not incidental, it is the entire point of this dish’s texture.

    This is deliberately not poaching. The traditional Çılbır uses poached eggs — a technique that can be tricky to master. This gently-cooked method produces a set white and a soft yolk through steam rather than poaching liquid. The result is very close to the traditional texture and considerably more beginner-friendly. No one is compromising by using this method.
    Gently cooking eggs covered with soft yolks for Turkish Eggs Çılbır

    Assembly

    5

    Spread the yogurt on the plate

    Spoon the garlic yogurt onto your serving plate or bowl. Use the back of a spoon to spread it across the surface in an even layer — not thick in the centre and bare at the edges, but distributed so every bite will have yogurt beneath it. This is the base the rest of the dish sits on.

    Spreading the garlic yogurt on a plate before assembling Turkish Eggs Çılbır
    6

    Drizzle both oils over the yogurt, add eggs, drizzle again

    Drop the parsley oil across the yogurt in small drops — not one big pour in the centre, but scattered lightly across the surface. Do the same with the chilli butter. Then place the two soft-cooked eggs on top of the yogurt. Finally, drizzle a little of both the parsley oil and the chilli butter directly over the eggs themselves. Serve immediately with bread.

    Finished Turkish Eggs Çılbır served with bread

    5 Things to Remember for Perfect Turkish Eggs (Çılbır)

    1. Use thick yogurt — or strain thin yogurt before you start; watery yogurt makes the dish collapse
    2. Prepare all three other components before you start the eggs — the eggs take 2 minutes and cannot wait
    3. Cook the eggs on low flame, covered — the steam does the work; high heat toughens the whites and risks overcooking the yolk
    4. Melt the chilli butter gently and stop immediately once combined — overheated butter goes bitter
    5. Assemble and serve immediately — this dish does not wait; the soft yolk and warm oils on cool yogurt are the whole point

    The Two Mistakes That Most Often Affect This Dish

    Using thin yogurt without straining it.

    Thin yogurt on the plate looks fine for about 30 seconds — and then the warm eggs hit it and it becomes a watery pool. The structural integrity of the base is gone, and the whole dish separates visually and texturally. It’s an easy fix: strain it first. Twenty minutes through a sieve is all it takes. There’s no reason to let thin yogurt be a blocker — just plan for it.

    Starting the eggs before the other three components are fully ready.

    The eggs are done in two minutes and need to go straight to the plate from the pan. If the yogurt isn’t spread, the oils aren’t ready, and the butter is still solidifying when the eggs come off the heat, you either rush the plating and make a mess or wait and let the eggs overcook. Get everything else fully prepared — yogurt spread, oils measured, butter melted and off the heat — and only then put the eggs on.

    For Beginners

    This gently-cooked egg method is intentionally easier than poaching — don’t feel like you’re missing out by using it. Poached eggs are the traditional choice for Çılbır, but they require a specific skill set and particular water conditions to do reliably. This covered low-flame method produces a set white and a soft, runny yolk through steam, which is everything the dish needs. If this is your first time making Turkish eggs, the covered method is the one to start with. Master the dish first; explore poaching separately if you’re curious.

    For Confident Home Cooks

    If you’re comfortable with poaching, try the traditional method for a closer match to Çılbır’s classic presentation. A poached egg has no crispy edges and sits very cleanly in the yogurt — the texture is slightly different from the covered method and arguably more elegant. Add a splash of white vinegar to gently simmering water, create a gentle whirlpool, and lower a cracked egg in from a small bowl. Two to three minutes for a set white with a runny yolk. For both the technique rationale and a walkthrough of the process, Serious Eats has a thorough guide to poaching eggs reliably.

    What to Serve Turkish Eggs With

    Bread. That’s it — and that’s not limiting, it’s the whole point. The yogurt and oils need something to carry them, and the combination of garlic-scented yogurt, chilli butter, and soft egg was always designed to be eaten with bread in hand. A soft bun works well; so does a crusty white loaf with some pull to it. Toasted sourdough is excellent if you want more texture. What you want to avoid is anything very dense or heavily flavoured — the dish itself is doing a lot, and neutral, absorbent bread is the right companion. For another quick, pan-first egg breakfast, our Spanish Garlic Fried Eggs is worth exploring next.

    Storage & Make-Ahead

    SituationGuidance
    Eating immediatelyAlways the best option — serve straight from the pan; the soft yolk and warm-meets-cool contrast are central to the dish
    Storing leftoversNot recommended — the eggs continue to cook in residual heat and the yolk sets firm; the yogurt base weeps when refrigerated and the assembled dish doesn’t reheat well
    Making ahead (partially)The yogurt base and herb oil can be made several hours ahead and kept at cool room temperature; the chilli butter can be made ahead and gently rewarmed. Only the eggs must be made fresh — immediately before serving
    ReheatingNot recommended for the assembled dish; if you must, gently warm leftover eggs in a covered pan on very low heat for 1 minute only — the yolk will be fully set and the texture different, but the dish remains edible

    This is genuinely a make-and-eat-immediately dish. Plan the components ahead if needed, but always cook the eggs fresh.
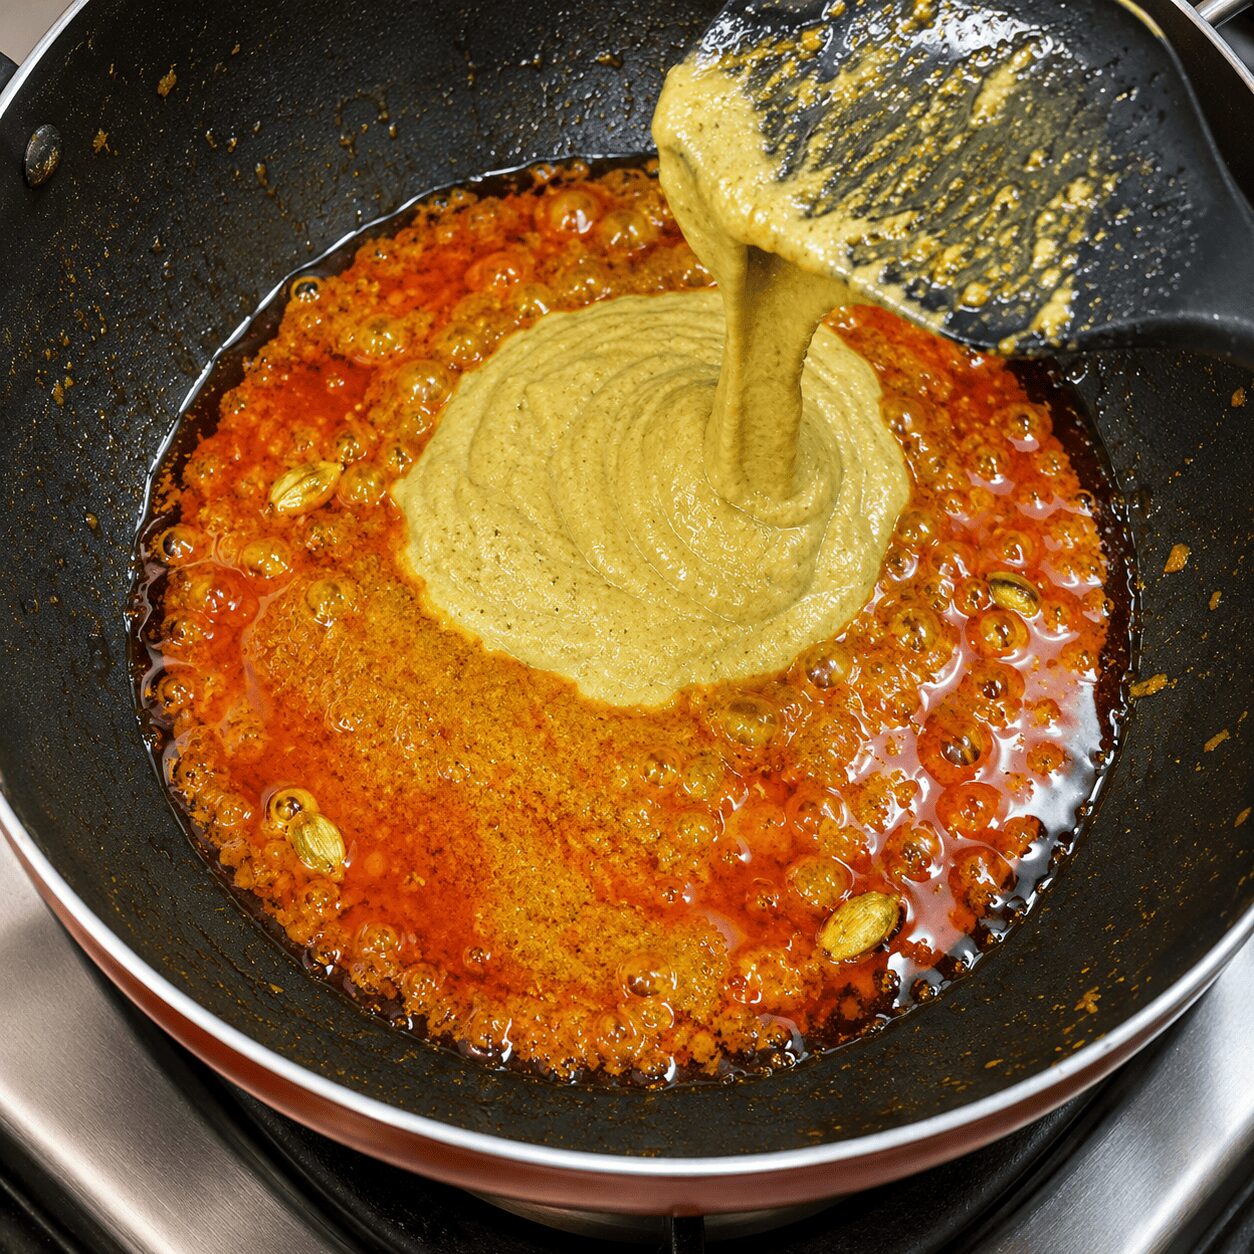
    Myth vs. Fact: Do Turkish Eggs Have to Be Poached?

    You can’t make proper Çılbır without poached eggs — if the eggs aren’t poached, it isn’t the real dish.

    Traditionally, yes — Çılbır is made with poached eggs, and that gives the dish a very specific, clean, membrane-free texture. But the reason poached eggs work in Çılbır is not poaching for its own sake — it’s a set white and a runny yolk, cooked without any fat that might interfere with the yogurt base below. A covered, gently steam-cooked egg achieves both of those things. It’s a different method to the same end. The creator of this recipe explicitly chose this approach for accessibility and explicitly offered to demonstrate poaching separately — that’s an honest framing, not an apology. If your soft egg has a fully set white and a still-runny yolk, you have made Çılbır in all the ways that matter on the plate.
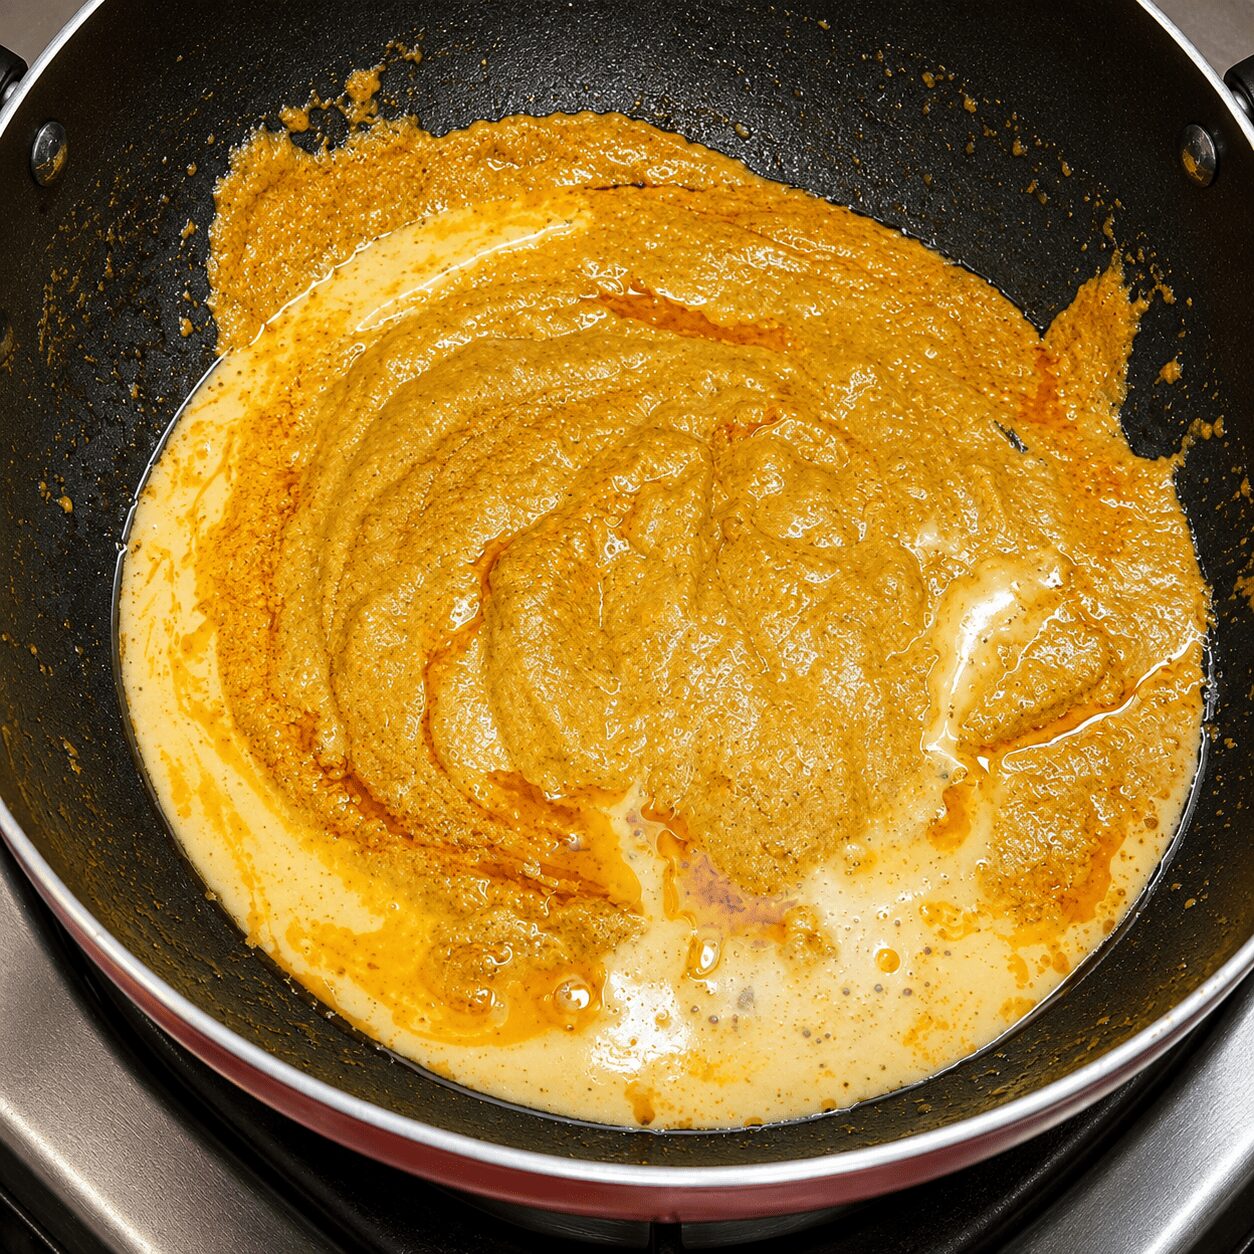
    Nutrition Snapshot (Estimated per serving — 1 person)

    NutrientEstimated Amount
    Calories~280–340 kcal
    Protein~13–16 g
    Fat~22–26 g
    Carbohydrates~5–8 g
    SodiumVaries with salt added

    Figures are estimated and will vary based on yogurt fat content, exact oil and butter quantities, and egg size. These are not a substitute for individualised nutritional advice. Per-egg nutritional data is available via USDA FoodData Central; yogurt data is available at the same source.

    Note on soft/runny egg yolks: this recipe deliberately keeps the yolk soft. If you are immunocompromised, pregnant, elderly, or cooking for young children, a fully cooked yolk is advisable. The USDA FSIS egg safety guidance covers safe cooking temperatures for eggs in detail.

    Frequently Asked Questions

    What is Çılbır (Turkish eggs)?

    Çılbır is a traditional Turkish breakfast dish — eggs served over garlicky yogurt and drizzled with spiced butter. It appears in Ottoman culinary records as far back as the 15th century and has been part of Turkish breakfast culture for a very long time. This recipe demonstrates an accessible home version using gently steam-cooked eggs instead of the traditional poached ones. The site’s egg recipes collection has more dishes from different traditions, including our Afghani Egg Curry.

    Do I have to poach the eggs for this recipe?

    No. The traditional Çılbır uses poached eggs, but the goal is a set white and a soft, still-runny yolk — and a covered low-flame method achieves exactly that, through steam rather than poaching liquid. This recipe deliberately demonstrates the easier method and the creator explicitly offered to cover poaching separately for anyone who wants to try the traditional approach. If your egg has a set white and a runny yolk, you have made what this dish needs.

    Can I use coriander instead of parsley?

    Yes — the creator herself suggests it as a direct substitute. Fresh coriander in the herb oil gives a different flavour from parsley (more aromatic, slightly citrusy) but it’s genuinely complementary to the garlic yogurt base and the chilli butter. It’s not a compromise; it’s a regional adaptation that works well. Parsley is the traditional choice; coriander is a perfectly good one for anyone cooking in a kitchen where parsley isn’t easily available.

    What if I only have thin, watery yogurt?

    Strain it. Set a fine sieve or a piece of muslin over a bowl, add the thin yogurt, and leave it for 20–30 minutes to let the excess water drain through. What remains in the sieve is thick, creamy yogurt — exactly what you need. This is the same process used to make Greek-style yogurt at home. Don’t skip this if your yogurt is watery; thin yogurt on the plate will separate when the warm eggs hit it and the dish won’t hold together.

    Can I use black pepper instead of paprika?

    Yes. Black pepper adds heat and sharpness without contributing colour, so the finished dish will look paler (no orange-red hue in the butter or yogurt). Kashmiri or degi chilli powder is a closer match to paprika — similar mild heat, similar deep colour — and the creator specifically mentions it as an alternative in the video. Regular red chilli powder also works if you want more heat, but go carefully.

    How is this different from shakshuka?

    Both are genuinely Turkish in origin, but they are completely different dishes. Shakshuka is a tomato-and-pepper gravy with eggs cooked directly into a simmered sauce — rich, warming, and heavily spiced. Çılbır has no gravy and no simmering at all: it’s four quickly assembled components (yogurt, herb oil, chilli butter, and softly-cooked eggs) layered on a plate and eaten immediately. One is a cooked-down sauce dish; the other is an assembly dish. The cooking methods, ingredients, textures, and eating experiences are entirely different.

    What bread goes best with Turkish eggs?

    Soft, neutral bread that absorbs well — a soft white bun, a simple white loaf, or toasted sourdough are all excellent. You want bread that carries the yogurt and oils without competing with them. Dense, very flavoured breads (like rye or heavily seeded loaves) tend to overwhelm the delicate balance of the dish. Turkish simit (sesame bread rings) are the traditional accompaniment if you can find them. For another quick egg breakfast to keep in rotation, try our Butter Garlic Egg.
    Can I make any part of this ahead of time?

    Three of the four components can be made ahead: the garlic yogurt base (keep at cool room temperature up to a few hours, or refrigerate up to a day and bring back to room temperature before using); the herb oil (lasts well at room temperature for a few hours); the chilli butter (make ahead and gently rewarm before drizzling). Only the eggs must be made fresh, immediately before serving. This means the actual cooking time once you sit down to make this is literally two minutes — everything else can be handled well in advance. This is one of the most make-ahead-friendly dishes on the site, despite being a dish that doesn’t technically store well once assembled.

    Conclusion

    Çılbır is a reminder that a few well-chosen ingredients, handled simply and in the right order, can produce something genuinely impressive. Garlic yogurt, herb oil, chilli butter, and a soft egg — nothing complicated in any single component, and together they become one of the more interesting breakfast dishes available to a home cook.

    Six things to remember: use thick yogurt, or strain thin yogurt first; parsley or coriander both work well for the herb oil; melt the chilli butter just until combined, then stop; have all three components fully ready before starting the eggs; cook the eggs only until the white sets and the yolk stays soft; and then assemble and serve immediately, with good bread. That’s the whole recipe in six lines.

    For a weekend brunch with a bit of international character, this is one of the best options on the site.

    Recipe demonstrated and filmed in the Zaika Mazedaar kitchen. Watch the full video on the Zaika Mazedaar YouTube channel for a step-by-step visual walkthrough of all four components.

  • Muradabadi Anda Yakhni Pulao Recipe

    Muradabadi Anda Yakhni Pulao Recipe

    Zaika Mazedaar · Rice & Pulao

    A Muradabadi-style egg yakhni pulao built on a freshly ground aromatic spice powder and a sliced lemon cooked right into the rice — it won’t even seem like you made an egg pulao.

    We make chicken pulao and mutton pulao often enough in most households that the egg version can feel like an afterthought — until you taste this one. This Muradabadi-style anda yakhni pulao is built specifically to smell and taste like a deep, meat-based pulao, even though there isn’t a scrap of meat anywhere near the pot. The first time the lid comes off after dum, it genuinely doesn’t seem like you’ve made an egg pulao at all.

    This recipe is demonstrated step-by-step in our video on the Zaika Mazedaar channel, filmed and cooked in a real kitchen — not assembled from recipe databases.

    What Is Muradabadi Anda Yakhni Pulao?

    Muradabadi pulao is a regional North Indian style associated with Moradabad, known for layering whole-spice aromatics and a yogurt-based masala into rice to build a deep, restaurant-style flavour without relying on a long meat-stock reduction. A yakhni-style pulao more broadly refers to rice cooked in a flavour-rich base — traditionally a meat stock — rather than plain water. This Muradabadi version gets there a faster, “instant” way: a freshly ground aromatic spice powder, a yogurt masala roasted until it browns, and a sliced lemon cooked directly into the rice water do the work that a long-simmered stock would normally do.

    Why This Recipe Works (and How It’s Different from Our Other Egg Pulao)

    If you’ve made our simpler Anda Yakhni Pulao, this one is a deliberately different, more elaborate cousin — not a duplicate. That recipe uses a simpler coriander-powder-and-fennel-powder flavouring stirred straight into a yogurt-roasted masala, with no whole-spice grinding, no lemon, and no food colour. This Muradabadi version goes further: a freshly ground aromatic powder — whole coriander, fennel, green cardamom, star anise, and javitri — added in two separate stages, plus a sliced lemon cooked directly into the rice water and an optional kewra-and-food-colour finish for presentation. Both are genuinely yakhni-style. This one is more regionally specific and more elaborate.

    Two techniques carry most of the flavour here.

    First: a fresh aromatic spice powder, used twice. Grinding whole coriander, fennel, cardamom, star anise, and javitri fresh — rather than relying only on a pre-mixed masala — gives the pulao a sharper, more layered aroma. Using most of it in the masala and holding a little back for the rice layering means you get a second hit of that aroma right as the dum finishes.

    Second: a sliced lemon cooked into the rice water. Rather than squeezing lemon juice in, a whole lemon is sliced and added directly to the boiling water before the rice goes in. It’s a deliberately milder, more rounded citrus lift than juiced lemon would give — built to season the rice itself, not just sit on top of it.

    Holding back a little of the spice powder to sprinkle over the rice later, instead of using it all in the masala, is a small trick that makes a noticeable difference once the lid comes off.

    Ingredients

    For the Eggs

    • A little less than ½ cup oil
    • 4 eggs (5–6 for a larger family), lightly scored with a knife before frying

    For the Fried Onion

    • 1 medium onion, finely sliced

    Whole Spices

    • 1 tsp cumin seeds
    • 3 green cardamom pods
    • 2 bay leaves
    • Cinnamon, a small piece
    • ½ tsp black pepper, whole
    • 3–4 cloves

    For the Aromatic Yakhni Powder

    • 2 tsp whole coriander seeds
    • 2 tsp fennel seeds (saunf)
    • Green cardamom, a few extra pods
    • 1 whole star anise (badiyan ka phool), broken up before grinding
    • Javitri (mace), a small piece

    For the Yogurt Masala

    • 1 tsp ginger-garlic paste
    • 1 tsp green chilli paste (or crushed green chillies)
    • ½ cup yogurt, well whisked, at room temperature

    For the Rice

    • 2 cups basmati rice (about ½ kg), soaked 30 minutes (sela/parboiled rice needs 1–1.5 hours soaking instead)
    • 3 cups water
    • Salt, to taste (use coarse/open salt for better absorption)
    • Green chillies, extra, to taste
    • 1 whole lemon, sliced (not squeezed)
    • A little kewra (kewda) water mixed with orange food colour (optional, purely cosmetic)

    For Garnish

    • Reserved fried onion (set aside earlier)
    • Reserved 1 tsp aromatic yakhni powder (held back from the masala)

    Ingredient Substitutions

    IngredientSubstituteEffect on Taste / Texture
    Basmati riceSela (parboiled) riceNeeds 1–1.5 hours of soaking instead of 30 minutes; slightly firmer grain
    Kewra water + orange food colourSkip entirelyPurely cosmetic per the original recipe — flavour and aroma are unaffected
    Javitri (mace) + star aniseA smaller amount of garam masalaRough stand-in only — the aroma will be noticeably less layered and distinct
    Frying the eggsSkip and use as-isPurely a presentation step — the pulao works fine without the golden skin on the eggs

    Mise en Place Checklist

    Get all of this ready before turning on the flame. This recipe has two things happening in parallel — the masala roasting and the spice grinding — so prep makes a real difference here.

    • Rice soaked (30 minutes for basmati, 1–1.5 hours for sela)
    • Eggs scored with a knife
    • Onion finely sliced
    • Whole spices (cumin, cardamom, bay leaf, cinnamon) measured into one bowl
    • Black pepper and cloves measured separately
    • Ginger-garlic paste and green chilli paste measured
    • Yogurt whisked smooth and brought to room temperature
    • Aromatic spice mix (coriander, fennel, cardamom, star anise, javitri) ground and set aside, with 1 tsp held back
    • Lemon sliced
    • Kewra water mixed with food colour, if using
    • Pot or pan ready, with a tight-fitting lid for dum

    Step-by-Step Method

    1

    Fry the scored eggs

    Heat a little less than ½ cup oil in a pot over medium flame. Score each egg lightly with a knife, then fry until a light golden skin forms. Remove and set aside.

    This step is optionalFrying the eggs is purely cosmetic — it doesn’t add flavour, just a nicer look. Skip it entirely if you’re short on time; the pulao works fine without it.
    Frying scored eggs to a golden skin for Muradabadi Anda Yakhni Pulao
    2

    Temper the first batch of whole spices

    In the same oil, add 1 tsp cumin seeds, 3 green cardamom pods, 2 bay leaves, and cinnamon. Fry briefly until fragrant.

    3

    Fry the onion, reserve some for garnish

    Add the finely sliced onion and fry on medium flame until golden. Once golden, remove a small amount and set it aside — this reserved portion goes on top as garnish later.

    Frying onion golden and reserving some for garnish, Muradabadi Anda Yakhni Pulao
    4

    Add pepper and cloves after the onion

    Add ½ tsp black pepper and 3–4 cloves now, after the onion — not with the first batch of whole spices. Fry briefly.

    Why the timing mattersAdding pepper and cloves alongside the onion hides them visually. They get lost in the onion and are easy to miss or accidentally discard while eating later. Adding them after keeps them visible and intentional.
    5

    Add ginger-garlic and green chilli paste

    Stir in 1 tsp ginger-garlic paste and 1 tsp green chilli paste. Fry for 30–40 seconds until the raw smell is gone.

    6

    Grind the aromatic spice powder

    While the masala continues on a low flame, grind 2 tsp whole coriander, 2 tsp fennel seeds, a few green cardamom pods, the broken star anise, and a small piece of javitri into a fine powder.

    Grinding whole coriander, fennel, cardamom, and star anise for Muradabadi Yakhni Pulao aroma
    7

    Roast the yogurt into the masala

    Add ½ cup well-whisked, room-temperature yogurt and stir quickly to prevent splitting. Roast until the yogurt’s colour visibly browns and the raw smell and excess moisture are gone.

    Bring the yogurt to room temperature firstCold yogurt is more likely to split when it hits a hot pan. Letting it sit out ahead of time, and stirring it in quickly, keeps the masala smooth.
    Roasting yogurt brown into the onion masala for Muradabadi Anda Yakhni Pulao
    8

    Add the aromatic powder, holding some back

    Add almost all of the freshly ground spice powder into the masala, holding back about 1 tsp to sprinkle over the rice later. Fry for 30–40 seconds on the still-low flame.

    Don’t use it all hereThat reserved teaspoon goes on top during the rice layering step — it’s what gives the dish a second wave of aroma once the dum finishes.
    9

    Build and boil the rice water

    Add 3 cups water, salt to taste, a little extra green chilli, and a whole lemon, sliced (not squeezed). Cover and bring to a boil on high flame.

    Adding sliced lemon to the boiling rice water for Muradabadi Anda Yakhni Pulao
    10

    Cook the rice until small bubbles appear

    Add the soaked 2 cups basmati rice and mix in gently. Cook covered on medium-to-high flame until the water is almost fully absorbed — you’ll see small bubbles breaking the surface. That’s the visual cue that there’s just enough water left to finish on dum.

    11

    Layer, dum, and rest

    Pour the kewra-and-food-colour water over the rice, if using. Layer the fried eggs on top, scatter the reserved fried onion over that, and sprinkle the reserved 1 tsp aromatic spice powder on top as well. Cover and cook on dum, low flame, for 8–10 minutes.

    Turn off the gas. Do not remove the lid immediately — let it rest a further 4–5 minutes so the aroma settles. When you do open it, let the steam escape briefly before gently folding the rice together by hand.

    Don’t stir right awayStirring hard the moment the lid comes off breaks the rice grains. Let the steam escape, then fold gently by hand instead.
    Layering fried eggs and onion on top of the rice before dum, Muradabadi Anda Yakhni Pulao

    Your Muradabadi Anda Yakhni Pulao is ready.

    Finished Muradabadi Anda Yakhni Pulao with kewra-soaked food color streaks

    7 Things to Remember for Perfect Muradabadi Anda Yakhni Pulao

    1. Frying the eggs is optional — purely cosmetic, skip it if short on time
    2. Stage the whole spices in two batches, not all at once
    3. Grind a fresh aromatic spice powder rather than relying only on pre-mixed masala
    4. Add pepper and cloves after the onion, not with the first whole-spice batch
    5. Slice the lemon into the rice water — don’t squeeze it
    6. Hold back a little spice powder for the rice layering
    7. Let steam escape before stirring once the dum finishes

    The One Mistake That Flattens This Pulao’s Aroma

    Adding all the whole spices at once, or stirring the rice the moment the lid comes off.

    It’s tempting to throw cumin, cardamom, bay leaf, cinnamon, pepper, and cloves into the oil together — most pulao recipes do exactly that. But pepper and cloves added with the onion get hidden inside it, and are easy to lose or accidentally bite into later. Add the first batch, then the onion, then pepper and cloves separately, after.

    The second version of this mistake happens at the very end: lifting the lid after dum and stirring immediately. That traps less steam to finish the rice properly and breaks the grains. Let the lid sit a full 4–5 minutes after the gas is off, then let steam escape for a moment before folding gently by hand.

    For Beginners

    Frying the eggs is optional and purely cosmetic — don’t stress over getting a perfectly even golden skin on them. Skip the step entirely if you’re short on time; the pulao tastes exactly the same either way.

    For Confident Home Cooks

    Try sourcing real javitri and star anise fresh, rather than pre-ground, for a noticeably stronger and more layered aroma. Freshly ground whole spices lose potency quickly once powdered, so grinding just before use makes a real difference here.

    What to Serve Muradabadi Anda Yakhni Pulao With

    This pulao pairs naturally with a cooling raita — cucumber raita keeps things simple, while boondi raita adds a bit of texture and tang against the deep, spiced rice. A sharp garlic chutney on the side also works beautifully, cutting through the richness of the fried eggs and yogurt masala.

    It’s substantial enough to be a complete meal on its own, but also scales easily for a small gathering when you want something that feels like biryani night without the extra effort of cooking meat. For that same biryani-night feeling with a different technique, our Anda Dum Biryani and Anda Korma Biryani are both worth trying too.

    Storage, Reheating & Make-Ahead

    SituationGuidance
    Fridge storageUp to 2 days in an airtight container
    FreezingUp to 1 month; thaw fully before reheating for even results
    ReheatingGentle reheat on low flame or in a covered pan with a splash of water, to keep the rice from drying out
    Reheating eggsThe fried eggs will firm up further on reheating — expect a slightly different texture than fresh
    Make-ahead strategyThe masala and aromatic powder can be made a day ahead; assemble and cook the rice fresh for the best texture

    A splash of water before reheating makes a real difference here — basmati rice dries out quickly in the fridge, and this pulao is worth protecting that aroma for.

    Myth vs. Fact: Does Pulao Need Meat for a Deep Aroma?

    A pulao only gets that deep, restaurant-style aroma from a long-simmered chicken or mutton stock.

    Not when the spice powder does the work. A freshly ground aromatic mix of coriander, fennel, cardamom, star anise, and javitri — used in two stages, once in the masala and again sprinkled over the rice — builds a genuinely deep, layered aroma without any meat or stock involved. The yogurt-roasted masala and the lemon cooked into the rice water round it out further. This recipe is built specifically to demonstrate that the aroma comes from technique and spicing, not from meat itself.

    Nutrition Snapshot (Estimated per serving)

    NutrientEstimated Amount
    Calories~380–420 kcal
    Protein~11–14 g
    Fat~16–19 g
    Carbohydrates~48–54 g
    SodiumVaries with salt added

    Figures are estimated and will vary based on exact oil quantity, rice measurement, and egg size. These are not a substitute for individualised nutritional advice. Per-egg and basmati rice nutritional data is available via USDA FoodData Central.

    Frequently Asked Questions

    What is Muradabadi anda yakhni pulao?

    It’s a regional, North Indian style of egg yakhni pulao associated with Moradabad, built on a freshly ground aromatic spice powder, a yogurt-roasted masala, and a sliced lemon cooked directly into the rice water. It’s designed to deliver a deep, meat-pulao-like aroma using only eggs and spices.

    How is this different from a regular egg yakhni pulao?

    Our simpler Anda Yakhni Pulao uses a coriander-and-fennel-powder flavouring stirred directly into a yogurt-roasted masala, with no whole-spice grinding, no lemon, and no food colour. This Muradabadi version is more elaborate — a freshly ground aromatic powder used in two stages, plus a sliced lemon in the rice water and an optional kewra-and-food-colour finish.

    Why is the lemon added as a slice instead of squeezed?

    A sliced lemon cooked directly in the boiling rice water gives a milder, more rounded citrus lift than squeezed juice would. It seasons the rice as it cooks rather than adding a sharp, concentrated tang on top afterward.

    Can I skip frying the eggs?

    Yes, completely. Frying the eggs to a light golden skin is purely a presentation step — it doesn’t add flavour. The pulao works perfectly well with eggs that go in unfried if you’re short on time.

    Why add black pepper and cloves after the onion instead of with the other whole spices?

    If pepper and cloves go in with the first batch of whole spices and then the onion, they get hidden inside the onion as it fries — making them easy to lose or accidentally bite into later. Adding them after the onion keeps them visible and intentional.

    Can I skip the food colour and kewra water?

    Yes, entirely. Both are explicitly optional and added purely for visual appeal — the orange streaks through the rice look appealing but contribute nothing to flavour. Skip them with no change to taste or texture.

    Can I make this less spicy?

    Yes. Reduce the green chilli paste and the extra green chillies added to the rice water — both are adjustable to taste. The whole spices (pepper, cloves, cardamom) contribute aroma more than heat, so the dish stays flavourful even with less chilli.

    What should I serve with Muradabadi anda yakhni pulao?

    Cucumber raita or boondi raita both work well as a cooling side, and a garlic chutney adds a sharp contrast to the rice’s richness. All three are used as pairings for this exact recipe.

    Conclusion

    Muradabadi Anda Yakhni Pulao earns its honest, surprising claim: it really does taste and smell like a meat-based pulao, built entirely from eggs and a carefully staged set of spices. The freshly ground aromatic powder, used twice, the yogurt roasted until it browns, and the lemon quietly perfuming the rice water — none of these are shortcuts, and together they explain why this particular pulao stands apart from a simpler everyday version.

    Fifty minutes from mise en place to table, one pot, and a dish that genuinely brings biryani-night energy to a weeknight — or works just as well for guests who don’t eat meat but still want that deep, layered aroma. Follow the staging — whole spices in two batches, the held-back spice powder, the patient rest after dum — and the result will speak for itself the moment the lid comes off.

    There’s a reason this doesn’t taste like a typical egg pulao — and it has almost nothing to do with the eggs themselves.

    Recipe demonstrated and filmed in the Zaika Mazedaar kitchen. Watch the full video on the Zaika Mazedaar YouTube channel for a step-by-step visual walkthrough.

  • Egg Shakshuka Recipe

    Egg Shakshuka Recipe

    Zaika Mazedaar · Global Egg Recipes

    A Turkish classic given an honest desi twist — green capsicum, a quiet hit of coriander powder, and eggs nestled into a tomato-pepper gravy until just set.

    There’s a particular moment in this recipe — right after the lid comes off for the first time — where the egg whites have just set into a soft cloud over a glossy red gravy, and the yolks are still sitting there, deliberately runny, waiting for a spoon to break into them. That’s shakshuka. And once you’ve made it once, the rest of your breakfast routine starts to feel a little plain by comparison.

    This recipe is demonstrated step-by-step in our video on the Zaika Mazedaar channel, filmed and cooked in a real kitchen — not assembled from recipe databases. It’s a genuine Turkish dish, built the traditional way, with a few honest desi additions stirred in along the way. It’s also the site’s first of two Turkish-origin egg dishes — our Turkish Eggs (Çılbır) takes a completely different, gravy-free, assembly-style approach if you’d like to compare both.

    What Is Shakshuka? (And How This Version Adds a Desi Twist)

    Shakshuka is a North African and Middle Eastern dish of eggs poached directly in a spiced tomato-and-pepper sauce, traditionally finished in the same pan it’s served from. It’s eaten across Turkey, Israel, Tunisia, and beyond, usually for breakfast or brunch, and the basic idea — eggs cooked gently in a thick, well-spiced gravy — translates surprisingly well into an Indian kitchen.

    This version keeps the real shakshuka technique intact: garlic and ginger fried in stages, a tomato-pepper base cooked down until it’s soft and glossy, and eggs nestled into wells so the yolks stay exactly where you put them. The desi touch comes in two small, named additions — a half teaspoon of coriander powder stirred into the spice mix, and an optional layer of mozzarella melted over the eggs at the halfway point. Neither is traditional. Both are honestly labelled as the part of this recipe that makes it feel like it belongs in an Indian kitchen rather than a borrowed one.

    Why This Recipe Works

    Shakshuka lives or dies on two things most rushed versions skip.

    First: garlic and ginger, fried separately, never together. Garlic and ginger don’t cook at the same speed — garlic needs longer over the flame to turn gently golden, while ginger burns and turns bitter if it goes in too early. Frying them one after the other, instead of as a single paste, keeps both aromatics sweet instead of scorched.

    Second: the tomato-capsicum base cooked all the way down. This isn’t a quick five-minute sauce. The capsicum and tomato need to collapse into something completely soft and mushy, with the oil visibly separating at the edges, before the dry spices and eggs ever go in. Rush this stage and the gravy stays thin and raw-tasting under the eggs — get it right, and you have a base that’s genuinely worth poaching an egg in.

    Adding coriander powder isn’t traditional shakshuka — but it’s the kind of small touch that makes a borrowed recipe feel like it belongs in your own kitchen.

    Ingredients

    For the Aromatics

    • 3 tbsp oil (in a wide, shallow pan you can cook and serve straight from)
    • 3–4 garlic cloves, grated
    • ½ inch ginger, grated — added only after the garlic, never with it

    For the Vegetable Base

    • 1 large onion, grated
    • 1 medium green capsicum, chopped (red capsicum is the traditional Turkish choice — see substitutions below)
    • 2 medium tomatoes, grated (or ground to a purée)
    • 1 tsp salt (added with the tomatoes, to speed up their breakdown)
    • A little water, added before the dry spices go in

    Dry Spices

    • 1 tsp paprika powder (Kashmiri red chilli powder works as a substitute)
    • ½ tsp hot red chilli powder
    • ½ tsp cumin powder
    • ½ tsp coriander powder (the desi touch — fully optional, skip it for a stricter Turkish profile)
    • An extra ½ tsp salt, or to taste
    • 1 tbsp store-bought tomato paste
    • A little water (added just before the eggs, so the gravy spreads slightly and the eggs don’t stick)

    For the Eggs & Topping

    • 5 eggs (5–6 works well, depending on your pan size), cracked individually into a bowl first
    • Salt and black pepper powder, for sprinkling
    • Fresh coriander, chopped
    • Green chillies, chopped (or left whole if children are eating)
    • Mozzarella cheese, a handful — completely optional

    Ingredient Substitutions

    IngredientSubstituteEffect on Taste / Texture
    Green capsicumRed capsicumThe traditional Turkish choice — sweeter flavour, deeper red colour. Green is used here mainly for cost and easy availability
    Tomato paste1 extra tomato, or 1 tbsp tomato ketchupSlightly less concentrated colour and richness, but the gravy still comes together fine
    Mozzarella cheeseSkip entirely, or use a milder cheeseLoses the rich, melted topping; the eggs and gravy underneath are unaffected
    Paprika powderKashmiri red chilli powderNear-identical bright red colour with minimal extra heat
    Coriander powder (desi touch)Skip entirelyMoves the dish closer to a strictly traditional Turkish shakshuka profile

    Mise en Place Checklist

    Get all of this ready before turning on the flame. Shakshuka moves quickly once the gravy’s down, and the eggs need your full attention near the end.

    • Garlic and ginger grated separately, kept apart
    • Onion grated
    • Capsicum chopped
    • Tomatoes grated or ground to a purée
    • All dry spices measured into one small bowl
    • Tomato paste measured (1 tbsp)
    • Fresh coriander and green chillies chopped
    • Mozzarella grated or shredded, if using
    • A small bowl nearby for cracking eggs individually
    • Wide, shallow pan you’re happy to serve straight from

    Step-by-Step Method

    1

    Fry the garlic, then the ginger

    Heat 3 tbsp oil in a wide, shallow pan over medium flame. Add the grated garlic and fry until lightly golden. Only once the garlic has turned golden, add the grated ginger.

    Why the order mattersGarlic and ginger have different cooking times. Frying them together means the ginger burns before the garlic is done, turning bitter. Always let the garlic colour first, then add the ginger.
    Frying garlic then ginger separately for Egg Shakshuka
    2

    Cook the grated onion to light pink

    Add the grated onion. Cook on medium flame until the raw smell is gone and the onion turns lightly pink — this is noticeably lighter than the deep golden onion used in most Indian gravies, and that’s intentional here.

    Onion cooked to light pink for Egg Shakshuka
    3

    Add and soften the capsicum

    Add the chopped green capsicum. Cook for 2–3 minutes until it softens slightly. Traditional Turkish shakshuka uses red capsicum — green works fine and is what’s used here for cost and availability.

    4

    Cook the tomato base down completely

    Add the grated tomatoes along with 1 tsp salt — the salt helps the tomatoes break down faster. Cover and cook on medium flame, stirring once or twice, until the tomatoes and capsicum are completely soft and mushy and the oil starts to separate at the edges.

    Don’t rush this stageThis is the step most people cut short. The base needs to fully collapse — soft, mushy, oil visibly separating — before you move on. A raw-tasting base under the eggs is the most common shakshuka disappointment.
    Capsicum and tomato cooked down soft for Egg Shakshuka
    5

    Bloom the spices

    Add a little water first — this stops the dry spices from catching on the hot pan — and reduce to low flame. Stir in 1 tsp paprika powder, ½ tsp hot red chilli powder, ½ tsp cumin powder, and ½ tsp coriander powder (the desi touch; skip it for a stricter Turkish profile). Roast together until the raw spice smell is gone and the gravy smells fragrant. Taste and adjust salt — an extra ½ tsp is often needed here.

    Paprika and spices roasted into the Egg Shakshuka gravy
    6

    Stir in tomato paste and finish the gravy

    Add 1 tbsp tomato paste (or use 3 tomatoes instead of 2 from the start, or 1 tbsp tomato ketchup, if you don’t have paste). Roast for a further 2–3 minutes until everything melds together and the oil separates again.

    7

    Make wells for the eggs

    Add a little water to the gravy so it spreads slightly and the eggs won’t stick to the bottom. Using the back of a spoon, gently press out small wells across the surface — one per egg.

    Why wells matterWithout a dedicated space, the egg whites spread into each other as they cook and the yolks drift together. A simple well per egg keeps each one exactly where you placed it.
    Making wells in the gravy before adding eggs, Egg Shakshuka
    8

    Crack the eggs in, one at a time

    Lower the flame. Working one at a time, crack each egg into a small bowl first, inspect it, then slide it gently into its well. Sprinkle salt and black pepper powder over the eggs, then scatter fresh coriander and chopped green chillies on top.

    Egg safety habitNever crack eggs directly into the gravy. An occasional spoiled egg cracked straight in ruins the entire pot — cracking into a bowl first lets you catch that before it happens.
    9

    Cover and cook until whites are set

    Cover the pan and cook on low flame for 2–3 minutes. Lift the lid — the whites should be set while the yolks are still visibly runny. This is the point to add mozzarella, if using.

    Eggs nestled into the gravy with whites just set, Egg Shakshuka
    10

    Add mozzarella and finish

    Scatter mozzarella over the top, if using — this is entirely optional and added purely for richness. Cover again and cook a further 2–3 minutes on low flame, until the yolks are slightly firm but still soft, not fully hard. Turn off the gas and let it sit, lid on, for 1–2 minutes before serving.

    Open the lid. Your Egg Shakshuka is ready.

    Finished Egg Shakshuka with optional melted mozzarella on top

    6 Things to Remember for Perfect Egg Shakshuka

    1. Fry garlic and ginger separately — never together
    2. Keep the onion light pink, not browned
    3. Cook the tomato-capsicum base until fully soft and mushy, oil separating
    4. Make wells in the gravy before adding the eggs
    5. Crack each egg into a bowl first, never straight into the gravy
    6. Stop while the yolk is still soft, even if you’re adding mozzarella

    The One Mistake That Ruins Shakshuka

    Frying garlic and ginger together, or cracking eggs straight into the gravy.

    It’s tempting to grate garlic and ginger together and throw them into the pan at once — most recipes do exactly that. But the two cook at different speeds, and ginger turns bitter if it burns before the garlic’s even golden. Add garlic first, let it colour, then add the ginger.

    The second version of this mistake happens later: cracking eggs directly into the hot gravy. An occasional spoiled egg ruins the entire pot when it goes straight in. Thirty extra seconds spent cracking each egg into a bowl first protects everything you’ve already cooked.

    For Beginners

    Don’t worry about getting the wells perfectly even — they’re just there to keep the yolks from merging into each other, not to be a precise grid. As long as each egg has its own little space in the gravy, you’re doing it right.

    For Confident Home Cooks

    If you can get hold of it, try red capsicum instead of green for a more traditional flavour and a deeper red colour. If you want a stricter Turkish profile, skip the coriander powder entirely — the dish still works perfectly well without the desi touch.

    What to Serve Egg Shakshuka With

    Shakshuka is built to be scooped, not eaten with a spoon. Puri works beautifully here, and so does a soft, hot paratha — both are demonstrated as pairings for this exact recipe, and our Anda Paratha Roll is a good bread-and-egg combination to make on the same morning. Plain white rice is an unconventional but genuinely delicious option if bread isn’t on hand.

    For a proper weekend brunch spread, serve it straight from the pan it cooked in, with extra bread on the side and a simple cucumber salad to cut through the richness. If you want a faster egg dish for a weekday morning instead, our Spanish Garlic Fried Eggs takes under 15 minutes.

    Storage, Reheating & Make-Ahead

    SituationGuidance
    Best eatenFresh, straight off the stove — the yolks are intentionally left soft, and that texture is best right away
    Fridge storage (gravy only, no eggs)Up to 2 days in an airtight container
    Fridge storage (with eggs already set)Up to 1 day, but expect the yolks to firm up further on reheating
    FreezingNot recommended once eggs are in — the gravy alone can be frozen for up to 1 month
    ReheatingGentle reheat on low flame with a splash of water; the soft-yolk texture will not be fully recreated, so be honest with yourself about that before reheating

    If you’re planning ahead, make the gravy a day in advance and add fresh eggs just before serving — that’s the closest you’ll get to the just-set texture this dish is known for.

    Myth vs. Fact: Does Shakshuka Need Red Capsicum?

    You can’t make real shakshuka without red bell peppers — it’s a defining ingredient.

    Red capsicum is the traditional choice and does give a sweeter flavour and deeper colour, but green capsicum works perfectly well and is what’s used in this recipe, mainly for cost and easy availability. The real defining elements of shakshuka are the technique — a properly cooked-down tomato-pepper base and eggs gently poached directly in the gravy — not the specific colour of pepper used.

    Nutrition Snapshot (Estimated per serving)

    NutrientEstimated Amount
    Calories~220–260 kcal
    Protein~10–13 g
    Fat~16–19 g
    Carbohydrates~8–11 g
    SodiumVaries with salt added

    Figures are estimated and will vary based on exact oil quantity, egg size, and whether mozzarella is used. These are not a substitute for individualised nutritional advice. Per-egg and per-tomato nutritional data is available via USDA FoodData Central.

    Frequently Asked Questions

    What is shakshuka?

    Shakshuka is a North African and Middle Eastern dish of eggs poached directly in a spiced tomato-and-pepper sauce, typically cooked and served from the same pan. It’s a popular breakfast and brunch dish across Turkey, Israel, Tunisia, and several other countries, and has become a global favourite well beyond its region of origin.

    Is this recipe traditional Turkish shakshuka or an Indian twist?

    It’s built the traditional way — staggered garlic and ginger, a properly cooked-down tomato-pepper base, eggs nestled into wells — with two honest desi additions: a half teaspoon of coriander powder in the spice mix, and optional mozzarella melted over the eggs. Both are clearly named here, and both are easy to skip if you’d rather keep things closer to the original.

    Can I use red capsicum instead of green?

    Yes, and it’s actually the more traditional choice — red capsicum gives a sweeter flavour and a deeper red colour. Green capsicum is used in this recipe mainly because it’s cheaper and easier to find; swap it for red any time you have it on hand.

    Why fry garlic and ginger separately?

    Garlic and ginger cook at different speeds. If you fry them together, the ginger tends to burn before the garlic turns golden, which makes the whole gravy taste slightly bitter. Frying garlic first until lightly golden, then adding the ginger, keeps both aromatics sweet.

    Can I skip the mozzarella cheese?

    Completely. The mozzarella is added purely to make the dish richer and is not part of traditional shakshuka at all. Skipping it doesn’t change the cooking method — just leave it out at the step where it’s added and continue covering and cooking as instructed.

    How do I keep the egg yolks from spreading into each other?

    Make small wells in the gravy with the back of a spoon before you add the eggs — one well per egg. This gives each yolk its own contained space, so they stay separate instead of running together as the whites set around them.

    Can I make this less spicy?

    Yes. Reduce or skip the hot red chilli powder and rely mainly on the paprika (or Kashmiri chilli powder) for colour without much heat. The green chillies on top are also optional — use whole chillies instead of chopped if children are eating, since whole chillies add less heat overall.

    What’s the best bread to serve with shakshuka?

    Puri and paratha both work wonderfully — both are used as pairings for this exact recipe, and either one is great for scooping up the gravy and yolk together. Plain white rice is a less conventional but genuinely tasty alternative if you’d rather skip bread.

    Conclusion

    Egg Shakshuka is one of those rare dishes that genuinely earns its cross-cultural identity instead of just borrowing a name. The technique — staggered garlic and ginger, a tomato-pepper base cooked all the way down, eggs nestled gently into their own space — is the real Turkish method, done properly. The coriander powder and optional mozzarella are the small, honestly-labelled touches that make it feel at home in an Indian kitchen too.

    Thirty-five minutes from mise en place to table, one pan, no special equipment — and a dish that’s as good for a quiet weekend brunch as it is for introducing something a little different to friends and family. Follow the sensory cues — light pink onion, a fully collapsed tomato-pepper base, whites set with yolks still soft — and you’ll end up with a shakshuka that genuinely tastes like the real thing, with just enough of your own kitchen in it.

    There’s one small step before the eggs go in that decides whether each yolk stays exactly where you put it — don’t skip the wells.

    Recipe demonstrated and filmed in the Zaika Mazedaar kitchen. Watch the full video on the Zaika Mazedaar YouTube channel for a step-by-step visual walkthrough.

  • Afghani Egg Curry Recipe

    Afghani Egg Curry Recipe

    Zaika Mazedaar · Afghani-Style Curries

    A pale, fragrant egg gravy built on cardamom, coriander, cashew, and yogurt — finished with both milk and cream, and an optional curl of charcoal smoke that’s the real signature of the style.

    There’s a moment near the end of this recipe that most home cooks have never tried: a piece of lit charcoal, a drop of oil on top, and the dish covered just long enough to trap the smoke. It’s the step that makes Afghani chicken, Afghani mutton, and Afghani pulao taste like they came from a dhaba rather than a home kitchen — and it works exactly the same way here, on eggs.

    This recipe is demonstrated step-by-step in our video on the Zaika Mazedaar channel, filmed and cooked in a real kitchen — not assembled from recipe databases. If you’ve only ever had egg curry in its red, tomato-based form, this pale, cardamom-fragrant version is worth the detour.

    What Is Afghani Egg Curry?

    Afghani egg curry (anda Afghani) is the term widely used across South Asian home cooking and restaurant menus for a pale, mild, coriander-cashew-cream style gravy — distinct from the red, tomato-forward curries most people associate with North Indian cooking. There’s no tomato here and no turmeric-driven colour; the base stays a soft off-white to pale gold throughout. Worth saying plainly: “Afghani” in this context is a culinary style descriptor as used across South Asian kitchens, not a claim that this dish documents Afghan national cuisine. It’s a gravy with loose inspiration from that direction, made the way home cooks across the region actually make it — mild, aromatic, and without red chilli heat.

    Why This Recipe Works (What Makes Afghani Style Distinct Here)

    This is the first Afghani-style article on the site, and it doesn’t overlap with any of our other egg curries — the profile is genuinely its own.

    No tomato, no turmeric colour. Where most egg curries on this site build colour and acidity from tomato, this one skips it entirely. The base colour comes from a deliberately pale-cooked onion paste, not from any spice.

    A coriander-cashew-yogurt paste, not a tomato-cashew one. Fresh coriander, soaked cashews, yogurt, and green chilli are blended together into the flavour base — yogurt in particular is a texture and tang this site’s other egg curries don’t use.

    Both milk and cream — not one or the other. Every other gravy on the site picks a single dairy finish. This one uses both: milk to thin and lighten the gravy, cream to add body, so the result lands somewhere between the two rather than being either thin or heavy.

    The charcoal smoke (koyla dhuan) finish. Optional, but this is the technique that actually defines the genre. It’s the same step used in Afghani chicken, Afghani mutton, and Afghani pulao — a lit piece of charcoal, a drop of oil or ghee, and a covered pan to trap the smoke before serving.

    Ingredients

    For the Eggs

    • 5–6 eggs, boiled and scored (cross-cuts or lengthwise cuts on top)
    • 3 tbsp oil

    For the Onion Base

    • 2–3 green cardamom pods (hari elaichi)
    • 2–3 cloves (laung)
    • 1 medium onion, blended into a paste with a little water
    • 1 tsp garlic paste
    • 1 tsp ginger paste

    For the Coriander-Cashew Paste

    • A handful of fresh coriander (hara dhaniya), washed
    • 8–10 cashews, soaked
    • 3 tbsp yogurt (dahi)
    • A little water, for grinding
    • 4 green chillies, chopped, or to taste

    Spices

    • ½ tsp black pepper powder (kali mirch)
    • 1 tsp chaat masala powder
    • Salt, to taste
    • ¼ cup water (rinsed from the grinding jar)
    • ¼ tsp garam masala powder

    For the Finish

    • ¾ cup milk (doodh) — up to 1 cup if you prefer a thinner gravy
    • 2 tbsp cream

    Optional: Charcoal Smoke Finish

    • 1 small piece of charcoal
    • A few drops of oil or ghee
    • A small metal bowl to hold the lit coal inside the dish

    Ingredient Substitutions

    IngredientSubstituteEffect on Taste / Texture
    CashewsBlanched almonds (skin removed), or skip entirelyThe creator’s own guidance: cashews and cream exist purely to enhance flavour, not to structure the gravy — skipping or swapping lightens it slightly but doesn’t break the dish
    CreamHomemade malai (milk cream), or more milk to thin the gravyMalai is a near-identical substitute; using extra milk instead of cream gives a lighter, slightly thinner gravy that still carries good flavour
    Chaat masalaA pinch of amchur (dry mango powder) + a pinch of coriander powderApproximates chaat masala’s tangy note; slightly less complex but works in a pinch
    Whole green cardamom⅛ tsp cardamom powderConvenient, but loses some fragrance — blooming whole pods in oil releases noticeably more aroma than pre-ground powder

    Mise en Place Checklist

    Get all of this ready before turning on the flame. The onion needs your attention while it cooks — it should never be left to brown unsupervised.

    • Eggs boiled, scored with cross-cuts or lengthwise cuts, set aside
    • Cashews soaking in water until soft
    • Onion blended into a fine paste with a little water
    • Coriander, soaked cashews, yogurt, water, and green chilli ready to blend (same jar used for the onion works fine)
    • Garlic paste and ginger paste measured
    • Dry spices (black pepper powder, chaat masala, salt) measured into one small bowl
    • Milk and cream measured out separately
    • If doing the charcoal step: a small piece of charcoal, tongs, a small metal bowl, and a little oil or ghee ready nearby

    Step-by-Step Method

    1

    Score and fry the eggs

    Heat 3 tbsp oil in a pan. Score each boiled egg with shallow cross-cuts on top, or lengthwise cuts if you prefer. Fry on medium flame until golden all over, then remove to a plate and set aside.

    Why score the eggsThe cuts open slightly during frying, and when the eggs simmer in the gravy later, masala works its way into those openings. The result is an egg that tastes seasoned all the way through rather than bland in the centre — the same technique used across this site’s other egg curries.
    Scored boiled eggs frying to golden for Afghani Egg Curry
    2

    Bloom the cardamom and cloves

    In the same oil the eggs were fried in — no need to add more — add the green cardamom pods and cloves. Let them bloom for 30–40 seconds until fragrant. This step builds the base aroma before anything else goes into the pan.

    3

    Cook the onion paste — pale, never golden

    Add the blended onion paste. Cook on medium-to-low flame, stirring occasionally, until it turns only lightly pink — not golden, not brown.

    This is the most important step in the recipeLetting the onion brown the way you would for a standard Indian curry gives the gravy a brownish shade that ruins the Afghani look entirely. Stop as soon as you see a light blush of pink. The whole identity of this gravy depends on the onion staying pale.
    4

    Add garlic and ginger paste

    Add 1 tsp garlic paste and 1 tsp ginger paste to the pale onion. Fry together on medium-to-low flame for about 1 minute, until the raw smell is gone.

    5

    Blend the coriander-cashew-yogurt paste

    In the same grinding jar used for the onion, blend the fresh coriander, soaked cashews, yogurt, a little water, and chopped green chillies into a fine paste.

    Mild by designAn Afghani-style gravy isn’t meant to be very spicy. Four green chillies gives a gentle background heat — adjust up or down to taste, but keep in mind that heat isn’t the point of this dish; fragrance is.
    Blended coriander, cashew, yogurt, and green chilli paste for Afghani Egg Curry gravy
    6

    Add the paste and roast until oil separates

    Pour the coriander-cashew-yogurt paste into the pan. Add ½ tsp black pepper powder, 1 tsp chaat masala powder, and salt to taste. Mix well and roast until the yogurt’s excess moisture has completely dried off and the oil begins to separate.

    Minimal spice is the style, not a shortcutAfghani-style gravies intentionally use very few spices. This short list — black pepper and chaat masala — isn’t an underseasoned curry; it’s the actual character of the genre, which leans on aroma and dairy richness rather than a long spice list.
    7

    Add milk and cream

    Once the oil has separated, add ¼ cup water rinsed from the grinding jar. Add ¾ cup milk to enhance the gravy’s flavour — use a little extra water alongside it, or go up to a full cup of milk, if the gravy still looks thick. Add ¼ tsp garam masala powder for fragrance. Then add 2 tbsp cream and mix it in well.

    Always cook the cream, never add it cold and stopAfter cream goes in, the gravy needs at least 2–3 minutes of cooking so the raw, uncooked dairy flavour disappears. This applies across every cream-finished gravy on this site — skipping it leaves a noticeably raw aftertaste.
    Milk and cream added to thicken the Afghani Egg Curry gravy
    8

    Simmer covered until the consistency is right

    Cover and cook on low flame for about 5 minutes. The gravy should reach a perfect, medium consistency — it will thicken slightly further once the eggs go in and simmer.

    9

    Add the fried eggs

    Add the fried eggs to the gravy. Mix gently on low flame — the eggs are already cooked, so this stage isn’t about cooking them further, just coating them and letting flavours settle in. Cover and cook for 2–3 minutes so the gravy’s flavour is absorbed into the eggs through the scored cuts.

    Don’t overcook at this stageThe eggs only need 2–3 minutes once they’re in the gravy. Leaving them much longer toughens the egg whites and doesn’t add meaningful flavour beyond that point.
    Fried eggs simmering in the pale cream Afghani Egg Curry gravy

    How to Do the Charcoal Smoke (Koyla Dhuan) Step

    This step is optional, but it’s the one that actually makes a dish “Afghani” rather than just mild and creamy. It’s the same finishing technique used for Afghani chicken, Afghani mutton, and Afghani pulao on this channel — once you’ve done it here, you can use it on any of those too.

    1. Light a small piece of charcoal until it glows red-hot, using tongs to handle it.
    2. Place the lit coal into a small heatproof metal bowl, and set that bowl directly inside the pot of finished curry, nestled among the eggs and gravy without touching them.
    3. Pour a few drops of oil or ghee onto the hot coal — it will begin smoking immediately.
    4. Cover the pot right away so the smoke has nowhere to escape.
    5. Leave it covered for as long as you’d like the smoke flavour to develop — a light touch needs only a minute or two; a fuller smoke flavour, the way the creator prefers it, means waiting until the smoke has fully settled before lifting the lid.
    6. Remove the bowl with tongs before serving.
    Safety noteThe coal is genuinely hot — handle it only with tongs, never bare hands. Keep it well away from plastic surfaces, tablecloths, and children, and make sure the metal bowl sits securely inside the pot before covering. Supervise this step closely from start to finish.
    10

    Dish out and serve

    Lift the lid, remove the charcoal bowl if you used it, and dish out your Afghani egg curry. The gravy should be pale gold, fragrant, and clinging well to the eggs.

    6 Things That Give This Curry Its Afghani Character

    1. Pale onion, never golden — this is non-negotiable for the Afghani look
    2. Cardamom and cloves bloomed in oil first, before the onion goes in
    3. Coriander, cashew, and yogurt blended into one paste — not added separately
    4. Both milk and cream in the gravy, not one or the other
    5. A short, minimal spice list — this is intentional, not a shortcut
    6. The charcoal smoke finish — optional, but the technique that defines the genre

    The One Mistake That Ruins Afghani Egg Curry

    Letting the onion brown.

    It’s an easy habit to fall into, especially if you’ve cooked a lot of standard Indian curries — onion usually wants to go golden-brown for depth of flavour. But Afghani-style gravy depends on the onion staying pale, just a light blush of pink. Let it brown and the entire gravy takes on a brownish-Indian-curry shade instead of the pale, off-white look that defines the style. No amount of milk or cream added afterward will undo that colour shift.

    Medium-to-low flame. Watch closely. Stop the moment you see pink, not gold.

    For Beginners

    Feel free to skip the charcoal smoke step entirely — the curry is complete and authentic-tasting without it. Focus your attention on the onion colour instead; that’s the step that actually determines whether this looks like Afghani-style gravy or not.

    For Confident Home Cooks

    If you’re comfortable with the basic charcoal smoke technique, try adding a small piece of cinnamon stick or a few dried rose petals directly onto the hot coal along with the oil. It builds a more layered, slightly sweeter smoke aroma than charcoal alone — a small variation, but one that’s genuinely worth trying once the base technique feels familiar.

    What to Serve Afghani Egg Curry With

    Afghani-style gravies are typically paired with something plain — naan or roti work best, soaking up the pale, fragrant gravy without competing with its subtlety. Plain basmati rice is another natural match; its neutral flavour lets the cardamom, coriander, and dairy notes come through clearly.

    This is not a dish that needs a heavily spiced side. Keep the rest of the meal simple and let the curry’s fragrance be the main event.

    Storage, Reheating & Make-Ahead

    SituationGuidance
    Fridge storageUp to 2 days in an airtight container
    Charcoal smoke flavourFades somewhat overnight — strongest the day it’s made
    FreezingNot recommended — the milk-and-cream gravy can separate on thawing, and egg texture turns rubbery
    ReheatingGentle reheat on low flame with a splash of milk, not plain water — water dilutes the creamy flavour the milk and cream built in
    Make-ahead strategyThe gravy (through the milk and cream stage) can be made a day ahead and refrigerated. Reheat gently with a splash of milk, then add freshly fried eggs and simmer 2–3 minutes

    Milk or Cream — Why This Recipe Uses Both

    Most egg curries pick one dairy finish and stop there. This recipe uses both deliberately, because they do two different jobs.

    DairyWhat It Contributes
    Milk (¾ cup–1 cup)Thins and lightens the gravy, adds a subtle natural sweetness, and keeps the texture from becoming heavy
    Cream (2 tbsp)Adds richness and body — the dairy thickness that milk alone can’t provide
    Both togetherBalances the gravy so it’s neither too thin nor too heavy — the texture this style is known for

    If you only have one or the other, the dish still works — see the substitutions table above for how to adjust.

    Myth vs. Fact: Is Afghani Curry Actually from Afghanistan?

    “Afghani” curry is a direct, documented part of Afghan national cuisine.

    Not quite. “Afghani” is widely used across South Asian home kitchens and restaurant menus as a style descriptor — a pale, mild, coriander-cashew-cream gravy, loosely inspired by the direction of Afghan cooking but developed and popularised within South Asian food culture. It isn’t a precise document of Afghanistan’s national cuisine, and it’s worth being honest about that distinction rather than overclaiming authenticity. What it is, genuinely, is a distinct and well-loved style in its own right — mild, fragrant, and built around techniques (the pale onion, the charcoal smoke) that give it real character.

    Nutrition Snapshot (Estimated per serving)

    NutrientEstimated Amount
    Calories~270–310 kcal
    Protein~11–14 g
    Fat~19–23 g
    Carbohydrates~8–11 g
    SodiumVaries with salt added

    Figures are estimated and will vary based on exact oil quantity, egg size, and how much milk and cream are used. Eggs supply complete protein and cashews add healthy fats — a reasonable nutritional combination, though these figures aren’t a substitute for individualised nutritional advice. Egg and cashew nutrient data is available via USDA FoodData Central.

    Frequently Asked Questions

    What is Afghani egg curry?

    Afghani egg curry is a pale, mild, coriander-cashew-cream style egg gravy popular across South Asian home cooking — built without tomato or turmeric, finished with both milk and cream, and optionally given a charcoal smoke finish. It’s milder and more aromatic than the typical red, tomato-based egg curry.

    Why does Afghani-style curry stay pale and not turn orange or red?

    There’s no tomato or turmeric in the base, and the onion paste is deliberately cooked only until lightly pink — never golden or brown. Letting the onion brown the way you would for a standard curry gives the gravy a brownish shade that goes against the pale Afghani look.

    What does the charcoal smoke step actually do to the flavor?

    A lit piece of charcoal with a drop of oil or ghee, covered briefly inside the finished dish, infuses the gravy with a subtle smoky aroma. It’s the same finishing technique used in Afghani chicken, Afghani mutton, and Afghani pulao — optional here, but it’s the step that gives the genre its signature character.

    Can I skip the cashews or the cream?

    Yes. Both exist purely to enhance flavour, not to structure the gravy. Skip the cashews or swap in another nut like blanched almonds; if you don’t have cream, use homemade malai instead, or simply use a little extra milk to thin the gravy while keeping the flavour balanced.

    Why use both milk and cream — what does each one do?

    Milk thins and lightens the gravy and adds a subtle dairy sweetness; cream adds richness and body. Used together, they balance each other so the gravy ends up neither too thin nor too heavy — exactly the texture this style is known for.

    How spicy is this recipe, and can I make it spicier?

    It’s intentionally mild — Afghani-style gravies are built for fragrance over heat. Four green chillies give a gentle background warmth in the original recipe. You can add more chilli or a pinch of red chilli powder if you’d like more heat, but doing so moves the dish away from its characteristic mild profile.

    What’s the best way to reheat Afghani egg curry without ruining the gravy?

    Reheat gently on low flame with a splash of milk rather than plain water — water dilutes the creamy flavour the milk and cream built into the gravy. Avoid microwaving on high, which can toughen the eggs.

    Can I use the charcoal smoke technique for other dishes?

    Yes — it’s the same technique used for Afghani chicken, Afghani mutton, and Afghani pulao. Once you’re comfortable doing it here, you can apply it to any of those dishes for the same smoky, restaurant-style finish.

    Conclusion

    Afghani egg curry is the mildest, most fragrant egg curry on this site — and the charcoal smoke step, optional as it is, is what makes it feel genuinely Afghani rather than just a mild egg curry with a label borrowed from somewhere else. The pale onion isn’t a small detail to rush past; it’s the whole identity of the dish.

    The technique worth remembering: keep the onion pale, non-negotiably; bloom the whole spices in oil before anything else goes in; let the coriander-cashew-yogurt paste do the real flavour work; trust that the short spice list is the style, not a shortfall; cook milk and cream together properly so neither tastes raw; and try the charcoal smoke at least once — it’s a small, safe step that changes the dish more than you’d expect.

    Forty minutes from pan to plate, one pot for both the eggs and the gravy, and a curry that tastes noticeably different from anything else on this site. Worth making the next time you want something fragrant and rich without reaching for red chilli.

    Recipe demonstrated and filmed in the Zaika Mazedaar kitchen. Watch the full video on the Zaika Mazedaar YouTube channel for a step-by-step visual walkthrough.

  • Anda Palak Butter Masala Recipe

    Anda Palak Butter Masala Recipe

    Zaika Mazedaar · North Indian Curries

    A spinach-tomato-cashew base blended vivid green, fried eggs folded in, and just one tablespoon of butter to finish — the happy accident that became one of this channel’s most finger-licked dishes.

    Anda palak butter masala wasn’t planned. Nazia from Zaika Mazedaar was thinking about a butter paneer-style base, swapped in eggs, then decided that wasn’t different enough — so spinach went into the pot. The result turned into one of the most finger-licked dishes the channel has made, and the honesty of that origin story is exactly why it works: nothing about this recipe feels engineered.

    This recipe is demonstrated step-by-step in our video on the Zaika Mazedaar channel, filmed and cooked in a real kitchen — not assembled from recipe databases. If you’ve got a bunch of spinach wilting in the fridge and eggs on hand, this is a genuinely good use for both. Building out your egg-curry repertoire? Our milder, cashew-yogurt Anda Korma recipe is a natural next one to try.

    What Is Anda Palak Butter Masala?

    Anda palak butter masala (also called butter palak anda masala) is a North Indian egg curry where spinach is cooked directly into the tomato-onion-cashew base and blended smooth, rather than stirred in as a garnish at the end. That single decision changes the dish: the spinach disappears into a vivid green-orange purée, so kids tend to eat it without the usual protest a visible vegetable invites. Medium-boiled eggs are fried briefly, folded into the roasted masala, and the whole thing is finished with just one tablespoon of butter — a flavour enhancer here, not the primary fat, since the cashews in the base already carry most of the richness.

    Why This Recipe Works (and How It Differs from Egg Butter Masala)

    If you’ve made our classic Egg Butter Masala recipe before, it’s worth being upfront about how this is a genuinely different dish, not a small variation. For a richer, restaurant-style option in the same family, our Mughlai Shahi Egg Curry recipe is worth bookmarking too.

    First: the spinach goes into the purée itself. It’s cooked alongside the onion, tomato, garlic, ginger, green chilli, and cashews, then blended together into one fine paste. It is never added at the end as a stirred-in garnish, which is how most spinach-egg curries handle it — and that ordering is the whole reason the spinach vanishes into the gravy instead of sitting on top as visible flecks.

    Second: the butter is a finish, not a foundation. Egg Butter Masala leans on a tomato-cashew purée plus a four-tablespoon cream finish for its richness. Here, it’s one tablespoon of butter, full stop — the cashews already blended into the base do the heavy lifting, so the gravy doesn’t need a heavy dairy finish to feel rich.

    Third: the colour tells you everything. Egg Butter Masala finishes a deep red-orange from degi mirch and tomato. This one finishes a vivid green-orange — unmistakably different on sight before you’ve tasted either.

    Here’s how the two compare side by side:

    FeatureEgg Butter MasalaAnda Palak Butter Masala
    BaseTomato-onion-cashew purée, no spinachSpinach + tomato + onion + cashew, cooked and blended together
    Blending stageYes, blended smoothYes, blended smooth
    Butter / cream1 tbsp butter + 4 tbsp cream finish1 tbsp butter only; cream is an optional garnish swirl
    Gravy colourDeep red-orangeVivid green-orange
    Sugar½ tsp, for restaurant-style flavour rounding1 tsp — rounds flavour and offsets spinach’s natural bitterness
    Coriander stalksNot a featured ingredientCore base ingredient, added with the spinach
    Egg-frying spice timingAdded from the startAdded only after the eggs start to colour

    Ingredients

    For the Spinach-Tomato Base

    • 1 medium onion, roughly sliced
    • 2 medium tomatoes, roughly sliced
    • 5–6 garlic cloves
    • 1-inch piece ginger
    • 1–2 green chillies, or to taste
    • 10–12 cashews (kaaju)
    • 150g spinach (palak)
    • A small handful of coriander stalks (dhaniye ki dandiyaan) — stalks only, not the leaves

    For the Eggs

    • 5 eggs, boiled — medium-boiled, not hard-boiled
    • ¼ cup oil (for frying the eggs and roasting the masala)
    • A pinch of turmeric powder
    • A pinch of red chilli powder

    Dry Spices

    • 1 tsp coriander powder
    • Red chilli powder, to taste
    • ½ tsp cumin powder
    • Salt, to taste
    • ¼ cup water (rinsed from the blender jar)

    For the Finish

    • Water, to adjust gravy consistency
    • 1 tbsp butter
    • Homemade garam masala powder, to taste
    • 1 tbsp kasuri methi (dried fenugreek leaves), roasted and crushed
    • 1 tsp sugar
    • A swirl of fresh cream, optional, for garnish

    Ingredient Substitutions

    Short on a specific ingredient? Here’s what to swap in — and if you enjoy butter-forward egg dishes generally, our Butter Garlic Egg recipe is a quicker, no-gravy option worth keeping in rotation too.

    IngredientSubstituteEffect on Taste / Texture
    CashewsSoaked blanched almonds, or skip entirelyCashews add creaminess to the blended base; skipping slightly reduces body
    Kasuri methiFresh fenugreek leaves, used very sparinglyFresh fenugreek is more bitter — use much less than you would dried
    1 tbsp butter1 tbsp gheeRicher, slightly nuttier aroma; a touch less creamy than butter
    SugarA tiny pinch of jaggerySame bitterness-balancing function, with a slightly earthier sweetness
    Coriander stalksCoriander leavesStalks give a more concentrated flavour in the cooked base; leaves work better as a garnish than as a base ingredient

    Mise en Place Checklist

    Get all of this ready before turning on the flame. The base comes together fast once it starts cooking, and the egg-frying step needs your full attention.

    • Onion and tomatoes roughly sliced
    • Garlic, ginger, and green chilli ready
    • Cashews measured out
    • Spinach washed, 150g measured
    • Coriander stalks separated from the leaves — leaves set aside for garnish elsewhere, only the stalks go into the base
    • 5 eggs boiled — medium-boiled only, not hard-boiled
    • Dry spices (coriander powder, red chilli powder, cumin powder) measured into one small bowl
    • Kasuri methi roasted and crushed, ready to add at the end
    • Butter and sugar measured
    • Same kadhai usable for both the base and the egg-frying stage — have it ready on the hob

    Step-by-Step Method

    1

    Cook the spinach base together

    In a pan, combine the sliced onion, sliced tomatoes, garlic, ginger, green chilli, cashews, spinach, and coriander stalks. Mix everything together, cover, and cook on medium flame for 7–8 minutes, until the spinach has wilted, the onion has turned transparent, and the tomatoes have gone completely soft and soggy.

    Why the stalks matterCoriander stalks carry a deeper, more concentrated flavour than the leaves. Cooking them into the base — rather than saving them for garnish — adds a layer most spinach curries skip entirely. The same trick works well in creamy bases generally — our Egg Malai Curry recipe uses a similar approach.
    Spinach, onion, tomato, cashews, and green chilli cooking together for Anda Palak Butter Masala base
    2

    Cool and blend into a fine paste

    Let the cooked base cool slightly, then transfer it to a grinding jar and blend into a fine paste. You’ll notice the colour at this stage — a vivid green that carries through into the finished gravy.

    Blended vivid green spinach-tomato-cashew paste for Anda Palak Butter Masala
    3

    Fry the eggs — spice after colour, not before

    Clean the same kadhai and heat ¼ cup oil. Add the medium-boiled eggs and fry until they just start to pick up a light colour. Only then add a pinch of turmeric and a pinch of red chilli powder. Continue frying until the eggs reach a good golden colour, then remove them from the oil and set aside.

    Don’t add spice at the startTurmeric and red chilli added to cold oil at the beginning of frying will scorch slightly as the eggs continue cooking, leaving the oil — and the whole dish — with a faintly burnt, bitter undertone. Wait until the eggs already show colour before the spice goes in.
    Eggs frying to golden — turmeric and red chilli added only after colour appears, not at the start
    4

    Roast the spinach paste with dry spices

    In the same oil the eggs were fried in, add the blended spinach-tomato paste. Mix it well into the oil over medium flame. Add 1 tsp coriander powder, red chilli powder to taste, and ½ tsp cumin powder. Mix the spices into the paste, then add salt to taste and ¼ cup water (rinsed from the grinding jar so nothing goes to waste).

    Cover the pan and roast on medium-to-low flame for 10–15 minutes, until the masala turns noticeably thicker, all the excess water has cooked off, and the oil starts to resurface.

    Keep the lid onThis masala splatters intensely as it roasts — leave the pan uncovered and you’ll find green spice flecks across your entire stovetop. Covering it isn’t optional here.
    Spinach paste roasting with dry spices until oil separates for Anda Palak Butter Masala
    5

    Fold in the fried eggs

    Once the masala has roasted down and the oil has resurfaced, add the fried eggs back in. Mix gently so the eggs are coated without breaking apart.

    Fried eggs folded into the thick spinach masala for Anda Palak Butter Masala
    6

    Adjust consistency and taste for salt

    Add water to reach your preferred gravy consistency — the masala will still be quite thick at this point, so add water gradually until it’s where you want it. Mix well, then taste and adjust the salt at this stage.

    Optional: if you’d like a heartier dish, cubed potato can be added during the masala-roasting stage in Step 4, cooked through alongside the spinach paste before the eggs go in.

    7

    Finish with butter, garam masala, kasuri methi, and sugar

    Add 1 tablespoon butter and homemade garam masala powder. Crush 1 tablespoon of roasted, home-dried kasuri methi between your palms and add it in. Add 1 teaspoon sugar. Mix everything together, cover, and cook for a further 2–4 minutes until the oil separates again.

    What the sugar actually doesIt does two jobs here, not one: it rounds out the overall flavour the way a small pinch of sugar does in most North Indian gravies, and it specifically cuts through the faint natural bitterness spinach can leave behind. Skip it and that bitterness lingers more than you’d expect.
    Butter, kasuri methi, and homemade garam masala added to finish Anda Palak Butter Masala
    8

    Garnish and serve

    Your anda palak butter masala is ready. Garnish with a swirl of fresh cream if you’d like the restaurant-style finish. Serve hot with white rice, roti, or paratha.

    Finished Anda Palak Butter Masala with cream swirl garnish, served with white rice

    6 Things That Make This Palak Masala Turn Out Right

    1. Medium-boil the eggs, not hard — they keep cooking later, so a hard boil leaves them dry
    2. Add turmeric and chilli to the eggs only after colour appears — never from cold oil
    3. Use coriander stalks in the base, not just the leaves, for a deeper flavour layer
    4. Cover the pan while roasting the spinach paste — it splatters more than you’d expect
    5. Don’t skip the sugar — it rounds the flavour and cuts spinach’s natural bitterness
    6. One tablespoon of butter is enough — the cashews in the blended base already carry the richness

    The One Mistake That Ruins This Recipe

    Hard-boiling the eggs before frying.

    It’s tempting to hard-boil the eggs the way most egg curry recipes assume you will. But these eggs go through two more rounds of heat after boiling — first the frying, then several minutes simmering in the masala. Eggs that start out hard-boiled come out noticeably dry and rubbery by the time the dish is finished. A medium boil, with the yolk not fully set, leaves enough moisture in the egg to survive the rest of the cook.

    Boil gently. Stop before the yolk is fully firm. The rest of the process will finish the job. Getting egg-doneness right matters across cuisines, not just this one — our Turkish Eggs Cilbir recipe is a good example of how much a soft yolk changes a dish.
    For Beginners

    If homemade garam masala isn’t something you have on hand, a good store-bought garam masala powder works fine here — add it a little at a time and taste as you go, since brands vary quite a bit in strength. Don’t worry if your gravy’s green looks slightly different from the video; spinach colour varies with how fresh it is and how long it’s cooked.

    For Confident Home Cooks

    If you want a heartier version, add cubed potato during the masala-roasting stage (Step 4) — let it cook through in the masala alongside the spinach paste before folding in the eggs. It stretches the dish further and adds a second texture against the soft eggs.

    What to Serve Anda Palak Butter Masala With

    White rice was the creator’s own pairing for this dish, and it’s a good one — the plain base lets the vivid green-orange gravy do all the talking. Plain or jeera rice both work well, and if you want a heartier rice option built around eggs instead, our Anda Dum Biryani recipe pairs nicely on the side for a bigger spread. Roti is a natural everyday pairing for mopping up the thick gravy, and if you’d rather wrap it up, our Anda Paratha Roll recipe turns leftovers into a handheld lunch.

    Because the spinach disappears so completely into the base, this is also a reasonable weeknight option for getting a vegetable-forward meal onto a kid’s plate without an argument.

    Storage, Reheating & Make-Ahead

    SituationGuidance
    Fridge storageUp to 2 days in an airtight container
    Colour after refrigerationThe vivid green can dull somewhat on standing — this is normal for spinach-based gravies and doesn’t affect flavour
    FreezingNot recommended — the egg texture turns rubbery on thawing and the blended spinach base can separate
    ReheatingGentle reheat on low flame with a splash of water; avoid microwaving on high, which toughens the eggs further
    Make-ahead strategyThe spinach masala (through Step 4) can be made up to 2 days ahead and refrigerated. Reheat gently, then fold in freshly fried eggs and finish with butter, garam masala, kasuri methi, and sugar

    If a shorter weeknight egg dish is what you’re after between make-ahead batches of this one, our Egg Shakshuka recipe comes together in one pan with far less roasting time.

    Myth vs. Fact: Does Spinach Make the Eggs Taste Bitter?

    Cooking spinach into an egg curry base always leaves a slightly bitter, “green” aftertaste.

    Spinach does carry a faint natural bitterness, but this recipe handles it directly: the cashews blended into the base add creaminess that softens it, and the one teaspoon of sugar added at the finish specifically cuts what’s left. Together, those two ingredients are doing real work — not just rounding out flavour in a general sense, but actively counteracting the one thing that makes people hesitant about spinach in a curry. Skip the sugar and you’ll likely notice the difference. If potato-and-egg combinations are more your thing, our Anda Aloo Salan recipe leans fully into that pairing instead of spinach.

    Nutrition Snapshot (Estimated per serving)

    NutrientEstimated Amount
    Calories~260–300 kcal
    Protein~11–14 g
    Fat~18–22 g
    Carbohydrates~9–12 g
    SodiumVaries with salt added

    Figures are estimated and will vary based on exact oil quantity, egg size, and how much butter and cream are used. Spinach contributes meaningful iron and folate, and eggs supply complete protein — a genuinely useful nutritional combination, though these figures are not a substitute for individualised nutritional advice. Spinach nutrient data is available via USDA FoodData Central.

    Frequently Asked Questions

    What is anda palak butter masala?

    Anda palak butter masala is a North Indian egg curry where spinach is cooked directly into a tomato-onion-cashew base and blended smooth, rather than added at the end. Medium-boiled eggs are fried briefly and folded into the roasted masala, which is finished with a tablespoon of butter, kasuri methi, and a touch of sugar. The result is a vivid green-orange gravy with the eggs disappearing into a thick, well-rounded sauce.

    How is this different from regular egg butter masala?

    Egg butter masala uses a tomato-onion-cashew purée with no spinach, finished with a generous cream pour. This recipe cooks spinach into the base itself before blending, uses only one tablespoon of butter as a finishing touch rather than a primary fat, and relies on one teaspoon of sugar to round the flavour and offset spinach’s natural bitterness. The two dishes look and taste distinctly different — one deep red-orange, the other vivid green-orange.

    Why cook the spinach into the base rather than adding it at the end?

    Cooking the spinach alongside the onion, tomato, garlic, ginger, and cashews, then blending everything together, means the spinach disappears completely into the gravy rather than appearing as visible leaves or flecks. That’s a big part of why this dish tends to work well with kids who would otherwise pick around a vegetable they can see.

    Why are the eggs only medium-boiled, not hard-boiled?

    The eggs go through two further rounds of cooking after boiling — frying, then simmering in the masala. If they start out hard-boiled, they end up noticeably dry by the time the dish is finished. A medium boil leaves enough residual moisture in the yolk to survive the rest of the process.

    Why add turmeric and red chilli after the eggs start to colour, not from the beginning?

    Adding these spices to cold oil at the very start of frying lets them scorch slightly as the eggs continue cooking, which can leave a faintly burnt, bitter taste in the oil. Waiting until the eggs already show some colour before adding the spice avoids this.

    What does the sugar do in a spinach curry?

    It does two things: it rounds out the overall flavour, the way a small amount of sugar does in many North Indian gravies, and it specifically counteracts the faint natural bitterness spinach can leave behind. Skipping it tends to leave that bitterness more noticeable.

    Can I add potato to this recipe?

    Yes. Add cubed potato during the masala-roasting stage, letting it cook through in the masala alongside the spinach paste before the eggs go in. It’s a genuine option for a heartier dish if you’d like more bulk relative to the eggs.

    How do I keep the spinach colour vivid in the finished dish?

    The colour is brightest right after blending and cooking. It can dull somewhat after a day or two in the fridge, which is normal for spinach-based gravies and doesn’t affect the flavour. Serving the same day it’s made, or shortly after, keeps the colour at its most vivid.

    Conclusion

    Anda palak butter masala started as a random kitchen experiment — a butter paneer idea redirected toward eggs, then redirected again toward spinach when “different enough” wasn’t quite reached. That unplanned origin is the best endorsement it could have: nobody set out to engineer a kid-friendly spinach curry, it just turned out that way once the spinach disappeared into the blended base.

    The technique worth remembering is the ordering: spinach cooked into the purée, not stirred in afterward; eggs medium-boiled, not hard; frying spices added after colour, not before; the pan covered while the masala roasts because the splatter is real; and just one tablespoon of butter plus one teaspoon of sugar doing the final work of making it taste restaurant-level.

    Forty minutes start to finish, one pan for both the base and the eggs, and a dish that — by the creator’s own account — got finished off the plate faster than most others on the channel. Worth trying the next time spinach is sitting in the fridge with nowhere else to go.

    Liked the cashew-blended base here? Our Reshmi Anda Cashew Curry recipe leans even further into that silky, nutty style. And for something scrambled and street-food-casual instead of a proper gravy, our Anda Ghotala recipe is another channel favourite worth trying next.

    Recipe demonstrated and filmed in the Zaika Mazedaar kitchen. Watch the full video on the Zaika Mazedaar YouTube channel for a step-by-step visual walkthrough.