

Zaika Mazedaar · North Indian Curries
Restaurant-style anda lababdar at home — rich cashew-tomato gravy, eggs set right in the pan, and the finishing layer most recipes skip entirely.
There’s a reason egg lababdar disappears off the table faster than almost any other egg curry — that cashew-rich, restaurant-style gravy clinging to a perfectly set egg is genuinely hard to resist. The colour alone, deep red from degi mirch with oil rising at the edges, tells you something good is happening in that pan.
This recipe is demonstrated step-by-step in our video on the Zaika Mazedaar channel, filmed and cooked in a real kitchen — not assembled from recipe databases. If restaurant-style North Indian curries have ever felt out of reach at home, this one will change your mind.
What Is Egg Lababdar?
Egg lababdar (also called anda lababdar) is a North Indian egg curry distinguished by its rich, creamy cashew-tomato gravy — a style historically associated with Mughlai restaurant cooking. What makes it different from a standard egg curry is the base: grated onion cooked to a soft, pale gold, blended with a fine cashew-tomato paste and bhuna’d (slow-roasted) until the oil separates and rises visibly to the surface. The result is a gravy that’s neither thin nor thick — exactly the body lababdar is known for.
The word lababdar roughly signals “indulgent, full-flavoured” in the context of North Indian restaurant menus, and the dish earns that description honestly. The eggs are cracked raw into the finished gravy, then cooked covered on low flame until just set — producing a silky egg with gravy clinging to every edge.
Why This Recipe Works
The secret is in two things that most everyday egg curry recipes skip entirely.
First: grated onion, not chopped. Finely grating the onion means it dissolves almost entirely into the gravy, giving lababdar its characteristic smooth, velvety body without needing to blend the whole curry after cooking. It’s the same technique used in our Egg Butter Masala recipe — and it makes a bigger difference than you’d expect.
Second: soaked cashews blended with tomato. The cashew-tomato paste, ground together into a fine slurry, creates both the body and the richness of the gravy before a drop of cream ever touches the pan. Cashews thicken without starch, add natural sweetness to balance the tomato’s acidity, and contribute that slightly creamy mouthfeel that sets lababdar apart from a basic egg curry. Our Reshmi Anda Cashew Curry recipe leans on the same cashew-based richness, if you’d like to see it taken even further.
Ingredients
For the Base
- Oil — a little less than ½ cup (in a wide-bottomed kadhai)
- 1 bay leaf (tej patta), torn before adding
- ½ tsp white cumin seeds (safed jeera)
- 2–3 green cardamom pods
- 1 large onion, finely grated (not sliced, not roughly chopped)
- 1 tsp ginger-garlic paste
- A splash of water (to prevent over-browning)
Dry Spices
- ½ tsp turmeric powder
- A little more than ½ tsp red chilli powder (spicy variety)
- ½ tsp cumin powder
- 1 tsp coriander powder (heaped)
- ¾ tsp Kashmiri / degi mirch (deep restaurant-red colour, minimal heat)
- Salt, to taste
Tomato-Cashew Paste
- 2 medium tomatoes (one can be slightly larger)
- 10–12 cashews, soaked in water for 20–30 minutes before grinding
Finishing Layer
- ½ cup water (for consistency)
- Fresh coriander (hara dhania), a generous handful
- 2 tsp fresh cream — or whisked malai
- ½ tsp sugar (optional — adds restaurant-style balance)
- ½ tsp garam masala powder
- 1 tsp kasuri methi (dried fenugreek leaves)
For the Eggs
- 4–5 eggs, cracked individually into a small bowl first
- Black pepper powder, for sprinkling
- 4–5 green chillies, roughly chopped
- Fresh coriander, for garnish
Ingredient Substitutions
| Ingredient | Substitute | Effect on Taste / Texture |
|---|---|---|
| Fresh cream | Whisked malai | Nearly identical; whisk malai first so it blends smoothly |
| Cashews | Soaked blanched almonds | Slightly drier body; less sweetness — still works well |
| Degi mirch | Kashmiri chilli + tiny pinch paprika | Similar colour; slightly different flavour depth |
| Ginger-garlic paste | Fresh grated ginger + garlic (equal parts) | Stronger raw flavour; fry a little longer on low flame |
| Fresh coriander | Skip or use dried | Loses freshness; add kasuri methi slightly earlier to compensate |
Mise en Place Checklist
Get all of this ready before turning on the flame. Ten minutes of prep makes the stove time flow with no scrambling.
- Onion finely grated, set aside
- Cashews soaking in water
- Tomatoes + soaked cashews blended into a fine paste
- All dry spices measured into one small bowl
- Ginger-garlic paste measured (1 tsp)
- Fresh coriander washed and roughly chopped
- Cream measured (2 tsp), or malai whisked smooth
- Small bowl or ramekin nearby for cracking eggs individually
- Wide-bottomed kadhai, ready on the hob
Step-by-Step Method
Temper the whole spices
Heat the oil in your kadhai over medium flame. When warm, add the torn bay leaf, ½ tsp white cumin seeds, and 2–3 green cardamom pods. Fry for 30 seconds, swirling gently, until fragrant.

Cook the grated onion
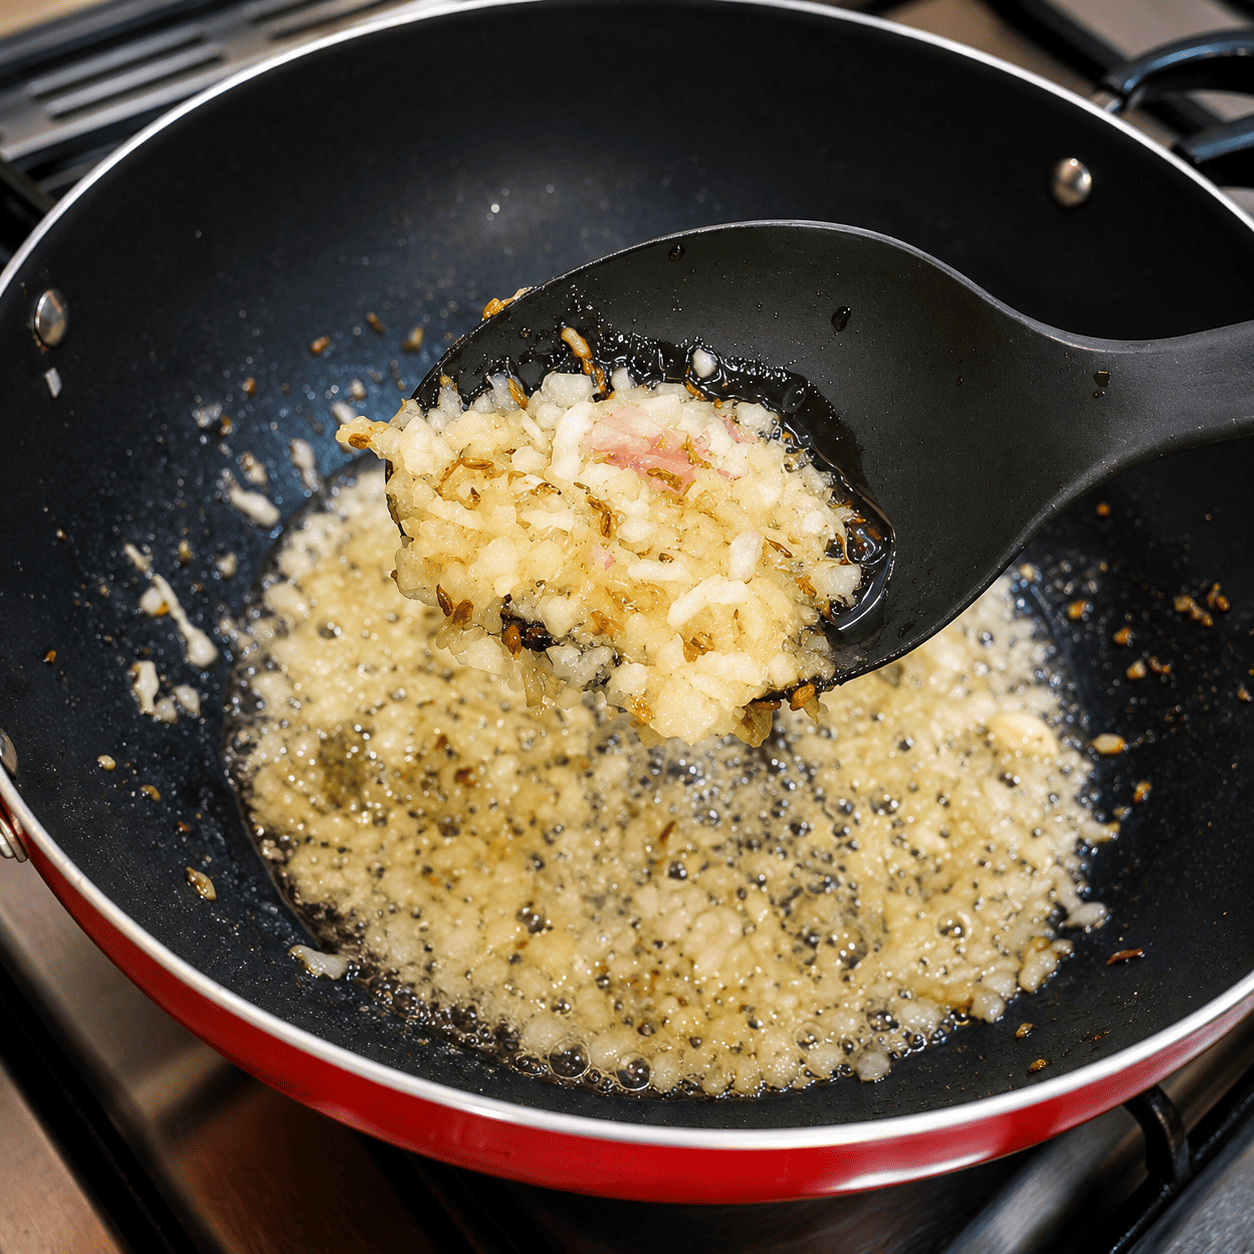
Add the finely grated onion. Cook on medium flame for 5–6 minutes, stirring occasionally, until the onion turns light pink and faintly golden — not deep brown, not caramelised. This lighter cook is intentional.

Add ginger-garlic paste
Reduce to low flame. Add 1 tsp ginger-garlic paste directly to the softened onion. Cook for 1 minute until the raw smell is gone, then add a small splash of water — enough to prevent the onion deepening further in colour and to stop the dry spices from burning in the next step.
Bhuna the dry spices
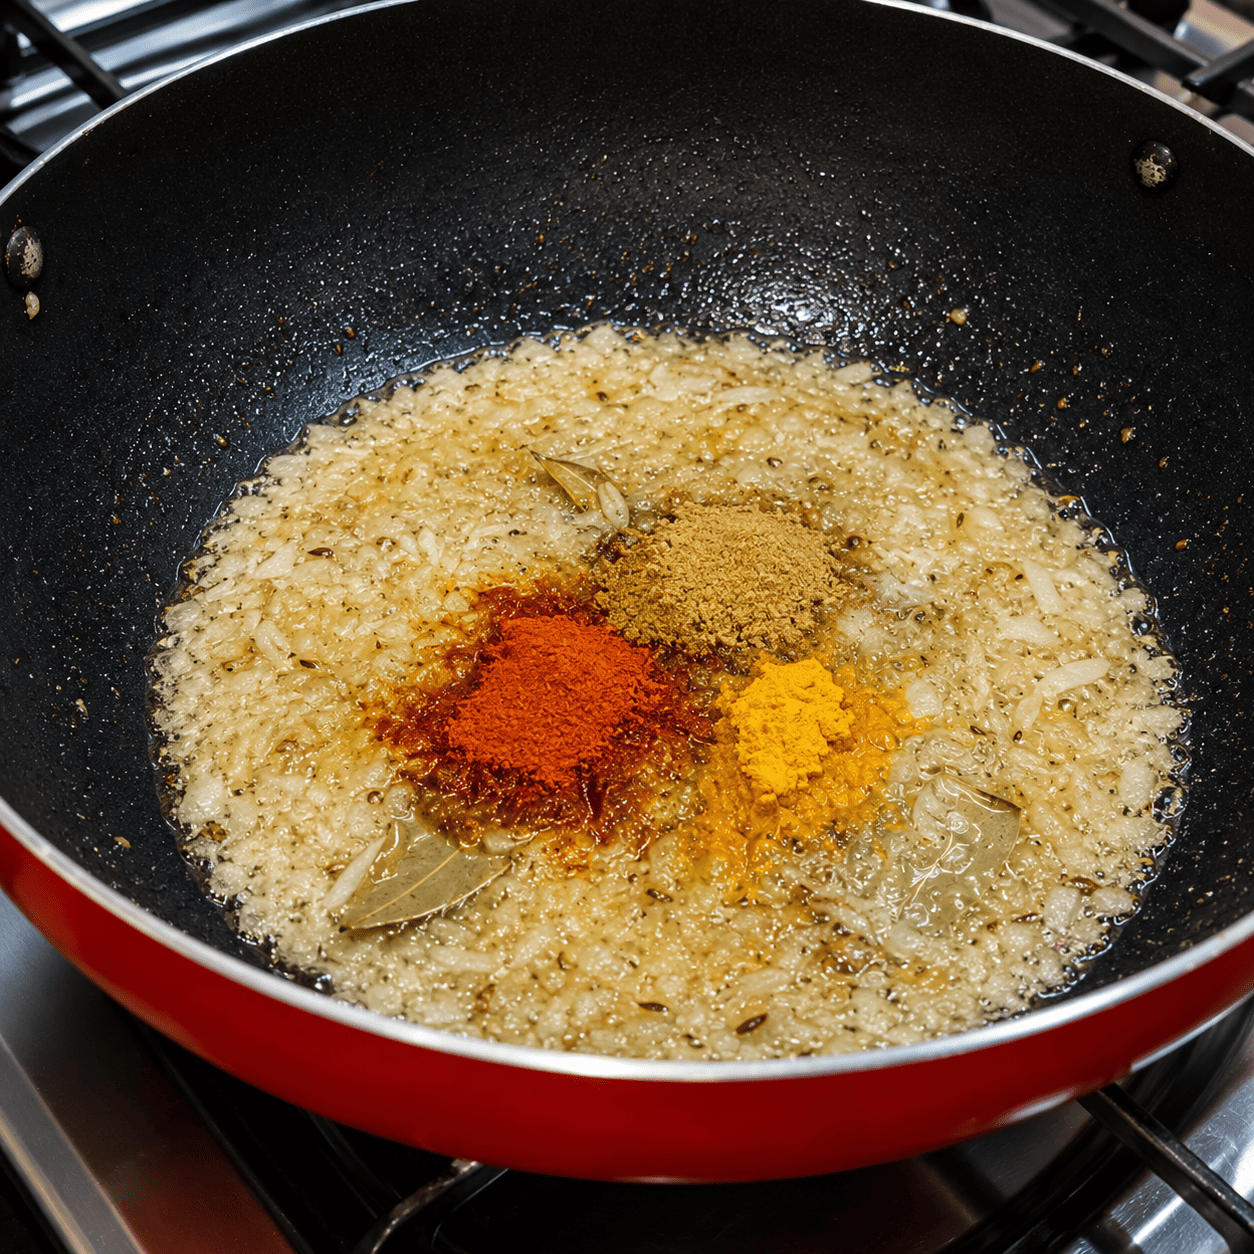
Add all the dry spices (turmeric, red chilli, cumin powder, coriander powder, degi mirch) in one go. Stir to combine and cook on low flame for 2–3 minutes, until the oil begins to separate at the edges and the spices smell fragrant rather than raw.

Add tomato-cashew paste and cook it down
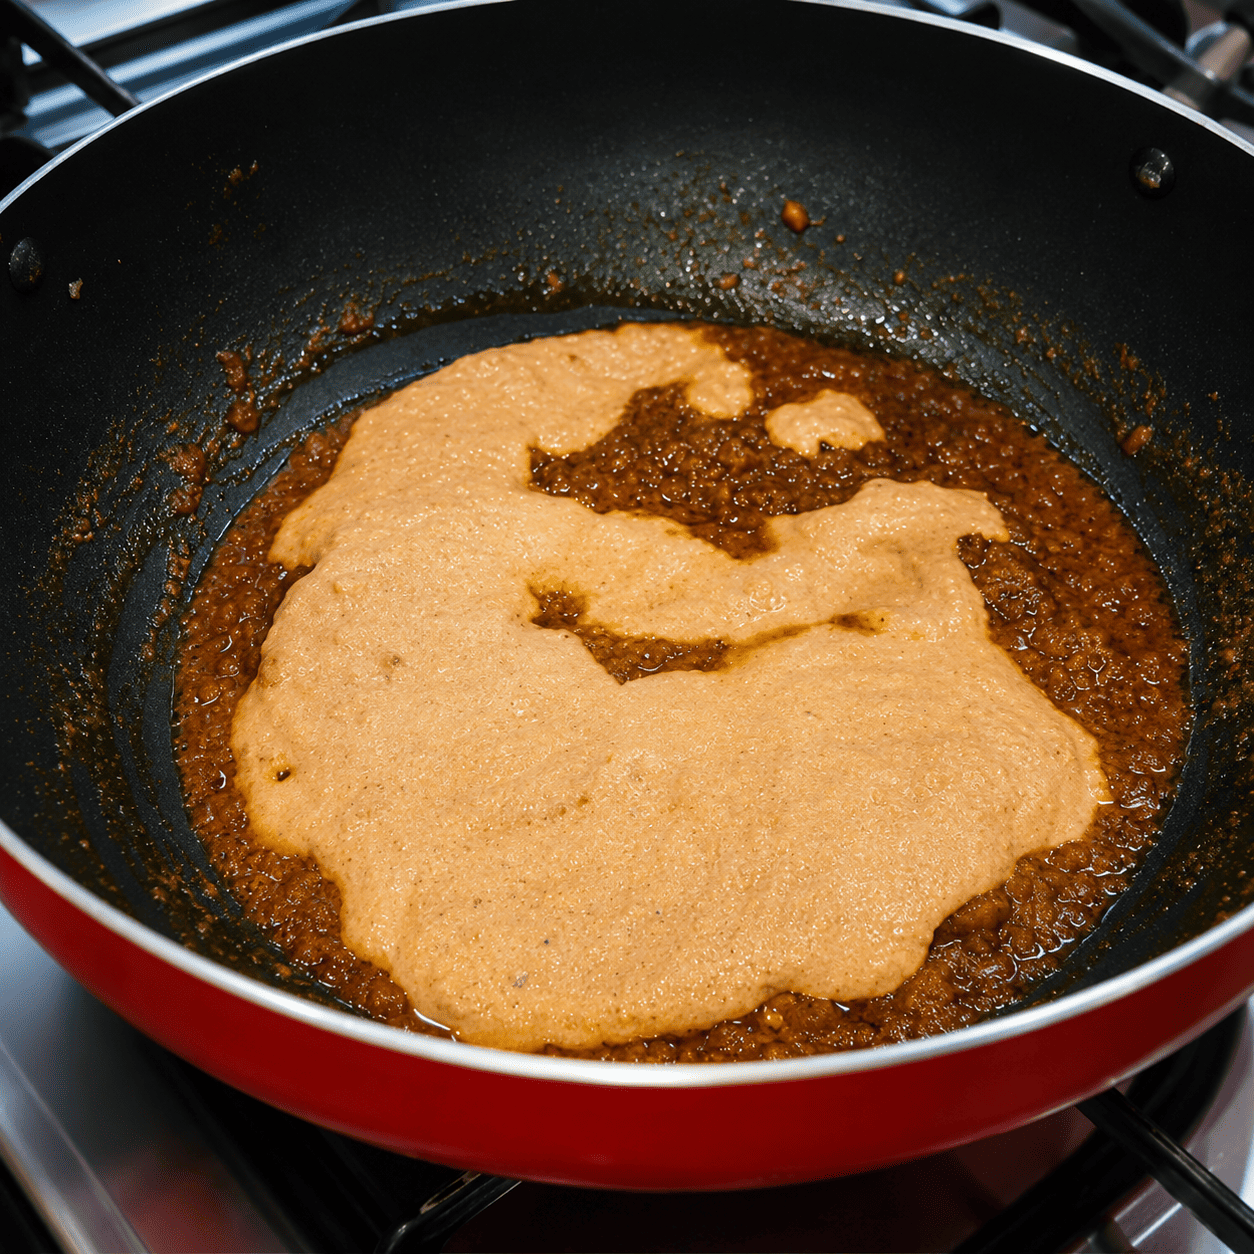
Pour in the entire tomato-cashew paste along with salt. Add a splash of water to your blender jar, swirl, and pour that in too — nothing goes to waste. Stir, cover the kadhai, and cook on low flame for 7–8 minutes, stirring once or twice.
The masala is ready when: oil has visibly separated and risen to the surface, there is no moisture left in the pan, and the raw tomato smell is completely gone. No shortcuts — this bhuna step is what gives the gravy its depth.

Adjust consistency with water
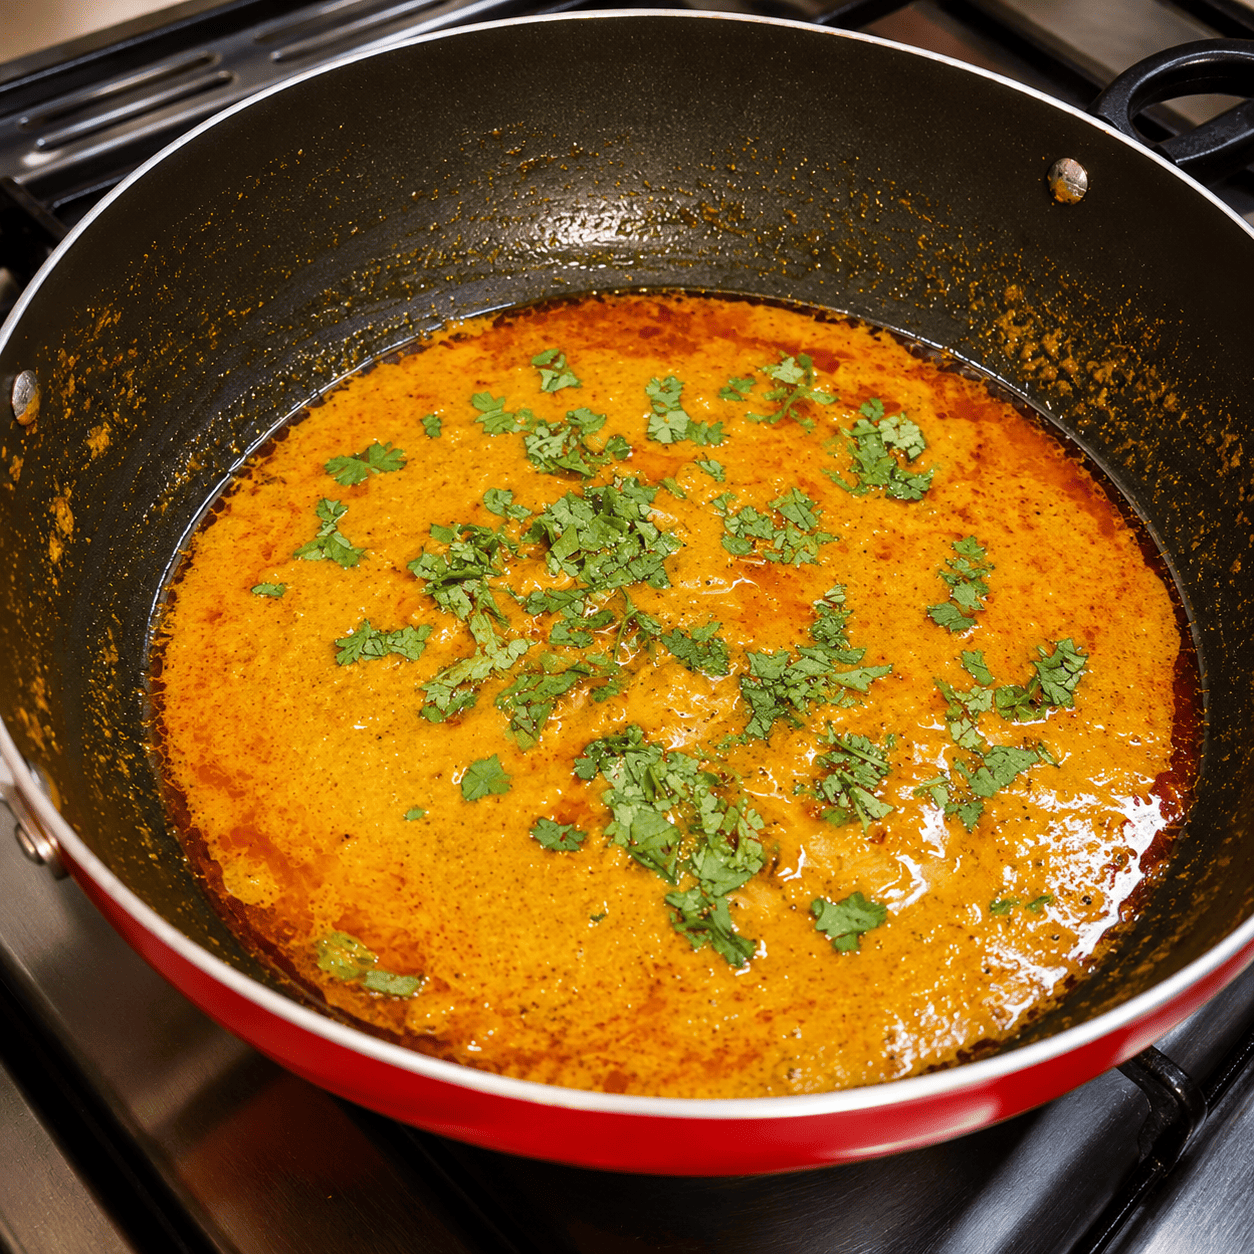
Add ½ cup water and stir well. Lababdar gravy sits between thin and thick — not soupy, not paste-like. Add a few extra tablespoons if you prefer it slightly looser.
Add coriander and cream
Scatter in the fresh coriander. Add 2 tsp cream (or whisked malai). Stir gently and cook for 1–2 minutes so the cream integrates fully — you’ll see the gravy shift to a slightly richer, more unified colour.

Finish the gravy
Add ½ tsp sugar (optional), ½ tsp garam masala powder, and 1 tsp kasuri methi. Stir everything together. Taste for salt and adjust. Remove the bay leaf now — it’s done its job, and you don’t want it sitting awkwardly under a set egg when you serve.
Clean the edges and set the eggs
Use a spatula to clean the kadhai edges neatly. This is a make-and-serve dish that goes to the table in the same pan, so presentation matters.
Working one at a time, crack each egg into a small bowl or ramekin, inspect it, then slide it gently into the gravy. Space them evenly.
Garnish, cover, and cook
Sprinkle black pepper powder over the eggs. Scatter the chopped green chillies and more fresh coriander on top.
Cover the kadhai and cook on low flame for 6–7 minutes. Do not lift the lid. The trapped steam finishes the eggs gently and evenly. After 6–7 minutes, turn off the gas — then leave the lid on for a further 2–3 minutes before opening. This resting time continues the cooking without the risk of rubbery whites.
Open the lid. Your egg lababdar is ready.

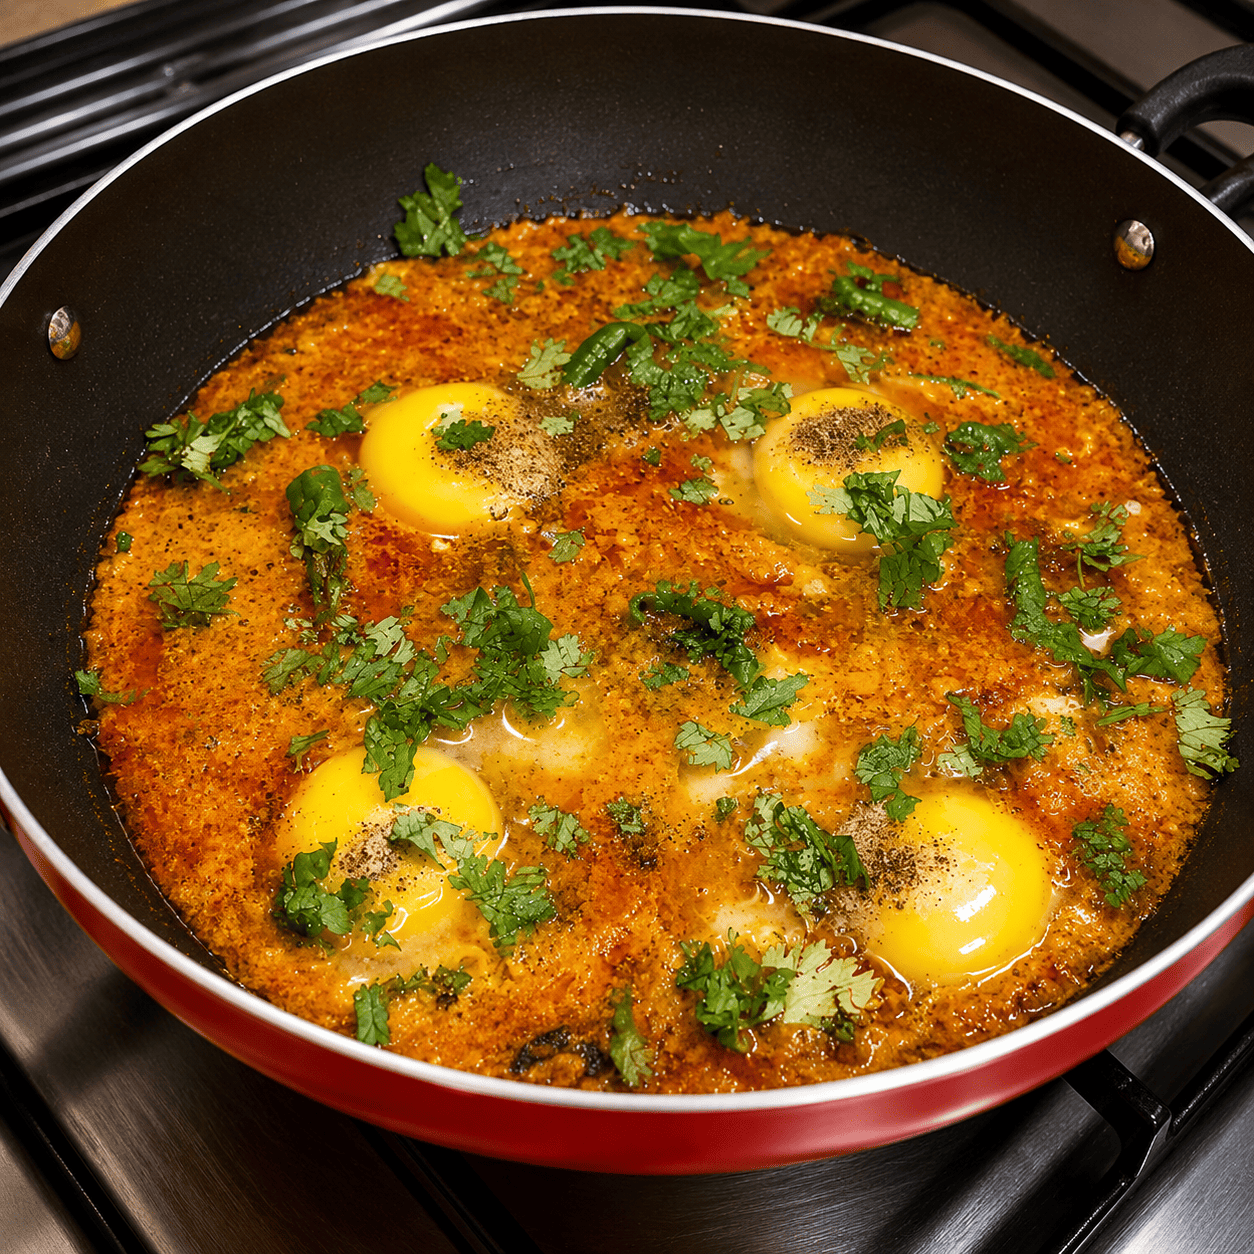
5 Things to Remember for Perfect Egg Lababdar
- Grate the onion — never slice or roughly chop it
- Bhuna the tomato-cashew paste until oil fully separates — no shortcuts
- Crack each egg into a bowl first before sliding into the gravy
- Don’t lift the lid during the 6–7 minute egg-cooking phase
- Rest 2–3 minutes after turning off the flame before opening
The One Mistake That Ruins Lababdar Gravy
Over-browning the onion.
It’s tempting to cook the onion until deeply golden — that’s what most curry recipes call for. But lababdar gravy needs a light, sweet onion base, not a bitter, dark one. The target is pale gold with just a blush of pink. If your onion goes deep brown before the ginger-garlic paste goes in, the gravy will have a slightly acrid edge that no amount of cream will fix.
Medium flame. Five to six minutes. Keep moving.
For Beginners
Don’t worry if your first lababdar gravy looks slightly darker or lighter than the video — stovetop heat varies, and kadhai sizes differ. The sensory cues matter more than the clock: pale golden onion, oil separating from the tomato paste, and no raw smell from the spices. Trust your nose as much as your timer.
For Confident Home Cooks
For an even deeper red without adding heat, increase the degi mirch to 1 tsp and reduce the regular red chilli powder slightly. A small pinch of smoked paprika alongside the degi mirch adds a subtle smoky undertone — it doesn’t appear in the original recipe but works well with the cashew base.
What to Serve Egg Lababdar With
Egg lababdar is flexible when it comes to pairing. A soft hand-rolled roti is the best way to mop up this gravy. Puri gives a more festive feel — the slightly puffed, golden bread is wonderful with the richness of the lababdar. Paratha works especially well for weekend brunch, and our Anda Paratha Roll recipe is worth trying if you want to make your own.
Plain white rice or jeera rice works beautifully here — the understated base lets the gravy do all the talking. For a rice-forward alternative on another night, our Muradabadi Anda Yakhni Pulao recipe is worth adding to the rotation. For a full spread, egg lababdar sits naturally next to a dal and a simple raita.
Storage, Reheating & Make-Ahead
| Situation | Guidance |
|---|---|
| Fridge storage (gravy only) | Up to 2 days in an airtight container |
| Fridge storage (with set eggs) | Best eaten the same day — egg texture degrades noticeably after 24 hours |
| Freezing | Not recommended — cashew-cream gravy separates on thawing, and egg texture becomes rubbery |
| Reheating | Gentle reheat on low flame with a splash of water; avoid microwave on high, which toughens the eggs |
| Make-ahead strategy | Make the gravy (steps 1–8) up to 2 days ahead. Refrigerate. When ready to serve, reheat gently, then add fresh eggs and cook covered on low flame for 6–7 minutes |
The make-ahead option is genuinely useful for dinner parties — the gravy deepens slightly overnight, and fresh eggs take less than 10 minutes to set in a warm, already-flavoured base.
Myth vs. Fact: Does Lababdar Need Cream?
You can’t make a proper lababdar gravy without cream — it’s the defining ingredient.
The cashew-tomato paste does the real structural work. The cream (just 2 tsp in this recipe) adds a final layer of richness and helps unify the gravy’s colour, but it’s genuinely optional. Whisked malai is a perfectly good substitute — and if you skip both entirely, the cashew base still produces a gravy that’s rich, smooth, and recognisably lababdar in style. The sugar and kasuri methi in the finishing layer arguably matter more than the cream for achieving that restaurant-like flavour balance.
Nutrition Snapshot (Estimated per serving)
| Nutrient | Estimated Amount |
|---|---|
| Calories | ~280–320 kcal |
| Protein | ~12–15 g |
| Fat | ~20–24 g |
| Carbohydrates | ~10–13 g |
| Sodium | Varies with salt added |
Figures are estimated and will vary based on exact oil quantity, egg size, and cream used. These are not a substitute for individualised nutritional advice. Per-egg nutritional data is available via USDA FoodData Central.
Frequently Asked Questions
What is egg lababdar?
Egg lababdar is a North Indian egg curry with a rich, creamy cashew-tomato gravy. The name lababdar refers to its indulgent, restaurant-style character — a thick, velvety gravy that’s neither thin nor heavy, typically finished with cream, garam masala, and kasuri methi. It’s associated with Mughlai-influenced cooking and is a popular menu item across North Indian restaurants and dhabas.
How is lababdar gravy different from regular egg curry?
Regular egg curry uses a straightforward onion-tomato base and produces a thinner, more rustic sauce. Lababdar gravy uses grated (not chopped) onion, a cashew-tomato paste ground together, and a finishing layer of cream, garam masala, and kasuri methi — producing a smoother, richer, restaurant-style result with a distinctive medium-bodied consistency.
Can I make egg lababdar without cream?
Yes. The cashew-tomato paste is what gives lababdar gravy its richness and body — the cream is a finishing touch, not a structural ingredient. Whisked malai is a direct substitute. If you skip dairy entirely, the gravy will be slightly less rich but still recognisably lababdar in style, especially with the kasuri methi and garam masala finishing layer in place.
Why is my onion turning brown instead of staying pink?
The flame is likely too high, or the onion cooked too long. Lababdar requires a light, pale-golden onion — not the deep caramelised brown you’d want for a biryani base like our Anda Dum Biryani recipe. Cook on medium flame for 5–6 minutes maximum, and stop as soon as you see a light blush of gold. If it tips into deep brown, the base will have a bitter undertone that cream and cashews won’t fully mask.
Can I make the gravy ahead and add eggs later?
Yes — and this is actually the recommended approach for meal prep or dinner parties. The gravy keeps well in the fridge for up to 2 days. Reheat gently on low flame with a splash of water, then proceed with fresh eggs. The gravy actually deepens slightly overnight, and fresh eggs set in under 10 minutes in a warm base.
What’s the best bread to serve with egg lababdar?
Hand-rolled roti or puri are the most natural pairings — the bread soaks up the medium-bodied gravy without overwhelming it. Paratha works especially well for weekend brunch. Plain white rice is also great for a simpler weeknight plate, and the gravy works beautifully with all of them. For something more substantial, our Chicken Egg Dak Bungalow recipe is worth trying next.
Can I make this less spicy?
Easily. Reduce or skip the regular red chilli powder (the spicy variety) and rely entirely on degi mirch / Kashmiri chilli, which contributes colour without significant heat. The green chillies added over the eggs are also optional — leave them out or replace with a milder variety. The finished dish will still have the full lababdar flavour.
Why should I crack eggs into a bowl before adding them to the curry?
Because occasionally an egg is spoiled inside — and discovering that after it’s already sitting in your gravy is a far worse outcome than the extra 30 seconds of cracking into a bowl first. It also lets you check for shell fragments and inspect the egg before it touches hot food. Good standard practice whenever cooking eggs directly into a sauce.
Conclusion
Egg lababdar is one of those dishes that punches well above its prep time. Forty-five minutes from mise en place to table, one kadhai, no special equipment — and the result tends to look and taste like something you’d order rather than cook yourself.
The key is trusting the process: the grated onion that looks like extra effort but takes two minutes, the cashew-tomato paste that bhuna’s down slowly, the lid you resist lifting during those final minutes while the eggs set quietly. Follow the sequence, follow the sensory cues — pale golden onion, oil separating from the masala, no raw smell — and you’ll have a gravy that genuinely earns the name lababdar.
Ideal for a weeknight dinner when you want something a little special without two hours of cooking. Make the gravy ahead, set the eggs fresh before serving, bring it to the table in the same kadhai it cooked in. If you enjoy this rich, restaurant-style approach, our Afghani Egg Curry recipe and Surti-style Anda Ghotala are both worth exploring next.
Leave a Reply